BidRidge › Designers › Guide › Chapter 49

Chapter 49 · Masonry DesignerBeta

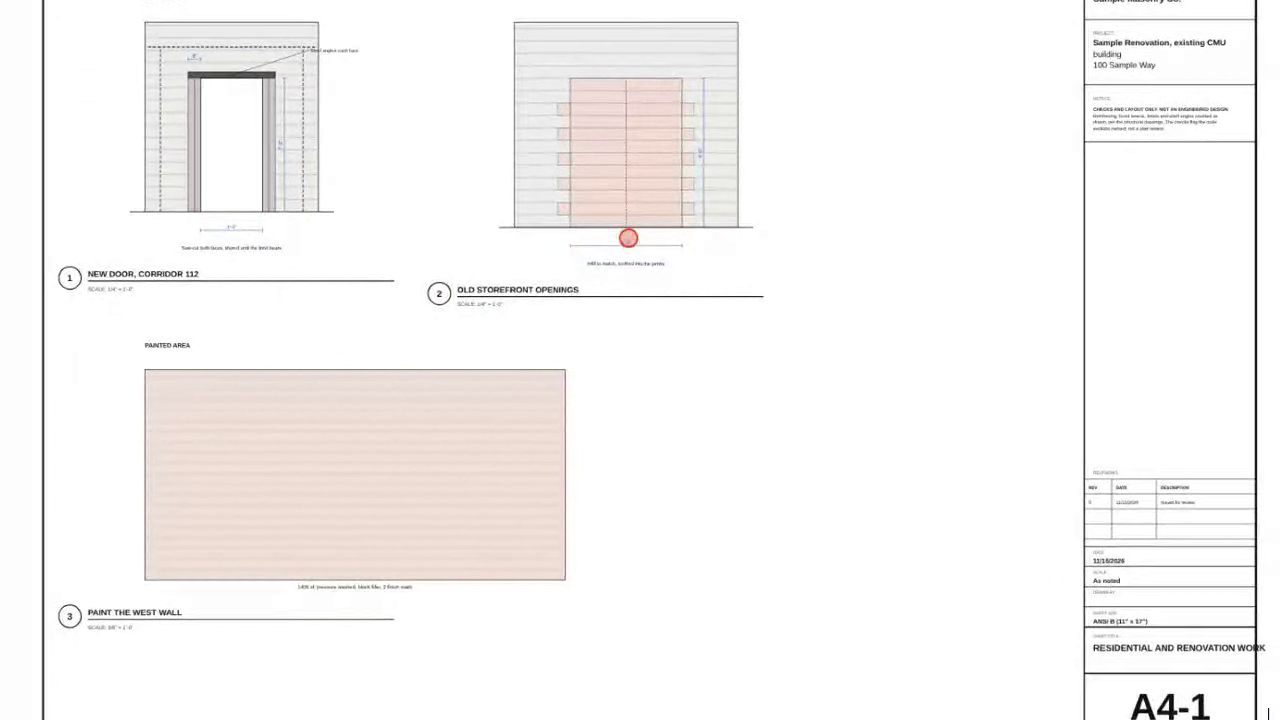
Sample Renovation: a new door cut into an 8 in. block wall, two old storefront openings filled in to match, and a 1,400 sf wall painted

A renovation of an existing block building has masonry work but no new walls: a door cut in where the plans move a corridor, old openings filled in to match, the block painted. These are priced by their sizes. The Masonry Designer's Residential and renovation work list has an item for each one, with the shoring, the lintel, the saw cutting, the units to match and the paint, drawn from the numbers you type and sent to BidRidge like any other masonry design.

Narrated walkthrough, 1:42. Captions on.

The sample in numbers

  • Work items
    3
    a new opening, two infills, painting
  • Material
    $4,077
    at the default prices
  • Install
    86.7 h
    at the default production rates
  • New in
    1.78
    works on commercial and residential jobs

Step by step

Step 1: A renovation with no new walls in the Masonry Designer

Step 1: A renovation with no new walls

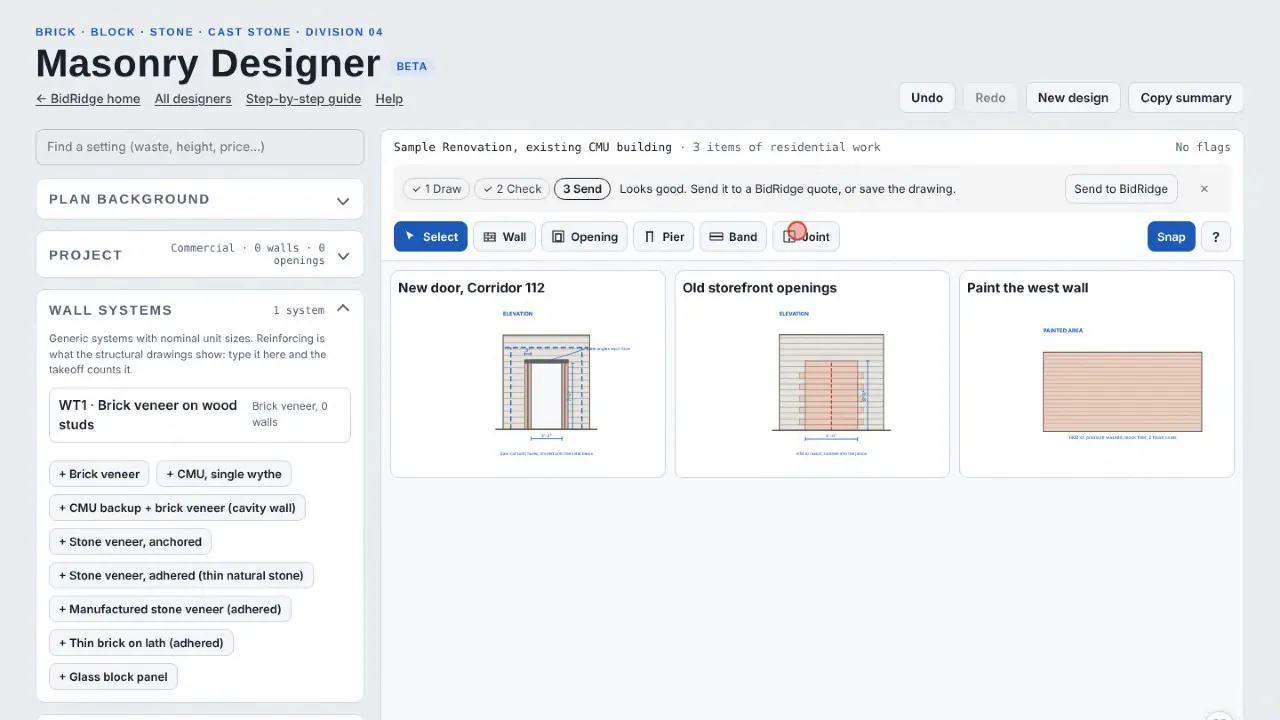
In the Masonry Designer, tap New design, then Blank, and set the project to Commercial (a residential remodel works the same way). The work is on walls that are already there, so it goes in the Residential and renovation work section of the side panel, not on the wall elevations. Each item shows its drawing on the board.
Step 2: Three items for existing walls in the Masonry Designer

Step 2: Three items for existing walls

New in 1.78, the buttons under the list add New opening in an existing wall, Infill an existing opening, and Paint existing masonry, beside the chimneys, steps and repairs. Each prices its own material, accessories and install hours at your production rates.

Step 3: A new opening in the Masonry Designer

Step 3: A new opening

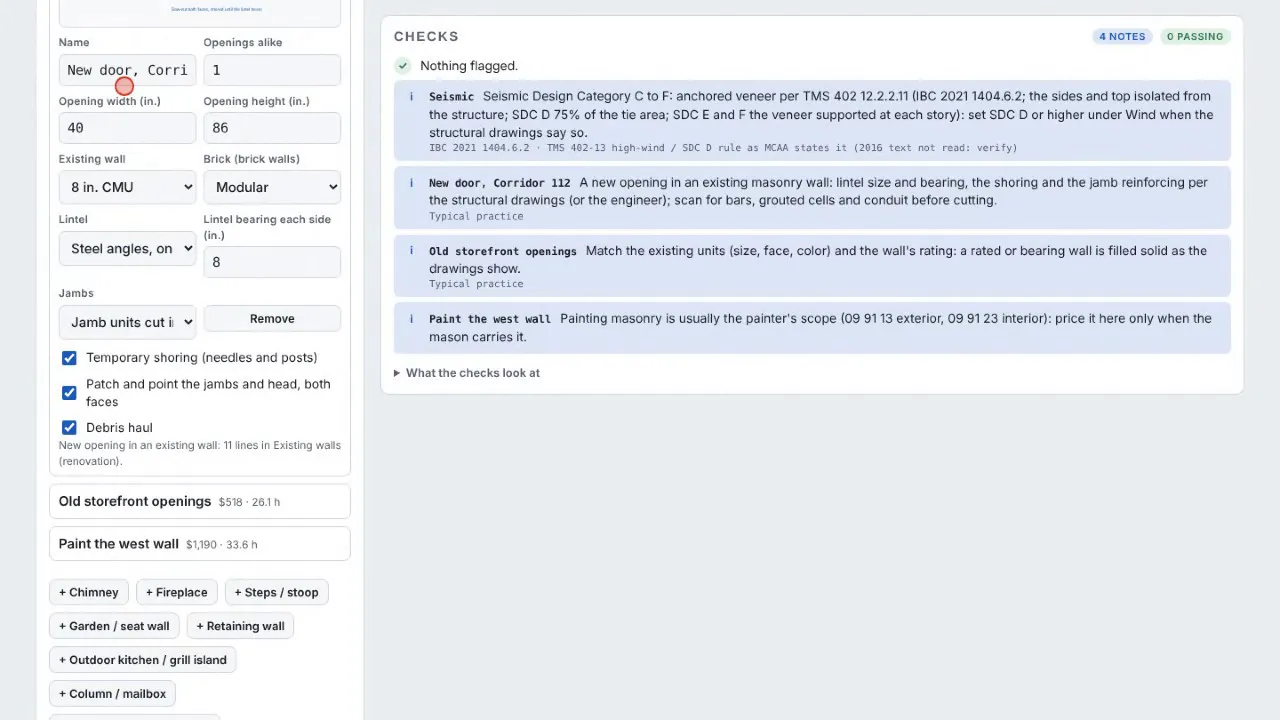
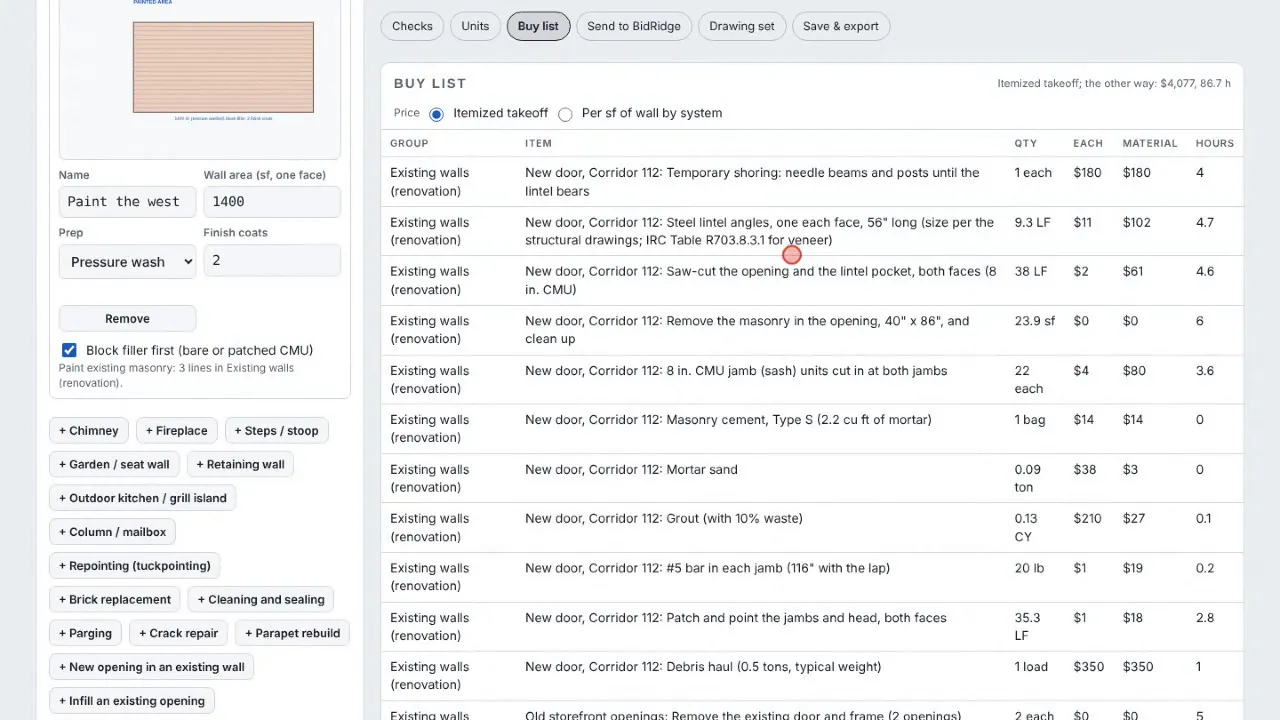
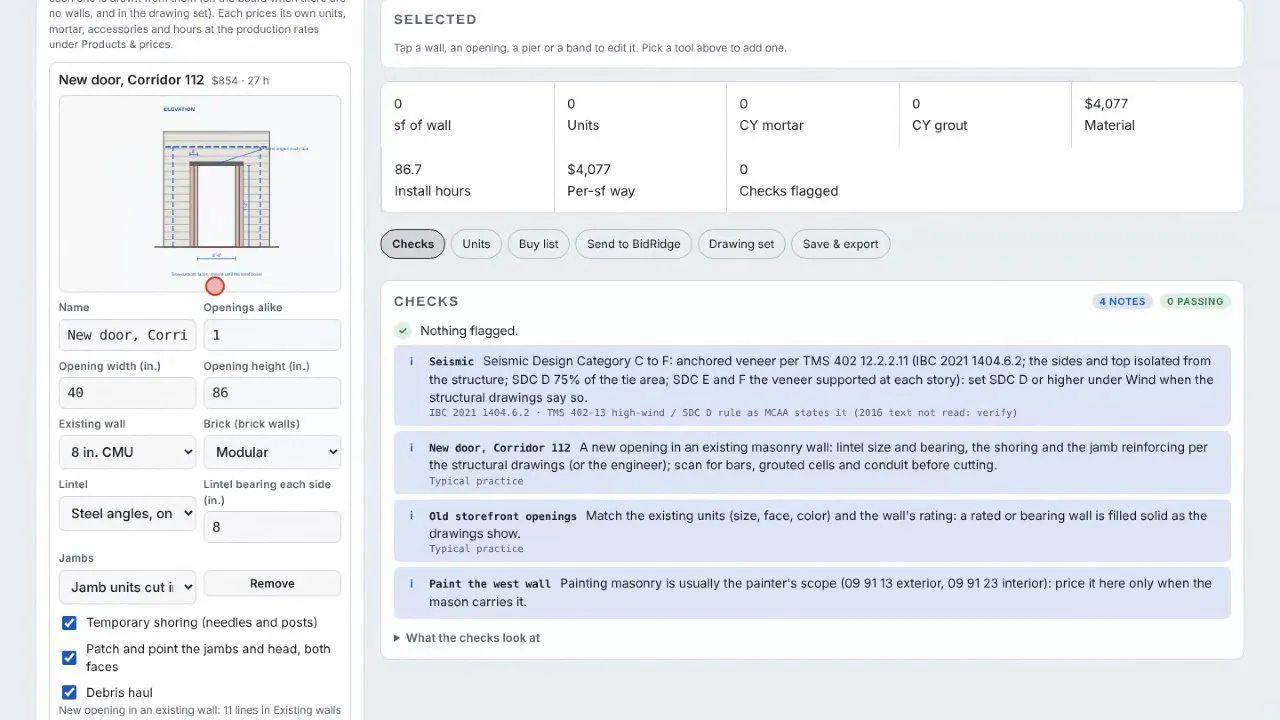
Type the opening's width and height, how many alike, and the existing wall: 6, 8 or 12 in. block, two wythes of brick, or block with a brick veneer. The drawing shows the opening with the saw-cut line, the lintel and its bearing, the shoring and the jambs. The lines: temporary shoring, the lintel, the saw cut on both faces, removing the masonry, jamb units cut in with their cells grouted and a #5 bar, patching the jambs and head, and a debris haul sized by the wall's weight.

Field tip: Scan for bars, grouted cells and conduit before cutting: the check says so on every new opening.

Step 4: The lintel and the jambs in the Masonry Designer

Step 4: The lintel and the jambs

Pick the lintel: steel angles on each face, a precast lintel, a block bond beam lintel with two #5 bars, or by others. The bearing at each side sets its length and the saw cut. The jambs can be cut in and grouted, cut in without grout, or just patched. Size the lintel and shoring from the structural drawings: the designer prices what you pick.

Step 5: Old openings filled in in the Masonry Designer

Step 5: Old openings filled in

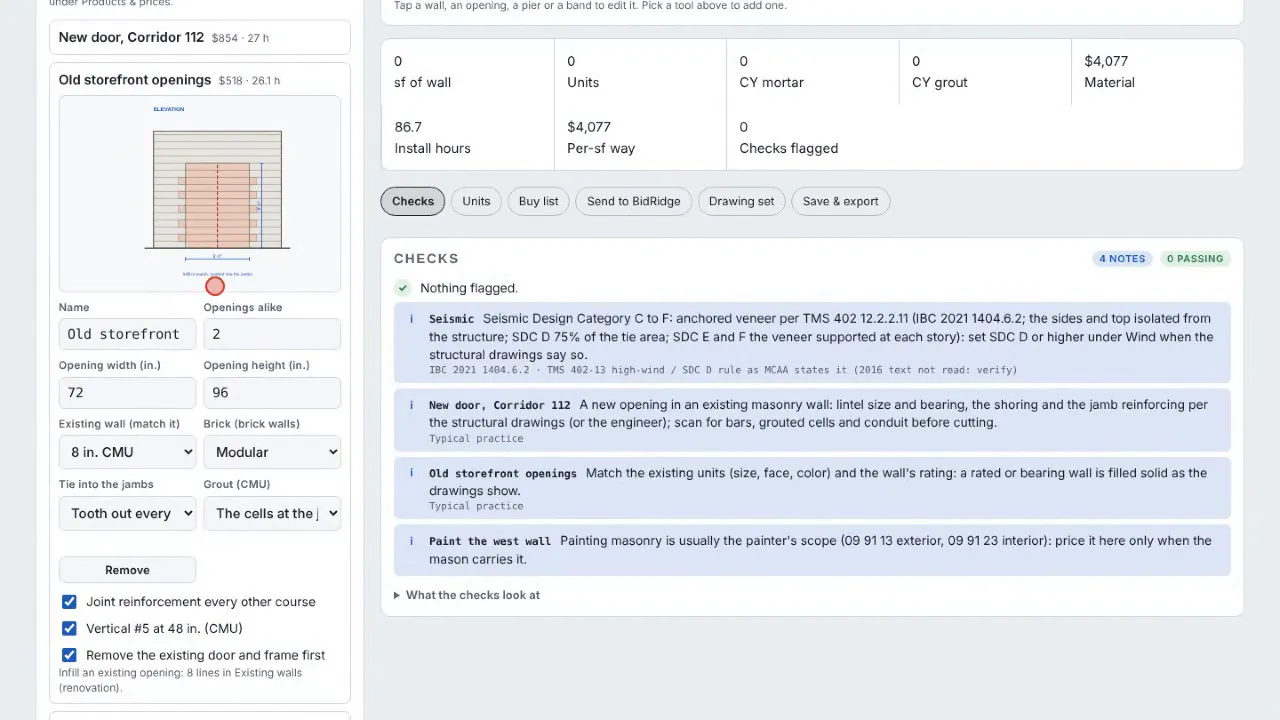
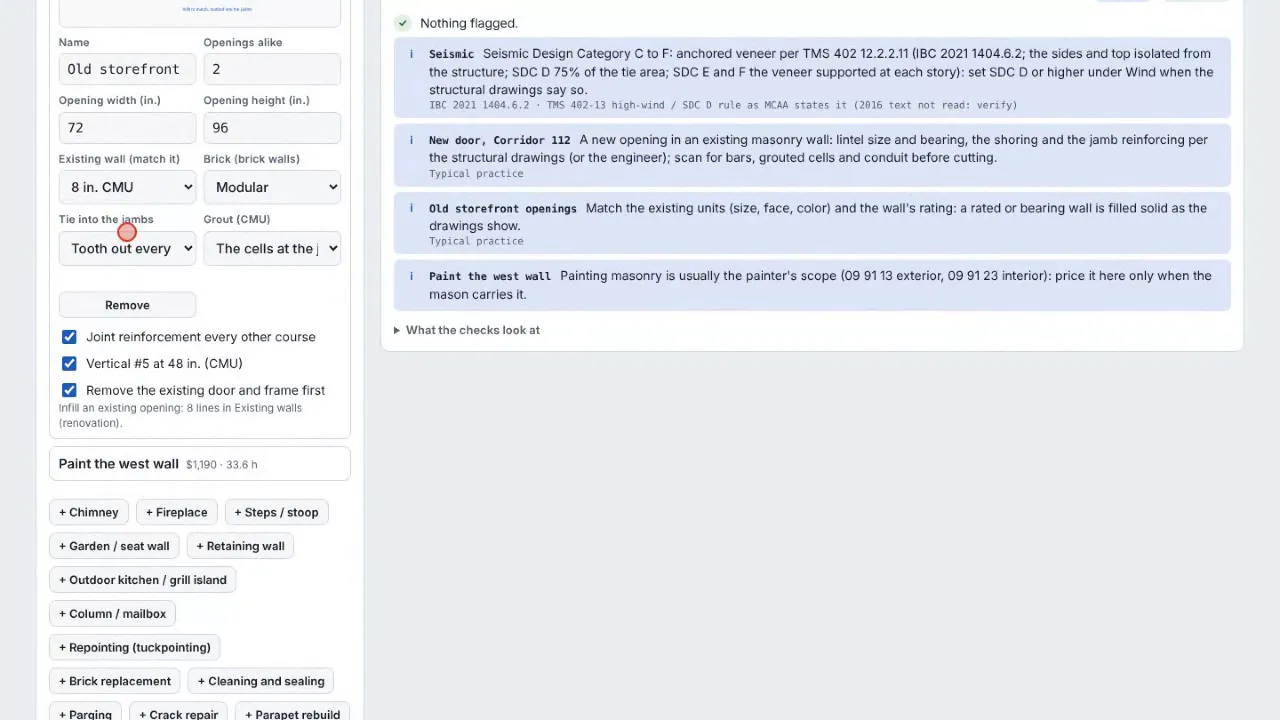
Infill an existing opening: its size, how many, and the wall to match. The units to match with waste, the mortar, grout at the jambs (or solid, for a rated or bearing wall), vertical bars at 48 in. and joint reinforcement every other course are counted, with removing the old door and frame first.

Step 6: Tie it into the jambs in the Masonry Designer

Step 6: Tie it into the jambs

Tooth out every other unit at the jambs and key the infill in, drill and epoxy #4 dowels every 16 in., or butt it with sealant and backer rod at both faces. The drawing shows the toothing or the dowels.

Step 7: Paint existing masonry in the Masonry Designer

Step 7: Paint existing masonry

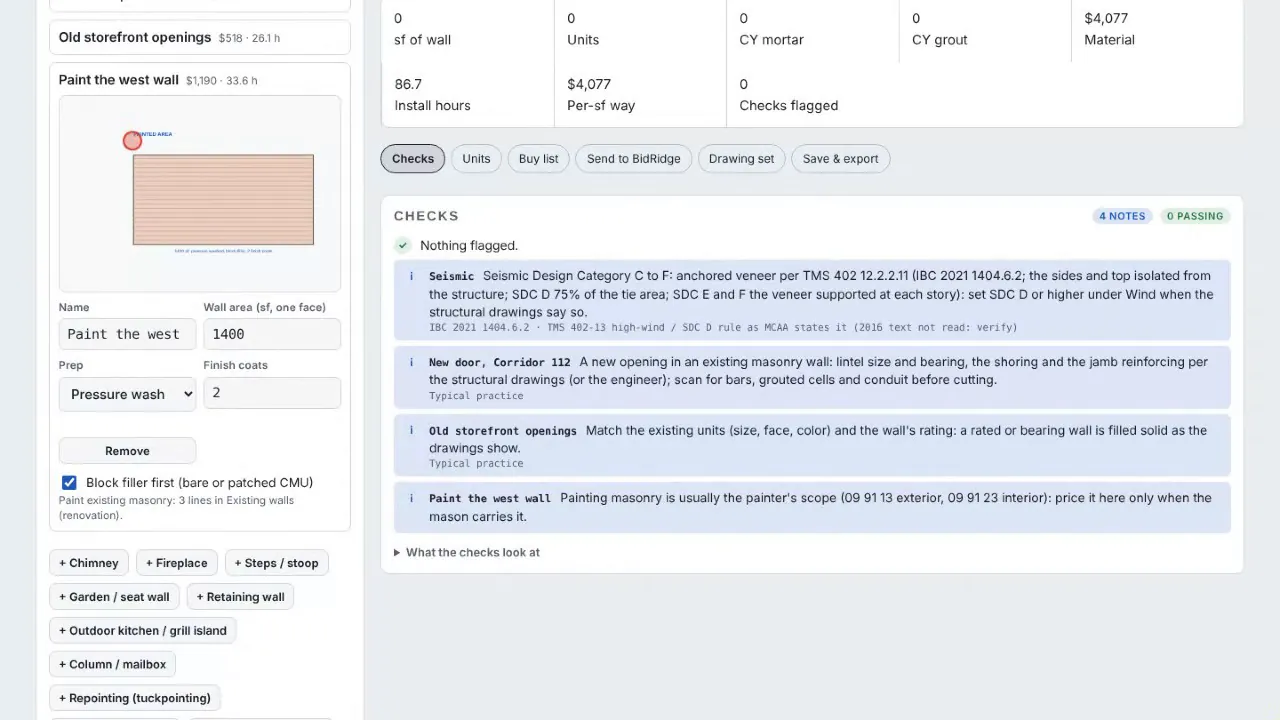
The wall area, the prep (pressure wash or detergent), block filler for bare or patched block, and the finish coats. Gallons come from the coverage under Products & prices.

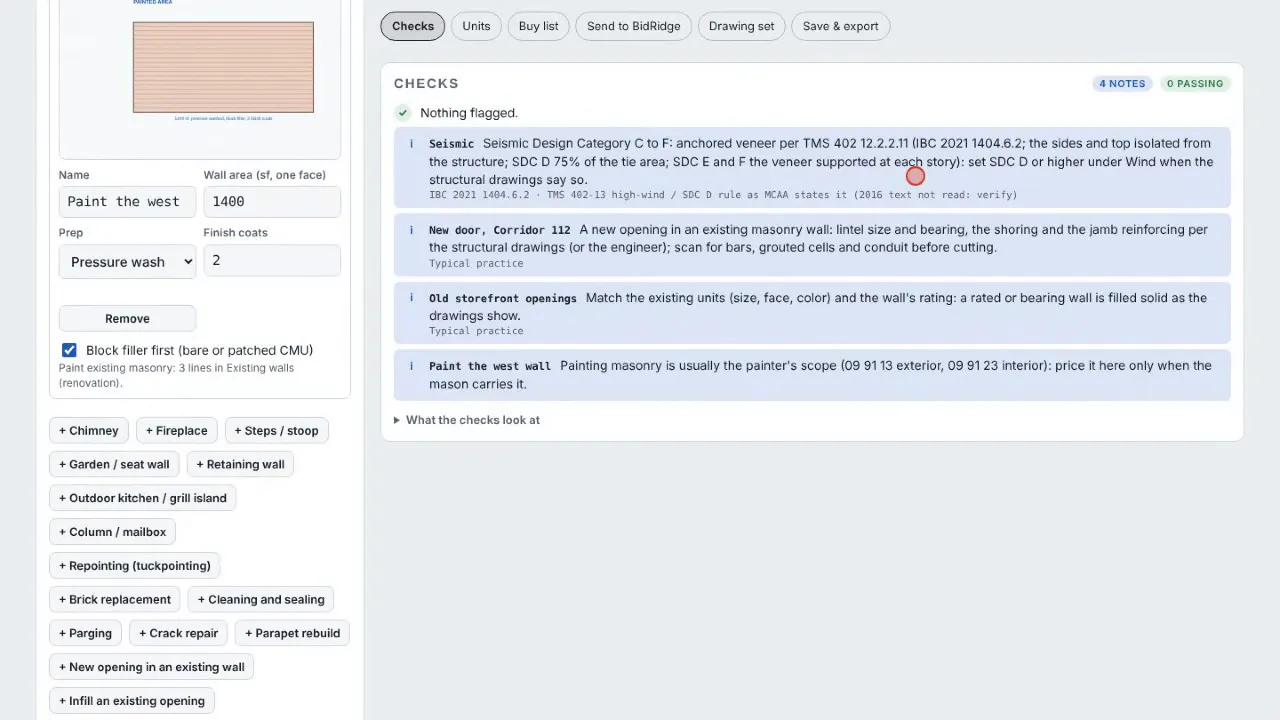
Field tip: Painting masonry is often the painter's scope: the check notes it, so price it only when the mason carries it.

Step 8: The checks in the Masonry Designer

Step 8: The checks

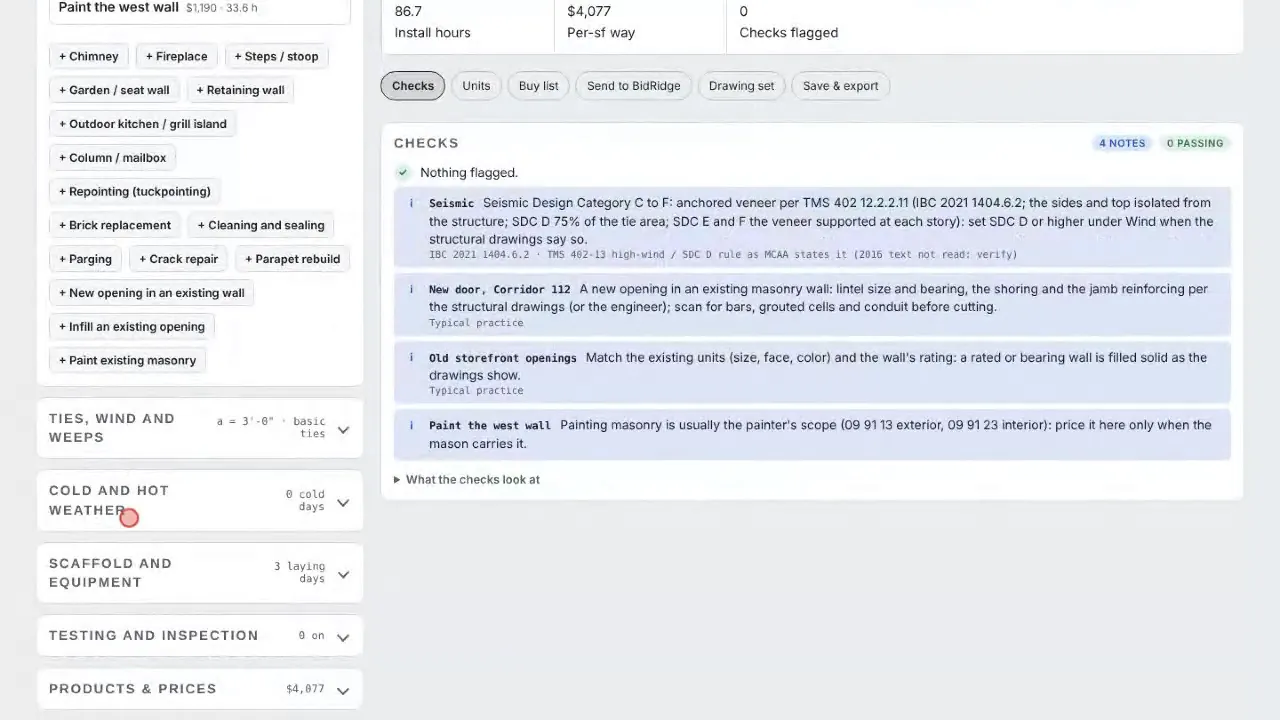
Each item adds its notes to the checks: the lintel, shoring and jamb reinforcing per the structural drawings, matching the existing units and the wall's rating, and who carries the paint.

Step 9: The buy list in the Masonry Designer

Step 9: The buy list

Every line lands under Existing walls (renovation), with the shoring, lintels, saw cutting, units, grout, bars and the hours, in both pricing ways.

Step 10: The drawing set in the Masonry Designer

Step 10: The drawing set

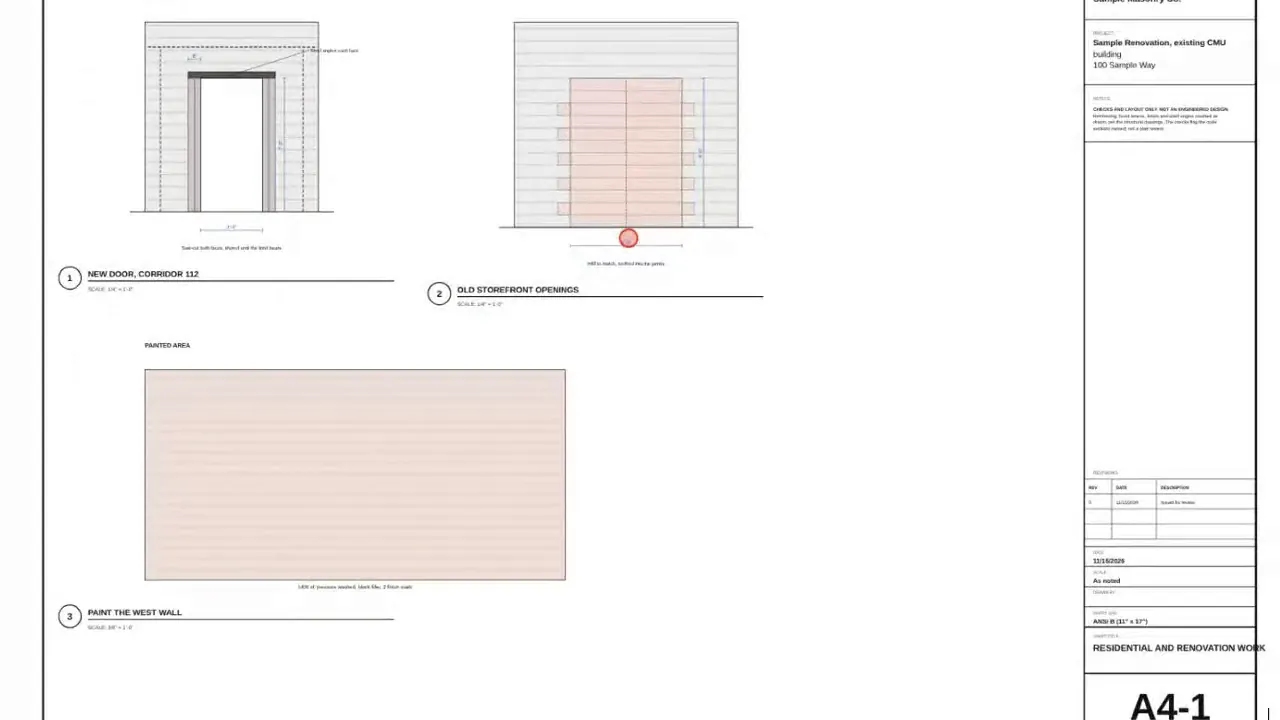
The Residential and renovation work drawings sheet shows each item drawn to its sizes, for the bid and the GC.

Step 11: Send to BidRidge in the Masonry Designer

Step 11: Send to BidRidge

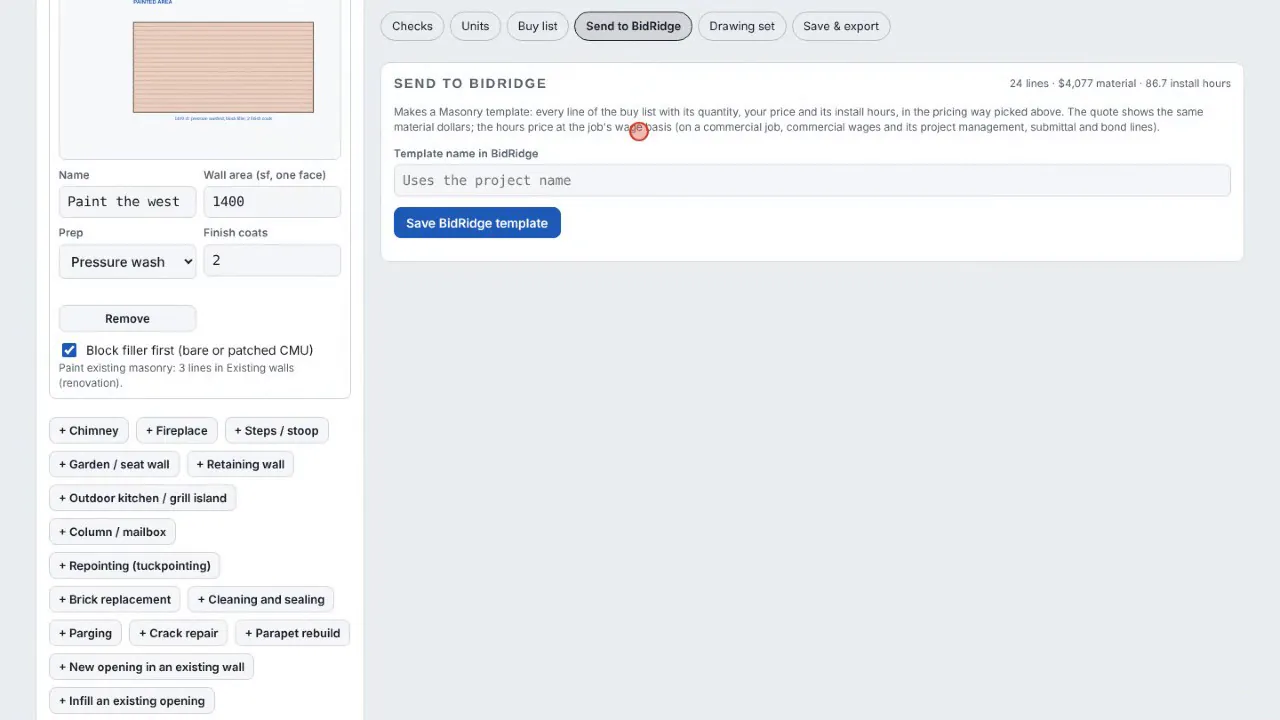
Send to BidRidge makes a masonry template with every line, its quantity, your price and its hours. In the app the lines come in under their own Existing walls group and phase.

What you get

The drawing set, the lists and the files

Real files from this sample, made by the designer. Tap a page to see it full size. Yours carry your company, the client and the address.

The renovation work drawings: the new door with its lintel and shoring, the infills, the painted area

More in the guide

Try it on your own job

Open the sample, change it to your measurements, and send it to a BidRidge quote. Drawing is free; the drawing set, the lists and the quote come with a BidRidge license or the 14-day trial.

Sample designs: names, sizes and clients are made up. Prices are BidRidge's starting rates; set your own. The designers check against common guidelines (IRC, NKBA and the makers' published numbers) to help you catch mistakes. They don't replace your building department or the manufacturer's installation instructions: verify with them.