
BidRidge User Guide
Everything BidRidge does, step by step: setting up, pricing a job, sending it for signature and payment, and running the job through to the final invoice. Most answers are here, so you shouldn't need to call.
For BidRidge 1.82.42 · Phone, tablet and computer. Search for a word with the box in Contents, or tap a topic below.
- 0:02Cabinet presets Cabinet Designer, 1.53
- 0:34Side splashes and the ADA section Cabinet Designer, 1.53
- 1:10Top presets Countertop Designer, 1.53
- 1:45Column wraps, bands and heater enclosures Cabinet Designer, 1.52
- 2:18A PDF under the plan, fixtures and DXF Ceiling Designer, 1.52
- 3:02Ceiling maker library Ceiling Designer, 1.52
- 3:27Casework specs, soffits, devices and typical units Cabinet Designer, 1.52
★Start here: your first job in 5 minutes
You don't need to read this whole guide. Do the steps below once, with a real job or the sample, and you'll know BidRidge. Everything after this chapter is detail you can look up when you need it.
Watch it first
Each video has a short spoken walkthrough, so turn your sound on.
The videos need an internet connection. If one won't play, tap Open full size under it. Everything else in this guide works offline.
Using the designers? The designer guide on bid-ridge.com has a narrated walkthrough and a sample design for each one.
Every feature, one short video each
Each one is about a minute or less. The same videos are in the matching parts of this guide.
The steps
- Set up (2 minutes). Open BidRidge, tick the box on the first screen, and answer the setup questions: company and license number, location, sales tax, the trades you do, and your pay and margin. In a hurry? Skip for now and come back to it from Settings. (The setup questions)
- Start a job. At the top of the home screen tap + New estimate, choose Estimate it or Draw it first, and pick how to price it (see the table below), or tap Try a sample job to practise on a filled-in exterior repaint.
- Customer. Type the customer's name, mobile number and/or email (you'll text or email them the proposal) and the property address.
- Measure. Answer the job questions and add the rooms, sides or tasks with their sizes, or type your line items. The bar at the top shows the price as you go.
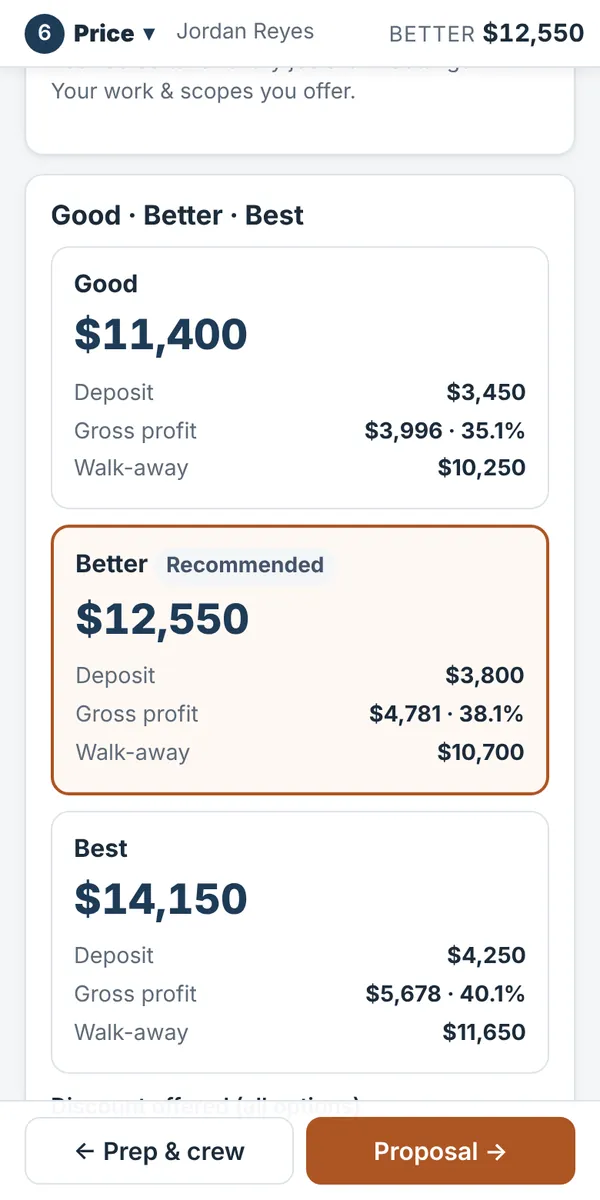
- Check the price. On the Price step, look at the Better price and the checks. Ready to send means nothing needs a look. Never go below the walk-away price; take work out instead. (The Price step)
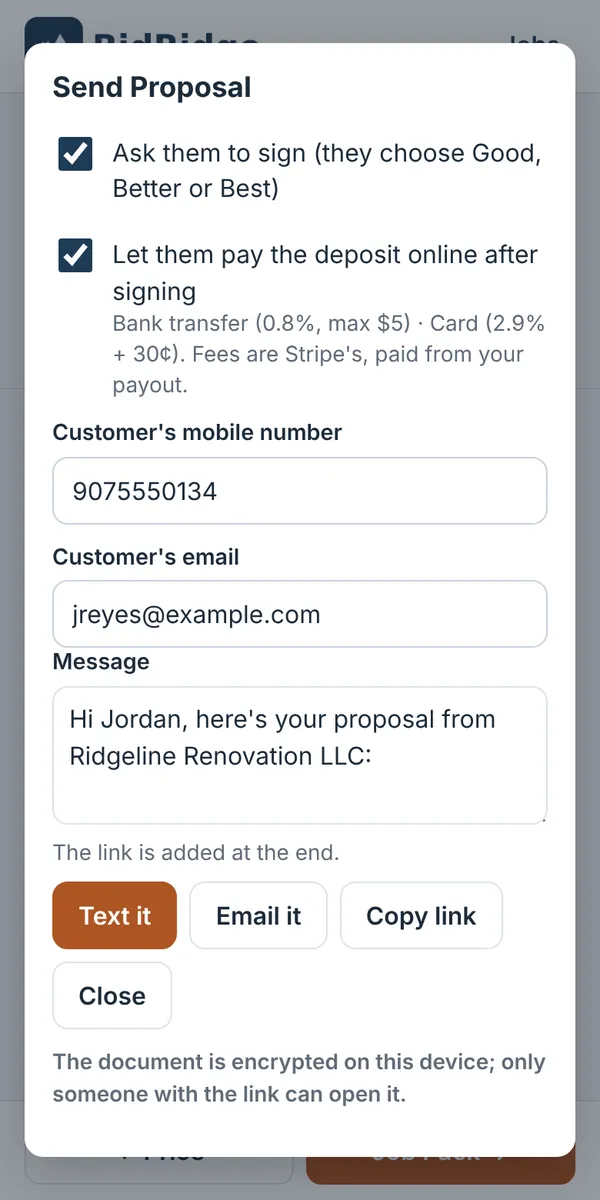
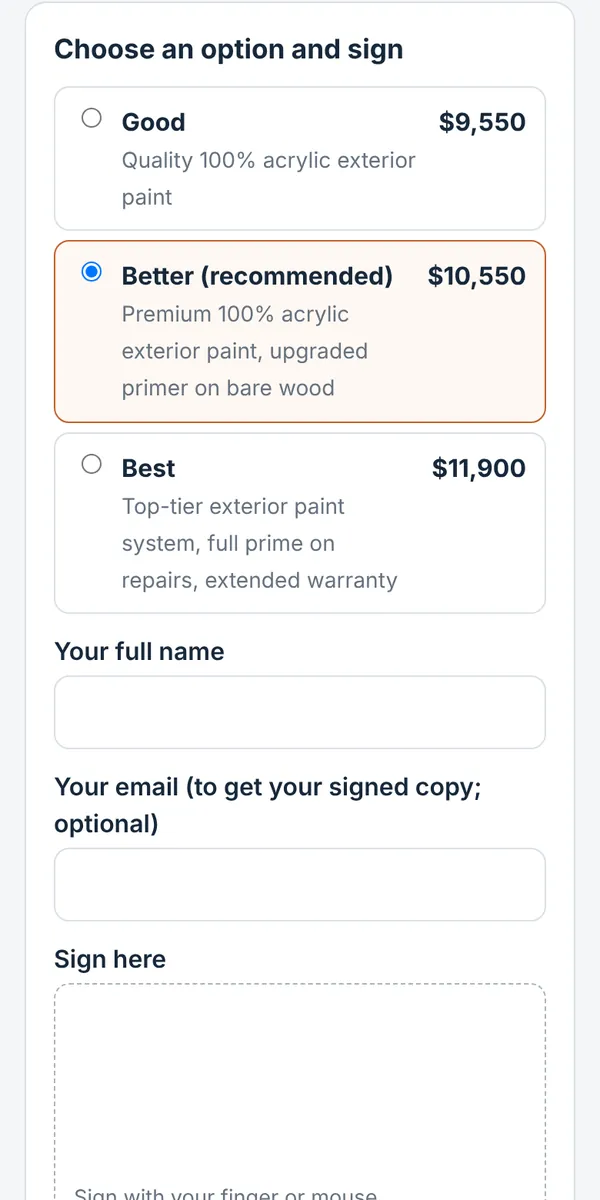
- Send it. On the Proposal step tap Send proposal to customer, then Text it on a phone or Email it on a computer. Your Messages or email app opens with the link filled in; hit send. The customer opens it on their phone, picks an option, signs with a finger and can pay the deposit. You get a note, and the job turns Sold. If they say yes in person instead, tap Mark sold on the Proposal step. (Send, sign and get paid)
- Run the job. The Job Pack has the start date, schedule, shopping list and crew checklist, your job photos, and work orders for your subs and purchase orders for your suppliers; finish trades also get a Finish schedule for the customer to approve. (After the sale)
- Get paid. On the Invoice step create each invoice and Send it, or tap Mark paid when they pay by check. When you mark the last invoice paid, BidRidge offers to text them your Google review link; after an online payment, they show up under Ask for a review on the home screen.
- Protect your work. Turn on Sync (home screen, Sync and backup) so your jobs are on every device and safe if a phone is lost. (Sync and backups)
Which way to price it?
| Use | When | How |
|---|---|---|
| A trade (exterior or interior painting, roofing, siding, EIFS, tile, flooring, epoxy floors, drywall, ceilings, countertops, bathroom, carpentry, insulation, windows & doors, concrete, hardscape & landscape, decks & fencing) | Most jobs. BidRidge prices from your wages, production rates and margins, and checks the price. | + New estimate → the trade. (Making an estimate) |
| Fast quote | Common jobs you price often: a backsplash, a move-out, a pre-listing refresh. | Fast quote from a template: pick it, choose a size, answer a few questions. (Fast quotes) |
| Quick quote | Punch lists, repairs and handyman visits. | + New estimate → Quick quote (task list). (Quick quote) |
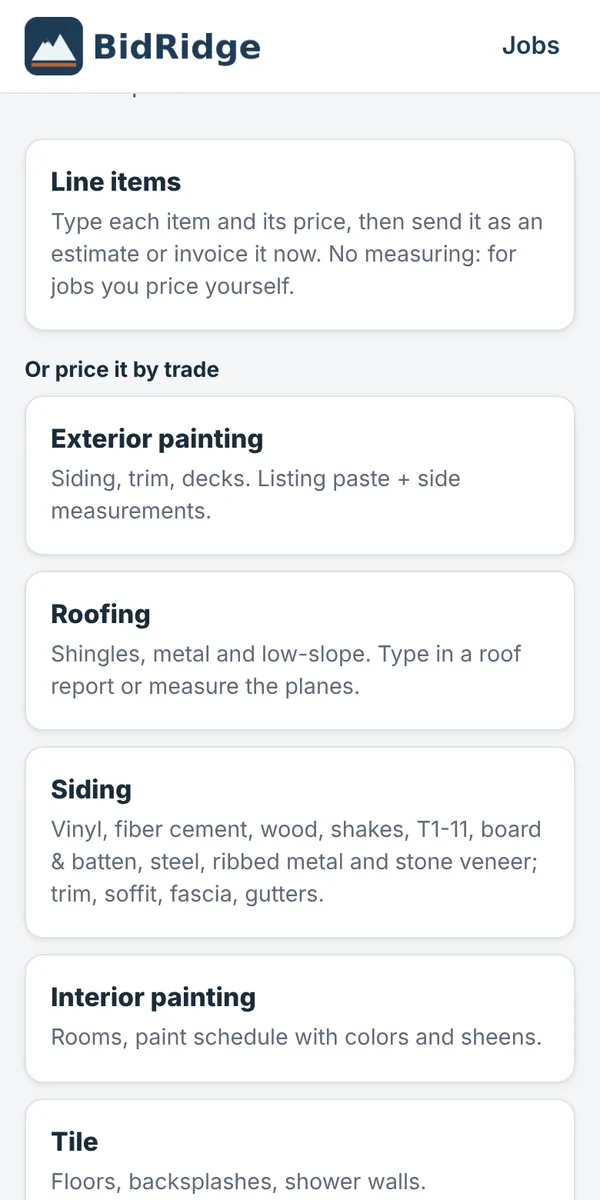
| Line items | You already know your price and just want to type it, then send an estimate or bill it on the spot. | + New estimate → Line items, or Line items: estimate or invoice on the home screen. (Line items) |
| A bid to a general contractor | Commercial work you quote to GCs: plans, specs and a bid date. | New bid from documents or + New bid (paste the invitation). (Bid board, GC jobs) |
| Multi-scope project | Several trades for one customer on one proposal and schedule. | + Multi-scope project. (Projects) |
| A designer | Tile, flooring, roofing, siding, EIFS, concrete, deck, finish carpentry (trim, stairs, cabinets), hardscape, ceiling, countertop, rough carpentry and insulation jobs you want drawn first. | Design it on the job's measuring step. (The designers) |
1Getting started
What BidRidge is
BidRidge is an estimating app for contractors. You walk the job, answer its questions and enter measurements, and it prices Good, Better and Best options from your own wages, production rates, material prices, overhead and margin. Then it builds the proposal, texts it to the customer to sign and pay, and carries the job through scheduling, photos, subs and suppliers, invoices, change orders and close-out.
It covers nineteen trades: Exterior painting, Roofing, Siding, Interior painting, Tile, Flooring, Drywall, Bathroom remodel, Rough carpentry, Finish carpentry, Ceilings, Countertops, EIFS, Insulation, air sealing, fire & sound, Window & door replacement, Epoxy & resin floors, Concrete, Hardscape & landscape, and Decks & fencing, plus three Commercial trades: Division 10 / Specialties, Glazing (Division 08) and Masonry. There's also Quick quote (a task list for handyman, punch-list and repair work) and line-item estimates you price yourself. Fifteen designers, built into the app, draw tile, flooring, roofing, siding and EIFS, concrete, deck, cabinet, trim and stair, hardscape, ceiling, countertop, framing (with the insulation) and masonry jobs, and for Commercial work Division 10 restrooms and lockers, glazing and low-slope roofs, and send the quantities to the estimate.
Install it
| Device | How |
|---|---|
| Android phone or tablet | Install BidRidge from Google Play, or use Chrome as below. Leads you get by email or text can be shared straight into it (see Leads). |
| iPhone or iPad | Open bid-ridge.com/app/ in Safari, tap Share → Add to Home Screen. Once it's on your home screen it works without signal. |
| Android in Chrome (instead of the Play app) | Open bid-ridge.com/app/, tap ⋮ → Install app. |
| Windows computer | Download BidRidge for Windows from the Download page on bid-ridge.com, unzip it, move the folder somewhere permanent (for example Documents) and double-click BidRidge.exe. If Windows says "Windows protected your PC", click More info, then Run anyway (only the first time). |
| Mac | Download BidRidge for Mac from the Download page, unzip it, drag BidRidge.app into Applications and open it. If macOS says it can't verify the developer, click Done, then open System Settings → Privacy & Security, scroll down and click Open Anyway. |
| Linux | Download BidRidge for Linux from the Download page, unzip it somewhere permanent and run sh install.sh in the folder. BidRidge appears in your app menu. |
The free trial
BidRidge is free for 14 days on each device, no card needed: estimates, proposals, PDFs, sending and signing, and the designers' drawing sets. Online payments, sync (photo sync included) and QuickBooks start when you buy a license. The device has to go online once to start the trial. When the trial ends your jobs stay safe and you can still open them and save backups; new estimates and PDFs need a license. See License, trial & devices.
First screen: "Before you start"
The first time you open BidRidge it says your free 14-day trial starts here (no card needed) and, in one line, that prices are a guideline you check yourself. Read the full terms opens the whole text. Tick the box, type your name and tap I agree at the bottom of the screen. You can read it again any time under Help → Disclaimer.
The setup questions
Next come six short screens. Everything here can be changed later in Settings, and you can run the whole thing again from Settings → Run setup again. If you're in a hurry, Skip for now starts you with the built-in numbers.
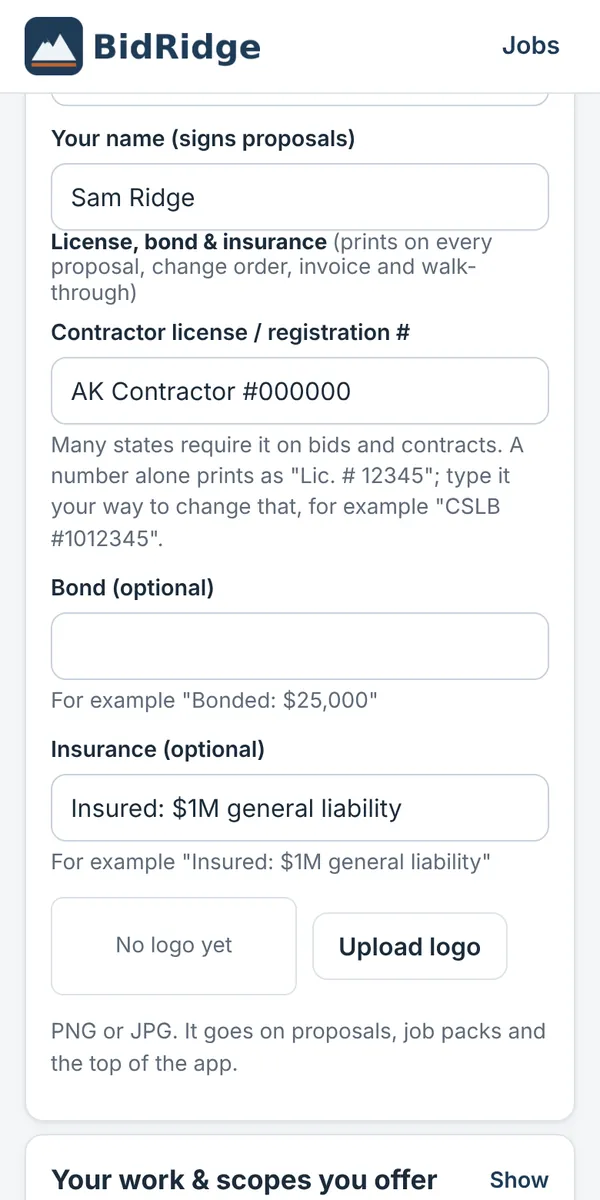
- Your company. Company name, phone, email, business address and your name (it signs your proposals). Under License, bond & insurance: your contractor license or registration number (many states require it on bids and contracts) and, if you like, your bond and insurance. They print on every proposal, change order, invoice and walk-through form, and on the page your customer signs. A number by itself prints as "Lic. # 12345"; type it the way your state writes it ("CSLB #1012345", "Reg. 12-345") and it prints exactly as typed. Tap Upload logo to put your logo on proposals, job packs and the top of the app (PNG or JPG).
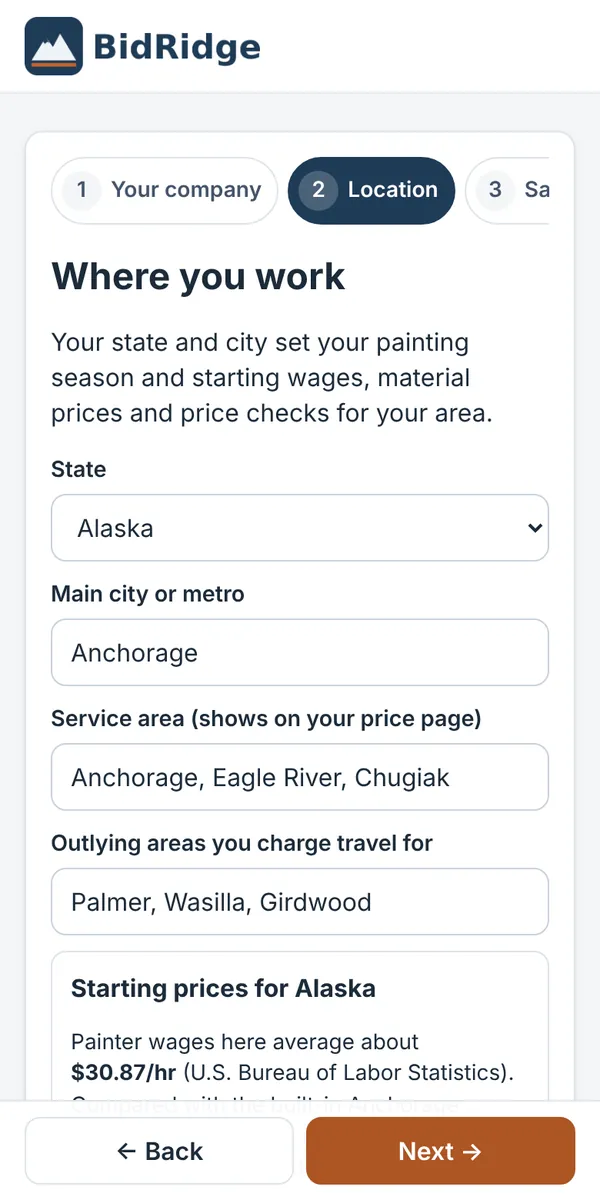
Already use BidRidge on another device? Tap Join sync (after activating your license) and your settings and jobs come over. Moving from another phone without sync? Use Load setup file. - Location. Pick your state and type your main city. BidRidge loads starting prices for your area: wages from the U.S. Bureau of Labor Statistics, and local material prices and minimums. It also sets your painting season (Short season, Four seasons or Year-round), which adds a little to jobs painted outside your best months. Add your service area and the outlying areas you charge travel for.
- Sales tax. Choose No sales tax on my jobs, Charge tax on materials or Charge tax on the whole job. If you charge it, enter your combined state + local rate and the name to print on proposals. Rules differ by state; check with your accountant.
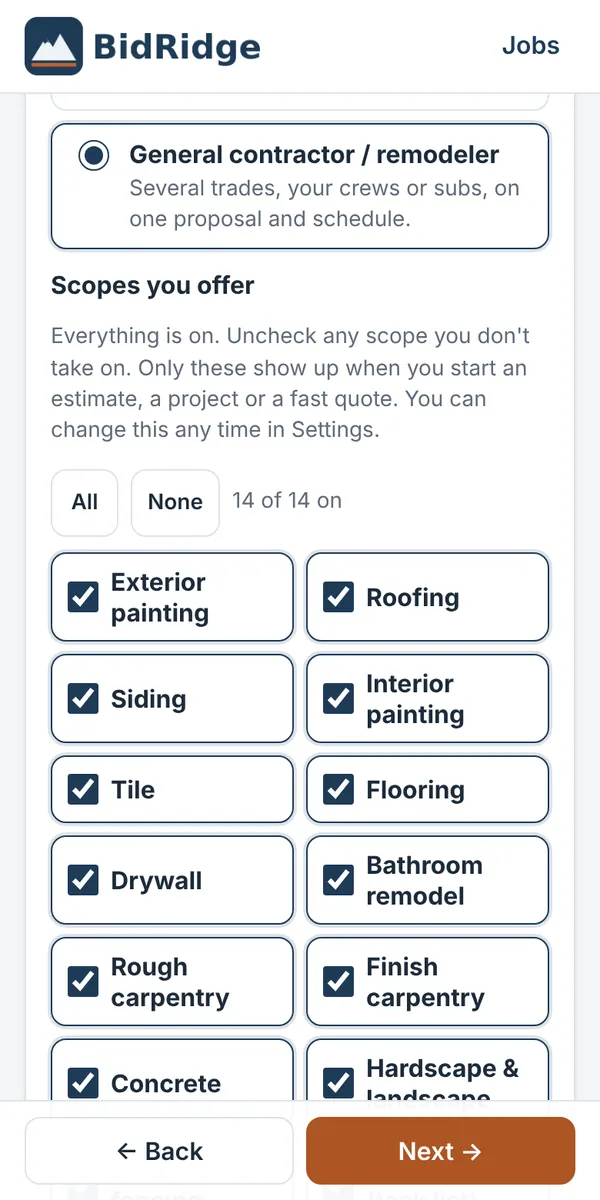
- Your work. Tell BidRidge what kind of contractor you are:
- Specialty contractor: you do one trade or a few (a painter, a flooring installer, a tile setter). Picking it unticks every scope, so you tick only the ones you do. (If you already picked your own list, it's kept.)
- General contractor / remodeler: you run jobs with several trades. Every scope starts ticked; untick any you don't take on.
Only the scopes you tick show up when you start an estimate, a project or a fast quote. You need at least one. If you offer only one, the multi-scope project buttons are hidden because you won't need them.
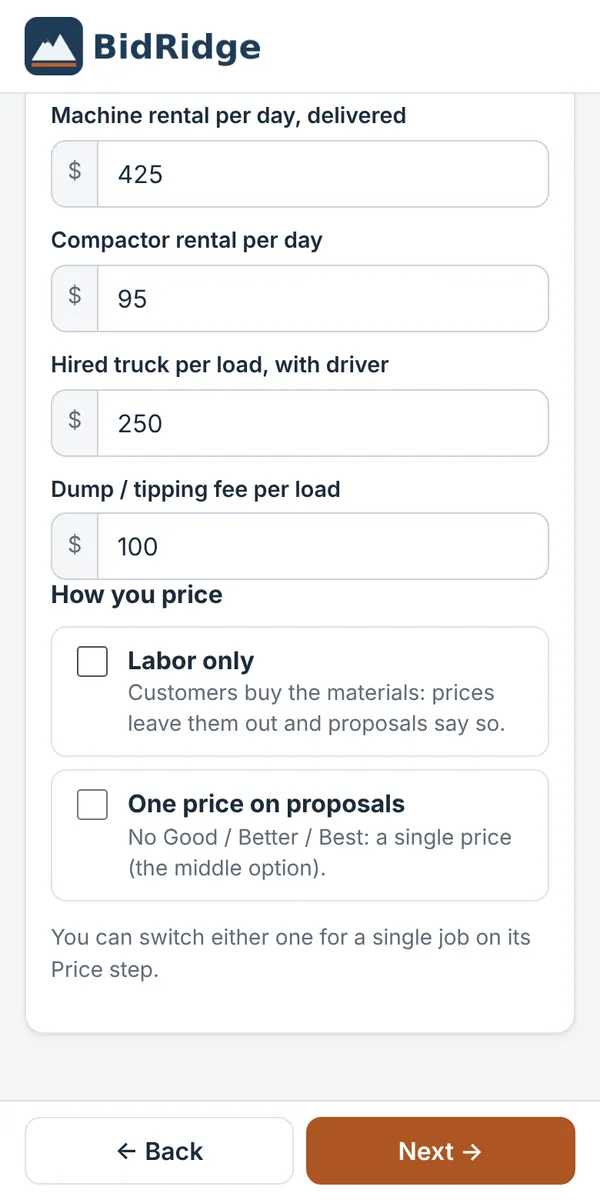
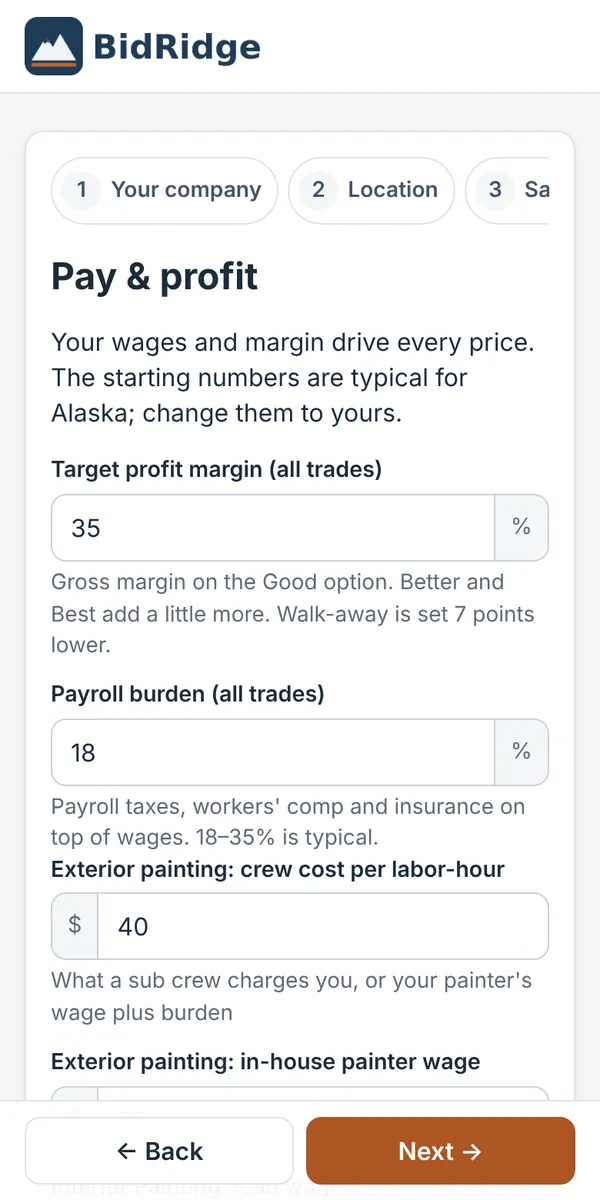
How you price: tick Labor only if your customers buy the materials (prices leave out material costs, proposals tell the customer they supply them, and Job Packs have no shopping list), and One price on proposals if you don't want Good / Better / Best (each proposal shows one price, the middle option). Both can be changed for a single job on its Price step (see How this job is priced). - Pay & profit. Your target profit margin (gross margin on the Good option; Better and Best add a little; your walk-away price is set 7 points lower), your payroll burden (payroll taxes, workers' comp and insurance on top of wages; 18–35% is typical), and the wages for each trade you offer. The starting numbers are typical for your area; change them to yours. Your state also sets the overtime rule for your own crew (for example Alaska: over 8 hours a day or 40 a week), so longer days or 6-day weeks are priced at overtime pay. Sub crews aren't affected. You can pick another rule, such as an approved Alaska flex plan, in Settings → Overtime.
- Finish. Check the summary and tap Start estimating.
2The home screen
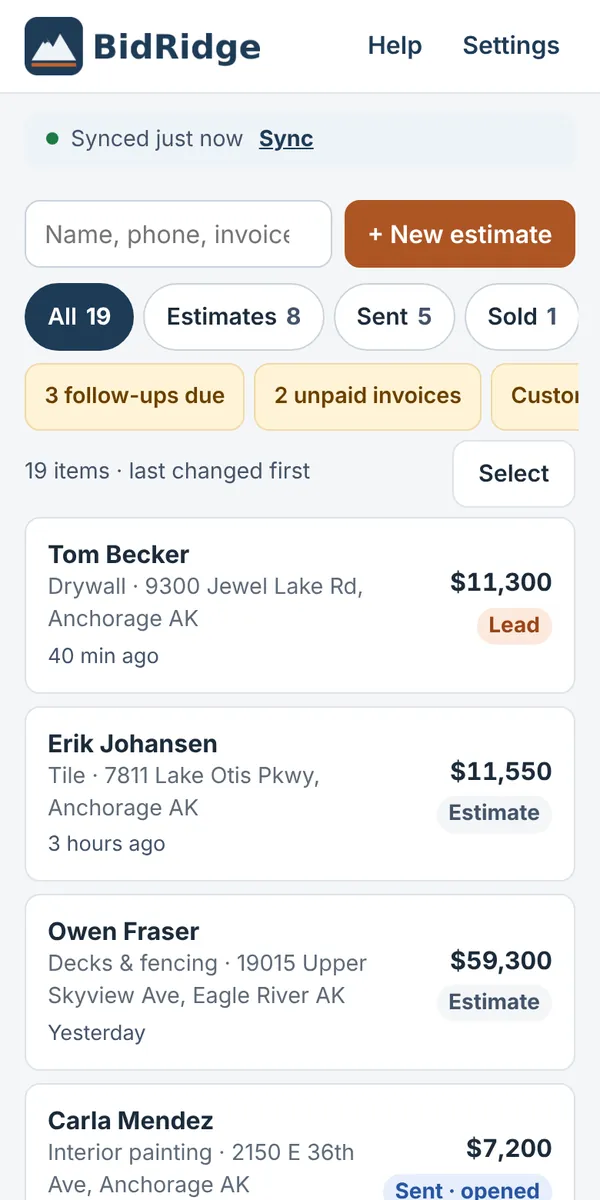
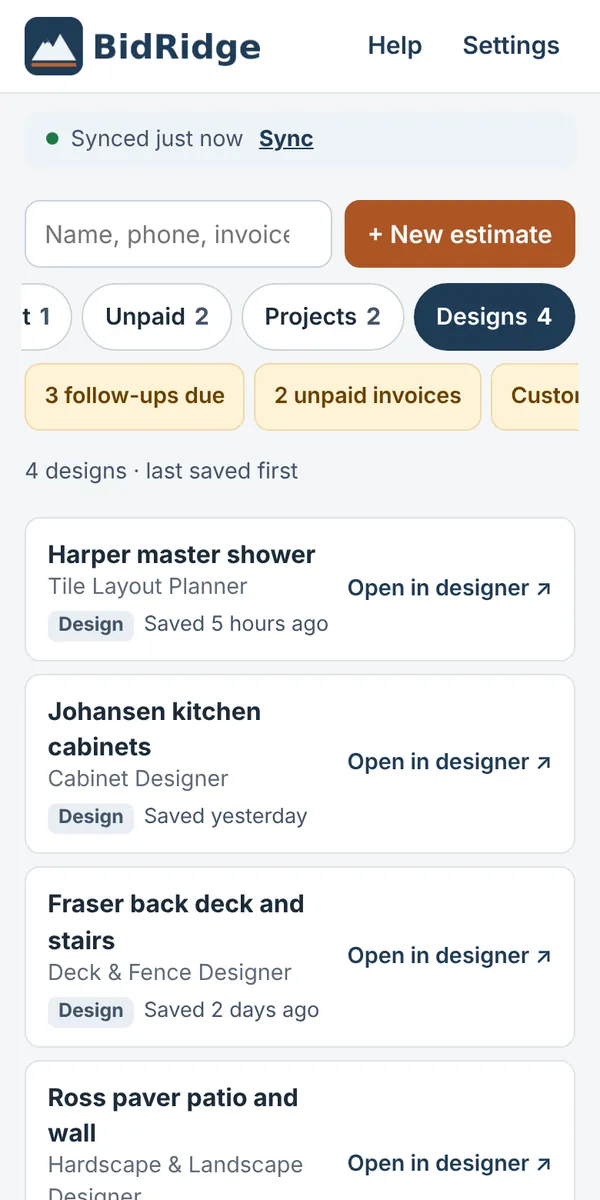
Help and Settings are at the top right. At the top of the screen is your library: a search box, + New estimate, filters and every job, project and saved design (see Library and bulk actions). Under the filters, a row of shortcuts says what needs doing ("3 follow-ups due", "2 unpaid invoices", reviews to ask for, Customer activity); tap one to jump to that panel. Below the list, depending on what you have:
- Follow up today: proposals that aren't signed yet and are due for a follow-up (see Follow-up reminders).
- Ask for a review: customers who just paid in full (see Review requests).
- Customer activity: the last two weeks of customers opening, signing and paying what you sent.
- Unpaid invoices: the total owed and how many are overdue. Tap one to open it, or Select them to send.
- More ways to start: pick Residential or Commercial first and only that side's ways show. Residential: Line items: estimate or invoice (see Line items), Fast quote from a template, + Multi-scope project and Try a sample job (shown until you add the sample; the sample is an exterior repaint for "Sample: Jordan Reyes"; delete it any time). Commercial: New bid from documents, + New bid (type it or paste the GC's invitation) and + Multi-scope project. Once you have bids to GCs, Commercial is picked for you; tap Residential to switch.
- Leads: + Add a lead, Lead sources, and Where your jobs come from: jobs, sold jobs, close rate and sold dollars for each lead source.
- Track record: how your finished jobs compared with your estimates.
- Export to a spreadsheet or CRM and Sync and backup.
Job status
Every job has a status: Lead → Estimate → Sent → Sold → Done, or Lost. You can set it on the job's Customer step, and BidRidge moves it for you along the way:
- Sending a proposal to the customer marks it Sent.
- The customer signing online (with the option they signed for), tapping Mark sold on the Proposal step, or creating the first invoice marks it Sold.
- Finishing the close-out marks it Done.
The lead-source table and the track record count jobs by these statuses, so keep them current (mark lost bids Lost).
Library and bulk actions
The list. Every job and multi-scope project, the one you changed last on top. Each card shows the customer, the trade (a project shows all its scopes on one card), the address, the price (the Better option, or the option sold), the status, and when it last changed ("3 days ago"). A project has a Project badge; a job with an invoice not yet paid has an Unpaid invoice badge. With a lot of jobs the list shows the newest first and loads more as you scroll.
- Search finds a name, phone number (type it any way: 9075550188 or 555-0188), email, address, trade, status ("lost", "in progress") or invoice number ("2003" or "#2003").
- Filters under the search box, each with a count: All, Estimates (drafts), Sent (the card says when the customer opened, signed or paid), Sold (not started yet), In progress / Done (sold jobs whose start date has come, and finished ones), Leads, Lost, Unpaid, Projects and Designs. The app remembers the last filter you used.
- Designs lists the drawings you saved in the BidRidge designers (tile, flooring, roofing and siding, concrete, decks, cabinets, hardscape, ceilings, countertops, finish carpentry and rough carpentry) with the designer and when it was last saved. Tap one (Open in designer) to open it in that designer, already signed in: inside the app on Android and the desktop app (it needs a signal to fetch the design), in your browser in the web app. You need sync on, with the same company passphrase the designers use; the app only reads them and never changes or deletes them. To save a design there, see Design it: the designers.
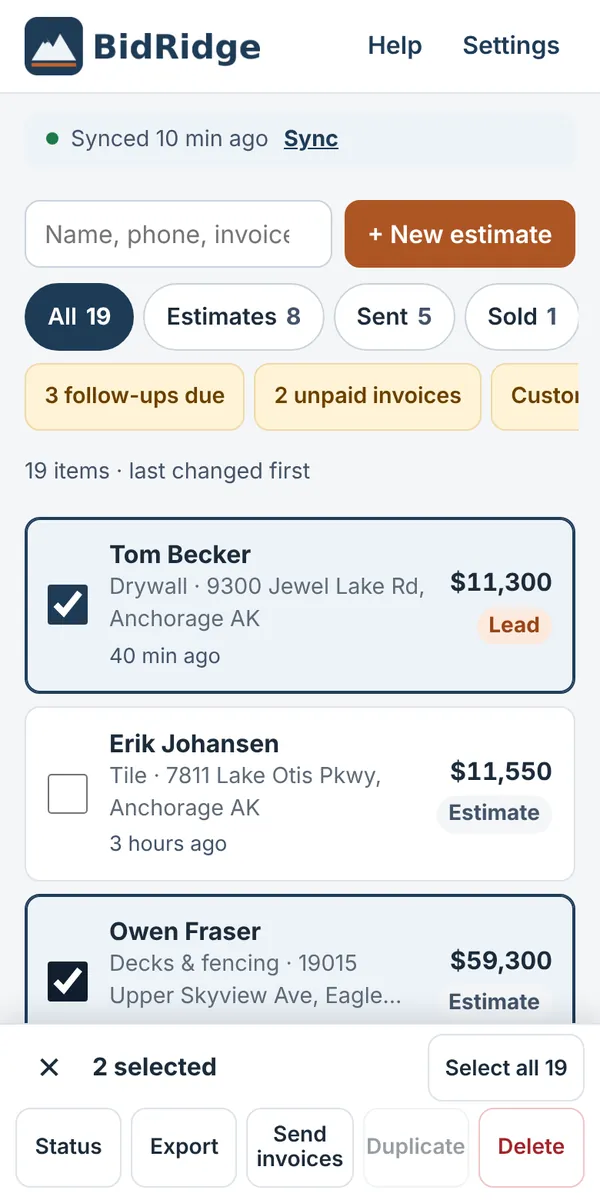
Select mode. Press and hold a card (or tap Select above the list), then tap the cards you want. The bar at the bottom shows how many are picked; Select all picks everything in the current filter and search. ✕, Back or Esc leaves Select mode.
- Status: set the status of every picked job (a project's scopes all get it).
- Export: a spreadsheet (CSV) of the picked jobs (customer, phone, email, address, trade, status, price and dates), or a backup file of just those jobs that Import backup file reads on any device.
- Send invoices: every picked job's unpaid invoices that haven't been sent yet, or are past due, open one after another in the usual Send dialog, so each customer gets their own text or email. Close skips one, Stop sending ends the run. At the end a summary lists what was sent and what was skipped and why (already sent and not due, paid, no invoice yet).
- Duplicate (one job or project): a fresh estimate (see below).
- Delete: asks once, with the count. Designer files only those jobs used are deleted with them.
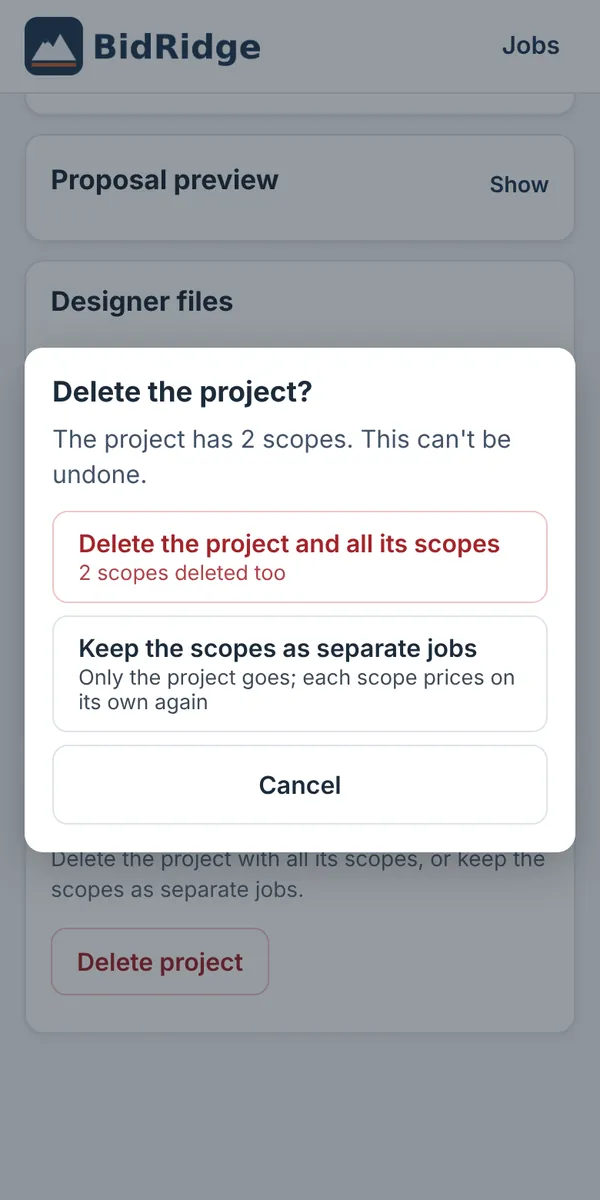
Deleting a multi-scope project (Delete project at the bottom of the project page, or in Select mode) asks whether to Delete the project and all its scopes or Keep the scopes as separate jobs (the project goes and each scope prices on its own again). A project with no scopes left, or whose jobs were already deleted, is simply deleted. Deleting a project's last scope removes the empty project too. With sync on, deletes reach your other devices.
Duplicate makes a fresh estimate for the same work: rooms, answers, notes, finish selections and designer files are copied; invoices and payments, change orders, the close-out, the sold option and dates, signatures, sent links and the start date are not, and the copy's status is Estimate.
Back. Moving between the steps of a job (Next, Prev or the step tabs) doesn't add to the phone's Back history, so one press of Back takes you out of the job. A refresh still opens the step you were on.
3Making an estimate
Tap + New estimate and pick the trade. Each trade has its own steps along the top. Tap any step to jump to it, or use the buttons at the bottom of the screen. Everything saves as you type.
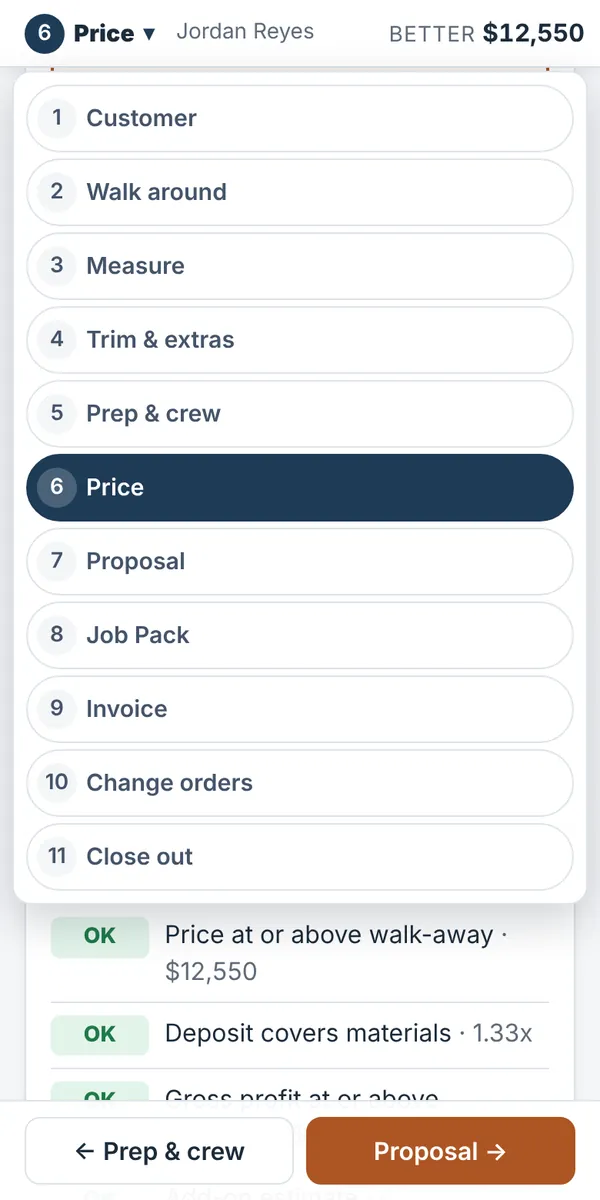
While you scroll down or type in a field, the header folds into one thin strip with the step's number and name, the customer and the price, so more of the form fits above the keyboard. Tap the step name on the strip (6 Price ▾) to open the step menu and jump to any step; scroll up (or leave the field) and the full header comes back. Press Next (Enter) on the keyboard to move to the next field.
Rules that apply to every trade
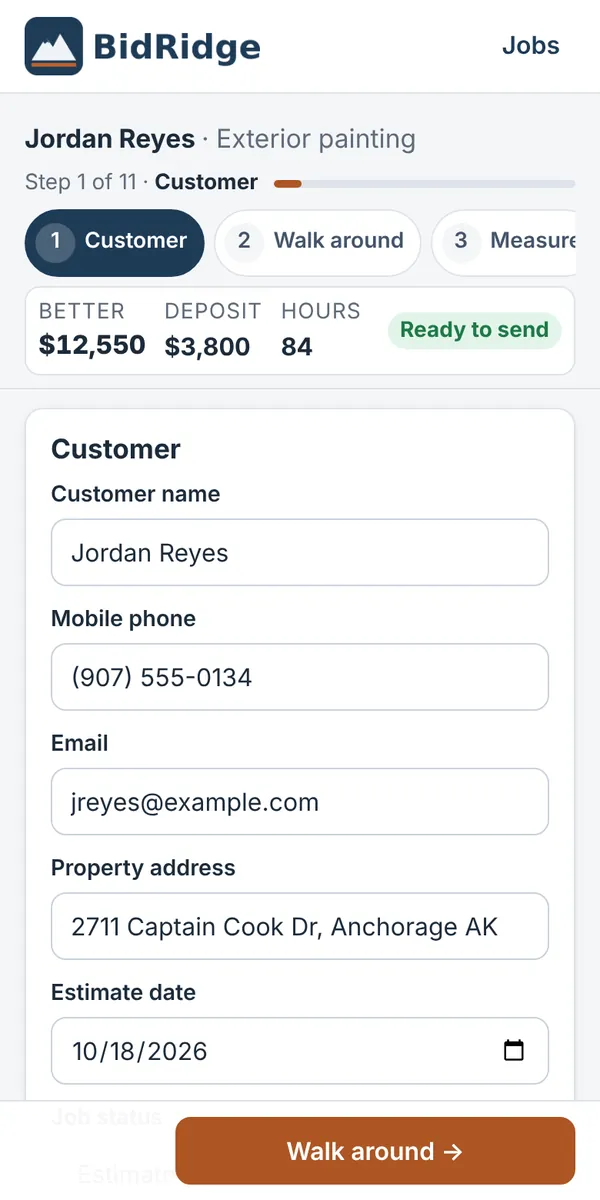
- The price bar. Under the steps you always see the Better price (or the single Price), the Deposit, the labor Hours, and either Ready to send or how many things need a check. Tap that to go to the checks. Before you've entered enough, it says what it still needs (the home's size, rooms with sizes, or tasks); a bathroom priced from the typical 5 x 8 ft room says Typical size: measure it. Once the job is sent, sold or done, it says so (Sold · Better).
- After it's sold. Until the job is sold, the steps you need only after the sale (Field, Invoice, Change orders, Close out) sit dimmed behind an After it's sold mark. They still open.
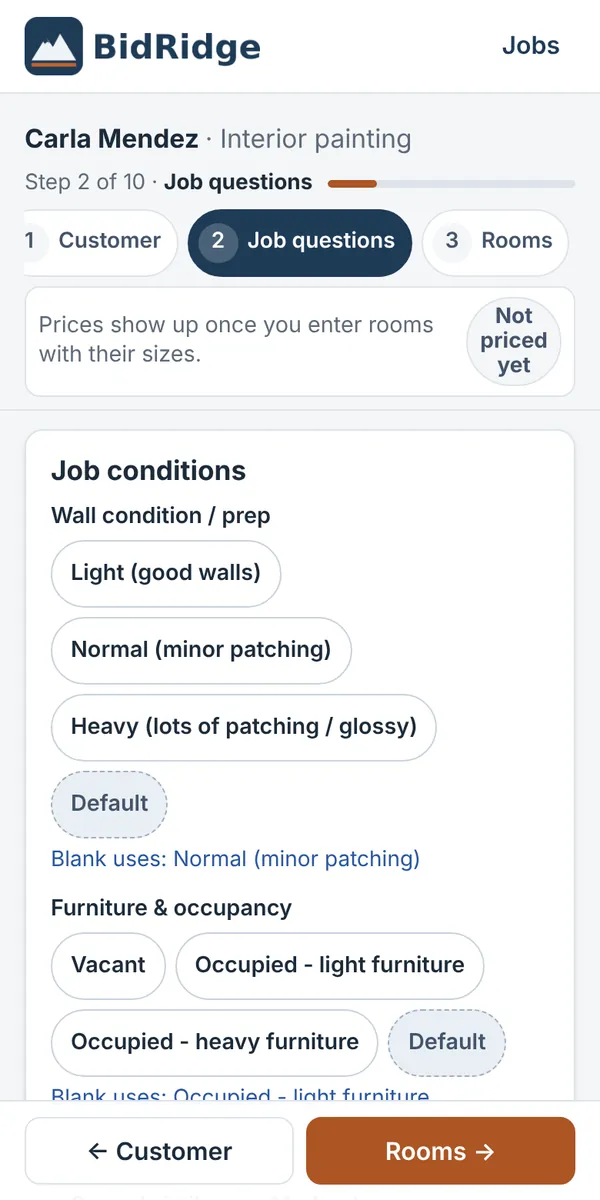
- "Blank uses". You don't have to answer everything. A blank box uses the default shown under it in blue, for example "Blank uses: Normal (minor patching)". Tap Default on a question to go back to it.
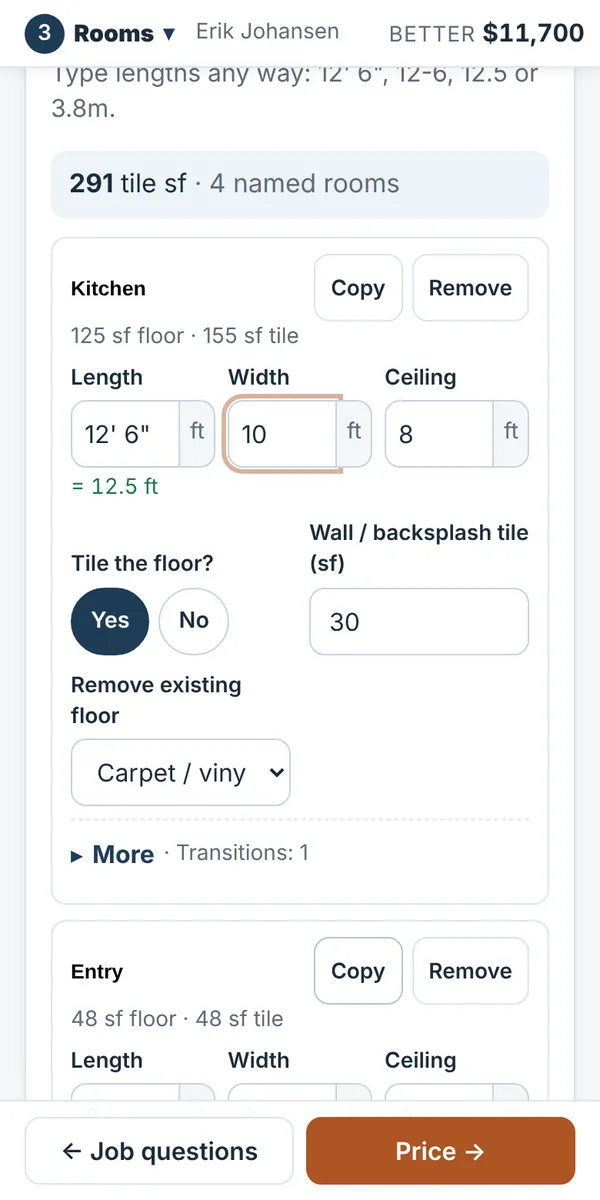
- Lengths, any way you write them. Type 12' 6", 12'6, 12-6, 12 ft 6 in, 12.5, 150", 3.8m or 381cm: each length box shows what it read ("= 12.5 ft"). Fields in inches (tub width, joist spacing, depths) read 3' 6" as 42. Two bare numbers like 12 6 could mean 126 or 12 ft 6 in, so the box asks you to type 12' 6" (or 126) instead of guessing.
- Two trades for one customer? Either make a multi-scope project (best), or make one estimate per trade and answer Yes to Add-on to another estimate for this customer? on the smaller one, so overhead and minimums aren't charged twice. That question is on Job questions (on Prep & crew for exterior painting, on Conditions & subs for bathrooms).
- Design it. Tile, Bathroom remodel, Flooring, Finish carpentry, Roofing, Siding, Concrete, Hardscape & landscape, Decks & fencing, Ceilings, Countertops and EIFS jobs have a Design it line under the heading of the step where you measure that opens the matching designer. See Design it from a job.
- Don't double up bathrooms. The Bathroom remodel estimate already includes its tile, drywall and paint. Don't add separate Tile, Drywall or Paint estimates for the same bathroom.
The Customer step
Customer name, mobile phone (opens the phone keypad) and email (opens the keyboard with @; both are used when you text or email the proposal; leads bring their email with them), property address, estimate date, Job status and Lead source. For interior trades, enter the year the home was built: before 1978 BidRidge reminds you that lead-safe (RRP) practices apply; for homes built 1978–1980 (except interior painting) it reminds you to test old flooring, mastic, texture or joint compound for asbestos before removal. Some trades also flag asbestos on the Price step.
The Notes panel (timeline, budget mentioned, who makes the decision, other notes) is for you; it never prints on the proposal. Exterior painting has its notes on the Walk around step.
Buttons on this step: Duplicate job (a fresh estimate for the same work, see Duplicate), Save as template (see Fast quotes & templates), Delete job (can't be undone), and + Add another scope, which turns the job into a multi-scope project.
Exterior painting
Steps: Customer · Walk around · Measure · Trim & extras · Prep & crew · Price · Proposal · Job Pack · Invoice · Change orders · Close out.
- Customer: under Listing, paste the Zillow, MLS or county listing text and tap Read listing. BidRidge pulls the living area, stories, year built and siding and estimates the paintable wall area, windows and doors. Or type the facts yourself; typed facts win. Open House shape for garage, roof, footprint and wall heights to sharpen the estimate.
- Walk around: stories at the tallest wall, main siding, paint condition (Light = tight paint, Normal = some chalking or cracks, Heavy = peeling, Very heavy = failed or bare wood), access, coats, color change and the season it'll be painted.
- Measure: measure each side (wall length, average height, windows, doors, gable base and rise). Leave everything blank to use the listing estimate, or type a known total paintable wall area. The line at the bottom tells you which one is being used. Measure before you send the final proposal.
- Trim & extras: soffit, fascia, trim, windows, shutters, doors, garage doors, gutters, foundation, deck floor and railings, fence. Blanks show an estimate.
- Prep & crew: pressure wash, scraping and priming percentages, caulking, carpentry / rot repair hours and materials, lead-safe setup (turns on by itself for pre-1978 homes), crew, lift or scaffold days, travel days, the add-on question, and three custom lines you name in Settings.
Interior painting, Tile, Flooring, Drywall and Finish carpentry
Steps: Customer · Job questions · Rooms · (Paint schedule, for interior painting) · Price · Proposal · (Finish schedule, for tile, flooring, drywall and finish carpentry) · Job Pack · Invoice · Change orders · Close out.
Typed quantities by area (1.63). On the Rooms step, How you measure → Type quantities (takeoff by area) lets you type each line's quantity by area (for example South Terminal, North Terminal) instead of drawing rooms: copy, rename or remove an area; the sub quote's schedule of values comes from the areas. Every job now also warns about a line with a quantity and no price, a sized room with no floor type, and a room with nothing painted, so nothing goes out at $0.
- Job questions: the job's conditions (for example wall condition, furniture and occupancy, color change for painting; subfloor, tile size and layout, access for tile) and a few job-wide details, plus crew size and the add-on question.
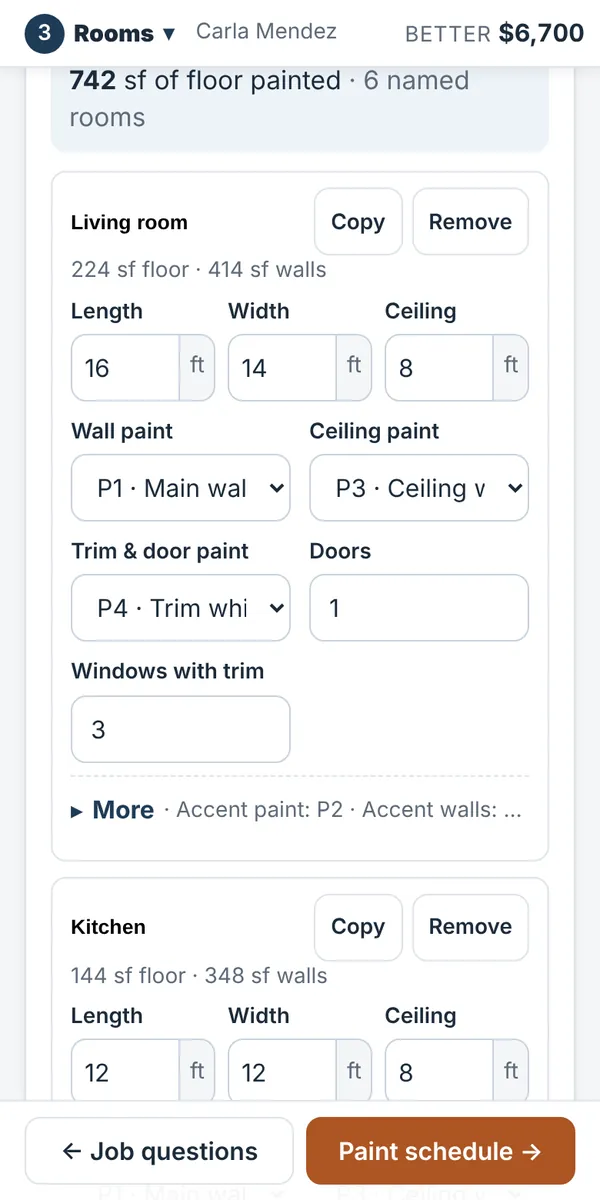
- Rooms: tap + Add room (it sits right under the last room), name it and enter length, width and ceiling height on one row, then what the room gets (which surfaces to paint and with which paint, tile on the floor or walls, new floor type and what's removed, which walls and ceilings to hang, which trim to install, and so on). New tile rooms start with Tile the floor? on Yes and new drywall rooms with walls and ceiling hung, so a room is priced as soon as it has a length and width; tap No for a backsplash-only or walls-only room. The answers you need less often (tile base, transitions, accent walls, closets…) and Specialty for this room (extra items from your rate book: pick one from + Add specialty item…) are folded under More; its line lists what's set. A room filled in by a designer shows the designer's numbers there too (for tile: cuts, boxes, thin-set, mosaic sheets and deck mud bags). Copy on a room makes a copy right after it (handy for bedroom 2 and 3). Load sample rooms fills in an example while the list is empty.
- Paint schedule (interior painting): up to ten paints, P1 to P10, each with a color name and code, product, sheen, price per gallon, coverage and coats. Rooms pick from these. A blank price uses your default from Settings → Interior paint.
Rough carpentry
Works the same way, but by Areas (a basement, an addition) instead of rooms: perimeter and interior walls, openings, windows and exterior doors, sheathing and wrap, insulation, floor and ceiling / roof framing, foundation. Each area has Demo, structural & extras for this area. Job questions include whether a permit or an engineer is needed and weeks of winter heat and enclosure; the checks flag structural work without a permit and engineer, and winter concrete without heat. Design it on the Areas step opens the Rough Carpentry Designer for a new building or addition; its sizes come from Settings → Code tables, and the Designed in the Rough Carpentry Designer check says when a framed area was estimated from its size instead.
Bathroom remodel
Steps: Customer · Project & room · Tile & surfaces · Fixtures & plumbing · Conditions & subs · Price · Proposal · Finish schedule · and the rest.
- Project & room: the scope (cosmetic refresh, full remodel with the same layout, or a layout change), the tub / shower plan, access, whether it's the home's only bathroom, and the room size. Blanks use a typical 5 × 8 ft bath.
- Tile & surfaces: niches, tile floor, heated floor, wainscot, drywall, paint, shower glass, door.
- Fixtures & plumbing: vanities, sinks, toilet, mirrors, lights, exhaust fan, circuits and GFCI outlets, grab bars, accessories, and drains, supplies and valves to move or replace.
- Conditions & subs: subfloor repair, and your sub quotes. A real plumbing or electrical quote replaces BidRidge's book rates for that work; the checks say CHECK until you enter real quotes.
The Price step adds a Subcontractors & permits table and Allowances (fixture and tile allowances for each option). The proposal explains that selections above the allowance are billed as a change order and unused allowance is credited. Bathrooms bill by milestone by default: 30% at signing, 30% at demolition, 30% when rough-in inspections pass, 10% at completion.
Quick quote (task list)
For punch lists, repairs, move-outs and handyman visits. Steps: Customer · Job questions · Tasks · Price · and the rest.
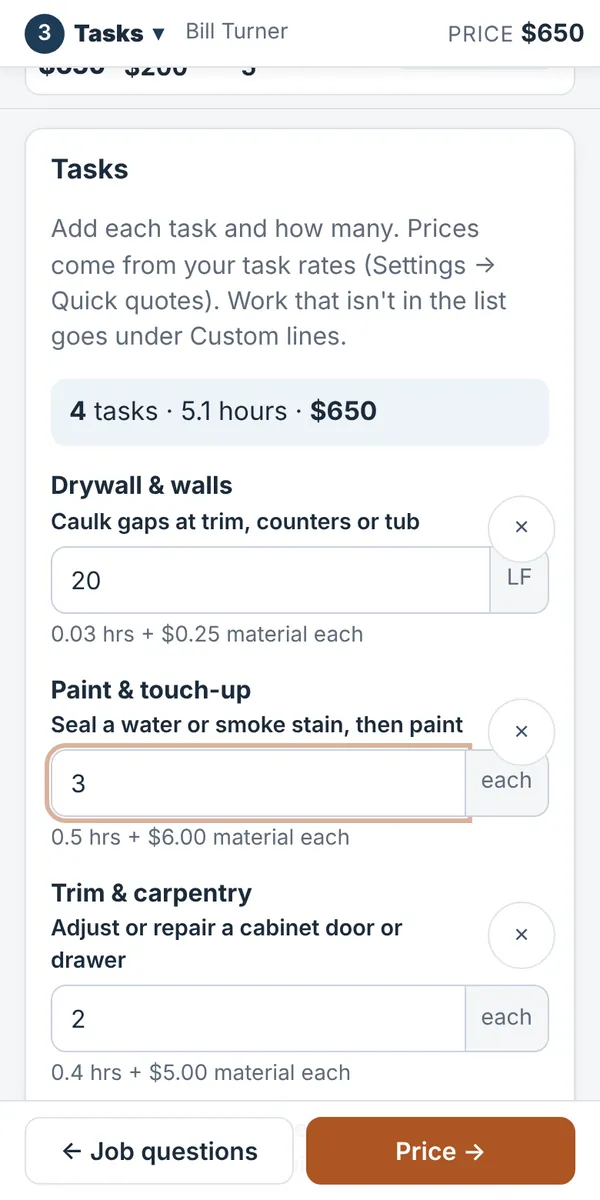
- Tasks: pick from + Add a task… (about 75 tasks in groups: drywall and walls, doors and locks, trim and carpentry, paint and touch-up, flooring repair, electrical, plumbing fixtures, safety, cleaning and turnover, exterior and yard) and type how many. Each task shows its hours and material. Remove one with ×.
- Custom lines: work that isn't in the list. Describe it, then enter how many, the unit, hours for one and material cost for one.
- Job questions: job conditions, trips to the site (each visit adds setup, protection and cleanup), and Offer Good / Better / Best? (No = one price). Quick quotes give one price unless you answer Yes.
Task rates (hours and material for each task) are in Settings → Quick quotes.
Roofing
Steps: Customer · Job questions · Roof measurements · Price · Proposal · Selections · Job Pack · Invoice · Change orders · Close out.
- Job questions: pitch, height and stories, how cut up the roof is, the season, plus permit and the add-on question.
- Roof measurements, two ways. Have a report (EagleView, Hover, GAF QuickMeasure, RoofSnap)? Tap + Roof report totals and copy the summary page: measured area, predominant pitch, layers to tear off, and the eave, rake, ridge, hip, valley and step-flashing lengths. No report? Tap + Measure a plane by hand and add one card per plane (eave length, run up the slope, pitch); enter each ridge, valley and rake only once. Use one way or the other: the checks flag a job that has both.
- Each card picks its roofing (3-tab, architectural, standing seam, ribbed metal, low-slope membrane…). Starter, ice barrier, drip edge, underlayment, ridge cap, waste and bundles are worked out for you. (Report and product names are trademarks of their owners; BidRidge isn't affiliated with or endorsed by them.)
- Extras: pick from + Add an extra… (decking replacement, pipe boots, vents, chimney flashing, skylights, gutters, heat cable, snow guards…) and type how many. Only the extras you add show up.
Ice-barrier width, waste and the other measuring defaults are in Settings → Roofing → Measuring & schedule.
No report? Draw it. Design it under the Roof measurements heading opens the Roofing & Siding Designer (see Roofing & Siding Designer): draw the house and it sends one card per roof section with every length filled in, the exact ice barrier, the metal trim and snow guard footage and the furring, then updates the job when you change the design.
Siding
Steps: Customer · Job questions · Walls & eaves · Price · Proposal · Selections · and the rest.
- Walls & eaves: + Add a wall for each side of the house: siding type (vinyl, fiber cement, engineered wood, cedar, steel, ribbed metal panel, T1-11 / panel siding, cedar shakes, board & batten, vinyl shakes, adhered stone veneer), length, height, gable rise, openings, outside and inside corners, and whether the old siding comes off. + Add an eave or rake run for soffit, fascia and gutters.
- Ribbed metal panels (shops and barns) price their own girts, trim and closures.
- Job questions: year built (pre-1978 homes get the lead-safe reminder), access, wall condition, season, height, rainscreen, permit and add-on.
- Extras: mounting blocks, accent areas, scaffold, backer board, sheathing repair, lift days and more, from + Add an extra….
- Siding types include T1-11 / panel siding, cedar shakes, board & batten and vinyl shakes, each with its own price line, plus transition trim (belly band or Z-flashing) where two sidings meet.
- Stone veneer (adhered) prices the stone on its own lines: flats by the sf (corners take about 3/4 sf a LF of the flats), corners by the LF, foundation weep screed, casing bead at openings and edges, stone window sills and a cap over a stone wainscot, and over wood framing 2 layers of WRB, galvanized metal lath and a 1/2 in. scratch coat. On a stone wall set the sills, the cap and the lath (0 over concrete or block); the Roofing & Siding Designer fills them in. The Job Pack lists boxes of stone, lath sheets and mortar bags, and adds a phase for the scratch coat to cure.
- Design it opens the same Roofing & Siding Designer as a Siding job, in Siding mode: one house drawing gives every wall (gables from the roof pitch), the exact window and door area and trim, corners, soffit, fascia, gutters and the rainscreen walls. A wall card from the designer shows those exact figures in extra boxes; leave them blank on cards you type.
Hardscape & landscape
Steps: Customer · Job questions · Areas, walls & lawn · Price · Proposal · Selections · and the rest.
- Areas, walls & lawn: + Add a patio, walk or path (pavers, flagstone, gravel, poured concrete by a sub…; length, width, base depth, edging, excavation), + Add a wall (block, boulder or timber; length, height, buried course, drain, caps) and + Add lawn or a planting bed (seed, sod, beds; topsoil and mulch depth, edging).
- Edge restraint on a paver patio or walk: Plastic + spikes (blank uses this), Aluminum or steel + spikes, Concrete toe or Soldier course in concrete. Each type is priced on its own line, and the Job Pack lists its pieces, spikes or bags of concrete.
- Excavation, base rock, compaction, loads hauled and machine days are worked out from your measurements. Walls taller than your engineer height, or with Needs an engineered design? on Yes (the designer sets it for a wall with a load above it or a tiered wall), get an engineered-design line. Guard on top (LF) prices a railing on top of a wall as a sub line.
- Job questions: machine access, soil, season and slope, plus permit and add-on.
- Extras: trees, shrubs, perennials, boulders, steps, step handrails (sub), fire pit, irrigation zones, landscape lights, sealer, stump grinding, demolition.
Equipment: in Settings → Company → Your work & scopes you offer, tick what you own (skid steer or mini-excavator, plate compactor, dump truck or trailer). Owned equipment is priced at your cost per day or per load; anything unticked is priced as a rental or hired truck. These questions only appear when you offer hardscape, concrete or decks & fencing (the truck and dump fee price the haul-off).
Concrete
Steps: Customer · Job questions · Slabs, footings & steps · Price · Proposal · Selections · and the rest.
- Slabs, footings & steps: + Add a slab, walk or pad (driveway, garage slab, patio, walk, heavy pad; length, width, thickness, finish, reinforcing, what's there now, under-slab insulation) and + Add footings, walls, piers or steps. Leave thickness blank for the usual one (5 in. for driveways and garages, 4 in. for walks and patios).
- What's there now (lawn, gravel, old concrete or old asphalt) sets the tear-out, haul-off and base: gravel can be reused as base.
- Job questions: access, soil, season, layout, permit, pump truck and how many pours.
- Extras: saw cutting, dowels, drains, snowmelt tubing, handrails, patching, isolation joints, vapor barrier, frost insulation, anchor bolts, radiant PEX and manifolds. Equipment is priced the same way as hardscape.
- Design it opens the Concrete Designer (see Concrete Designer): draw the work any shape and it sends one card per slab and per footing, wall, pier or step with the exact area, yards, base, forms, joints and bar list. A card from the designer shows those figures in extra boxes; leave them blank on cards you type.
Decks & fencing
Steps: Customer · Job questions · Decks, stairs, railings & fences · Price · Proposal · Selections · and the rest.
- + Add a deck: length along the house, width out from it, and height above grade. Pick the boards (capped composite, PVC, pressure-treated, cedar or ipe), the pattern (straight, diagonal, picture-frame border, diagonal with a border, herringbone or parquet), fasteners, ledger or freestanding, footings (concrete piers, helical piles or deck blocks) and what's there now (new, tear off, or resurface on the old framing).
- Framing is worked out for you: joists at 12 in. for diagonal, herringbone and parquet (16 in. otherwise), 2x8 / 2x10 / 2x12 by span, beam lines, posts and piers. Then the blocking: mid-span rows, blocking under every board seam the pattern makes (diagonal butts, herringbone and parquet modules, butt joints on decks longer than a board), and a double joist with ladder blocking under picture-frame borders and breaker boards. Raised decks get diagonal knee braces; attached decks get the ledger flashing and lateral load connectors.
- Resurfacing keeps the framing. Pick a diagonal or herringbone pattern and BidRidge adds the joists needed to close the old 16 in. spacing to 12 in., plus the pattern blocking.
- + Add stairs (width and risers; stringers at 12 in.), + Add railing (composite, aluminum, cable, glass or wood; level and stair LF; posts are blocked and through-bolted) and + Add a fence run.
- Fences: wood privacy (dog-ear, board-on-board, horizontal), picket, hog-wire, chain link (galvanized or black, with privacy slats), vinyl privacy or picket, composite, aluminum and steel ornamental. Enter length, height, ends and corners, walk gates and double drive gates; tick old-fence removal, sloped ground or stain. Wood is priced as pressure-treated with a cedar upgrade line.
- Checks: guards on decks 30 in. or more above grade, a handrail on each flight of 4 or more risers (a stair with a landing from the designer counts each flight), permits, joist spacing for the pattern, fence height and calling 811.
- From the Deck & Fence Designer: pressure-treated decking is face-screwed, so the coated screws are priced on the designer's board area. Long cut-stringer stairs get a Stair stringer supports: beam, posts & piers line, and their piers, concrete and 6x6 posts are added to the footing lines.
- Extras: deck lights, skirting, sistering rotted joists, privacy screens, hot tub framing, electrical and fence post repairs.
Chain link tension wire (1.62). A chain link fence from the Deck & Fence Designer brings its bottom tension wire in LF, priced on the Chain link bottom tension wire line (set your price in Settings).
Settings → Decks & fencing has the spans, pier depth (48 in. to start), post spacing for each fence family and the debris and auger numbers. Spans are starting points: check them against your code's span tables. Building a deck as part of an addition? You can still use Rough carpentry's deck framing line; price a deck in one place.
Insulation, air sealing, fire & sound
Steps: Customer · Job questions · Insulation, air sealing, firestopping & sound · Price · Proposal · Selections · and the rest.
Insulation, Epoxy & resin floors, Window & door replacement, Ceilings, Countertops and EIFS are off until you turn them on in Settings → Company → Your work & scopes you offer.
- + Add an insulation area: one row per assembly and material (the attic floor, the 2x6 walls, the rim joists). Pick the assembly (attic, vaulted ceiling, open or closed walls, floor over a garage, rim joists, basement or crawlspace wall, exterior continuous, under slab) and the insulation: blown cellulose or fiberglass, fiberglass or mineral wool batts, open- or closed-cell spray foam, flash-and-batt, or rigid board (EPS Type I, II or IX, graphite EPS, XPS, foil-faced polyiso, mineral wool board).
- R-values: leave the target blank and the row uses the Code R-value lines in Settings → Insulation, air sealing, fire & sound → Measuring & schedule. Settings → Code tables fills them from the code edition and climate zone you pick (IRC 2021, zone 7 to start: attic R-60, vaulted R-49, walls R-21, floors R-38, basement walls R-15, slab R-10); a value you type there yourself stays. Thickness blank = what that R-value takes. Blown insulation is priced in bags from the depth and your bag coverage; batts by R-value band (two layers above R-38, or R-30 for mineral wool); spray foam in board feet at a sub price, plus a yield allowance; rigid board per sf per inch, with cut-and-fit, seam tape, and furring strips and long screws when it goes over the sheathing.
- Polyiso outside the sheathing or under a slab is priced thicker for its cold-weather R-value (the derate % is in Settings).
- Options on each area: remove the old insulation (vacuum, bags and disposal loads), a poly vapor retarder, eave baffles from the eave length, full-length vent chutes in vaulted ceilings, and a barrier coating when foam is left exposed.
- + Add a price-list area: a fast quote from 16 common assemblies (R-38 to R-60 blown attics, R-13 to R-23 wall batts and mineral wool, R-30 and R-38 floors, dense-pack, spray foam rims and walls, basement XPS, exterior polyiso with furring), each at an all-in rate per sf in the rate book. Set the rates from your own jobs; use an insulation area when you want the full build-up.
- Spray foam with your own rig: set Spray foam with your own rig? to 1 in Settings and foam is priced by the set (board feet per set from your real yield), your crew's spray and trim hours, and rig days (fuel, generator, wear) instead of the sub's price per board foot.
- + Add air sealing: plates (LF), small penetrations, chases and soffits, flue chases (sheet metal and high-temperature sealant), can-light covers, duct boots, rough openings around windows and doors, and attic hatches. The job question Blower-door tests prices 0, 1 (final) or 2 (before and after).
- + Add firestopping: one row per rated wall or floor, with its listed system numbers. Count metallic and plastic pipe penetrations, collars on plastic pipe over 2 in., cable bundles, putty pads on electrical boxes, joints to caulk and head-of-wall joints to spray, and steel to coat with intumescent paint (thickness in mils from the listed design). Elastomeric and intumescent sealant tubes, spray gallons and paint gallons are figured from those counts, and a documentation line labels and photographs each one.
- + Add sound control: a wall or floor-ceiling with acoustic batts, a rubber (mass-loaded vinyl) membrane over the studs, sound clips and hat channel or resilient channel, damping compound between drywall layers, acoustical sealant at every layer, sound spray at the head of the wall, putty pads, and the STC (or IIC) target. The drywall itself is a Drywall scope.
- Allowance: fire and sound sealants, sprays and coatings are measured, then a material allowance (20% to start, Settings) goes on a line of its own, because real use always runs over a takeoff. The proposal says so.
- Design it: for a new building or addition, the Rough Carpentry Designer sends the wall, attic, floor and rim areas net of openings and the plates and rough openings to seal as rows.
- Checks: R-values against the Code R-values in Settings, attic baffles, a vapor retarder on the warm side, exposed foam barriers, exterior foam and the dew point, polyiso derate, firestop system numbers, intumescent thickness, sound targets, a blower-door test and testing old insulation before removal.
- Extras: knee-wall air barrier, more attic hatches or plates to seal, more blower-door tests and insulation certificates, from + Add an extra….
Epoxy & resin floors
Steps: Customer · Job questions · Floor areas · Price · Proposal · Selections · and the rest.
- + Add a floor area: length and width (or the sf), the coating system (solid color epoxy, full flake broadcast, quartz broadcast, metallic epoxy, polyaspartic 1-day flake, urethane cement, or grind and seal), the surface prep (diamond grind, shot blast, or already profiled) and what's on the slab now (bare, old sealer or paint, old epoxy, tile or adhesive).
- Each system is a stack of layers priced per sf: primer, body coat, broadcast and scrape, metallic coat, polyaspartic base, urethane cement or sealer, and clear topcoats (blank = the system's count). Add non-slip grit, a moisture-mitigating primer, cracks (LF), spalls (sf), control joints to fill (LF), integral cove base (4 or 6 in.) and stem walls.
- Prep and rentals: grinding or shot blasting per sf, edge grinding along the perimeter, and the grinder or shot blaster rented by the day from your production in Settings. Moisture tests are counted from the area (3 for the first 1,000 sf, 1 for each 1,000 after).
- Checks: an old coating with no grinding or shot blasting, the moisture-mitigating primer if the test fails, moisture tests priced, a cold slab, and control joints.
- Extras: safety or parking striping, logos or inlays, floor or trench drains, stair treads and risers, and oil stains to degrease.
- The Job Pack lists primer, body coat, topcoat and base gallons from your coverage, flake and quartz pounds, urethane cement units, filler and mortar, and the cure waits between coats; the proposal tells the customer when they can drive on it.
Window & door replacement
Steps: Customer · Job questions · Windows & doors · Price · Proposal · Selections · and the rest.
- + Add windows: one row per opening is best, because each row becomes a line on the supplier order (rows of identical windows work too): frame (vinyl, fiberglass, wood clad, aluminum), style (hung, slider, casement or awning, picture, bay or bow, specialty shape), install (insert in the old frame, or full-frame with a nail fin or a block frame), width and height in inches, and how many.
- Price: type your supplier's price per unit on the row and that's what's priced. Leave it blank and the unit is estimated by size: (window sf + an allowance per unit) × the style factor × the frame's rate in the rate book. The Units priced from supplier quotes check reminds you before sending.
- Install is priced per unit by method and size (large above 101 united inches), with foam, backer rod and sealant by the perimeter, a sill pan and flashing on full-frame, the siding, stucco or log-wall patch, exterior trim boards or coil capping, and new casing, jamb extensions and stools inside. Tempered glass, egress windows and enlarging an opening for egress are on each row.
- Order details on each opening: rough opening, handing (casements, sliders, doors), glass (dual-pane low-E argon, triple-pane, obscure, tinted), grids, colors inside and out, and screen. Triple-pane, obscure and tinted glass and grids raise the size estimate (factors in Settings). The Job Pack shopping list prints every opening as an order line, so a purchase order from it is ready for your supplier; checks flag a casement, slider or door with no handing and a unit that won't fit its rough opening.
- + Add doors: entry, entry with sidelites, patio slider, French patio door, storm door, garage service door or interior prehung, prehung or slab only, hardware, trim, sill repair and finishing.
- Checks: bedroom egress clear openings (IRC R310), tempered glass in hazardous locations, units still estimated, the energy code U-factor, stucco patches and a permit for egress changes. Homes built before 1978 get a lead-safe (RRP) line per opening.
- Extras: egress window wells (sub), blinds and coverings to remove and reinstall, extra screens, alarm contacts and rot repair at openings.
- The order lead time (4 weeks to start) goes on the proposal, not the crew's days: set the Job Pack start date for after delivery.
- Flashing details in the Job Pack: full-frame windows (nail fin or block frame) and exterior prehung doors get a typical sill pan and head flashing detail, with the rows, counts and sizes they're for, on the Job Pack screen and in its PDF. Inserts, slab-only, storm and interior doors don't. They are typical details, not engineered: follow the window or door maker's instructions.
Ceilings
Steps: Customer · Job questions · Ceiling areas · Price · Proposal · Selections · and the rest. One trade covers a T&G ceiling in a home through ACT in an office.
- + Add a ceiling area: one row per ceiling and system: T&G wood, plank (shiplap or nickel gap), beadboard, ACT 2x2 or 2x4, drywall on a suspension grid or on black iron, linear metal or wood, acoustic clouds or baffles. Length and width (or the sf), the height of that ceiling, the vault pitch for wood, beadboard and drywall, the perimeter, the lights, diffusers and sprinkler heads, and the old ceiling to remove.
- Suspended ceilings: mains 4 ft on center, 4 ft and 2 ft cross tees, wall angle, hanger wires 4 ft along the mains, tiles less the lights and diffusers, cut border tiles, and the lights' own support wires. Drywall grid: main beams and cross tees at 16 in.; black iron: carrying channel at 4 ft and furring channel at 16 in.; then the board, and tape and finish if you sell it.
- Seismic is on by default (Anchorage is seismic D): perimeter clips, splay wire groups and compression posts every 144 sf on ceilings over 1,000 sf (smaller ceilings get the clips and 2 in. wall angle only; both numbers are in Settings), and 2 in. wall angle (ASTM E580). Answer No on Job questions only where your design category allows it; the check flags it.
- Wood: boards in LF from the surface on the slope (the pitch adds to the plan area), the face width and the waste in Settings; pine, cedar, fir or paint-grade; strapping, perimeter cove or crown, and stain and clear coat. Linear panels at the module on carriers; clouds by the sf with cable kits; baffles each.
- Lift: areas above the Settings height (14 ft) get scissor lift days from the sf per lift day.
- Checks: lift for high ceilings, seismic bracing, wood acclimation, wood in a commercial space (IBC 803 flame spread), lights on their own wires, and a reminder when the quantities are estimated instead of designed.
- Extras: access panels, faux box beams, soffits and bulkheads, and more lift days.
- Design it opens the Ceiling Designer: its exact counts (the balanced grid, the bracing layout, the boards nested into stock lengths) replace the estimates.
Countertops
Steps: Customer · Job questions · Tops · Price · Proposal · Selections · and the rest. Kitchens, islands and peninsulas, window sills, and the other tops a remodel replaces.
- How the tops are made (Job questions): Fabricate & install (our shop) by default: slabs or sheets bought, fabrication, edges, cutouts, seams and install priced from your rates. Or Fabricator's installed price (sub): their price per sf by material on every top they make, plus their cutouts, edge upgrades, miters and small pieces, and for solid surface their panels, coved splash, thermoforming, build-up and integral bowls and sinks (each line has a starting price and its basis: set your fabricator's). Templating trips, freight, crating, the slab-yard visit, mobilization and protection count as inside their price; pick Fabricator's installed price (sub) + freight, trips & site costs on top to add them. At the fabricator's price, Job details also ask Fabricator's price: add our field measure (templating) on top? and Fabricator's price: add premium time on top? (Yes to start; No leaves that line out when their price already covers it) (1.51.3). Job questions also ask whether you disconnect and reconnect the sink, faucet and cooktop (a plumber's line) and whether there's a template visit (Yes to start).
- + Add a countertop run: one row per run, island or peninsula. Material (laminate, solid surface, quartz, granite, marble or quartzite, butcher block), shape, length along the front and depth, the edge profile, backsplash (4 in., coved for solid surface, or full height), undermount and drop-in cutouts, faucet holes, waterfall ends, a mitered apron, the seating overhang and its brackets, and the old top to remove. Edge LF and seams are estimated from the shape and the usable slab length unless you type them.
- Slabs and sheets: bought by the sf: the top sf divided by the yield in Settings (70% for stone, 85% for solid surface sheets), or the nested slabs from the Countertop Designer. Waterfall legs and full-height splash are in the sf; each waterfall adds a miter across the depth and a leg to set.
- + Add window sills: how many, the opening width and depth; the stool runs past the casing by the ear each side (Settings), with returned ends, jamb notches, and whether it sets on new framing or over the old sill. Mark Cut from remnants and no material is bought for them.
- + Add a vanity, curb, hearth or other top: vanities (single or double), shower curbs, thresholds, niche shelves and benches, tub decks, hearths and surrounds, laundry, bar and desk tops, wall caps, transaction and break-room tops; cultured marble is bought cast to size.
- Checks: overhangs deeper than the Settings limit with no brackets, the template after the cabinets are set, seam locations, cabinets that carry stone, accessible top heights and knee space (2010 ADA Standards 902.3, 606.3, 904.4.1, 306), waterfall grain, sealing natural stone, and a reminder when the slabs are estimated instead of designed.
- Extras: outlet cutouts in a full-height splash, cabinet reinforcement or leveling, dishwasher side-mount brackets and extra trips.
- Design it opens the Countertop Designer: the pieces nested on your slabs replace the yield estimate.
EIFS
Steps: Customer · Job questions · EIFS walls · Price · Proposal · Selections · and the rest. New EIFS, re-coats and repairs.
- + Add an EIFS wall: one row per wall or section and system: Drainage EIFS over sheathing (a fluid-applied WRB and drainage plane, required over any framed wall by IRC R703.9.2), EIFS over concrete or block (R703.9.1), Re-coat (wash, fill cracks, prime and a new finish over sound EIFS, with a base coat and mesh skim if you pick it) or Repair (cut out and patch: the patched sf and the number of spots). Length, height and gable, windows and doors, outside corners, foam thickness, finish texture, primer and impact mesh at the base.
- New work prices the WRB and sheathing joints (drainage), the starter track over base flashing, foam boards set in ribbons and the EPS by the board foot (sf × inches), the base coat with mesh, high-impact mesh to the Settings height at grade, the finish (sand or swirl, or smooth and specialty), backwrap and diagonal mesh at every opening, corner mesh, head flashing at each opening, and sealant with backer rod at openings, roof lines and other siding.
- Details: reveals, foam bands and shapes, quoins and expansion joints by the LF or count; mounting blocks, kick-outs, scaffold, a boom lift or swing stage, winter enclosure and heat, damaged sheathing and a moisture probe survey are extras.
- Checks: EIFS without drainage over a framed wall, the clearance at grade (6 in., IRC R703.9), paving and roofs, sealant at every opening, 40°F and rising for the coatings, foam under 1 in. or a reveal with less than 3/4 in. of foam behind it, foam over 4 in. (IBC 2603 and NFPA 285 on Types I to IV), impact mesh at grade, and kick-outs where roof eaves meet the walls.
- Design it opens the Roofing & Siding Designer as a siding job: make a wall or section EIFS and its exact area, impact mesh, starter, opening perimeter, corner mesh, joints, reveals, bands, quoins and Z-flashing come back here.
Price each row on the proposal. On the Price step of an insulation, epoxy floor, window & door, ceiling, countertop or EIFS job, Price each row / area / top / wall on the proposal splits the price over the rows (each row's share of the lines, with the job-wide costs and markup in proportion) and shows it next to each one on the proposal. With Good / Better / Best, the row prices are for the Better option.
Line items: estimate or invoice
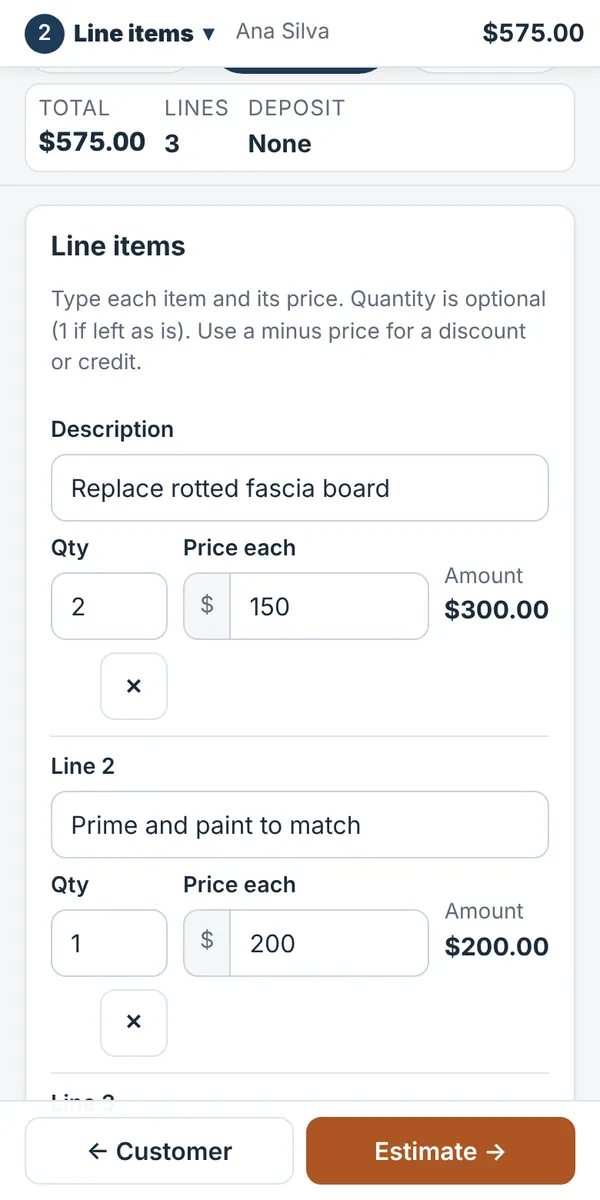
For a job you'd rather price yourself, skip the rates and measurements: type each item and its price. + New estimate → Line items (or Line items: estimate or invoice under More ways to start on the home screen). One screen does both: type the lines, then send an estimate or invoice them now.
- Customer: name, phone, address and status, as for any job.
- Line items: for each line type a description, an optional quantity (1 if you leave it) and the price each. The amount shows as you type. + Add a line for more, ✕ to remove one. A minus price makes a discount or credit. With sales tax on, each line has a Taxable box (ticked when you charge tax on the whole job; untick permit fees or anything you don't tax). Set the Deposit at signing (0% = paid on completion) and, if you like, notes printed under the estimate's title.
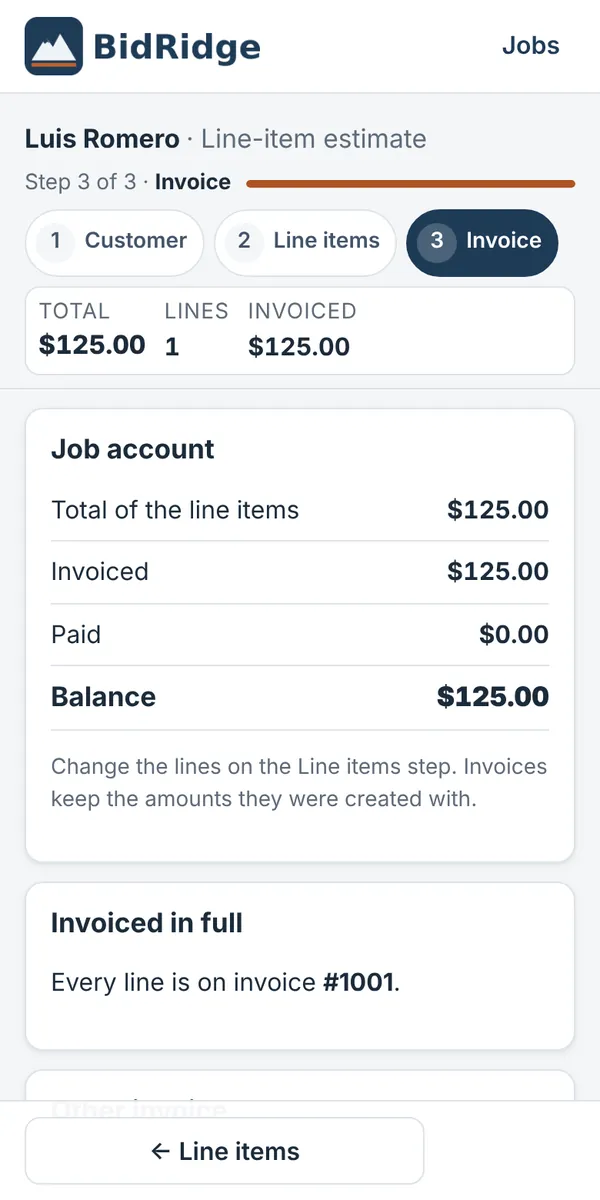
- Estimate it, or invoice now: under the lines, Estimate → goes on to the estimate; Invoice now skips it and makes one itemized invoice with every line, for a service call or a price already agreed.
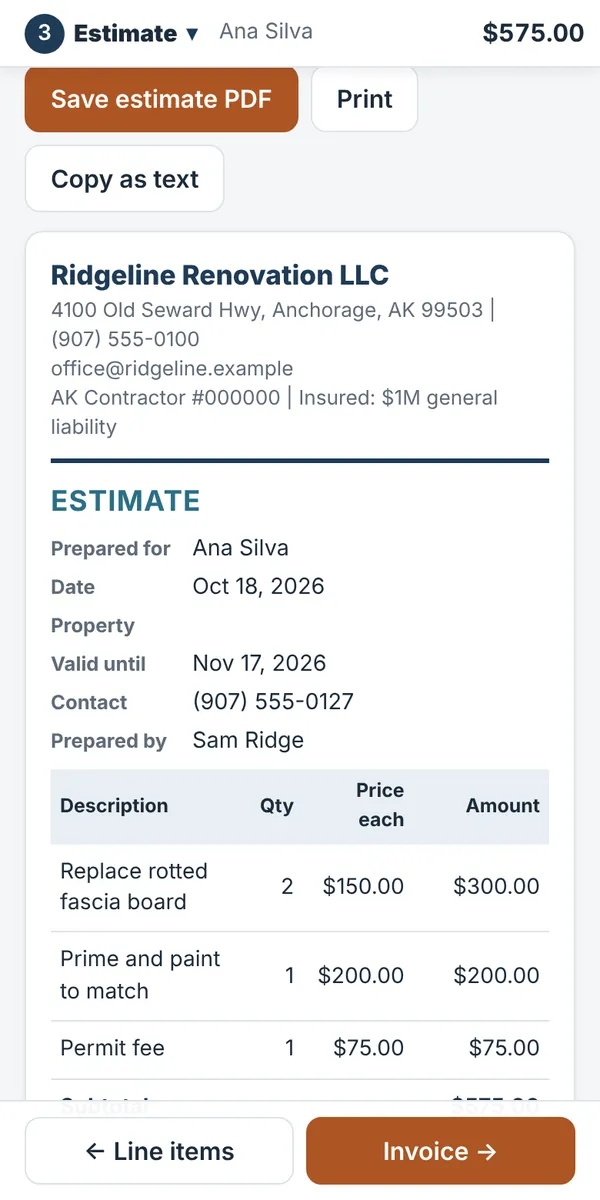
- Estimate: a one-page estimate with your logo, every line with its quantity, price and amount, subtotal, tax and total, the deposit, your terms and a place to sign. Send estimate to customer texts a link they open, approve and sign (and pay the deposit online, if you set one and online payments are on). Save estimate PDF for email or print.
- Invoice: after the customer signs, bill the deposit and balance from the payment schedule (or Invoice now for every line at once). Send, mark paid, QuickBooks, follow-ups and review requests all work as for any job.
Quick invoices you made before 1.74 open as they were (Customer → Line items → Invoice now).
The default deposit, how long estimates are valid and the terms printed on them are in Settings → Company → Line-item estimates & quick invoices. Line-item jobs aren't part of multi-scope projects or templates, and never shared for pricing research.
4The Price step and the checks
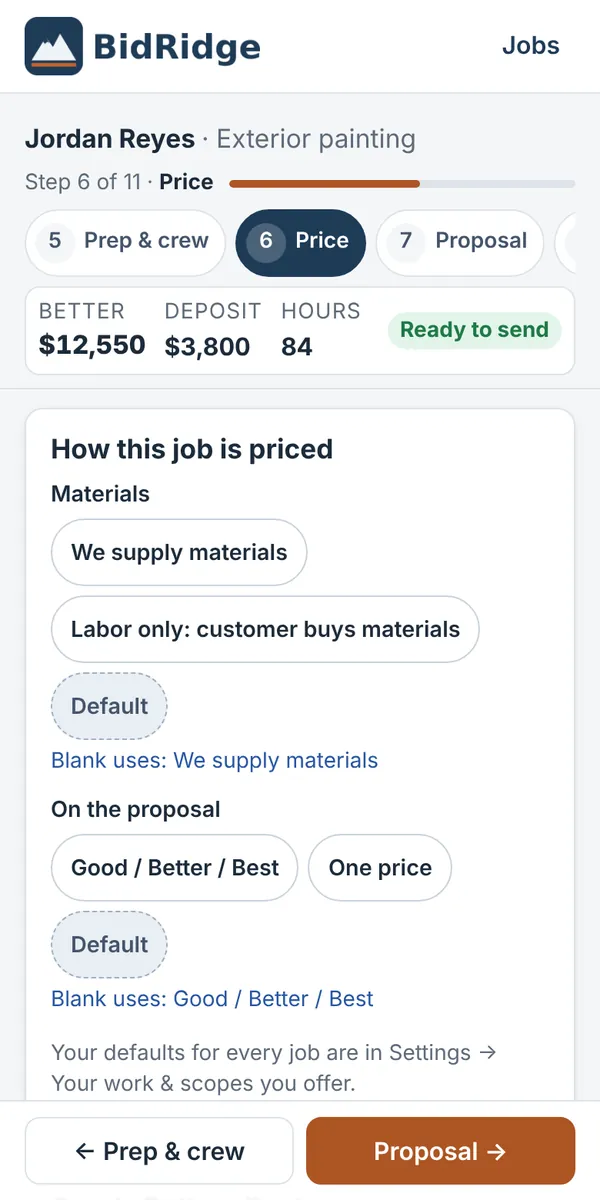
How this job is priced (top of the Price step): Materials (We supply materials or Labor only: customer buys materials) and On the proposal (Good / Better / Best or One price). Default follows your setting in Settings → Your work & scopes you offer. Labor only takes every material cost out of the price (paint, tile, flooring, lumber, fixture allowances; plumbing and electrical subcontractor prices stay, since subs supply their own parts), skips the local price-range checks (those ranges include materials), adds a line to the proposal that the customer supplies the materials, and drops the Job Pack's shopping list.
Commercial jobs and wage settings (1.51). Wages & job type (below How this job is priced) sets what the job's labor is priced at. Job type: Residential or Commercial. A commercial job (or one a designer sends from a Commercial project) starts on your commercial default and adds the Commercial overhead lines: Project management (a share of the direct cost), Submittals & shop drawings (hours at the job's crew rate) and Insurance & bonds (a share of the price); leave them blank for your Settings numbers. Wage basis: Open shop (your Settings wages; every job saved before 1.51 stays on it), Commercial open shop, Union (a rate sheet you type in Settings), Davis-Bacon (federal), Alaska Pamphlet 600 or Custom crew rate (your crew cost per labor-hour for this job). The table shows each role's wage, fringe and cost per hour. On union, prevailing wage and custom bases, shop work (countertop fabrication, the Cabinet Designer's shop hours) stays at a shop rate: Shop work (fabrication in your shop) picks Regular shop rate, Commercial rate or At this job's basis for the job. A check flags a commercial job left on residential open shop. Set the defaults in Settings → Crews & schedule → Commercial jobs & wage rates: the Wage basis for a new commercial job, Shop work on commercial jobs, the commercial open-shop rates for each trade (starting points; set your own), the overhead lines and your Union rate sheets (+ Add a union rate sheet, one per local or agreement; BidRidge ships no union rates). The cost breakdown, Job Pack, proposal, sub work order, change orders and close-out show the job's basis. In a multi-scope project (1.51.3), set the wages once: on one scope's Wages & job type, tap Use for all jobs in this project and choose Apply to the other scopes or Only new scopes. New scopes start on the project's setting (job type, wage basis, union sheet, and the prevailing wage source, region and fringe); each scope keeps its own rate edits and shop pick and can still be changed on its own (Use the project's setting puts it back). The project page shows the setting, how many scopes use it, Apply to every scope and Stop using it for new scopes.
Residential or Commercial at the start (1.62). + New estimate (both Estimate it and Draw it first), the Fast quote and a new project show a Job type row: Residential or Commercial. It is remembered (Settings > Commercial jobs & wage rates: New estimates start as). Commercial starts the job on your commercial default wage basis with the commercial overhead lines, lists the commercial trades first (the residential workbooks go under More trades) and opens a designer in its Commercial project type. A Residential license starts Residential, with the one note about Commercial. Wages & job type on the Price step still changes it for one job.
Prevailing wage (Davis-Bacon and Pamphlet 600): for federal and federally funded jobs, and state or city jobs that require it, pick Wage basis: Davis-Bacon (federal) or, for state-funded jobs in Alaska, Alaska Pamphlet 600 (Where: south or north of the 63rd parallel). The first time, read the note and tap I understand: I'm responsible for paying the prevailing wages my contracts require. For Davis-Bacon, Rates from picks the built-in Alaska federal Davis-Bacon (built in) rates (Construction type: Building statewide, Residential for Anchorage) or Paste the wage determination from the bid documents: copy the one listed in your bid documents from SAM.gov (search its decision number), paste it in and tap Read the rates, then check the classifications BidRidge picked (outside Alaska, pasting is the only way). Each crew role is paid at the higher of your own wage and the determination's base rate, plus whatever fringe is still owed (cash wage above the base counts toward the fringe). Choose whether fringe is Paid as cash on the paycheck (the default: the fringe is added to the hourly rate on the paycheck; it is subject to payroll taxes, so your payroll burden applies to it) or Paid into benefit plans (no payroll taxes on it). Overtime is 1.5x the base rate only; the fringe is paid at straight time. Type a different base or fringe for any role. A classification that isn't on the determination is flagged: ask the contracting officer for a conformance (form SF-1444). The built-in Building determination lists power equipment operators (the landscaping lead) by equipment group and BidRidge doesn't carry those rates: type the base and fringe for the operator's group from the contract's wage determination (a check reminds you). The Job Pack lists the rates for the crew. Shop fabrication is priced at your shop rate unless you pick At this job's basis: decide from your contract whether its rates cover shop work. On Pamphlet 600 the tile roles show the pamphlet's classifications: Bricklayers: Marble/Stone Mason, Tile Setter (A0201) and Bricklayers: Marble & Tile Finisher (A0203). The rates are your responsibility: the wage determination in your contract governs, so check every classification and rate against it.
More wage options (1.63). In Wages & job type on a prevailing wage job: Higher of Davis-Bacon and Pamphlet 600 prices each role at the higher of the two (a state job with federal money pays the higher rate); Wage escalation adds a percent a year for the years the work runs (any wage basis); Owner on the crew puts a note in the job pack that the owner's own hours go on the certified payroll. A project sets them for all its scopes.
The Price step shows Good, Better (marked Recommended) and Best with each option's deposit, gross profit and walk-away price, plus sales tax if you charge it. With one price (your setting, the job's choice, or a one-price quick quote) it shows a single Price: the Better option.
- Walk-away price: the lowest you should go. Never go below it. If the customer wants a lower price, take work out instead.
- Discount offered (all options): optional; watch the walk-away check when you use it.
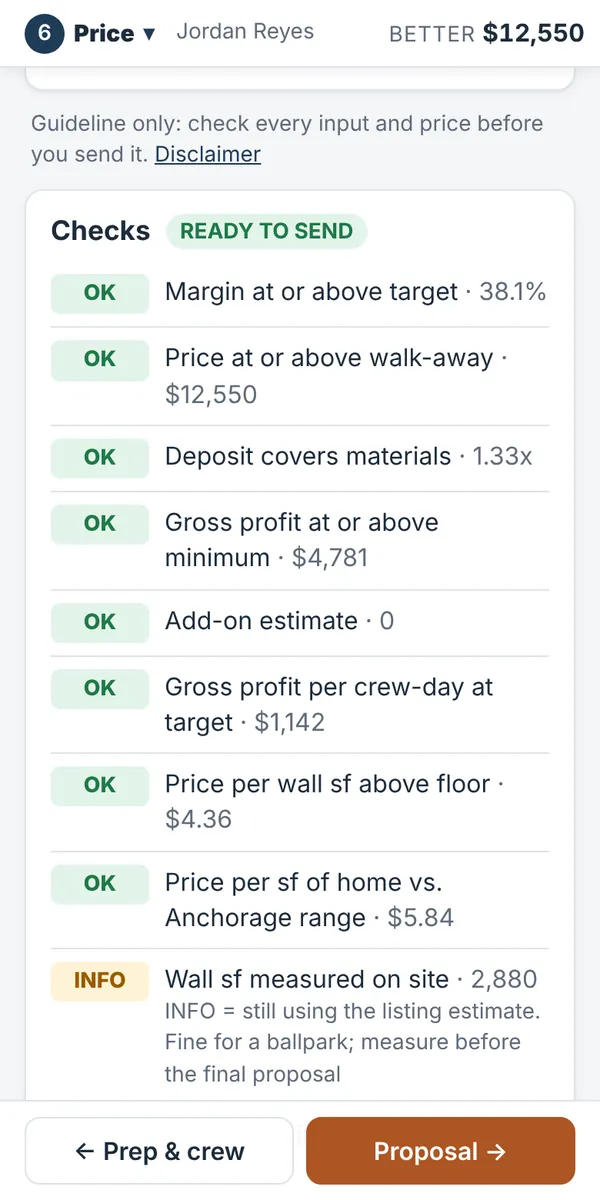
- Checks: a list marked OK, CHECK or INFO, with a note on how to fix each. When nothing needs a look the panel says READY TO SEND; otherwise REVIEW FLAGS. Common checks: margin at or above target, price at or above walk-away, deposit covers materials, gross profit at or above your minimum, gross profit per crew-day, and price per square foot against your local market range. Some trades add their own (wall area measured on site, every paint has a price, plumbing quote used, and so on).
- Schedule: labor hours, crew-days and days to book.
- Cost breakdown (Better) and Scope lines. In Scope lines, type a quantity to override the calculated one shown in grey; leave it blank to keep BidRidge's number.
5Proposals and billing
The Proposal step shows the proposal exactly as the customer will see it: your logo and company, the customer and property, the options, the scope of work (room by room, with the paint schedule for painting), the payment schedule, terms and the signature lines.
Sub quote to a GC (1.63). On a Commercial job or project, Proposal style picks Sub quote to a GC: one price with a schedule of values (by area from a takeoff, by scope on a project, or typed), add and deduct alternates, unit prices, the scope, exclusions, clarifications and terms (starting from your trade's defaults), the schedule, your relevant experience (Settings → Company) and the GC's acceptance block. Fill from bid documents reads a bid PDF's text for the project, owner, bid date, completion, wage law, bond, addenda and your spec sections, and fills them in (scanned pages have no text to read). Save PDF, Copy as text and Send use it.
Key dates (1.82.19). Fill from bid documents also reads the invitation's key dates, free: the deadline to register to bid, the pre-bid meeting (and whether it's mandatory, with its time and place), questions due, answers due and bids due, plus how to register as the invitation says. They're listed under the project fields with the days left. The quote's checks warn in the week before a registration deadline or a mandatory pre-bid, and the Bids list shows the next one on the bid's card. Registering is for bidding to the owner directly: a sub quoting to the GCs doesn't register, but some owners take bids only from registered bidders and some pre-bids are mandatory, so a general contractor who misses either can't bid the job.
Spec checklist (1.64). When Fill from bid documents reads a project manual (up to 10,000 pages), the Spec checklist lists each of your trade's sections with what it requires: the products and manufacturers (and the basis of design), the submittals, the warranty, the extra stock, the mockups and the substitution rule, each with its article and page (for example 2.1.A, p. 312). Tick each one as you cover it; Copy checklist gives it as text, and Add the submittals to "Also included" puts a line per submittal in the quote. It reads the manual's own text, with no AI and no internet; a scanned manual has no text to read. With the AI add-on, Read with AI reads one section again, and Draft with AI (beside Exclusions) suggests inclusion, exclusion and clarification lines from your scope and the checklist, added under yours to edit (your prices are not sent).
New bid from documents (1.66). On the home screen, More ways to start → New bid from documents: pick the invitation, project manual and drawings (or New bid from a folder of sheets, the way plan rooms hand sets out). BidRidge starts a project as a sub quote to a GC, names it from the documents, adds a scope for each of your trades the spec sections cover (with one trade on, a job), and reads the set. Add or remove scopes on the project after.
Read the bid set (1.66). After Fill from bid documents, the Read the bid set card reads the schedules (door, finish and others: free), finds the rooms on the plan sheets you tick (AI: about a page per sheet; on a roofing job, the roof areas, pitch, eaves, rakes, ridges and valleys from the roof plan) and sends the spec sections the free reader wasn't sure of overnight at half the AI cost. Check these lists the rooms with their sizes inside the walls; add them to the job as rooms (or as takeoff lines on a takeoff-by-area job), or Open them in the Flooring, Ceilings or Trim Designer, where they come in traced. Ask the bid set finds words in the drawings and specs with the sheet and page (free), or answers a question from the matching pages (AI). Any size of set reads: big files in pieces, up to 10,000 pages, with Cancel; one PDF can be up to about 2 GB on a computer (400 MB on Android). The set is kept on the device for that job, so the takeoff and Ask work next time without picking the files again; Forget it removes it. Always check AI sizes against the drawings.
Walls from the elevations (1.67). On a siding, EIFS or exterior painting job (on exterior painting each elevation becomes a side on the Measure step), Read the bid set offers the exterior elevation sheets (AI: about 5 pages each). Each elevation comes back with its wall area at the sheet's scale, its openings and the material zones as labeled; Add walls to this job makes a wall for each with its area and openings. Set the siding type, corners and trim on the walls step.
Casework from the drawings (1.82, AI add-on). On a Commercial finish carpentry job, after Fill from bid documents, Casework from the drawings lists the interior elevation and casework sheets. Tick the ones to read and tap Read the casework (up to 5 AI pages a sheet): each piece of casework comes back as a line with its length, depth, counter height, the cabinets left to right (drawers, doors, sinks, equipment openings, knee spaces), the top and its finish codes, read from the dimensions written on the sheet. With A closer look at each piece (on by default, 2 more AI pages a piece) each piece's part of the sheet is read again at about four times the detail, so small dimensions and drawer lines come out right. A line is flagged when its cabinets don't add up to its length or its sizes were scaled instead of written. Untick any that repeat or aren't yours, then tap Open in the Cabinet Designer: each piece becomes a starting run in a Commercial design, its notes go in the general notes, and every flag becomes an RFI. Pick the door styles, materials and details there; the Submittal set prints the shop sheets (11×17, one sheet an item). AI never sets a price, and nothing changes in the estimate until the design is sent back. Free first, AI for the rest (1.82.30). Draft the casework without AI reads the written dimensions, the size tags under each cabinet (W H D tables, CDS and stainless tag boxes) and the linework (1.82.34: a run dimensioned only EQ takes its widths from the overall written over or under it, or from the drawing's scale); then Read only the drawings the free draft wasn't sure of with AI sends just those (none drafted, a cabinet type it couldn't tell, no counter height) and keeps the other drafted pieces as they are. Scanned sheets are listed too (unticked): a ticked scan has each of its elevations found and read with AI.
Submittals from the drawings, more trades (1.82). After Fill from bid documents, each of these opens its designer with the Submittal set on; what the drawings don't settle goes in as RFIs or notes to check. Doors (no AI): a door schedule under Schedules read has Door submittal: a Commercial door list in the Finish Carpentry Designer, each hardware set started from a typical set for its rooms (check them against the hardware schedule). Restrooms (Division 10 jobs, AI add-on): Restrooms from the drawings reads the enlarged restroom plans into rooms with their compartments, accessories and door (1.82.35: a set tagged by keynotes such as 10-73 GRAB BAR, with no accessory schedule, is read too, and a keynote or schedule tag written inside a room adds an accessory or fixture the AI left out). 1.82.42: free cross-checks on every room: the plumbing plans' fixture tags (a room the AI missed is added from them), a plan drawn for several rooms (RESIDENTIAL BATH E101A, E104A...) counts them all and puts each in the designer, the interior elevations' tags, and urinals counted from the set's own keynoted symbol; a room whose checks disagree is read again close up; Open in the Division 10 Designer. Countertops: on the casework card, Open the tops in the Countertop Designer (also on Countertop jobs). Ceilings (no AI once the rooms are read): Ceiling submittal opens the checked rooms at their outlines with the ceiling type and height from the finish schedule; exposed rooms are left off. Painting (no AI): the Job Pack's submittal package starts with a Paint schedule: every paint code, its color and sheen from the legend and where it goes, with the questions; Save the paint schedule (PDF). Glazing (no AI): a window schedule has Glazing submittal: each type at its size and sill in the Glazing Designer; draw the mullions from the architect's type elevations.
Rooms from the walls, ceilings and finishes (1.67). Plan sheets without areas on the room tags are read free from the drawing itself: each named room closed off by walls (doors and windows bridged) comes back with its floor area net of the walls and its wall length, marked found from the walls around its name: check it. Finish tags (HIP-1, P-1 / SLDS-2B) and notes aren't taken for room names; a name set on two lines is joined. On sheets whose tags do print the area, the wall length is measured from the room's own walls where they close it off. The reflected ceiling plans' height tags (8'-0" AFF, CLG 9'-0", or a ceiling tag's bare 10'-0") set each room's ceiling height (the main ceiling inside the room, not a soffit beside it; a vaulted room is left for you to set), shown on the room and used for the wall area. With a room finish schedule, each room you add takes the trade's answers from it: the floor type and rubber base (Flooring), tile floor yes or no (Tile), no ceiling paint or ceiling board under a lay-in ceiling (Painting, Drywall); on a takeoff by area each room goes on its floor type's own line.
Sheets by floor, typical plans (1.67). The plan sheets are grouped by floor (Level 1, Level 2, Basement…), the best sheet of each floor picked first; tick a floor to take or leave all its sheets. A typical plan (LEVELS 2-4 TYPICAL) counts once for each floor it stands for: its rooms are added once per floor, and its takeoff quantities multiplied.
Addenda (1.67). Pick the addenda with the set (or later, with the set again). A file whose first page says ADDENDUM NO. 2 is read as Addendum 2: its sheets replace the same sheets read before (the latest addendum wins; marked in the sheet list), the sheets and spec sections it names are listed in the reading note, and the addenda field on the quote is filled.
Scanned sets (1.67). Drawing pages that are pictures (no text) are listed as scanned pages, read only when you tick them. With the AI add-on, AI takeoff reads each one whole: its sheet number and title from the title block (read close up when the whole sheet doesn't show them, 1 more AI page), its scale from the written dimensions (right even when the set was printed half size; else the written scale, flagged to check) and its rooms. Without the add-on they can't be read.
Door counts into the estimate (1.67). Under Schedules read, a door schedule has Use in the estimate: doors to undercut on Flooring; the doors in each room on Painting and Finish carpentry and the openings on Drywall, by the room each door serves (its room column, else its number: 101A goes to room 101). Doors that match no room are counted for you to add by hand.
Quote requests (1.67). On the Price step, Request quotes (PDF) makes a request for your suppliers from this estimate: the material lines with their quantities (waste included), the products the plans and specs name, the job site and when you need the price. Copy as an email copies the same as text. Their quote PDF comes back in through Add a supplier quote.
Bid package (1.67). On a quote to a GC, Save bid package (PDF) makes one file: the quote, the addenda it covers and what they changed, the submittals the spec asks for, and the job's PDFs named insurance, certificate, license, bond, W-9 or product data, attached behind it.
Bid from documents, step by step (1.69). Once the documents are read, the quote shows where the bid stands: read the documents, the spec checklist, read the plans and schedules, add the rooms, supplier prices, check before you send, save the bid package. Each step is a tap away and the next one is in bold; the spec and supplier quotes help but aren't required.
Check before you send (1.69). On the quote, above the bid package: what came from the plans (room tags) and what needs a look (rooms found from the walls or by AI), rooms without a ceiling height from the plans, addenda not named on the quote, door schedules read but not used, sheets whose scale needs a check, material prices that are still BidRidge's starting figures, spec settings not used, and the quote's missing project name, address or bid date.
One bid set, every trade (1.69). On a project with more than one trade, Add to all trades, each by its finishes sends the rooms read once to every trade job: each takes the rooms its finish schedule calls for (a carpeted room goes to Flooring, not Tile), with that trade's answers (floor type and base, tile yes or no, no ceiling paint under a lay-in ceiling).
How close was the reading? (1.69) Every room added from the plans remembers what was read and how (room tag, found from the walls, AI). Correct the rooms to their real sizes, then look under How close was the reading?: the typical difference and how many rooms came within 5% and 10%, for each way of reading, and the furthest misses. Record this job's score keeps it on this device, so a running score shows whether each way of reading can be trusted.
The spec in the estimate (1.67). Under the spec checklist, Use in the estimate lists what the spec sets for this trade: a prime coat and the number of finish coats (painting: a full prime coat line, and a line for coats past the 2 the rates price), the extra stock (tile: that share of the tile ordered), a mockup line (4 hours and $50 each: check it) and the warranty (a line in the clarifications). Stop using takes them back out.
Submittal package (1.67). On a Commercial job's Job Pack step, Submittal package lists the items the spec's Submittals article asks for, in spec order (one product data item per named product). Mark each Attached, To follow, Physical sample or Not used; attach its PDFs (data sheets, the designer's Submittal set) or use one of the job's files. Save the package (PDF) makes one file: a transmittal with the index, then each item's PDFs with the submittal number and item stamped on every page. A locked PDF can't be merged: it's listed as sent separately.
Supplier quotes (1.67). On the Price step, Add a supplier quote (PDF) reads a distributor's quote (rows where quantity × price = amount, and the total). Check where each row goes: a material line (its amount replaces the line's material, as quoted: no waste, tier or material factor), the freight line (freight and packing), its own line, or left out. Quoted setting materials can replace the materials in the install rates so they aren't counted twice. Tick Also save these unit prices to my price list to make them your defaults; every quote goes into Prices paid. A line whose quantity changes by more than 15% after the quote is flagged. Commercial tile jobs now carry freight by default (one shipment per tile product, about $375): type 0 if the supplier's price includes it.
- Save PDF saves it (Android puts it in Downloads and opens the share menu). Print is on computers. Copy as text copies it to paste into a text or email.
- Send proposal to customer texts a link they can sign and pay from. See the next section.
- Mark sold: the customer said yes in person or on the phone. One sheet takes the option they chose, the status, the start date and whether the deposit is in (see Job Pack).
- How you'll bill this job: Deposit + balance on completion, or Bill by milestone. With milestones, edit the names and percentages, + Add milestone, and Save as my … default to use them on every job of that trade. The first payment is the deposit and is never less than what you need to buy materials. If the percentages don't add up to 100%, BidRidge spreads the amounts in proportion and the last payment takes whatever is left.
- Include Walk-Through Part A adds a pre-start condition check (existing damage and site conditions on day one, signed by both of you). Turn the default on or off in Settings.
If the checks still say REVIEW FLAGS, the Proposal step reminds you to fix them on the Price step first.
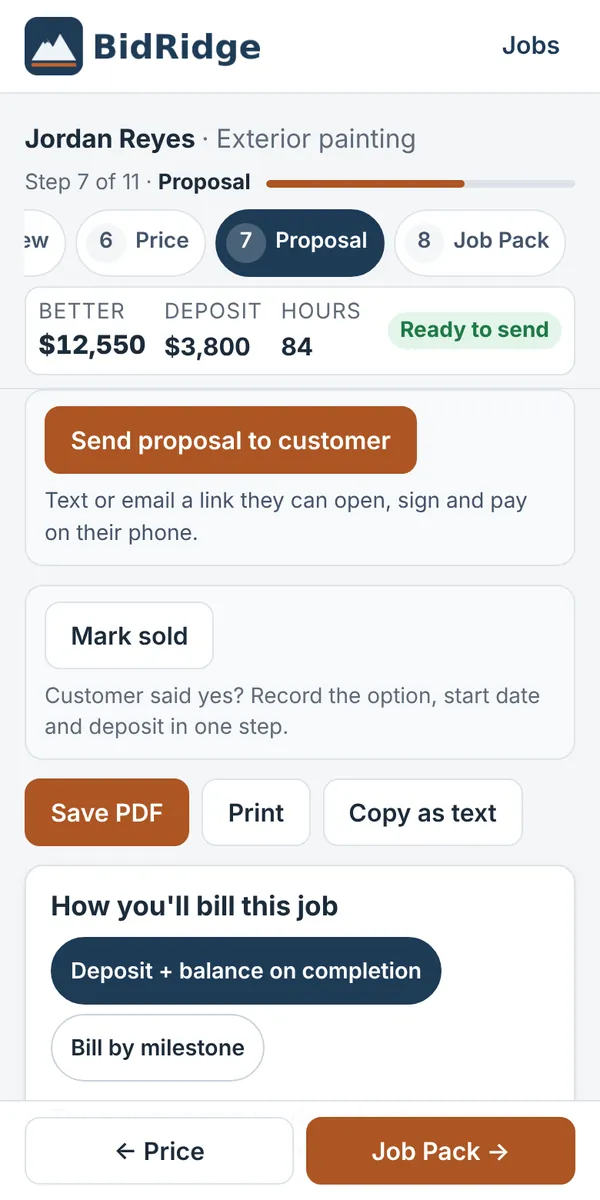
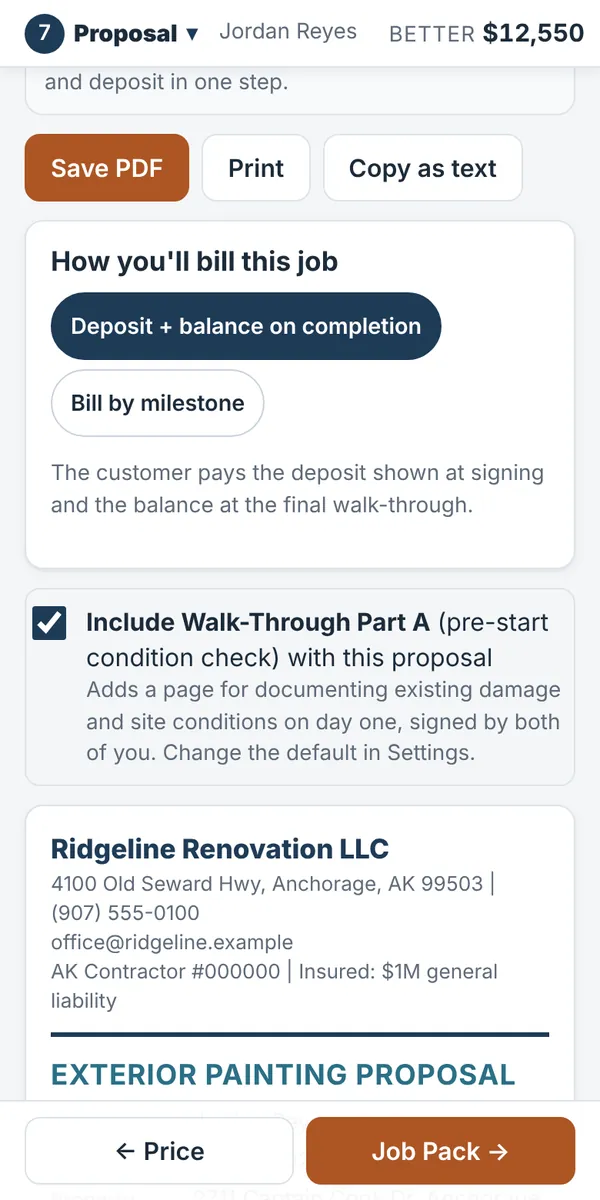
6Send, sign and get paid online
Text the customer a link. They open it on their phone, pick Good, Better or Best, sign with a finger, and can pay the deposit right then by card or bank transfer. The job updates itself in BidRidge.
What you can send
- Proposals (and project proposals): Send proposal to customer on the Proposal step.
- Change orders: Send to customer to sign on the change order's last step. Tick Let them pay for it online after signing and a paid change order is invoiced and marked paid by itself.
- Finish schedules: Send to customer to approve on the Finish schedule step.
- Invoices: Send on the invoice's row.
- Walk-Through Part A (pre-start) and Part B (final): from the Job Pack and Close out steps.
- Design agreements: Send to customer to sign on the Customer step (see Design agreement).
- One link for everything a customer has: the customer portal.
- To your sub or your supplier (never to the customer): sub work orders and purchase orders.
Set up online payments (once)
Signing works without this. To let customers pay online you connect your own Stripe account. Payments go to your Stripe account and then to your bank on Stripe's schedule; BidRidge never holds your money and takes no cut. Online payments need a BidRidge license (sending and signing also work during the trial).
- Open Settings → Company and open Send, sign & get paid online (or search settings for stripe).
- Tap Connect Stripe. Stripe's own page opens. Fill in your business and bank details there.
- Come back to BidRidge and tap Check status. When it says Connected to Stripe, you're ready. If it says Stripe setup isn't finished yet, tap Finish Stripe setup and complete what Stripe asks for.
- Choose what to accept: bank transfer (ACH) (Stripe's fee is 0.8%, max $5; best for big payments; clears in a few business days) and cards (2.9% + 30¢; paid right away). Stripe's fees come out of your payout.
- Optional: Ask for the deposit when a customer signs a proposal (on by default), Show a 3-day right-to-cancel notice (often required when you sell a job in the customer's home; check your state's rules), and the text message that goes before the link (use {name}, {doc} and {company}).
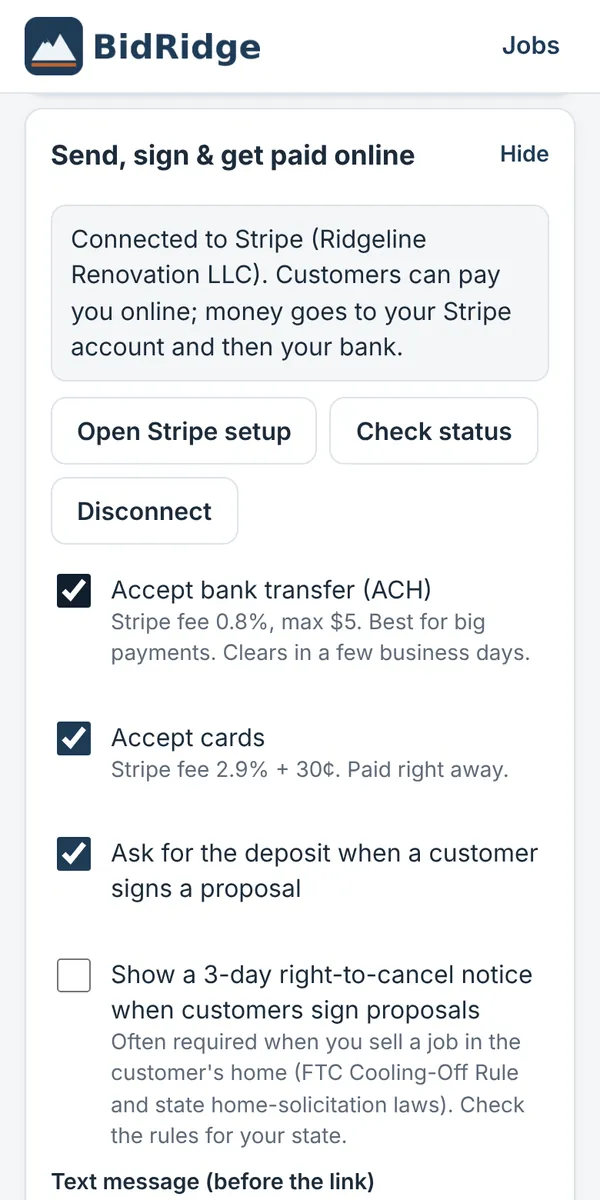
Send something
- Make sure the customer's mobile number or email is on the Customer step (they're filled in for you).
- Tap Send proposal to customer. Choose Ask them to sign and, if Stripe is connected, Let them pay the deposit online after signing.
- Check the message, then:
- On a phone: tap Text it (your Messages app opens with the text and link filled in) or Email it (your email app opens). Share… appears on phones that support it.
- On a computer: tap Email it to open your email app (Outlook, Mail, Thunderbird) with the customer's address, a subject, your message, the link and your company name and phone filled in. If you email from a website, tap Gmail or Outlook.com instead and it opens a new email there. On a Mac, Text it is there too and opens Messages.
- Copy link works everywhere: paste it into any text, email or chat.
The document is encrypted on your device before it's uploaded; only someone with the link can open it. Texts go from your own phone, so there's no texting charge from BidRidge.
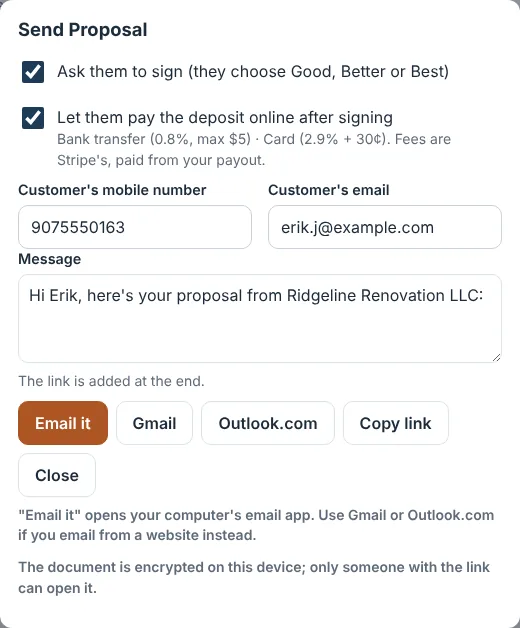
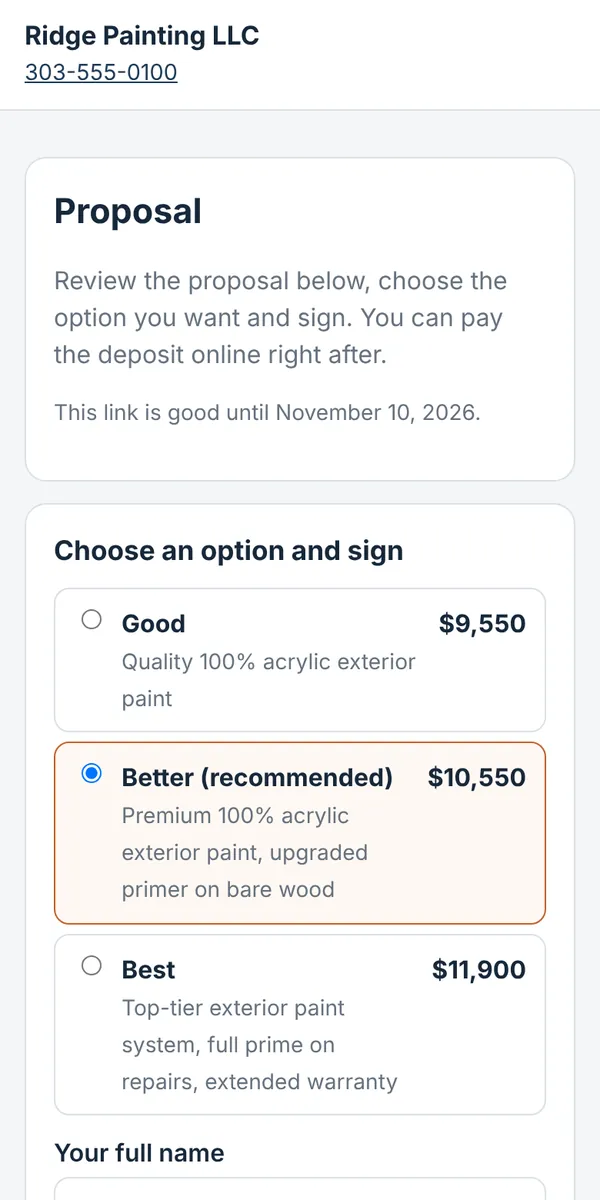
What the customer does
The page shows your logo, company and phone, the document, and how long the link is good. For a proposal they choose an option (Better is pre-selected as recommended), type their name and (optionally) their email, which is kept with the signature record, sign in the box, tick the box agreeing to sign electronically, and tap Sign. If you asked for the deposit, a Pay button appears; it opens Stripe's secure checkout. For an invoice, the Pay button is there right away. They can download or print a copy, including the signed copy, any time.
Pay now, on the spot (1.81). On an invoice you sent with online payment, Pay now shows a code on your screen. The customer points their phone's camera at it and pays on the same page as the link: by card or bank, and by Apple Pay or Google Pay where your Stripe account offers them. Check if paid asks Stripe right away. (Tapping a card on your own phone isn't built yet.)
Follow up
- After you send, the button changes to Sent: status & resend with the status: opened (how many times, and when they last looked), signed (by whom and which option), paid, bank payment processing, or failed.
- Opened alerts. BidRidge checks for news when it opens, when you come back online, and while it's open: every 45 seconds while something you sent in the last two weeks is waiting on the customer, otherwise every couple of minutes. When a customer opens a proposal you see "Jordan Reyes just opened your proposal. Good time to call!" They're looking at your price right now, so that's the best moment to call. You also see notes like "Jordan Reyes signed the proposal (Better)." or "$3,200.00 paid online by Jordan Reyes."
- Notifications. To get these as phone or computer notifications while BidRidge is in the background, turn on Settings → Follow-ups & reviews → Notify me when a customer opens a link and allow notifications when asked. BidRidge has to be open or in the background (not closed) for notifications; when you open it, you see everything that happened since.
- When they sign, the job becomes Sold with the option they chose. When they pay the deposit, BidRidge creates the deposit invoice and marks it paid. A signed change order becomes Approved; a paid invoice is marked paid.
- Open Sent: status & resend to Text link again (phones and Macs), Email link again, Copy link, download the Signed copy (PDF) (with the signature record and a fingerprint proving the document wasn't changed), or Cancel link.
- Changed the proposal after sending? The status says so. Send a new version; it cancels the old link (a signed link is never cancelled).
Follow-up reminders
Most proposals that are never signed simply weren't followed up. BidRidge reminds you: a proposal that's been sent but not signed shows up on the home screen under Follow up today 2, 5 and 10 days after you sent it (change the days in Settings). Each one shows when you sent it and whether the customer opened it, and how many times.
BidRidge emails them for me (1.81). In Settings → Follow-ups & reviews, tick BidRidge emails them for me and BidRidge sends these by email itself, so you don't have to: the follow-ups on a proposal (on your follow-up days), invoice reminders (the day before it's due, then the days you set after), a reminder the day before a job's start date, and the review request when a job is paid in full. They come from your company name "via BidRidge", replies go to your company email, and only customers with an email on the job get them. They go out each morning, about 8 a.m. Alaska time (9 a.m. on the West Coast). A follow-up stops by itself when the proposal is signed and an invoice reminder when it's paid; marking a job lost or tapping Stop stops the rest, and every email has a link for the customer to stop them. It needs a license (not the free trial). The home screen no longer asks you to text a follow-up that BidRidge is emailing.
Texts too (1.82). Tick Also text customers who have a mobile number under it and each reminder also goes as a short text (US and Canada numbers), from BidRidge's number with your company name in front and the link to the proposal or invoice. A customer with only a phone number on the job now gets the reminders by text. Customers can reply STOP, and then get no more texts from BidRidge. If texts aren't set up on your license server yet, the setting says so and only emails go.
- Text opens your messages app with a ready-made follow-up and the proposal link. On a computer the button is Email when the job has the customer's email (your email app opens with the follow-up), or Copy text when it doesn't; paste it into a text or email.
- Call dials the customer (when the job has a phone number).
- Already did: you followed up some other way. The next reminder comes after the next gap.
- Stop ends the reminders. If they went with someone else, choose Mark Lost so your close rate stays right.
Reminders stop by themselves when the proposal is signed, the job's status is no longer Sent, the link expires or is cancelled, or about three weeks after the last reminder day. If you send a new version, the reminders follow the new one. Edit the three texts in Settings → Follow-ups & reviews; use {name}, {doc} and {company}, and the link is added at the end.
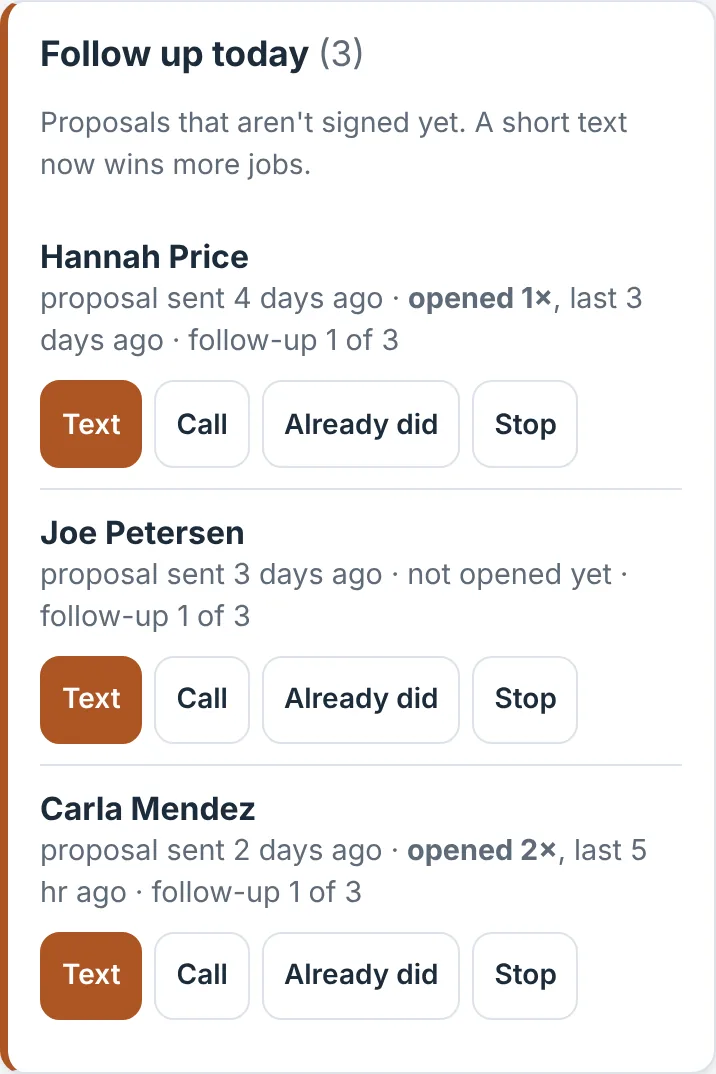
Customer portal: one link per customer
Instead of a string of separate texts, give a customer one page with everything: every proposal, change order, selections and invoice you've sent them, where each one stands (signed, paid, waiting for them), the start date, and the photos you picked for them. It works for one job or for all of a customer's jobs.
- Open the job's Customer step and find Customer portal. If the same customer has other jobs (same name and the same phone, email or address), they're listed with a tick box: tick the ones to include. A different customer with the same name is never added.
- Make the portal link, then Text the link, Email the link or Copy link. The customer's page puts what needs them (sign, pay) at the top; each entry opens that document's own link, so they sign and pay there as usual.
- The link stays the same. It updates by itself a few seconds after you send something new, or when the customer signs or pays; Update now does it right away (for example after you change the start date).
- Tick or untick a job under Jobs on this portal to add or remove it. Show the photos adds up to 8 of the photos you marked for the proposal or a change order.
- Turn off stops the link. The documents you sent keep their own links. A portal link works for a year from its last update.
- Photos you share show on the customer's page as a photo grid with their captions; they tap one to see it bigger. Other files stay a list to open or download.
- Like everything you send, the page is encrypted on your device; BidRidge's server can't read it.
Design agreement: bill for design time
For a job that needs design before you can price it, charge for the design first. On the job's Customer step, tap Add a design agreement.
- Flat fee, due when they sign, or Hourly with a cap: your design rate, a not-to-exceed amount and an optional retainer at signing.
- Credit it toward the job: if they sign the contract within the days you set, what they paid for design counts toward the contract price (the Invoice step's balance shows it). If they don't, the design invoice stands on its own.
- Send to customer to sign works like a proposal: they sign, and pay the fee or retainer online if you've set up payments. It's on their customer portal too.
- Design time: the designers count the time you actively spend drawing a design (not time the page sits open) and send it with the design. It shows on the Customer step. For an hourly agreement, check the Hours to bill and tap Make the design invoice: hours x rate, capped, less any retainer paid. Nothing is billed until you do.
Good to know
| Question | Answer |
|---|---|
| How long do links last? | Proposals: your "quote valid" days (30 by default). Projects, change orders and walk-throughs: 30 days. Invoices: 120 days. Proposal links always last at least 7 days. A signed or paid link keeps opening past its expiry date. Ninety days after that date the document is erased from the server, signed or not, so keep the signed copy (PDF). |
| Do I need internet? | Yes, to send, cancel, or check status. Everything else works offline. |
| How do I refund a payment? | In your Stripe dashboard. Then edit or note the invoice in BidRidge. |
| A bank payment failed. | The customer's page tells them and lets them pay again. You'll see "bank payment failed" in the status. |
| It says "opened" but the customer says they haven't looked. | Anyone who opens the link counts, including you. To check what the customer sees without counting a view, use PDF instead of opening the link. |
| Can I send the drawings? | Yes: tick Include the drawing set when you send a proposal or selections, or use Send drawings to customer on the Job Pack. See Designer files. Up to 8 files, about 1.4 MB each and 4.5 MB in all. |
| Does BidRidge send the email itself? | No. Email it opens your own email app (or Gmail / Outlook.com) with the link filled in, and you hit send, the same as texts. Or Copy link into any email. |
7Fast quotes and templates
A fast quote is a priced proposal from one screen: pick a kind of job, a size and a few answers. Saving it makes a normal estimate (or a multi-scope project), so you can still open every room, quantity and price in the full steps.
- Tap Fast quote from a template on the home screen (or the card on What kind of job?).
- Type the customer's name, mobile number and address (they stay if you switch templates).
- Pick a template. Search (kitchen, move-out, deck…) or filter by category.
- Pick Small, Medium or Large (0.6×, 1× and 1.5× the template's medium size), or Enter the real size in square feet; rooms and quantities scale to match.
- Answer A few questions. The price at the bottom of the screen updates as you tap.
- Tap Save on that price bar (it saves and opens the proposal), or scroll down for Save & send to customer, Save & see the proposal and Open full estimate to fine-tune it.
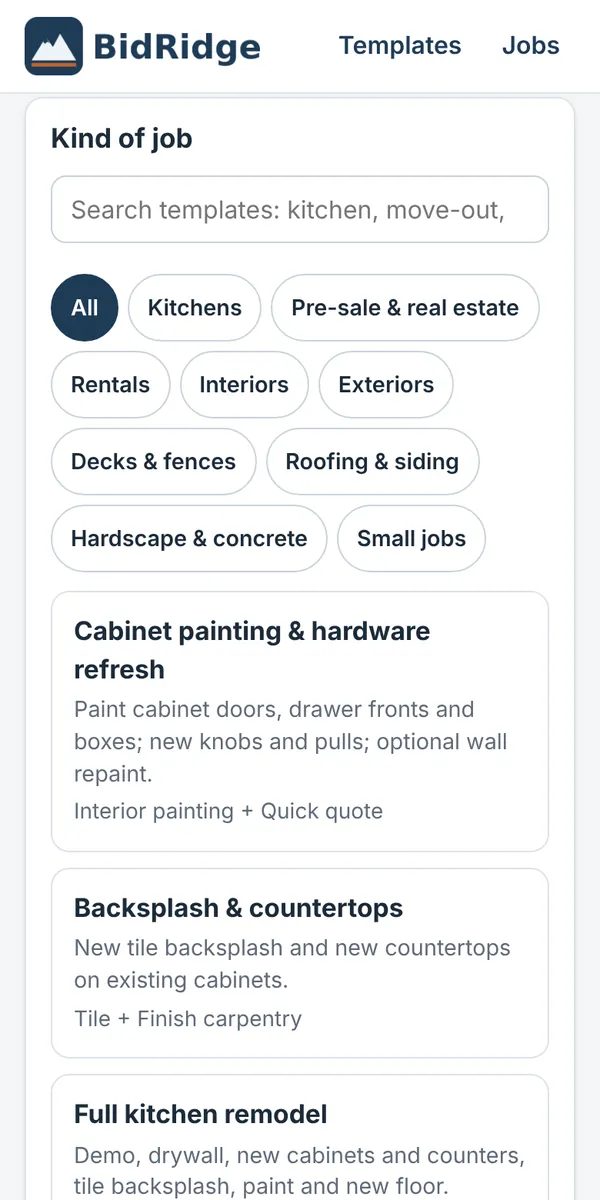
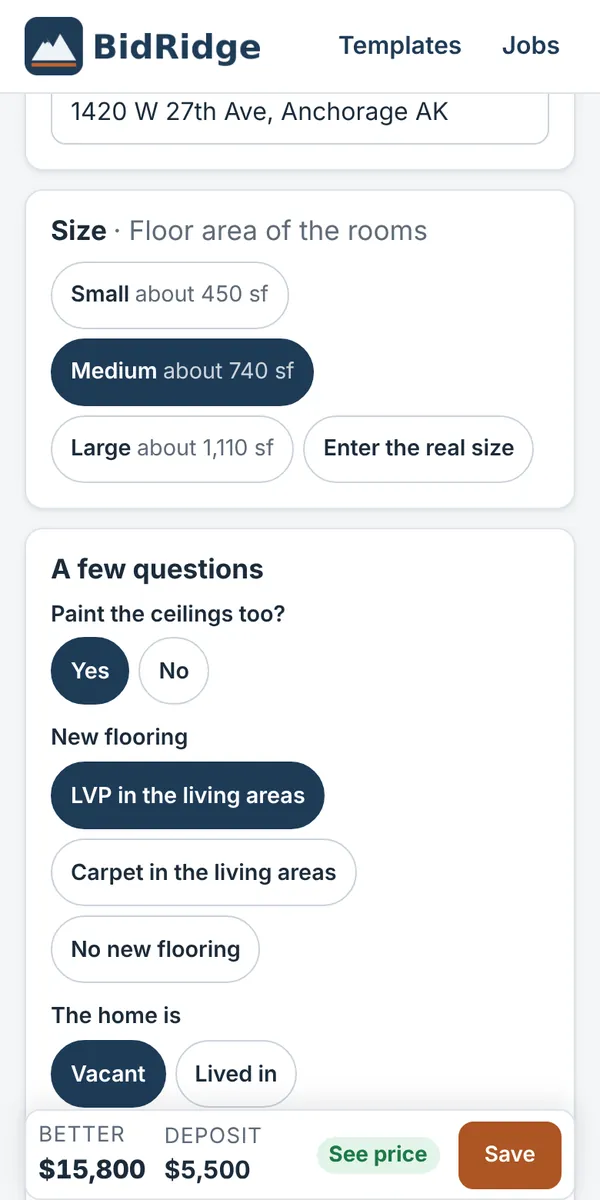
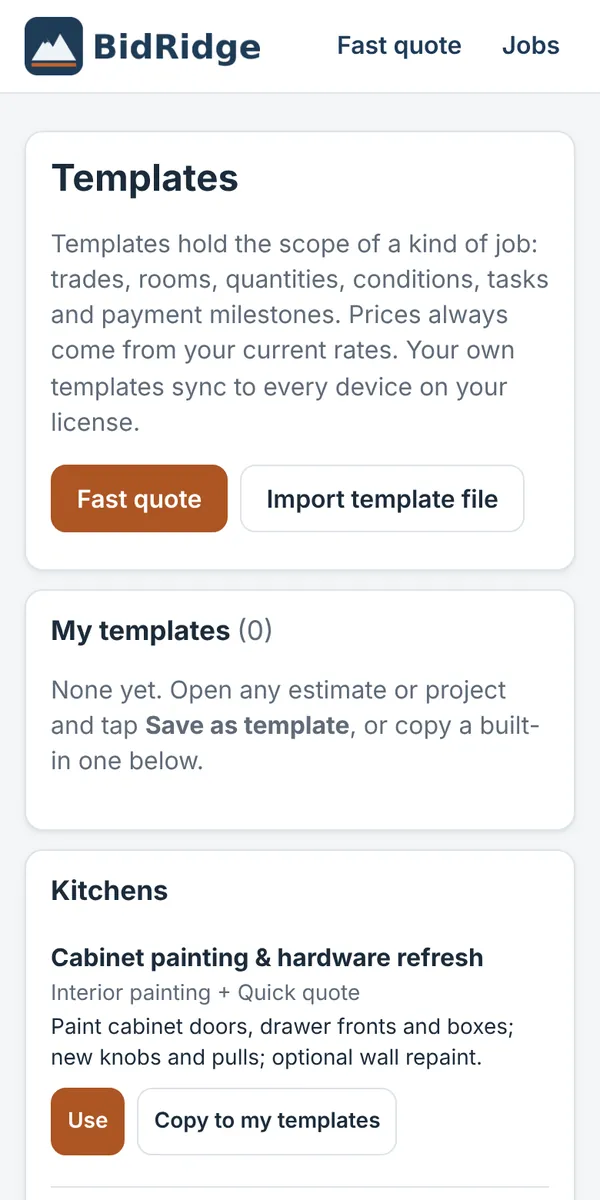
Built-in templates
| Category | Templates |
|---|---|
| Kitchens | Cabinet painting & hardware refresh · Backsplash & countertops · Full kitchen remodel |
| Pre-sale & real estate | Pre-listing refresh · Inspection repair quote |
| Rentals | Tenant move-out turnover · Make-ready between tenants · Water-damage patch & repaint |
| Interiors | Basement finish |
| Exteriors | Curb appeal package · Deck repair & stain |
| Roofing & siding | Re-roof (tear-off and new roof) · Re-side a house |
| Hardscape & concrete | Paver or stone patio · Concrete driveway |
| Decks & fences | New composite deck (diagonal, picture-frame border) · Deck resurface · Wood privacy fence · Chain link, vinyl or metal fence |
| EIFS | EIFS re-clad (drainage EIFS over sheathing) · EIFS re-coat and repairs |
| Countertops | Kitchen countertops (quartz, granite or solid surface) · Waterfall island · Stone window sills · Bathroom vanity top |
| Ceilings | Office ACT ceiling (2x4 or 2x2) · Vaulted T&G wood ceiling · Basement ceiling: drywall on black iron or grid · Acoustic clouds and baffles |
| Insulation, epoxy floors & windows | Attic air sealing & blown insulation · Rim joists & basement walls · Firestop a rated wall or garage firewall · Soundproof a wall · Garage flake floor · Shop or basement epoxy with cove · Replacement windows (insert) · New entry door |
| Small jobs | Punch list / handyman visit · Aging-in-place safety package |
A built-in template only shows if you offer every trade in it (Settings → Your work & scopes you offer). The Templates screen tells you how many are hidden. Your own templates always show.
Your own templates
- Save one: on any estimate's Customer step, or on a project page, tap Save as template. Give it a name, a category and an optional description. It saves the scope (trades, rooms, quantities, conditions, tasks and payment milestones), never the customer or the prices; quotes made from it always use your current rates.
- Update one: make a quote from it, open the full estimate, change it, then Save as template and choose Replace: (its name).
- Manage them: the Templates screen (from Fast quote) has Use, Rename, Duplicate, Export and Delete, plus Copy to my templates on built-in ones. Deleting a template doesn't touch estimates made from it.
- Share them: Export saves a
.bidridge-template.jsonfile; another BidRidge user can Import template file. With sync on, your templates are on all your devices automatically.
8The designers: draw it, then price it
Seventeen designers for the jobs with the most cutting and fitting: the Room Designer (kitchens and bathrooms), the Tile Designer, the Flooring Designer, the Roofing & Siding Designer, the Concrete Designer, the Deck & Fence Designer, the Cabinet Designer, the Hardscape & Landscape Designer, the Ceiling Designer, the Countertop Designer, the Finish Carpentry Designer and the Rough Carpentry Designer, plus the Masonry Designer (its Commercial mode with Commercial), and the Metal Stud & Drywall Designer, the Division 10 Designer, the Glazing Designer and the Low-Slope Roofing Designer for Commercial work. You draw the job; the designer counts the cuts, seams, panels, framing, bars, block or ceiling grid, checks the layout, prints a drawing set with your title block and sends the quantities and the extra labor to the job's estimate.
- Inside the app. On Android phones and tablets and in the desktop app, the designers open inside BidRidge and work with no signal. They are also free to draw in any browser at bid-ridge.com/designer/. Saving the drawing sets and lists, and sending to a quote, come with your BidRidge license or the free trial.
- Full screen on a phone. Tap Full screen on the drawing: it fills the screen, one finger draws and moves, two fingers pan and zoom, the bar at the bottom opens the selected item and its material, and Done (or the back button) goes back.
- Presets. The Concrete, Roofing & Siding and Deck & Fence designers start from presets at common sizes, and Add a preset (first in the tools, also in full screen) puts one next to the drawing, selected so you can change its sizes. Undo takes it out. The Ceiling Designer has ceiling presets of its own, and you can save your own (see Ceiling Designer).
- In beta. Tap the Beta label in a designer to tell us what to fix.
- Layout and estimating tools, not engineered designs. Code numbers (spans, frost depth, snow load, slopes, clearances) are defaults to verify with your building department.
Design it from a job
Tile, Bathroom remodel, Flooring, Finish carpentry, Roofing, Siding, EIFS, Concrete, Hardscape & landscape, Decks & fencing, Ceilings, Countertops, Rough carpentry and Insulation jobs have a Design it line under the heading of the step where you measure (Rooms; Areas; Roof measurements; Walls & eaves; EIFS walls; Slabs, footings & steps; Areas, walls & lawn; Decks, stairs, railings & fences; Ceiling areas; Tops; Insulation, air sealing, firestopping & sound; Tile & surfaces for bathrooms). It opens the matching designer right inside the app, over the job, already using this app's license or free trial, so you never type a key; ‹ Back to the job at the top goes back. Each designer has Undo, Redo and New design at the top, and prints a drawing set with your title block. A Finish carpentry job has two lines, one under the other: the Finish Carpentry Designer for the trim and the Cabinet Designer for the cabinets. Use either or both; each one updates only its own rooms.
From a commercial job (1.62). Design it on a commercial job opens the designer with its Project type set to Commercial, and the design sent back keeps the job commercial.
The sizes you typed go along (1.76). The first time you open a designer from a job, it starts from what you measured on the estimate. A Bathroom remodel job opens the Room Designer at the room's length, width and ceiling height, with the tub or shower from the Tub / shower plan at its width and depth and the tile to the wet-wall height. A Flooring, Floor coatings, Ceilings or Finish carpentry job opens its designer with each room that has a length and width drawn as a rectangle, named, side by side: drag each into place. A Kitchen row on a Finish carpentry job opens the Room Designer at its size. Since 1.77 also: a Tile job's rooms whose floor is tiled open the Tile Designer as rooms in the building plan, each with its floor at its size; a Concrete job's slabs, walks and pads and a Hardscape job's patios, walks and paths are drawn at their sizes, named, in front of the house; and a Decks & fencing job opens the Deck & Fence Designer with each deck against the house at its length, width and height and each fence as a straight run at its length and height. Already drawing another job in that designer? It asks first and adds nothing until you pick Start a new design or Use this design. After the first time the designer keeps your drawing, and when its design comes back the rooms you typed are set to be replaced by it (pick Keep them if they're extra work).
The bid documents in the designer (1.72). On a commercial job whose sub quote read the bid documents (Fill from bid documents, Read the bid set), Design it hands the designer what was read: the blank Submittal fields (project, owner, architect, general contractor, spec section) are filled, a From the bid documents card above them shows the spec checklist (products and makers, the submittals asked for, warranty, mockups, substitutions, the woodwork grade, each with its page) and the finish codes, and the Cabinet Designer puts a Pick a code… list under each finish code (the legend's description goes into the definition) and a Pick a maker… list under each manufacturer row the spec names makers for. The AWI grade the spec asks for is picked the first time. Nothing else changes until you pick; Forget these documents removes them. No AI is used.
Suggest walls and rooms (1.63). In the Plan background panel, on a vector PDF (one made from CAD, not a scan) with the scale set, Suggest walls finds the walls from the drawing's double lines and Suggest rooms outlines each room from the room names printed on the sheet. They show on the plan for review: tap any you don't want, All or None, then Use adds the rest as if you had traced them (rooms keep their names). Walls: Cabinet, Countertop, Rough Carpentry, Masonry; rooms: Flooring, Tile, Ceilings, Finish Carpentry, Division 10; both: Concrete, Hardscape & Landscape, Low-Slope Roofing. Scanned sheets are still traced by hand. (1.65) It leaves out stair treads, ceiling grids, soffit slats and other evenly spaced lines, the edges of gray shading and finish fills, and the thick block a wall and the cabinets, chase or shaft beside it used to make; walls split by windows and doors join up and come in picked.
Read schedules (1.64). In Plan background, with the schedule sheet imported as a vector PDF, Read schedules reads the door, window, room finish, material and accessory schedules off the drawing itself (its lines and words; no AI). A review shows each schedule with a field picked for each column; tap a cell to fix it (doubtful cells are marked), then Use. In the Finish Carpentry Designer (Commercial) a door schedule fills the door schedule and a room finish schedule fills the finish rows, linked to the drawn rooms by number or name. With the AI add-on, Tidy with AI fixes cells the reading got wrong and strikes rows that aren't data.
Suggest doors and AI takeoff (1.64). Suggest doors finds each door drawn with a swing on a vector plan (set the scale first): tap a leaf to leave it out, then Use; in the Finish Carpentry Designer each door goes on its wall and a pair becomes one opening. Doors drawn without a swing can't be found this way. With the AI add-on, AI takeoff reads a sheet's picture, scanned sheets too, and gives the rooms with their outlines and names to check before Use, like Suggest rooms.
Draft RFIs from the checks (1.64). In the designers with an RFI register (Ceiling, Countertop, Cabinet and Tile, Commercial), Draft RFIs from the checks lists the design's warnings and failed checks; the ones you pick become RFIs with a plain question and the code reference. Read each question before it goes out. With the AI add-on, Word with AI beside a question rewords it for the architect (Undo brings the old one back).
| Job | Designer |
|---|---|
| Tile, Bathroom remodel | Tile Designer |
| Flooring | Flooring Designer |
| Roofing, Siding, EIFS | Roofing & Siding Designer |
| Concrete | Concrete Designer |
| Decks & fencing | Deck & Fence Designer |
| Finish carpentry | Finish Carpentry Designer (trim), Cabinet Designer (cabinets) |
| Hardscape & landscape | Hardscape & Landscape Designer |
| Ceilings | Ceiling Designer |
| Countertops | Countertop Designer |
| Rough carpentry | Rough Carpentry Designer |
| Insulation, air sealing, fire & sound | Rough Carpentry Designer (new buildings and additions) |
The designers also count the time you actively spend drawing and send it with the design; to bill for it, see Design agreement.
Room Designer
The quick way to lay out a kitchen or a bathroom before you price it (1.71, every plan). Tap New design and pick a starting room (a tub bath, a shower bath, a primary bath, a powder room, an L-shaped, galley or island kitchen, or a blank one), or open it from a Bathroom remodel job's Design it. Tap Vanity, Toilet, Bathtub, Shower, Door, Window (in a kitchen: base cabinets, sink base, dishwasher, range, fridge, tall and wall cabinets, island) and it lands in a free run of wall; drag it and it slides along the nearest wall, turns the corner by itself and lines up with its neighbour. Drag the blue handles to size the room, or type the sizes. Tap anything to set its width, depth and distance from the corner; tap a wall letter for that wall's elevation.
Clearances as you go. The clear space in front of each fixture shows green or red: a toilet 15 in. from its centreline to a wall or fixture each side and 21 in. in front (IRC P2705.1), a lavatory and a tub 21 in., a shower 24 in. in front of its opening (Figure R307.1), and the shower itself 30 in. each way and 900 sq in. (P2708.1). No fan and no window is flagged (R303.3), and so is a door that swings into a fixture. Kitchens: aisles between facing runs and around the island, the work triangle and the dishwasher by the sink are checked against typical values you can change under Rules, and the counter receptacles are counted space by space (E3901.4.1). Checks, not a plan review.
Selections, rough-in, and on to the other designers (1.71). Selections lists what the customer picks for the room (in a bathroom, one row for each of the estimate's allowances: vanity, faucet, toilet, valve, glass, mirrors, lights, fan, tile, grout, paint...): type the product, color, size, price and supplier, or leave it To be selected with a date. They go to the job's Selections, each pointed at its allowance, so the estimate shows what is over or under. Tick Rough-in under the drawing to see where the drains, supplies, valve and head, receptacles, lights, switch and fan go, on the plan and on each wall with its height (typical heights; the fixture maker's rough-in sheet and your inspector govern); the Rough-in card lists them and the drawing gets a second sheet with the rough-in plan, its schedule and the selections. Detail it > Open in the Tile Designer makes the shower or tub walls (niches, open sides left out), the shower floor and the bathroom floor with the fixtures on it, or a kitchen's backsplash runs with their outlets and windows; Open in the Cabinet Designer makes each kitchen wall's run of starting boxes (corners as a lazy susan, the sink base, the appliance openings, wall cabinets, the hood and the windows, the island), and from there the tops go on to the Countertop Designer. Both stay linked to the same BidRidge job.
Into the estimate. Before you move anything, Existing layout > This is the existing layout: every drain the new layout moves 6 in. or more, or adds, is counted as a drain or supply to relocate and makes the job a layout change. A bathroom fills the Bathroom remodel job's answers (the scope, the tub or shower and its size, the room, the tile heights, wainscot, the floor, the fixtures, mirrors, lights, fan, grab bars, niches, circuits and the moves), so it prices from your Bathroom remodel settings. A kitchen sends the base and wall cabinet LF, tall cabinets and the countertop to Finish carpentry, the backsplash (and a tile floor) to Tile, the floor around the cabinets to Flooring and the walls to Interior paint. Drawing makes one 11 x 17 sheet with the plan, the four walls and the takeoff. Step by step: chapter 42 of the designer guide.
Tile Designer
Patterns, every cut, full-size cut templates, edge trim and movement joints. A job is a row of surface tabs right above the drawing. A new design starts on What are you tiling? (presets, any surface at its typical size, or a whole area at once: Tub surround, 3 walls, Shower, walls + floor, Kitchen floor + backsplash); + Add surface and Add a preset add more. Pick the tile shape, then its size (the name on the box, like 3×12), then the pattern. 21 sheet mosaics (penny round, hex, 1/2" random stick, pebble, arabesque…) are ordered by the sheet. Side by side shows the walls unfolded; Wrap the pattern around the corners carries the pattern around each corner and marks the corner cuts CW-1, CW-2… Shower floor slope (center, offset or linear drain) draws the fold lines and spot heights, marks the slope cuts SL-1, SL-2… and counts the deck mud bags. Niche, curb and bench faces are tiled, fixtures can be lined up with the grout lines, and elevations get location dimensions and a course story pole. Save project keeps the whole job in one file.
Presets and the new look (1.55). The Tile Designer has the same layout as the Cabinet and Countertop Designers: a Project card first (project, client, Project type), plain Undo and Redo, and the start step with presets, each with a picture drawn from its own surfaces: Showers (a tub / shower, 36 x 36 and 48 x 36 stalls, 5 and 6 ft walk-ins with a niche and a bench, curbless with a linear drain), Bathroom floors, Kitchen backsplashes, Floors, Other (fireplace, tub deck, countertop, patio) and, on a commercial project, Commercial (single and multi-stall restrooms, a roll-in shower, a locker-room shower, a commercial kitchen, a lobby floor). Type in the search box to find one. Surface > Save as preset… keeps a surface or the whole job as your own (in this browser, like the other designers' presets: rename, delete, export and import on the cards). Designs and project files saved by the Tile Layout Planner open as before.
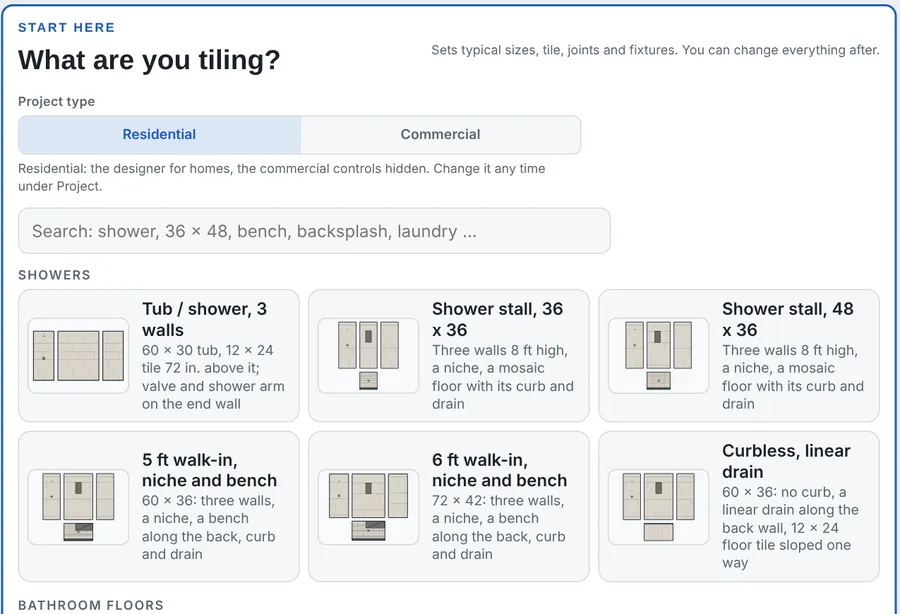
Natural stone (1.55). On any surface, Tile & pattern > Material: Natural stone, then the stone (marble, granite, limestone, travertine, slate, quartzite, onyx), its finish and thickness, the setting material and the grout. The designer checks the stone's rules: 95% mortar coverage on every stone surface, a floor over wood framing asked for L/720 (type the joists or the engineer's confirmation), white mortar for light stone, a moisture-sensitive stone on epoxy or rapid-setting mortar, the grout for polished stone, lippage by the joint. It adds sealing, a 15% starting overage (yours to change), stone saddles at the doors and the fabricated stone edge, and draws the vein direction on the plan. In BidRidge the stone comes in on its own lines (stone setting, white or epoxy mortar, stone edge, saddles, sealing), at starting prices to set.
Tiled stairs (1.55). Pick Stairs on the start step or with + Add surface: flights and landings (straight, L or U), each riser and tread as measured, the structure and the build-up, and the floors at the top and the bottom. The designer works out every finished riser height and checks the flight against the IRC or IBC (3/8 in. between risers, the tallest riser, the shallowest tread, the nosing), and ADA 504 for a commercial exit stair. A riser out of limit is named with the ways to fix it; nothing is changed for you. Treads, risers, landings and skirts are laid out and counted, the drawing set gets the stair sheets, and BidRidge gets the stair steps, skirt tile and non-slip strips.
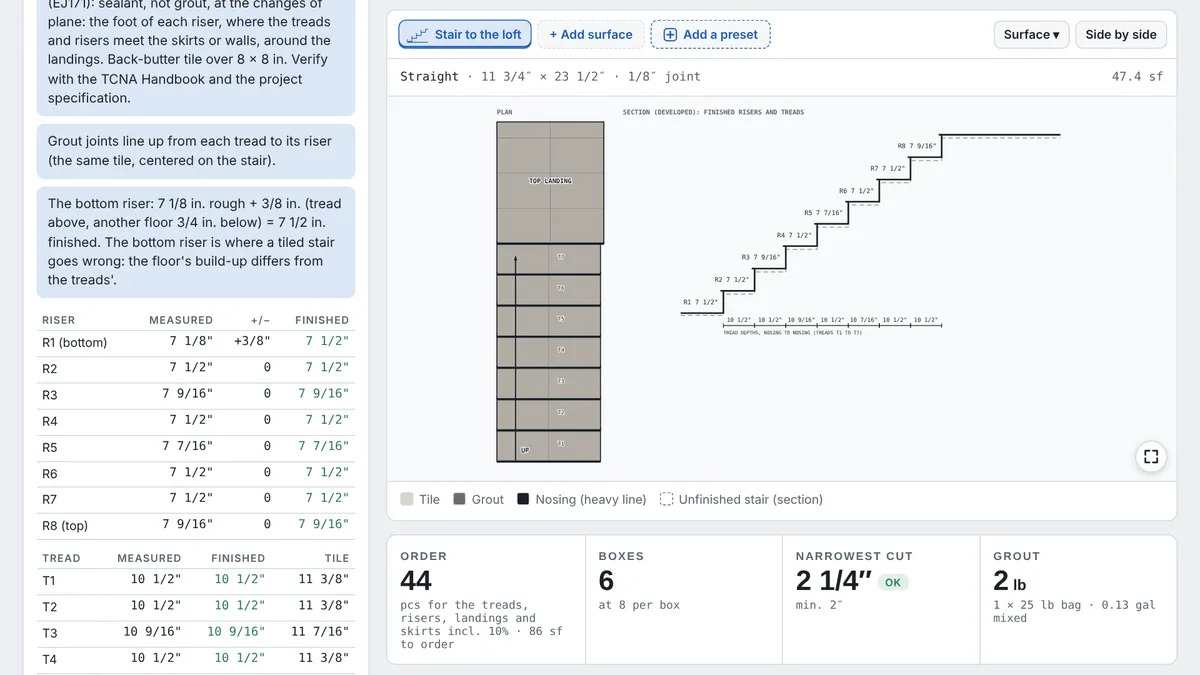
Trims and profiles (1.56). Under Edge trim, set what each edge is (an exposed edge, an outside corner, a wall, a tub deck) and pick the profile for each kind of edge, generic or Schluter, from the list or with Pictures. A trim now comes off the tile: at a trimmed edge the tile is cut shorter by the profile's visible face and its joint, and the centering, the narrowest cut, the cut list and the templates follow (on an exposed edge you say which holds: the wall or stop, or the tile edge with the trim adding to the finished size). A size the maker does not publish is a note, and that cut waits until you type the number. Trims are drawn at their true width in their finish; tap one for its section at your tile. Each profile used gets a detail on the drawing set and one TR tag across the project. A sanitary cove base gets no metal trim on top by default: the cove piece has its own finished top. Designs saved before 1.56 open with their trims taken off the cuts and a note that says what changed.
The floor / wall cove (1.63). A Cove picked on a wall's bottom edge (where it meets the floor) or on a floor's edge at a wall now starts as Schluter-DILEX-AHKA, on its own Floor / wall cove setting under Edge trim. AHKA sits on the finished floor tile: the floor goes in first and runs to the wall, and the profile covers its cut edge and the gap at the wall, so a floor coved in AHKA needs no cut at the walls. Coves in a wall / wall inside corner and on a countertop or backsplash stay DILEX-AHK. Where a floor cove is still DILEX-AHK (a design saved before keeps its profile), the trim card says why AHKA is more forgiving and Use Schluter-DILEX-AHKA switches it in one tap. Its detail on the drawing set shows the floor tile under the profile.
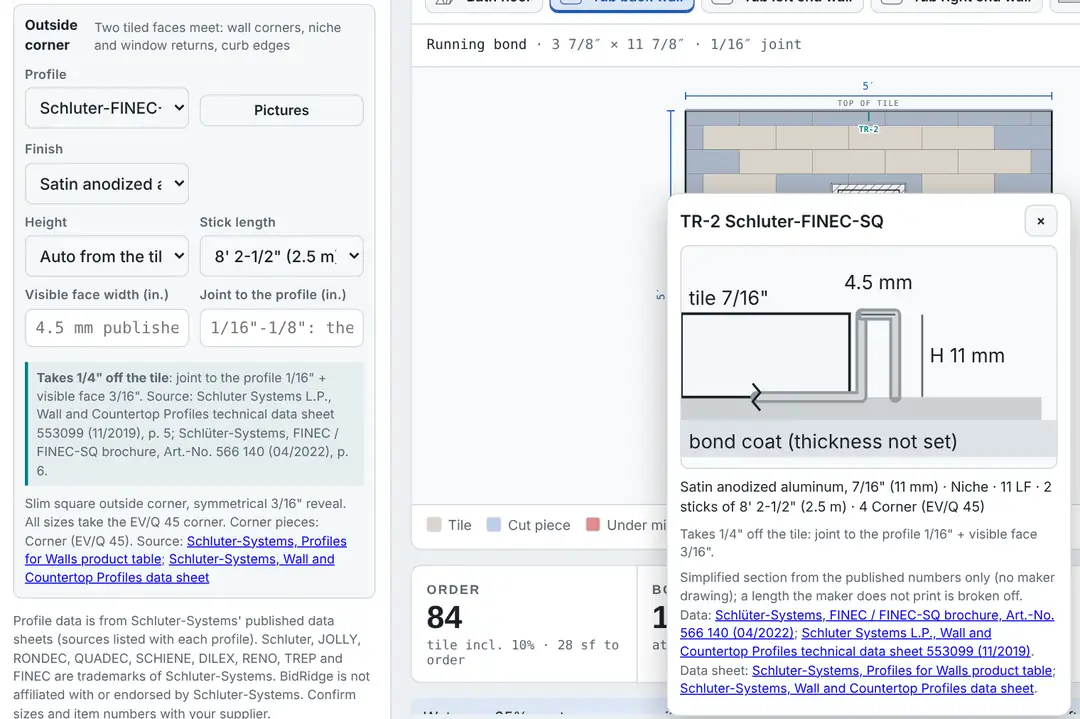
Thickness and trowels (1.56). Tile & pattern > Thickness, trowel & build-up: pick the tile's thickness from the typical ones for its kind (flagged "confirm with the product" until you type the maker's); a trim's Height follows it and is checked against the tile. The card suggests a starting trowel notch from the tile's size and kind, back-buttering where it is needed and the coverage (80% dry, 95% wet and exterior: lift a tile to check); the mortar maker's data sheet wins. Where a floor Meets another floor of a different height, it lists the ways to make them meet, each with its result and limit: a thicker bond coat, self-leveling underlayment, a membrane, a mortar bed, or a transition profile checked against ADA 303. Nothing is picked for you.
Commercial tile (1.54). Project > Project type (the first card; a new design can also start as Commercial): Commercial adds the Building plan, the Submittal set (a full set on ARCH D or 11x17 shop sheets, with the product data and samples log), questions for the architect (RFIs), revisions and the Commercial costs card (mobilization, protection, premium time, freight, submittal time, sent as Tile job extras). On the Building plan, Plan background puts the architect's PDF or a picture under the plan (set the scale from a dimension you know); Trace room or Draw room makes a numbered room with its floor as a new surface, and + Walls / + Base add its walls and base; Door places a room's door on its wall and Place room puts the open tab's room (a stair too) on the plan (1.56). The Submittal set's plans and elevations show every trim with its TR tag and a callout to its detail, the base under each wall and the top of the tile (1.56). The Finish schedule holds the architect's codes (FT-1, WT-2, QT-1 ...): change a code and every surface on it follows. A room can be a Typical unit built in several rooms (as drawn or mirrored): everything in it counts that many times. Totals adds it up by level, room, code and type. Open the sample hotel loads a whole sample job. Sent to BidRidge, a Commercial project comes in as a commercial job (as from the Cabinet and Countertop Designers): your commercial default wage basis and the commercial overhead lines, shown under Wages & job type.
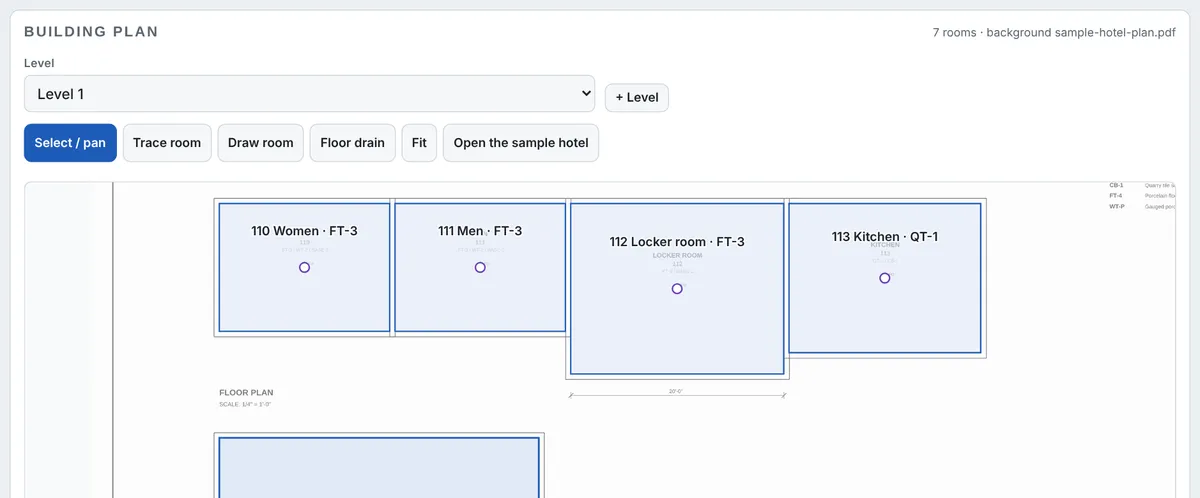
Floor drains, roll-in showers and cove base (1.54). Floor drain on the Building plan puts a drain on a room's floor. On the floor, Floor sloped to drains > A floor area (restroom, locker room, kitchen) slopes it without the shower rules, checked against the maximum slope you type from the project specification; Slope: the whole floor or A zone around each drain (24, 36 or 48 in.), the rest level. The card works out the mortar bed, the deck mud and the fold cuts; a thin-set method slopes the slab by others instead. A shower or drying area slopes as a whole against the project's minimum (Use Alaska 18 AAC 30.660(c): 1/4 in./ft). Accessible shower (ADA) checks a roll-in or transfer shower against the 2010 ADA Standards (size, entry, threshold, clearance); Wet area and slip resistance checks the wet DCOF (0.42, ANSI A326.3). A base surface with Sanitary cove base counts the cove pieces and corners; a quarry tile code sends quarry tile sf, and a Chemical-resistant system (epoxy or furan) gets its notes and detail. The typical details carry their TCNA method numbers.
Large-format tile, panels and transitions (1.54). A finish code's Tile kind makes it large-format (a side of 15 in. or more) or gauged porcelain panels (ANSI A137.3): their lippage, flatness and coverage notes print once a code, panels are marked P1, P2 ... on the elevation, and Large tile, panels and level line sets the level line drawn on every wall elevation. Each code can also say its Grout type (cement, high-performance, epoxy, epoxy emulsion, furan), a Sound-control membrane (ANSI A118.13) with its rating, and its extra stock. Submittal extras adds the grade certificates, installer qualifications and the system warranty. Floor heights, doors and transitions works out each floor's height and checks every door against ADA 303 (it can read a Flooring Designer project for the other floor): the transition schedule and the strips. Tick Price the tile setting in BidRidge by crew productivity and the Tile job asks for your setters and finishers and the sf a crew-day by tile size, and prices the setting hours from them.
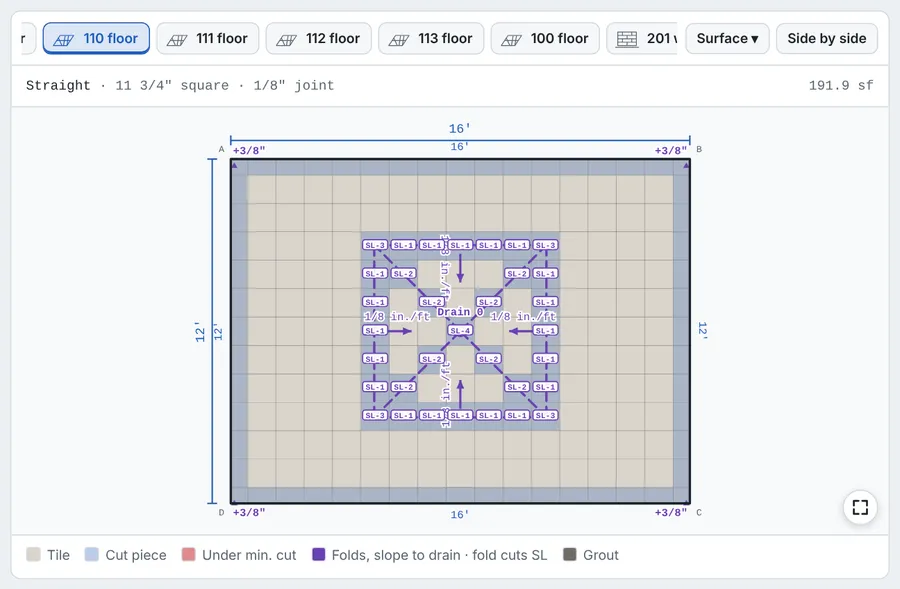
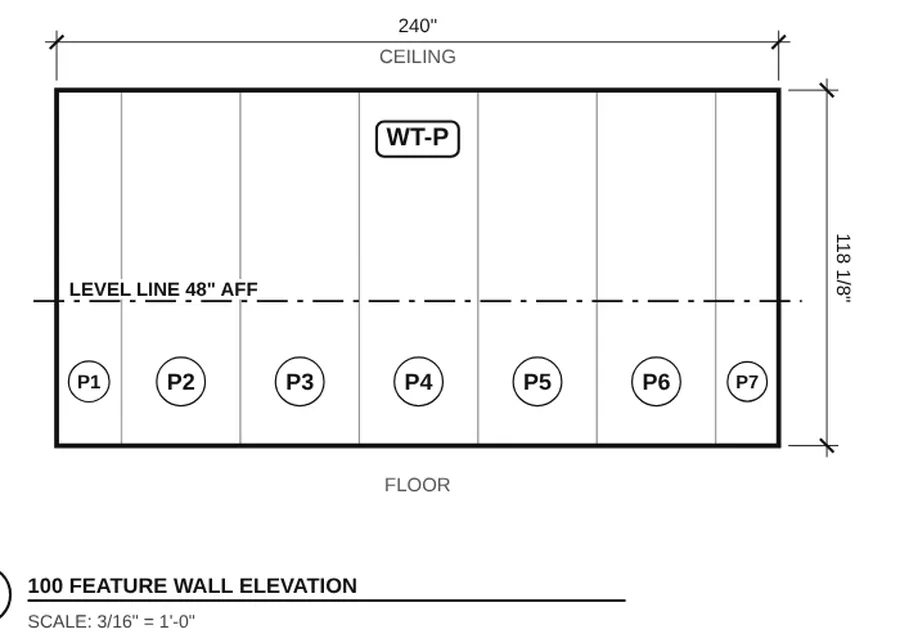
Flooring Designer
Draw each room (any shape) and pick its floor: LVP, laminate, carpet, engineered or solid wood, residential sheet vinyl, VCT, LVT or commercial heat-welded sheet. It works out the product to order (rolls, drops and pattern included), the seam plan and heat-weld rod, flash cove with its stick, cap strip and full-size inside and outside corner templates to print, rubber or vinyl wall base by height (less doors, openings and cabinets) with its corners, VCT floor finish, pattern layout and extra cuts. Check flash cove and welding details against the manufacturer's installation instructions.
Wood, laminate, carpet tile, prep, transitions and stairs (1.58). New floors: solid and engineered wood (nail-down, glue-down or floating, plank widths and random lengths, underlayment, an acclimation note), laminate, carpet tile (monolithic, quarter-turn, ashlar or brick, with attic stock) and walk-off mats, with wood and carpet base. Floor prep: moisture tests counted by area (ASTM F2170 or F1869), self-leveler by depth, patch and skim, grinding, and removal of the old floor (old resilient floors and adhesives get a flag to test for asbestos first). Where two floors meet, the transition is picked from the floor heights, and a change in level over the ADA 2010 303 limits is flagged. Stairs get treads, risers, nosings and skirts, with their checks. In a Commercial project, Sheets for > Submittal set adds finish tags, the room finish schedule, transition and stair details and the product data list.
Diagonal LVP and insets. LVP can be laid at any angle off its start wall (45 for diagonal): the rows, rips and end cuts follow, and it counts as pattern layout. Inset puts a circle of another floor in a room; set it to an oval, a rectangle or a drawn shape (Draw inset: straight sides, or a smooth curve through the points), with a ring of a third floor if you like. The room's floor is cut round it. The designer counts the inset and ring material, the seam round them (heat-welded on welded sheet, sealed on residential sheet) and prints a full-size template for each inset, or a layout page (radius, string method or offsets from the center) when it is too big to print. BidRidge prices insets on their own lines: insets, inset material and inset seams.
Plan background (1.62). The Plan background panel (top of the side panel) puts a PDF page or a picture of the floor plan under your drawing: Import PDF or image, pick the page, then Set scale by clicking both ends of a dimension you know and typing its length (Check it against a second one). Square it, rotate or move it, fade, hide or lock it. Room, Doorway, the fixed items and the notes snap to its lines. Trace room turns the room you click inside into a flooring room with the floor you used last. Saved with the design and the project file, never printed on the sheets, works with no signal.
Roofing & Siding Designer
For Roofing and Siding jobs. Draw the house as rectangles (gable, hip, shed or flat, pitch, overhangs, stories), or any shape with Section, any shape; where sections touch it works out the valleys, sidewall and endwall flashing and kick-outs. You get squares, every edge length, the ice barrier by the Alaska rule (from the eave to 24 in. inside the warm wall, in whole 36 in. courses, plus valleys), vents and waste. Pick a metal profile (presets from a panel maker's catalog: Classic Rib, Pro-Panel II, PBR, Seam-Loc 24, Clip-Loc, T-Armor and more; confirm specs with your supplier) and it lays out every panel by plane with a cut list by length, checks the profile's minimum slope, sizes every flashing leg to the rib and picks the matching closures, fasteners and catalog trim names. Furring for the roof (strapping, purlins or a vented counter-batten) and the walls (rainscreen strips or girts) gets its own furring plan sheet. Openings go in per wall; the drawing set has the roof plan, panel layout, furring plan, elevations and a trim table with leg sizes, plus cut and buy lists.
Low-slope roofs (1.58). A porch, garage or dormer flat can be a low-slope membrane: TPO, EPDM or modified bitumen (two plies), with the laps and waste, edge metal, a scupper or roof drain and the tie-in flashing to the steep roof and the walls. It prices in the Roofing trade. The laps are starting values to set from the membrane maker's instructions.
Commercial cladding and metal roofs (1.60). Set Project type to Commercial and the walls get the Commercial cladding settings: the construction type, stories, parapet and fire separation distance, the cladding systems and the wall assemblies behind them (sheathing, the air and water barrier, continuous insulation of mineral wool or polyiso, thermal clips, Z-girts or hat channels). Walls that usually need an NFPA 285 tested assembly are flagged with their IBC sections (a combustible barrier over 40 ft, foam plastic insulation, MCM and HPL panels): flags to review with the design team, never a finding that a wall complies. Metal panels, insulated metal panels, ACM / MCM, phenolic / HPL, thin brick and fiber cement panels are laid out by module with the joints on the openings, each piece marked, with the cut and order lists; fiber cement panel sizes come from Nichiha's published data (Nichiha is a trademark of its owner; BidRidge is not affiliated with or endorsed by Nichiha). Attachment is spaced by wind zone (zone 5 corners, zone 4 field) from the maker's tested tables you enter; the sealant joint schedule, trims, details, gridlines, levels and access follow. Import PDF or image puts the architect's elevation of a wall under the drawing to trace. Commercial roof sections take structural standing seam over purlins or architectural standing seam on a deck: edge and corner zones on the plan, clips by zone, end splices, snow retention rows and clamps from the roof snow load (typical, not engineered), trims and flashings. The commercial lines go to the Siding and Roofing scopes, and Sheets for: Submittal set draws the cladding and roof Submittal sets. These come with BidRidge Commercial.
EIFS, siding and rainscreen panels on commercial walls (1.60). A commercial wall can be drainage or barrier EIFS with V or square grooves (checked so 3/4 in. of board stays behind each groove), impact mesh, and foam bands, cornices, sills, surrounds and quoins drawn with the Band and Cornice tools, their tops checked for slope; lap, panel, board and batten or shingle siding with band boards at the floor lines and flashed transitions between claddings; or rainscreen panels on rails: porcelain, terracotta, wood and composite boards and metal plank, with their clips. Combustible siding is flagged on Types I to IV by height and fire separation distance. EIFS goes to the EIFS trade, the rest to the Siding scope. The Sample Hotel (New design) shows it all.
Angled, many-sided and curved sections (1.72). Section, any shape draws a section by its corners: tap each one, then the first to close. Use it for a 45-degree bay, an angled wing, an octagon or a round tower. In its panel each edge has its length, Eave or Gable end, a curve (how far the edge bows out at its middle) and Remove corner; drag a corner, or drag the dot in the middle of an edge to add a corner. Every eave edge gets its own roof plane at the section's pitch, so a hip on many sides is a pyramid and a round tower a cone, with the valleys or wall flashing where it meets the house. In Siding each straight edge is its own wall named by its compass direction, a round tower is one curved wall measured around, and the corner trim takes each corner's angle. A rectangle's panel has Any shape and Turn it; Add a preset has the bay window and the two towers. The outline can't turn in on itself: draw an L or a T as two sections that meet. Barrel roofs and eyebrow dormers are still typed under Extra roof areas.
Job type. The designer starts by asking what the job is: Roofing, Siding or Roof and siding, and shows only what that job needs (Design it picks it for you from the job's trade). Change it any time with Job at the top: nothing is deleted, the other parts are only hidden, and only that scope is sent back. On a phone the roofing or siding choice sits right under the drawing.
Presets. Start a design from a preset (gable or hip ranch, re-roof, two-story with a garage, cape with dormers, lean-to, low-slope porch, garage, pole barn, steep metal cabin; for siding a vinyl ranch, lap with shake gables, board & batten or metal shop, T1-11 garage, shake cottage, lap over a metal wainscot, lap over a stone wainscot), or tap Add a preset, first in the tools, to put one next to the drawing (a lean-to or porch goes against the selected section) at common sizes, ready to change.
Stone veneer. Pick Stone veneer (adhered) for a wall or a section (a wainscot, say) and set what it goes on (wood frame, or concrete or block with no lath) and the joints (grouted or dry stack). The designer draws the courses and works out the flats with the corners' share taken out, the corner LF, boxes of each, lath sheets, 2 layers of WRB, lath fasteners and mortar bags. Smart trim puts weep screed at the base, casing bead around openings and under the soffit and rakes, a stone sill under each window and a cap along the top of a stone wainscot. Fixtures get stone-look blocks. BidRidge prices it on the stone lines.
Siding mode. Switch Roof | Siding (a Siding job calls them House | Walls and goes straight to the walls once the house is drawn) and every wall of the house gets a tab with its elevation, drawn to scale. Add windows, doors and garage doors, and lights, outlets, hose bibs, vents, meters and line sets (each gets its mounting block). Split a wall into sections (a belly band, a shake gable, a metal wainscot, T1-11 on the garage) and give each its own siding: courses, sheets and battens are drawn, and the pieces are nested into stock lengths. Smart trim is on by default: window and door trim, corners, transitions, base and rake for that siding type, and you can change any edge. Each section goes to the quote as its own wall card.
EIFS. Pick EIFS for a wall or a section and set the system (drainage EIFS over sheathing, EIFS over concrete or block, or a re-coat), the foam thickness, the finish, impact mesh (at grade up to the Rules height, the whole section, or none), quoins at the outside corners and a tinted primer. The designer lays the 2 × 4 ft boards in running bond from the bottom left, counts them cell by cell, and cuts them L-shaped at every opening corner so no joint lands there; the impact band and the quoins are drawn. Smart trim puts a starter track over base flashing at the base, backwrap and a sealant joint around openings and at the soffit and rakes, corner mesh at outside corners and head flashing over openings. A line between two EIFS sections is an expansion joint (pick a reveal or a foam band instead); against other siding it is a sealant joint, Z-flashing over the top of the EIFS, or a starter track over Z-flashing above the siding below. EIFS sections go to the EIFS trade; the buy list has the boards by thickness, adhesive, WRB, joint tape, mesh, impact mesh, base coat, finish by texture, primer, sealant, backer rod, detail and corner mesh and quoins.
Flashing schedule. Every place two assemblies meet gets a row: drip edge and valleys; step, apron, kick-out and chimney flashing and the metal roof trims; how each siding ends above a lower roof; the base of each siding (weep screed, EIFS starter track, base Z-flashing); the lines between two sidings; head flashing and sill pans. Each row has its profile and leg sizes, and a pick list for the metal with a default (prefinished 26 ga steel, a PVC kick-out, a membrane sill pan). The thickness is checked against the code: roof flashing at least 0.019 in. (No. 26 galvanized, IRC R903.2.1), valley lining from Table R905.2.8.2 (0.024 in. aluminum), weep screed 0.019 in. or plastic (R703.7.2.1); a thinner wall flashing is a warning (R703.4 sets no thickness). Bare aluminum against mortar, stucco, a stone scratch coat or EIFS base coat, and copper above aluminum gutters, Galvalume or galvanized metal are flagged. Clearances (EIFS 6 in. above grade, stone 4 in. above earth and 2 in. above paving, siding 1 to 2 in. above a roof) print as field rows. The schedule prints with the drawings, names the metal on the buy list, and goes to BidRidge in the notes.
Construction details. Every flashing schedule row has a Detail button that shows how that flashing goes in, drawn with this job's metal, gauge and leg sizes: drip edge at the eave (under the ice barrier) and the rake (over the underlayment), open or closed-cut valleys, step flashing with the kick-out, headwall apron, chimney step and counter-flashing and the cricket, pipe boots, the metal roof trims and closures, siding base and weep screed, Z-flashing between sidings, window head flashing and sill pans, corners, the EIFS starter, joints and roof clearance, and stone veneer weep screed. The plan is tagged where each one applies (3/R-20) and the drawing set gets a Flashing details sheet. They are typical details, not engineered ones: not to scale, and every detail says to verify it with your building department and the maker's installation instructions.
Profile names are trademarks of their owners; BidRidge isn't affiliated with or endorsed by any panel maker.
Concrete Designer
For Concrete jobs. Draw slabs, drives, walks and pads any shape, plus footings, stem walls, piers and steps. It lays out the control and isolation joints, checks the fall away from the house, schedules the rebar by mark, size, bend and pound, splits the job into pours with the trucks and the mix (with a ready-mix order sheet), and handles thickened edges, frost-protected footings, anchor bolts and radiant PEX in garage and shop slabs. Code numbers are defaults to verify with your building department.
Construction details. The Sections & details sheet draws each slab section (thickness, base, vapor barrier or foam, rebar or mesh at mid-depth, the thickened edge), the footing and stem wall with its bars, dowels, anchor bolts and the frost depth or frost-protected foam, piers, steps, and the control joint, isolation joint and dowelled cold joint the job has, all with this job's sizes. Tap a slab, joint, footing, pier or steps row to see its detail. They are typical details, not engineered ones: not to scale, and every detail says to verify it with your building department and the maker's installation instructions.
Presets. Start a design from a preset, or tap Add a preset, first in the tools, to put one next to the drawing at common sizes: single or double driveway, sidewalk with a turn, patio, AC pad, curb or mow strip, garage or shop slab, house footing and stem wall, fence post footings (13 holes 8 ft apart on a 96 ft line you can retype, bagged mix), deck footings or front steps.
Commercial: slabs, joints, pours and site concrete (1.59). Set Project type to Commercial and the designer adds the slab, joint, pour and site concrete schedules. A building slab is split into pour strips with construction joint dowels (plate or smooth round, size and spacing under Commercial), early-entry or conventional saw-cuts, column blockouts, isolation joints, depressions, hardener, curing and floor flatness numbers (FF / FL). Draw curb and gutter, curb ramps with their detectable warnings, pads, light pole bases and bollards; with Accessibility checks (ADA 2010) on, the sidewalks and curb ramps are checked, each item with its section. Each pour gets its yards, trucks, pump and testing agency, and cold- or hot-weather protection when the job calls for it. Sent to a quote, the commercial lines come into the Concrete trade. Sheets for > Submittal set draws the joint and pour plan, the site concrete plan, the schedules, the accessibility checks and the sections. The joint spacing, dowels and reinforcing are starting points: the structural drawings and specs govern. The commercial slab and site features and the Submittal set come with BidRidge Commercial. Step by step: chapter 32 of the designer guide.
Commercial: foundations, walls and formwork (1.60). On a Commercial project, type the engineer's footing and wall schedules (continuous and spread footings, pile caps, grade beams; stem, foundation and retaining walls with brick ledges, waterstops and dowels; pilasters) and put each type mark on the plan on its gridlines. Each bar line takes its mark, size, spacing, hooks and lap as drawn: the designer counts the bars into the bar list and the tons by size, and never sizes them. Embed places embed plates and anchor bolt groups; Spread ftg the column footings. Wall forms are laid out by pour with the pressure from the pour rate and temperature and plywood, studs, walers and ties at the spacing the published forming tables allow, with the sheets, lumber, ties and carpenter hours; past the tables, or with one or two studs between ties, the checks flag it for whoever designs the forms. Recess (residential and commercial) draws a sump or pit, a mat well, a tile or finish recess or a trench drain recess in a slab: the slab's concrete comes out and is thickened under it, with the edge forms. The commercial lines go to the Concrete quote and the foundation sheets to the Submittal set.
Commercial: slabs on metal deck and elevated slabs. On a Commercial project, the Plan bar over the drawing picks a floor; Elevated slab draws its slabs from the structural plans (one per pour), Slab opening the stair, elevator and shaft openings and Column the concrete columns. A slab on metal deck takes the deck profile (rib depth, spacing and flute widths from the deck maker's data: the presets are typical) and the total thickness: the concrete is the flute plus the topping, plus the deflection and ponding % you set. Studs, welded wire or bars as drawn, bars over the girders, pour stops, closures and construction joints are counted; formed slabs and beams get their forms and shores by the days set. The checks flag the topping over the ribs against your minimum and the UL design's topping, the welded wire cover and the deck span against the maker's unshored span you type. Pan stairs, pads on the decks and the PT, tilt-up, shoring engineering and testing allowances are under Project, Elevated slabs. Everything goes to the Concrete quote on its own lines, and the Submittal set adds a slab plan per floor, the schedules and the sections.
Plan background (1.62). The Plan background panel (top of the side panel) puts a PDF page or a picture of the site plan, the foundation plan or a structural floor plan under your drawing: Import PDF or image, pick the page, then Set scale by clicking both ends of a dimension you know and typing its length (Check it against a second one). Square it, rotate or move it, fade, hide or lock it. The drawing tools snap to its lines, and a pier or post tapped on a drawing point stays on it. Trace room makes the outline you click into what Trace room makes says: a slab or walk, the house (building), existing concrete or a recess; on a Commercial floor, an elevated slab or a slab opening on that floor. Trace walls makes footing runs with a stem wall on each wall's centerline (its thickness from the drawing): set the sizes in each footing's panel. The background is saved with the design and the project file, never printed on the sheets, and works with no signal.
Deck & Fence Designer
Borders, inlays, curves, framing, footings and the cut list by stock length. Pressure-treated decking (5/4 RED or 2x6) and a PT wood rail are the default. Stairs can have a landing partway (straight, L-turn or U-turn) and a pad at the bottom, with one-tap fixes for what the IRC checks flag. It spaces the ledger fasteners from the IRC table, takes your snow load (over 40 psf it says to get an engineer), uses hem-fir / Douglas fir-larch / SPF spans unless you pick another species, cuts a deck drawn into the house back to the wall, and adds supports under long cut-stringer runs. Long fences fit the sheet.
Commercial fencing (1.58). Project type > Commercial adds chain link security fence (fabric gauge, top rail or tension wire, barbed or razor wire, privacy slats), ornamental steel and aluminum, welded wire and temporary construction fence (rented by the month, no post holes); gates swing, double or cantilever slide, and pedestrian gates get their accessible clear width and hardware checks, with operators and access-control prep. Post spacing is a setting to take from the maker's wind-load table. Sheets for > Submittal set draws the fence and gate elevations, post and footing details, the gate schedule and the product data list.
Presets. Start a layout from a preset, or tap Add a preset, first in the tools: a 100 ft fence in an L (wood privacy, picket, horizontal cedar, 4 or 6 ft chain link, vinyl, aluminum) to redraw or retype, a 4 ft walk gate or 12 ft double drive gate on the selected fence, a ground-level platform or an attached deck with stairs.
Deck permit set. In the Deck & Fence Designer, pick Permit set in the drawing set's sheet list for a set without prices: P-0 cover with the design criteria and the Municipality of Anchorage Handout R.13 checklist (each item points to its sheet), P-1 site plan, P-2 framing and footing plan, P-3 elevations, P-4 details (ledger, tie-back, joists at the beam, beam to post, footing, bracing, guard post, stairs) and P-5 hardware and materials. Anchorage requires the plot plan on an as-built sealed by an Alaska land surveyor: load it as a picture or PDF page under Site & permit, scale it with two taps and a distance, and draw the lot lines, setbacks, easements, utilities and overhead wires. (1.52) A PDF as-built opens with the PDF reader built into the app, the same one the Ceiling Designer uses: faster, and with no signal. Add the house's windows and doors (the designer checks door thresholds and windows near stairs), fill in the hardware part numbers, and use Anchorage (MOA) under Code & site for 50 psf ground snow, 60″ frost depth and seismic category D. It follows the IRC and the city's amendments as written; it is not a stamped design, so verify with the building department.
Construction details. The drawing set has a Fastening & anchoring details sheet, drawn from this deck's framing: the ledger at the house with its bolt or lag spacing from the IRC table and the flashing over it (no ledger detail when the deck can't hang on a ledger), the lateral load connector, joist hangers, joists at the beam, beam to post, the post base on its footing at your frost depth, guard post attachment, the stair stringer at the top and bottom, and fence and gate posts in concrete or gravel. Tap a detail pill in the deck, stairs, railing or fence editor, or tap a post or the ledger, to see it. They are typical details, not engineered ones: not to scale, and every detail says to verify it with your building department and the maker's installation instructions.
Cabinet Designer
Frameless cabinets and built-ins, cut list, sheet layouts and hardware. Add islands and peninsulas (seating overhang, finished back and end panels, back elevations), lazy susan, diagonal and blind corner cabinets. It checks aisles, landing areas, the dishwasher, cooktop clearances and corner clashes against the NKBA planning guidelines, and offers Line uppers up when the uppers don't match the bases. The countertop takeoff gives square feet, edges, sink and cooktop cutouts, seams and brackets. Sheet sets: Client (never has cut lists or prices), Install or Shop.
Editing on the drawing (1.69). Tap a cabinet and the bar under the drawing shows it: move it left or right, make it an inch narrower or wider or type its width, fit it to the rest of the run, duplicate or delete it, add a cabinet, or open all its settings (the Selected card, now right under the drawing). Edit this wall under the wall tabs changes the wall's name, width, ceiling, counter height and top of uppers, fills the runs, and duplicates or deletes the wall. On a wide screen the drawing stays in view while you edit below it (Keep the drawing in view turns that off). The wall's rarer settings (countertop and soffit, notes, the room, cutouts and electrical, typical units) are grouped so they fold away.
Cabinets: buy stock instead of building. In the Cabinet Designer's Project card, switch Cabinets from Shop-built to Buy stock cabinets. Every box takes a stock size (widths in 3″ steps; standard heights and depths), fillers are worked out to fit each wall, and each box gets its stock code (B18, SB36, DB18-3, W3036, LS36, T2490, F3, BEP…). The Cabinet order card and its CSV list every code with counts and where it goes, priced from Stock line & prices: set your supplier's list prices there (the starting prices are placeholders, not any maker's), your discount and freight. BidRidge then prices the job as the purchased cabinets on one line plus the install in Finish carpentry, with no shop labor or sheet goods; the cabinet allowances stay at zero so nothing is counted twice. The install set adds a Cabinet order sheet and shows the codes on the elevations; cut lists and shop sheets belong to shop-built mode. Switching back to shop-built gives the design exactly as drawn. Check the codes against your line's catalog before ordering.
CNC files and part labels. The CNC export & labels card machines the parts and writes each nested sheet out for your CNC: shelf-pin line bores on the 32 mm system, hinge cups (35 mm) and plate holes, drawer slide holes, back grooves or rabbets, Confirmat, dowel, pocket-screw or cam-lock holes by the joinery you pick, drawer bottom grooves and toe kick notches. Pick your machine (plain DXF with a layer per operation, G-code for ShopBot, GRBL, Mach, Centroid and Fanuc-style controllers, or the layer mappings for Homag, Biesse, SCM, Thermwood, Multicam, AXYZ, Laguna, Avid, Cabinet Vision and Mozaik-style imports). Every choice has a default (Confirmat, a 1/4 in. back in a dado, 5 mm holes at 37 mm, full-overlay cups, undermount slides, onion skin with tabs on small parts, a 3/8 in. compression bit), kept for your shop in the browser; the tool library holds your tool numbers, speeds and feeds. Part labels (PDF) prints a 2-5/8 × 1 in. label for every part (30 a sheet) with the cabinet, part, size, banded edges and a QR code, in the order the parts come off the machine. Dry-run every program above the sheet before cutting.
Countertops from the cabinets. Design the tops in the Countertop Designer (in the Countertops card) takes the counter runs, sinks, cooktop and dishwashers to the Countertop Designer. From a Commercial project (1.50) each top goes with its item, finish code, thickness, edges and mitered aprons, its sinks and cutouts, the openings and supports under it and the RFIs it cites, ready for the fabricator's bid and Submittal set; send it again and the tops update in place.
Submittal set (1.46). For commercial work, Drawing set > Submittal makes the set an architect and GC review (CSI 06 41 00 Architectural Wood Casework): a cover sheet with the project, owner, architect, GC, spec section, submittal number, AWI grade (or your stock line), the sheet index, general notes and two empty review stamp boxes; the plan and elevations with section marks; full-height wall sections for each run condition; the typical cabinet sections; large-scale details (scribe, toe kick, countertop edge, end panel, crown and light rail, dishwasher opening, island overhang); and the cabinet, finish, hardware and materials schedules with manufacturer / model columns you fill in under Submittal. It never shows prices, the cut list or sheet layouts. It is download only: Save PDF, then send it yourself; it isn't added to the BidRidge job. Add a revision under Revisions and tick Cloud on sheets to cloud what changed. Tap a sheet preview to see it full size (Prev / Next, tap to zoom). For plastic laminate casework pick the Commercial PLAM, Custom grade materials preset (HPL on particleboard, 3 mm PVC edges). Overall dimensions run to the outside of the finished end panels; countertop overhangs are dimensioned separately. Not an engineered design: verify in the field.
Residential or Commercial (1.47, 1.48). Project > Project type picks which controls show: Residential keeps the designer simple; Commercial adds the Submittal set and its fields (finish codes, architect references, the hardware grade, item numbers), ARCH C and D sheets and VERIFY notes. The type never changes what a set or the BidRidge job prints. The Submittal set now fits an item on 2 to 4 sheets like a hand-drafted set (Sheet layout: Compact), in black on white. New objects: a countertop by others and a sub-top under the tops, under-counter appliance openings (Spaces), open shelving standing on the countertop, cabinets on both sides of an island or peninsula with a finished back, the walls, doors and things by others around a run, tab pulls and countertop cutouts. Each is drawn, checked and priced in your quote; open shelving and the new cutouts come in on their own lines (Open shelving on the countertop, Countertop cutouts, grommet / rectangular / fixture).
Custom casework (1.49). A Floating counter, Floating vanity or Floating bench (palette: Base, Vanity, Built-in) has no cabinet boxes: it sits on concealed brackets, a steel tube frame or wood cleats into wall blocking by others, with the bracket loads, the stone's span and the ADA clearances checked. Wall card > Wall paneling hangs shop-built veneer or laminate panels on Z-clips or furring, with reveals, cased openings, a flush or recessed base and metal inlays; Spaces > Fin and Column, clad add fins between bays and cladding on a column by others. Each is drawn, priced in your quote and comes into BidRidge on its own Finish carpentry lines (Floating counters, vanities & benches, Concealed counter brackets, Shop-built wall panels, Fins and column / shaft cladding panels and the paneling's openings, ends, base and inlays). In a Commercial project, Drawing set > Questions for the architect (RFIs) keeps the RFI list: tag a dimension so it prints VERIFY (RFI-32), draw a cloud on the sheet view, and the Submittal set adds a sheet of the questions after the drawings; RFI list (CSV) and RFI list (PDF) save them to send to the architect. Not an engineered design: confirm the supports with the maker's load table.
Bars, lighting and display casework (1.51). A bar (Base palette: Bar, straight, Bar, L, Bar, U or Bar, island ring) stands on a die wall framed by others (Wall card > Die wall): the top and its sub-top on concealed brackets let into the die, guest and bartender overhangs, a lower ADA counter, a flip-up top over a passage, a foot rail and purse hooks, with the bracket loads and overhangs checked; Close the ring (island bar) closes an island ring. Wall card > Integral lighting adds a + Toe-kick LED channel, + Under-cabinet LED channel, + Lit shelves, + LED cove or + Backlit panel: the routed channels, diffusers, cove fascias, backlit cavities, wire chases and access panels are yours; the LED tape, drivers and power are by the electrician. Display casework: a Floating shelf on concealed supports (Wall palette), a Display bay with a metal frame and shelves (Spaces), lockable Display drawers in a base cabinet and a removable Panel box over it above a cooler or other equipment. Each is drawn, checked and priced in your quote and comes into BidRidge on its own Finish carpentry install lines (Bar tops on die walls, Integral LED channels, LED coves, Backlit panels, Metal-frame display bays, Floating shelves, Lockable display drawers, Removable panel boxes over equipment and the rest); the shop work rides on the designer's shop hours. Shelf sag and bracket loads are starting checks, not an engineered design: confirm them.
Stone-clad desks, tambours and angled runs (1.51). Wall card > + Stone-clad desk shell round this run builds a U, L or straight shell round an island or peninsula run: our plywood shell with blocking for the stone (set by its fabricator, drawn in outline with its seams), the upstand, an ADA wing, a metal toe kick and power / data through the top, with the staff cabinets fitted inside (Fit the cabinets between the end walls). A wall cabinet can stand on the countertop (cabinet editor: Stands on the countertop, or the Tambour unit on the counter in the Wall palette), anchored down through the top, with a finished back when nothing is behind it. Tambour doors in the cabinet editor put a rolling curtain of slats over its open or door sections, in tracks that park behind a fixed bay or roll up behind a valance, with locks; the clearances and the fixed shelf's sag are checked. Wall card > Angles sets a plan at an angle to the building grid (drawn true, with a key plan and the north arrow turned) and the wall's angle at a run's left or right end (scribe fillers or a triangular closure); a run joined at an angled inside corner gets corner fillers cut to the angle. They come into BidRidge as Stone-clad desk shells, ADA wings at a desk, Metal toe kick at a desk, Power / data units at a desk, Cabinets standing on countertops, Tambour doors, Angled scribes at walls off square and Angled inside corners. Verify every angle in the field.
Shop sheets and keyed drawers (1.51.3). In a Commercial project, Drawing set > Submittal > Submittal format picks Full set (as before) or Shop sheets (11x17): a cover with the finishes and sheet index, a typical sections and backing sheet, an RFI sheet when there are RFIs, then one simple sheet per item with its plan, front elevation, a cut section and its finish codes. In both formats the plans draw the walls each run butts against. A drawer section's Across (2 to 4) puts drawers side by side on partitions, and Keyed lock adds a keyed lock to each; both are drawn, scheduled, in the cut list and priced.
Spec settings, soffits, devices and typical units (1.52). The Spec settings card sets once what the project specification asks for: the box material by cabinet class, finished ends, dust panels, door and drawer silencers, the countertop edge radii, accessories by others (not in contract), and the drawer construction; the labels, schedules and sections follow it. In a run's Wall card: Soffit over the uppers (a laminate closure of ours or a drywall soffit by others) and, in a tall cabinet's editor, a Sloped dust top; Electrical devices places receptacles, data, switches and other devices on the elevation, checks them against the backsplash, the cabinets and the sinks, and prints a device schedule; Typical unit: rooms builds one run in several rooms (as drawn or opposite hand), counted once per room with a room and handing schedule. An appliance opening can be Unit TBD (per the equipment list): sized and tagged, its checks waiting on the unit.
A device in the backsplash, behind the countertop edge, inside or behind a cabinet, behind an appliance or within 6″ of a sink shows in the checks: move it, or tag it with an RFI so it prints VERIFY (RFI-nn). Set a device's By to In our casework and its cutout is counted and priced instead. Give a typical run its rooms (for example 101 as drawn, 102 opposite hand) with any room's own upper height or other difference; the Submittal sets print the Electrical devices and Room and handing schedules.
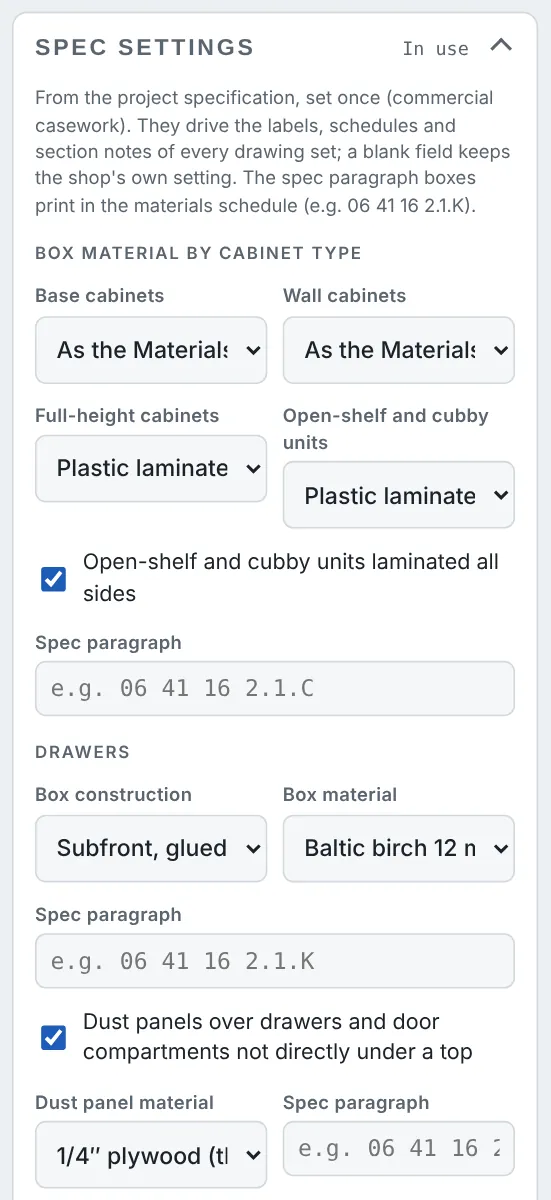
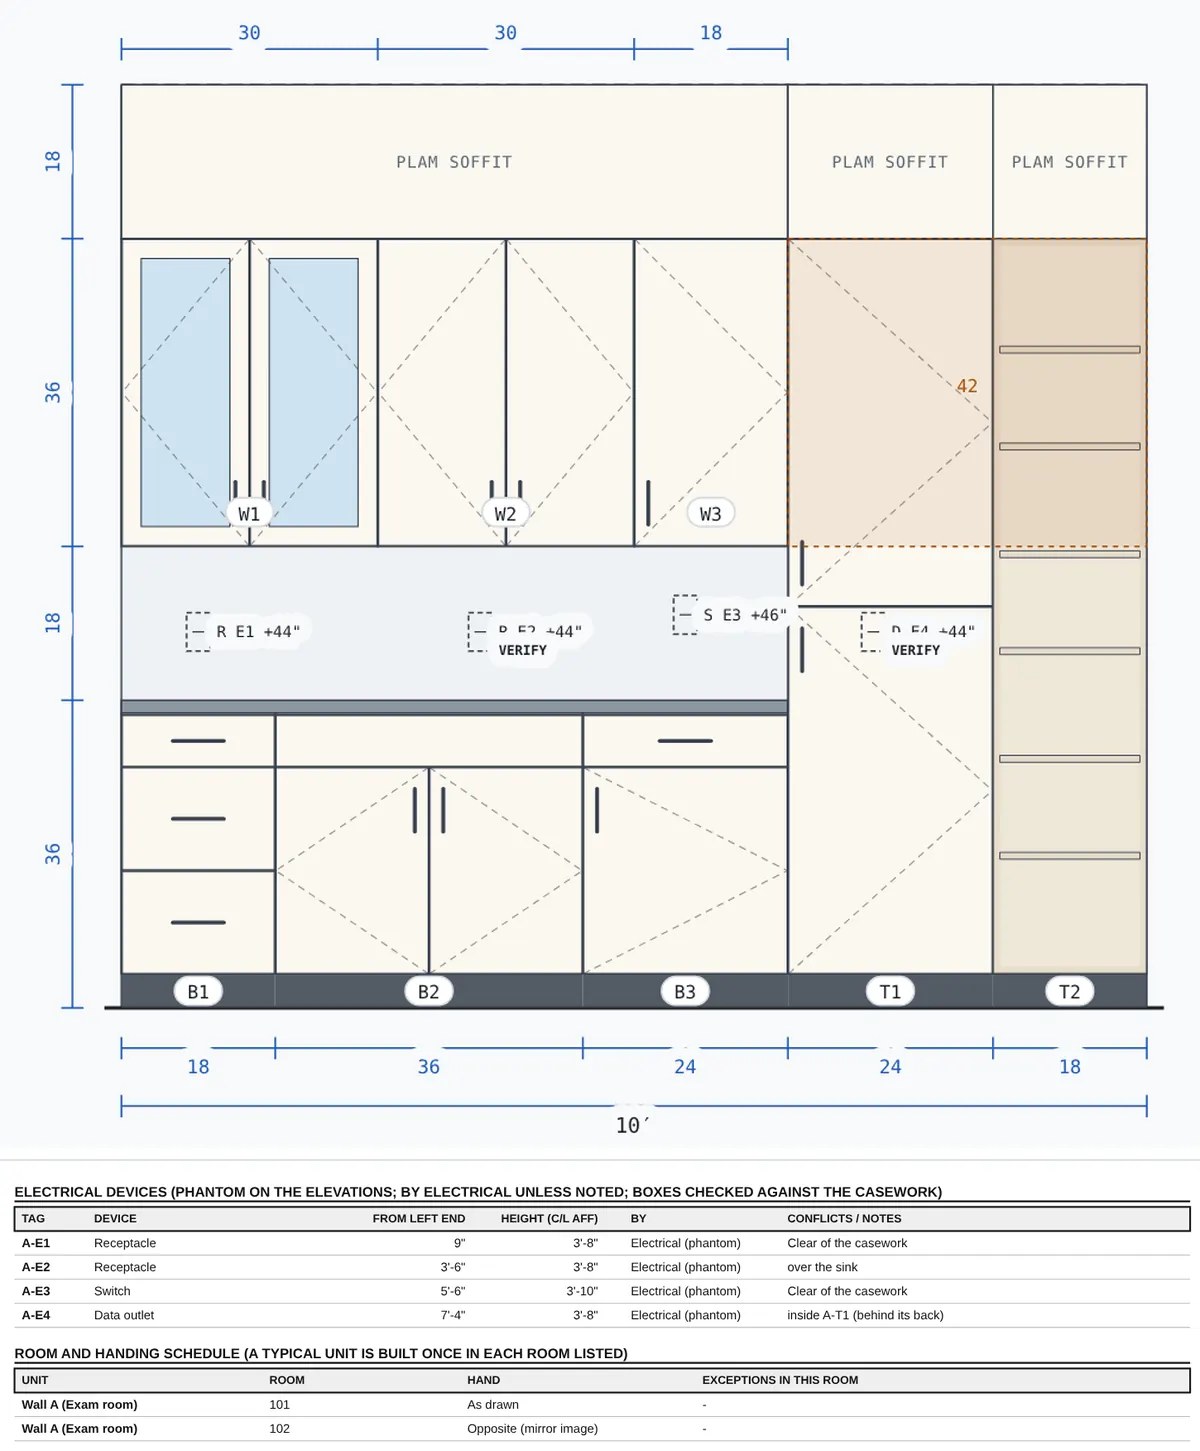
Commercial Submittal sets (1.57). Ticking Accessible on a floating vanity or a vanity sink base brings its counter to 34 in. The shop sheets (11x17) number as SH-, with the submittal cover, one typical section per cabinet type, details at a scale you can read and the backing as a broken wall section; in both formats, labels and dimensions are kept clear of the linework.
Clad walls, benches, enclosures and column wraps (1.52). Wall card > Clad wall, bench, enclosure or wrap turns a run into one of four clad objects along a path of straights and curves: a wall clad on both faces (solid surface, laminate or veneer, a core, a cap with an optional glass channel), a bench (seat, raked back, apron and toe swept along the path), an enclosure over equipment (top, front, grilles and access panels) or a column wrap or boxed panel. The faces are developed (unrolled) and cut from the sheets, curved faces thermoformed or kerfed; seams, devices through the cladding and expansion joints are checked, and each is drawn, listed and priced, with its own install line in BidRidge (Finish carpentry).
- Pick the kind. In the run's Wall card, tap + Clad wall, + Clad bench, + Enclosure over equipment or + Column wrap / boxed panel (switch it later under Kind).
- Type the plan path. Lengths in inches are straights;
R48@90is an arc of 48″ radius turning 90° left (@-90turns right);@90alone is a square corner. For example24 R48@90 220 R48@90 24is a U with round corners. Set where it starts on the run and its heading, and the expansion joints by their distance from the start. - Fill in the build-up. Height, thickness, each face's finish and code, the substrate, the core (by others or ours), the cap and the glass by others in it, the base; for a bench the seat, back and toe; for an enclosure the grilles and access panels.
- Check the drawings. The plan shows the path; the elevations are developed (unrolled along the nosing, the back or each face) with each arc's length and radius, the seams proposed from your sheet sizes and what's by others in phantom. The cut list flags each THERMOFORMED or CURVED piece, and the checks flag a joint across the object, glass taller than the drawings allow, a pocket deeper than the cap and a curve too tight to thermoform.
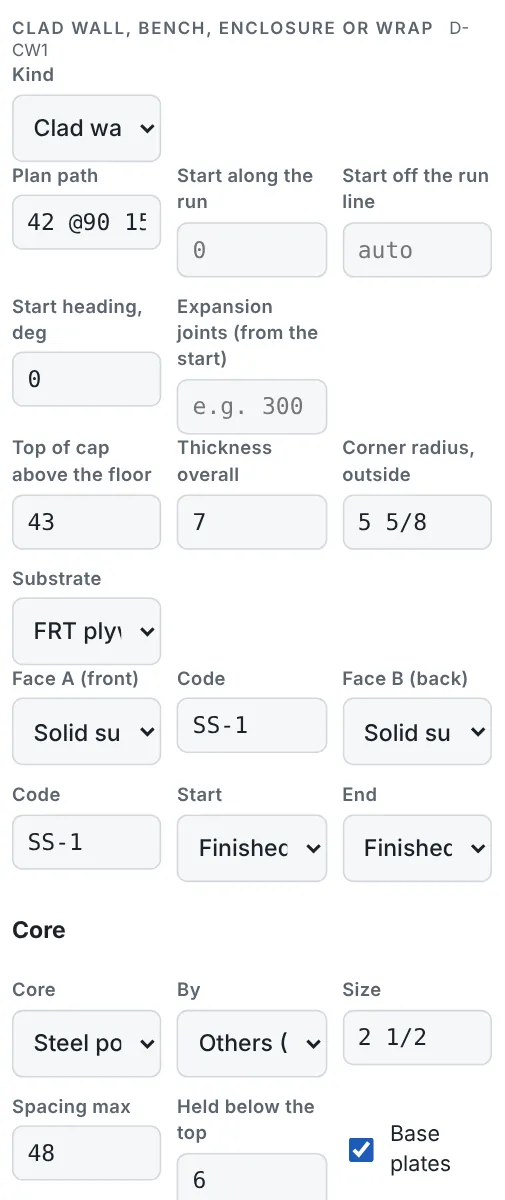
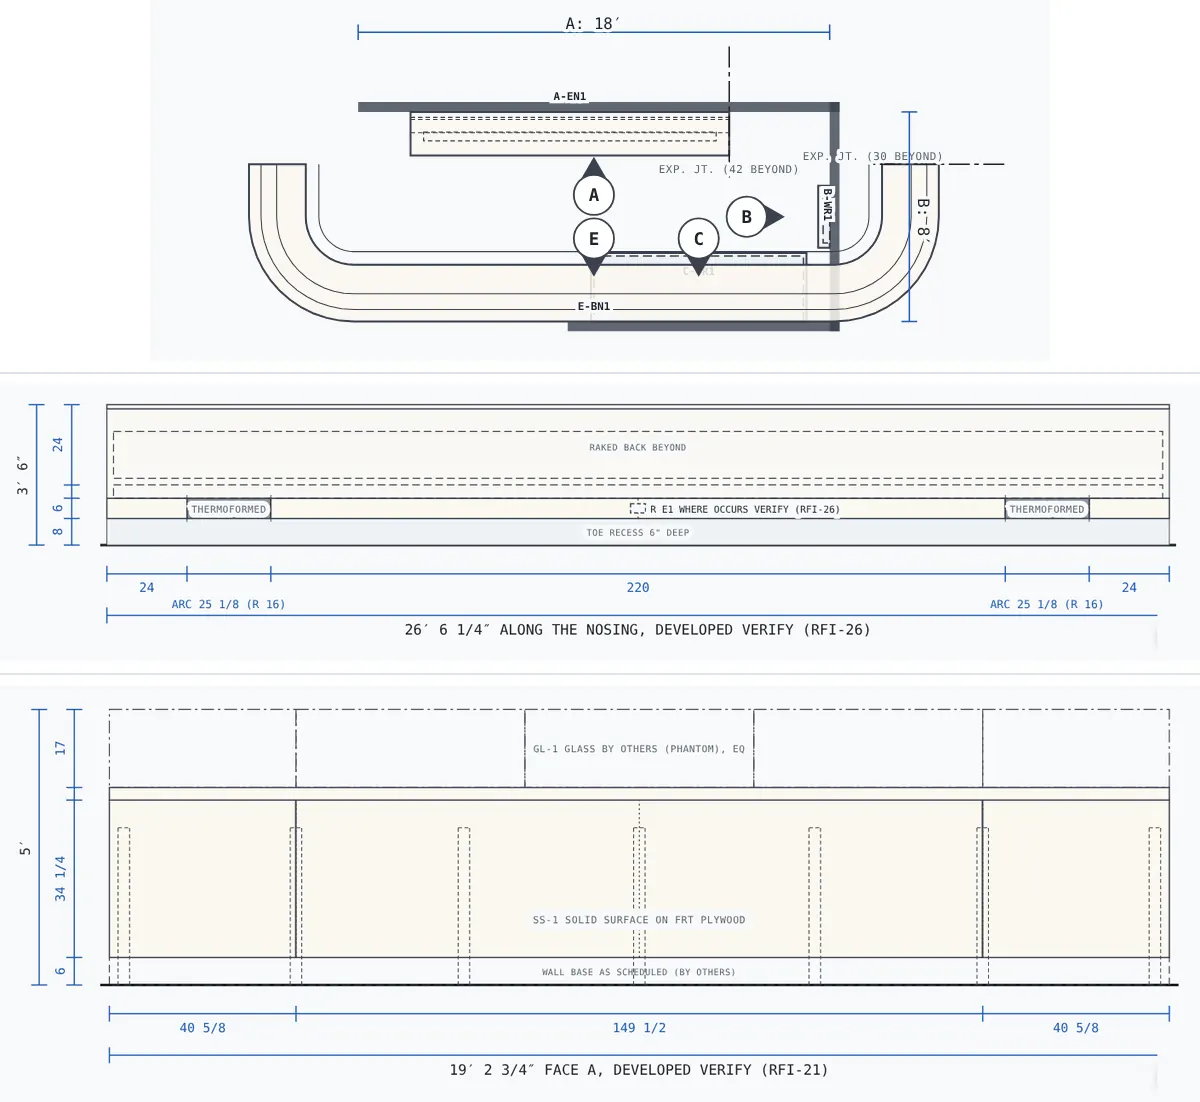
Not an engineered design: the core, anchorage and framing are to be confirmed.
Presets (1.53). Add a preset (in the Add to the wall card) opens a picker of ready-made pieces in tabs: Benches (floating, storage, locker-room and curved clad benches), ADA vanities (one or two bowls), Lockers & storage (single or double tier lockers, open cubbies, a mail sorter, a wardrobe), Commercial (a nurse station wall with its transaction top, a column wrap, a dryer counter with side splashes, a reception desk, a break room run) and My presets; the search box looks across every tab. The piece goes after the selected item on the selected run (the clad pieces, the desk, the dryer counter and the break room get a run of their own) and its size card opens above the Selected editor: width, ADA, finish, counts, tiers, a bench seat, sloped tops. Each change rebuilds it in place, and one Undo takes it out. A preset starts with no open checks and is made of the same objects you would draw yourself, so it is drawn, listed, priced and sent to BidRidge like them. Save as preset keeps a piece you have sized under My presets in this browser: rename or delete it there, and Export (.json) / Import move your presets to another device. Sizes start from the ADA standards and common shop sizes; check them against the job's drawings.
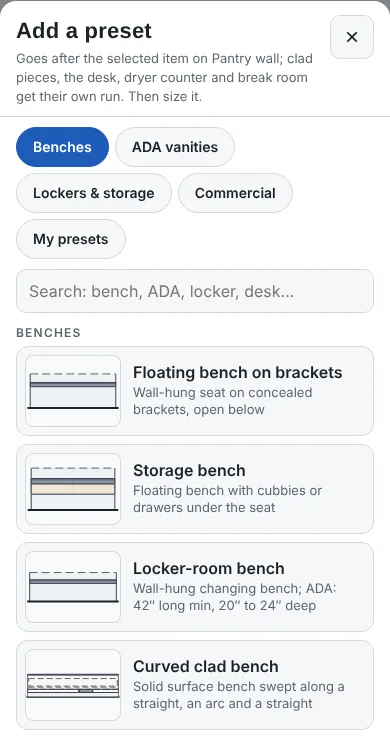
Side splashes and the accessible section (1.53). A run's Wall card > Side splash puts a splash at the left end, the right end or both ends of its countertop, as high as the backsplash unless you type a height. It is drawn on the elevation, the plan and the sections, counted in the splash and its square feet, listed in the buy list, shown on the Submittal set and the shop sheets, and sent to the Countertop Designer as a wall edge. A floating counter or vanity with a top of yours has the same setting in its editor. A side splash at an open end (no wall or tall cabinet there) is a warning. The nurse station preset can add an ADA section beside its counter (right, left or none; 36 in. long at least): a floating work surface at 34 in. with knee space, in line with the wall.
Plan background (1.62). The Plan background card under the drawing opens the architect's plan (a PDF page or a picture) in its own viewer: Import PDF or image, Set scale from a dimension you know and Check it. Then Wall run: tap the corners along the wall faces the cabinets go against (each tap snaps to the drawing) and Finish run; each leg becomes a run of that length, joined to the one before at its corner (square or at the angle drawn). Trace room makes runs all the way round the room you click inside. The viewer shows your runs and cabinets over the plan to check them. Saved with the design, never printed, works with no signal.
Hardscape & Landscape Designer
Paver patios, walks, driveways, walls, steps and beds, with base and drainage quantities. Anything drawn into the house is flagged; Clip at the house cuts it back to the wall. It checks driveway pavers, step handrails, guards and walls that need an engineer, and lets you pick the edge restraint type (plastic, aluminum or steel, concrete toe, or a soldier course in concrete), drawn in the section details. The site plan has a north arrow and dimensions from the house; long walls print in strips with match lines.
Construction details. The Typical sections & details sheet draws each surface's section (pavers or other surface, bedding sand, compacted base, fabric and the edge restraint), each retaining or seat wall (buried course, leveling pad, drain stone, perforated pipe to daylight, and geogrid when the wall needs it), block steps, and the drain lines, with this job's depths and sizes. Tap an area, wall, steps or drain row to see its detail. They are typical details, not engineered ones: not to scale, and every detail says to verify it with your building department and the maker's installation instructions.
Plan background (1.62). The Plan background panel puts a PDF page or a picture of the site plan, the survey or the landscape architect's plan under your drawing: Import PDF or image, Set scale from a dimension you know (survey scales like 1" = 20' work the same way) and Check it. The drawing tools snap to its lines. Trace room makes the outline you click into a patio or walk, a bed (its edging counted as for a drawn bed), a lawn or a building, as Trace room makes says; Trace walls makes a wall on each wall's centerline (set its block and heights in its panel). Saved with the design, never printed on the sheets, works with no signal.
Ceiling Designer
For Ceilings jobs. Draw each ceiling area on a reflected ceiling plan and give it a system and its own height: 2x4 or 2x2 ACT, drywall on grid or on black iron, T&G or plank wood (flat or vaulted), beadboard, linear wood or metal panels, clouds and baffles. It balances the ACT grid (borders at least half a tile, or a line or tile on the center), snaps lights, diffusers, heads, detectors, speakers and access panels into it, flags a light in a cut border tile, nests the boards into your stock lengths, lays out the mains, hangers, carrying channel and furring, and places the seismic bracing groups. Where two ceilings at different heights meet it counts and tags the soffit. The drawing set has the reflected ceiling plan, the suspension and bracing plan, the schedules and order list, the cut lists and installation notes. Code numbers (bracing spacing and the exempt size) are defaults to verify with your building department.
Edit many ceilings at once. Shift- or Ctrl-click, drag a box, tap Select all ceilings, or tap one of the Select every ceiling buttons (for example at 9′ or ACT 2x4) to pick every ceiling at one height or of one system. One editor sets them together: a field that says mixed stays as each ceiling has it until you set it. Raise or lower all by moves every selected height, Copy settings from copies one ceiling's settings to the rest, and a preset applies to all of them.
Presets. Office 2x4 ACT at 9 ft, conference 2x2 ACT at 10 ft, restroom drywall grid, basement black iron, vaulted cedar T&G, lobby linear wood and break room clouds. Save preset keeps a ceiling's settings under your own name, in the design and on this device, and new ceilings take the last preset you used.
Construction details. The Suspension details sheet (after the suspension plan; tick it in the drawing set) draws the hanger wires along the mains or carrying channel with their spacing, the wall angle (or, with seismic on, the attached and unattached perimeter clips), the seismic bracing group with its splay wires and compression post, and black iron framing. The plan's legend points to them, and a ceiling's editor opens them. They are typical details, not engineered ones: not to scale, and every detail says to verify it with your building department and the maker's installation instructions.
Commercial ceilings (1.52). Drawing set > Project type: Commercial adds the Submittal set (a full set or Shop sheets (11x17), with the product data and samples log), questions for the architect (RFIs) and the Commercial costs card (mobilization, protection, premium time, freight, submittal time), sent to the Ceilings job as their own lines. Rules > Seismic design for the job sets the seismic design category: the perimeter, bracing, separation joints and fixture wires follow it, drawn on the suspension plan and in the details. The Features tools add feature ceilings (canopies, grilles, dropped bands and boxes, drapery pockets, light coves, edge reveals) and healthcare items (cubicle curtain and IV tracks, a patient lift track by others), and a ceiling area can take an impact-resistant, washable, scrubbable, clean room or high-humidity tile. Coordination flags a sprinkler head in a light, a fixture on a main and other clashes. A Residential project shows none of this.
Seismic, trims and site hours (1.57). A commercial job needs its seismic design category (Rules > Seismic design for the job): until it is set, the set prints a failed check. In categories D to F every suspended ceiling gets its bracing and a suspension and bracing plan, heavy-duty mains are noted, and each canopy, grille, band, box, track, cloud and baffle gets a lateral restraint (splay wires, a rigid brace or the maker's seismic kit), counted and drawn in its detail; the counts are a starting point to check with the maker's guide and the engineer of record. A ceiling of 144 sq ft or less, surrounded by braced walls, is exempt. Two ceilings of different systems at the same height get a transition trim. A fire-rated area takes the UL design you type from the drawings. The Submittal set's plans carry a callout at each detailed element, the shop area plans print at 1/8 in. = 1 ft or larger, and the Commercial costs card shows the site hours by task (seismic work and features at the Ceilings trade's rates).
Plan background (1.52). The Plan background panel puts a PDF page or a picture of the architect's plan under the ceiling plan: Import PDF or image, pick the page, then Set scale by clicking both ends of a dimension you know and typing its length (Check it against a second one). Square it, rotate or move it, fade it, lock it. The drawing tools snap to its lines, and Trace room makes a ceiling area from the room you click. The background is not printed on the sheets. In the app the PDF reader is built in, so it works with no signal.
- Open the sheet. Import PDF or image; for a PDF set, pick the page with Page or Next ›.
- Set the scale. Tap Set scale, click both ends of a long dimension (40′-0″ is better than 4′-0″) and type it, like 40'-0". The panel shows the scale it found (for example 1/8″ = 1′-0″). Tap Check and measure a second dimension: if it's off, set the scale again.
- Line it up. Square to axis (click two points along a wall), Rotate 90°, Drag, or Point to point (a point on the sheet, then where it goes). Slide Opacity to fade it, untick Show to hide it, tick Lock so it can't move.
- Draw on it. With Drawing lines ticked under Snap, corners and lines snap to the sheet (Picture edges does the same on a scan). Trace room and a click inside a room makes its ceiling area; Measure checks any distance.
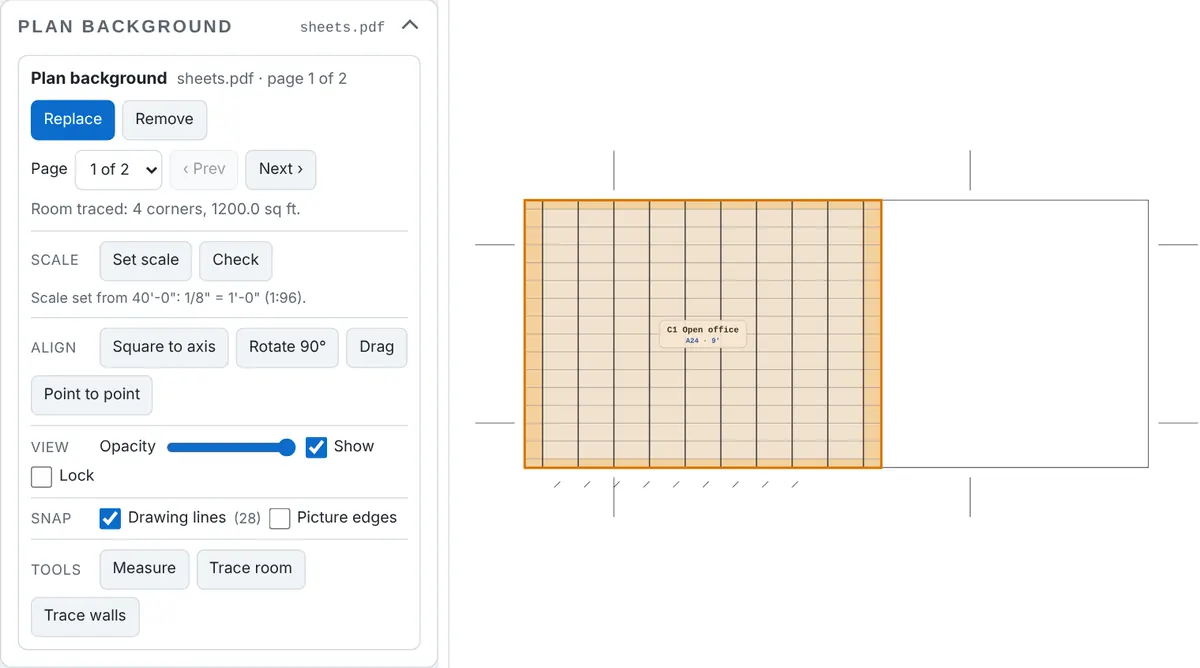
Fixtures from drawings and DXF (1.52). With the lighting or mechanical plan as the background, the Fixtures from drawings panel counts and places fixtures for you: Pick a symbol (drag a box round one light, diffuser, head, detector or speaker), choose its fixture type, then Find all like this and Place; they snap into the grid, and fixtures already placed are not placed twice. For another sheet, Pick 2 reference points on the ceiling plan (grid line crossings or building corners), show the other sheet and Line up this sheet on the same two points. Open a DXF places the fixture blocks from a CAD file, and Save & export > Ceiling plan (.dxf) writes the ceiling plan for CAD, on layers, at full size. Check the counts: a symbol drawn another way is another symbol.
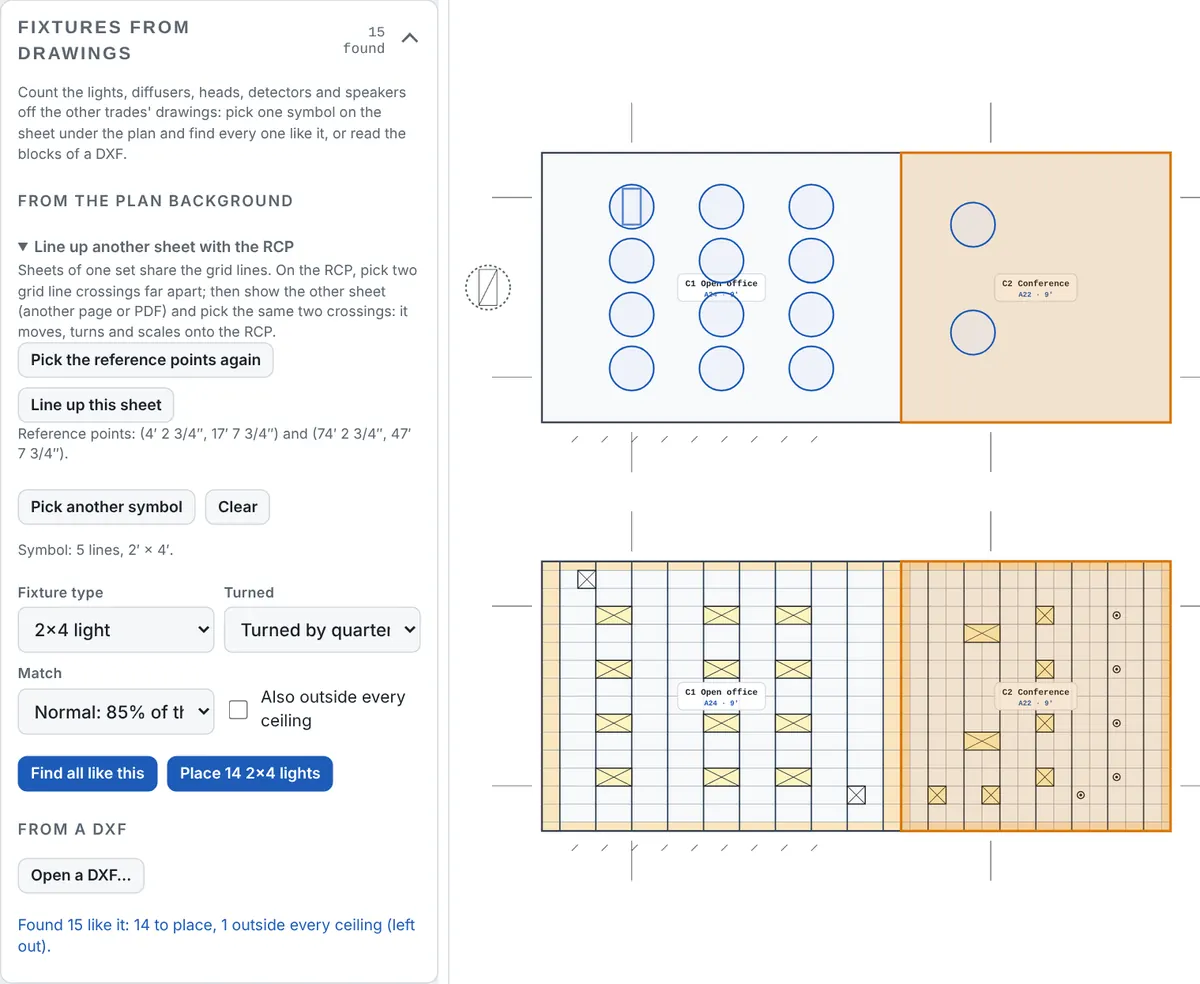
Maker products (1.52). In a Commercial project, an ACT ceiling area's editor has a Maker product row (closed until you open it): a library of acoustical panels (2x2 and 2x4) and suspension grid lines from the makers' published data sheets, with filters for maker, edge, grid face, tile type, NRC, CAC and healthcare. Pick a panel, then a grid line for it: the area takes the panel's size, the product data log and the sheets name the product with its data sheet, and the grid is checked against the job's seismic design category. Each record shows the date it was checked: confirm it with the maker's current data sheet. With no pick nothing changes.
Countertop Designer
For Countertops jobs. Draw the tops (rectangles or any shape with curves), or tap From the Cabinet Designer to bring them in, and set each one's role: a run, island or peninsula, window sills, or a vanity, curb, hearth or other top. Mark every edge: against a wall (with a 4 in., coved or full-height splash), finished (eased, bevel, bullnose, ogee or a laminated build-up), unfinished, a waterfall leg or a mitered apron. Put the sinks, cooktop, faucet holes and the dishwasher on them. Seams go in where a piece won't fit your slab: at an inside corner first, at least 6 in. off a cutout and never over the dishwasher; draw your own with Seam. The pieces are nested on your slab or sheet sizes with the vein kept along the slab, the waterfall legs cut next to the top when the slab is long enough, and the sills and small tops in the offcuts, with the yield. Checks: seams, overhangs without brackets, sharp inside corners in solid surface, cutouts near an edge, accessible heights and knee space.
Shop steps and CNC files. Each piece gets its steps: the cut, the cutouts with their corner radius, the edges by bit, then the polish or sanding to the finish. The CNC export card writes each slab or sheet for your machine (the same machines and tool library as the Cabinet Designer). The drawing set has the plan, a sheet per slab, the shop steps, the schedules and order list, and the fabrication notes.
Existing cabinets and templates (1.45). The switch above the plan has three modes: Tops, Existing cabinets and Templates. In Existing cabinets, draw the walls (Wall: tap the corners or type each length) and the boxes that are there: Base cabinets, Sink base, Dishwasher, Range gap, Filler, End panel and Vanity, each tapped against a wall or added beside the last one, its width typed to the inch; or tap Start from a layout (single wall, galley, L, U with island, vanity). The tops come out of them: your front overhang and the overhang at open ends, a splash on every wall edge, seams kept off the sink and the dishwasher, and the sink, faucet holes and cooktop where the old ones were. Type each run's two diagonals (back corner to the opposite front corner): if they differ, the run is out of square and the check says by how much, before you cut. In Templates, Load DXF reads a file from a digitizer (Proliner, LT-55 and similar) or from CAD: every corner and curve is kept, several tops a file, sinks and holes inside them. Its layer names say what each line is; check them once for your digitizer and tap These layers are right. Or Load photo of a luan or stick template: shoot it straight on, Set scale from one length you know, Check a length, then Trace top (corners, and Curve for a curved edge). Every top made these ways is an ordinary top in Tops: edges, seams, nesting, CNC files and the drawing set.
Construction details. The Countertop details sheet (tick it in the drawing set) draws what the tops need: the overhang on hidden brackets with their count and spacing, the seam, the undermount sink attachment, and the waterfall miter or mitered apron. Tap a top, a seam or a cutout to see its detail. They are typical details, not engineered ones: not to scale, and every detail says to verify it with your building department and the maker's installation instructions.
Commercial countertops (1.50). Project > Project type: Commercial adds item numbers, finish codes (Q-01, SS-01), the true thickness and VERIFY notes to each top, grommets, rectangular and fixture cutouts, and the Submittal set (Drawing set > Sheets for): a cover sheet with the sheet index, the countertop plan and schedules, each top's plan with its edge callouts, the details, the slab layout sheets for the designer's approval, the product data and samples log, and the RFI list, with VERIFY (RFI-nn) on a dimension and clouds you tag right on the sheet. Slab products prices several materials in one job, each finish code on its own slabs and price, book-matched pieces mirrored on consecutive slabs. Solid surface gets wall cladding and shower panels, integral bowls and sinks, coved splashes, thermoformed fronts and build-up edges; the equipment gets drop-in wells and understone frost tops; stone gets mitered build-ups (profiles B, C, D), cladding, flip-up tops and ADA counters. Each is checked and priced, and Commercial costs adds templating trips, freight to Alaska, crating, mobilization, protection and a slab-yard visit as job extras. In BidRidge, at Fabricator's installed price (sub) those costs count as inside their price; pick + freight, trips & site costs on top to add them. Not an engineered design: confirm supports and attachments.
Shop sheets, fixtures and splash guards (1.51.3). In a Commercial project, Submittal format > Shop sheets (11x17) gives a cover (finishes, fixture schedule, sheet index), the typical details, an RFI sheet when there are RFIs, then one sheet per top with the walls it butts against, its cutouts, edges and one section; the plans in both formats draw the walls. The Fixtures & splash guards card keeps the project's fixture schedule (tag, sink or bowl type, size, faucet holes). Give a sink cutout its Fixture tag and it takes that size and those holes; HOLD marks a fixture pending an RFI: it is drawn clouded, left out of the cut list and CNC files, and priced at the type's default. A cutout's Splash guard adds a guard beside the sink, priced by you or listed as by others. Sent to BidRidge (1.52), the guards are priced on the Countertops line Splash guards beside sinks (at the fabricator's price, the fabricator's splash guard line) at a starting price each: set yours in the rate book (the designer's notes give this design's price each). Guards by others, glass among them, are listed, not priced. A design sent before 1.52 gets a check: send it again, and take out any guard cost you added by hand.
Aprons and accessible vanities (1.57). A mitered apron strip is now cut next to its top on the same slab, so the vein turns the corner; Rules > Apron strips from the offcuts keeps them apart, and a top too big for one slab with its strips says so in a check. An accessible vanity top from the Cabinet Designer arrives at 34 in. with its apron cut to 7 in. (27 in. of knee clearance at the front). In a Submittal set, labels and dimensions are kept clear of the linework.
Top presets (1.53). In Tops, Add a preset opens the picker: ADA vanity tops (one bowl, 36 x 22 in., or two bowls, 72 x 22 in., at a 34 in. rim with knee space and undermount bowls), Transaction tops (a 42 in. transaction top over a work counter with a cord grommet and an accessible section at 36 in.), Window sills (sized from the opening, the casing and the ears, with returned ends and notches at the jambs), Bench tops (a built-in bench or window seat, a laundry or mudroom top, a shower bench seat) and My presets. The top goes on a clear spot right of what is drawn and its size card opens in the Selected card: length, depth, height, ADA, material, edge profile, splash and ends. It is an ordinary top after that: edges, cutouts and splashes stay editable, and seams, nesting, the drawing and Submittal sets, CNC files and the BidRidge template take it like any other. Save as preset keeps your own; Export (.json) and Import move them between devices. The layouts under Existing cabinets stay as they were.
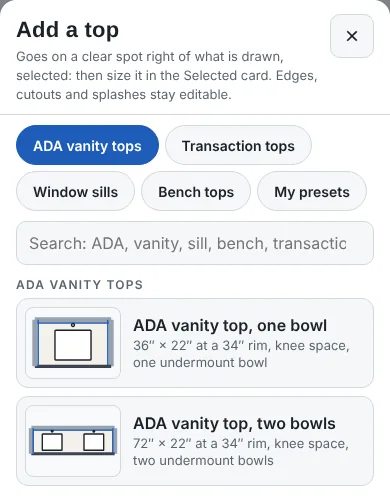
Plan background (1.62). In Tops and Existing cabinets, the Plan background panel puts the architect's plan (a PDF page or a picture) under the countertop plan: Import PDF or image, Set scale and Check. The tools snap to its lines. Trace room in Tops makes a top run from the outline you click (between the wall line and a counter's front line, or inside an island); in Existing cabinets it makes the room's walls, and the cabinets you put against them give the tops as usual. A template photo still goes under Templates. Saved with the design, never printed, works with no signal.
Finish Carpentry Designer
For Finish carpentry jobs (the Cabinet Designer does the cabinets on the same job). Three modes on one switch: Rooms, Walls and Stairs. In Rooms, draw each room (tap the corners or drag a rectangle) or type its size, then tap a wall with Door, Exterior door, Closet, Cased opening, Window, Cabinets, Outlet or Switch. Give each room a trim package: base and shoe, casing and its head (mitered, butted, plinth blocks, backband, or a header with a cap), window trim, chair rail, crown and its spring angle, picture rail and a wall treatment. Change any of it for one room (it says changed; Back to the package undoes it) or one wall, without changing the package. Sixteen packages are built in (Builder basic, Craftsman, Colonial, Farmhouse, Shaker, Modern minimal, Traditional with crown, Victorian, Mission, Coastal, Commercial and more); Save these settings keeps your own.
Walls. Each wall's elevation, with its openings, outlets and switches. Pick a treatment: board and batten (12, 16 or 24 in.), raised or flat panel wainscot, 2-panel and 3-panel walls, picture-frame boxes, beadboard, shiplap, grids and accent walls. Battens are spaced evenly between the doors and kept off outlets and switches; panels are equal on each wall with the outlets inside a panel; anything left on a box is flagged.
Stairs. A straight run or an L or U with a landing, open or closed sides, the total rise (it picks the risers) and the tread. It checks the riser and tread against code defaults (7 3/4 in. and 10 in., verify locally) and lays out the trim that follows the stair: the skirt board with its notch layout for every tread and riser, base on the floors and landing, chair rail and panels on the rake, crown on a raked ceiling, and a rail with balusters on open sides. Every joint (level to rake, rake to level, and the corners where the rake meets a level wall) gets a detail with the miter and bevel for each piece, crown laid flat or nested, which face is up and the long point. Verify each with a test cut.
The cut list counts the copes and miters and nests every piece into the stock lengths you buy (8, 10, 12, 14 and 16 ft unless you change them in Rules); the buy list, the drawing set (trim plan, wall elevations, stair sheets and joint details, schedules, cut list) and the template sent to BidRidge all come from the same layout.
Commercial: doors, frames and hardware (1.59). On a Commercial project, put each door on its wall or paste the architect's door schedule and map its columns. Every opening gets its number, type (single, pair, Dutch, sliding, pocket, borrowed lite), size, frame (knock-down or welded hollow metal, wood, aluminum), fire rating, lite, louver and hardware set, built from a library of common sets. Turn on ADA 2010, ICC A117.1-2009 or -2017 and each door is checked: clear width, maneuvering clearances by approach, hardware height, thresholds, closer speed and opening force, each flag with its section. The install hours per opening (frames, hanging, each hardware item, rated and electrified openings) go to the Finish carpentry quote. Sheets for > Submittal set draws the door plan, the door and hardware schedules, the door and frame types and typical details. The door and hardware schedules and the Submittal set come with BidRidge Commercial. Step by step: chapter 31 of the designer guide.
Commercial: interior finishes (1.60). On a Commercial project the Finish legend holds the architect's codes (base, casing, chair or crash rail, crown, stools with their species, finish and AWI grade; architectural wood panels, slat walls, FRP and high-impact panels; crash rails and corner guards; slat ceilings) and the Room finish schedule gives each room its codes: Add the drawn rooms, type a room, or Import a finish schedule pasted from the architect's table. Panels are laid out on the elevations with their sheet joints, sequence numbers and trims; Handrails, guards and wraps checks each rail against ADA 2010 505 and your guard settings and adds column wraps, storefront stools and station trim. The checks compare each code's flame-spread class with the class the room needs (IBC Table 803.13) and the wood trim on each wall with the 10 percent limit, and the backing plan lists the blocking for the GC. One Interior finishes row goes to the Finish carpentry quote, and the finish plan, schedule, elevations, backing plan and details go in the Submittal set after the door sheets.
Plan background (1.62). In Rooms, the Plan background panel puts the floor plan (a PDF page or a picture) under the trim plan: Import PDF or image, Set scale and Check. The tools snap to its lines. Trace room makes a room of the outline you click (its walls carry the base, casing and crown). Pick two jambs (under Openings): tap both sides of an opening on the plan and a door, closet, cased opening, exterior door or window of that width goes on the wall there (a scheduled door on a Commercial project). Saved with the design, never printed, works with no signal.
Rough Carpentry Designer
For Rough carpentry jobs, and Insulation jobs on a new building or addition. It frames a shed, a garage, an addition, an ADU or an outbuilding: a framing and estimating tool, not house design and not engineering. Four steps on one switch: Building, Floor, Walls and Roof. In Building, draw each building as a rectangle (drag, or tap and type its size) or tap Add a building for a ready-made one: sheds (8x10, 10x12, a 10x16 lean-to, a 12x16 barn style), 1- and 2-car garages (with one or two doors, or a loft), 12x16 and 16x24 room additions, a bump-out, a sunroom, a 20x24 ADU or cabin, a 24x32 workshop with clear-span trusses and a covered porch roof. L and T shapes are rectangles side by side: the wall they share is framed once. Draw the house an addition ties into and mark it existing: its wall isn't framed and the new roof ties into it. Each building has its use, stories, wall height, floor (slab, joists on beams and piers, or joists on a foundation wall), roof (gable, hip or shed, the pitch and overhangs), rafters or trusses, and the stud size and spacing.
Floor. Joists sized from the span table for the spacing, the beams and piers under them (the piers go to the Concrete Designer), rim, blocking and the subfloor sheets nested on the floor. Walls. Tap a wall with Window, Door or Garage door to put the openings on it; Wall draws an interior wall. Every wall is framed stud by stud: plates, studs at 16 or 24 in., corners and T's (3-stud or California), king and jack studs, the header from the header table, cripples, sills and fire blocking, and each wall has its framing elevation. Roof. Rafters from the rafter table by default, with the ridge, hips and valleys, ceiling joists or rafter ties, and a cut sheet: the plumb angle, the birdsmouth seat and heel, the height above the plate and each rafter's length. Or trusses: the count, the spacing and the loads to give the truss maker; add the truss maker's drawings (PDF or photos) and they go to the job with the design and print at the back of the drawing set.
Code tables. In the Code tables panel pick the code edition (IRC 2018, 2021 or 2024), local amendments (Anchorage, Mat-Su or your own tables), the climate zone, the ground snow load and the lumber species; set your usual ones in Settings → Code tables and every new design starts from them. The same setting fills the Insulation trade's code R-values. A span past the table, a point load or a wall over 10 ft is flagged for an engineer, never sized. The numbers are defaults to verify with your building department.
Wall and roof sheathing is laid out on each plane with the openings cut out and the offcuts used again; the lumber is nested into the stock lengths you buy (8 to 20 ft, in Rules); hangers, ties, straps and anchor bolts are counted. The drawing set (floor, wall and roof framing plans, wall elevations, the rafter details, sheathing layouts, schedules, the buy list and the cut list), the CSVs and the template sent to BidRidge all come from the same layout. Roofing & Siding file (in Save & export) writes a file the Roofing & Siding Designer opens (the same walls, openings and roof), and Open project takes one of its files, so a framed building can be roofed and sided without drawing it again.
Two scopes. From a Rough carpentry job the design sends the framing and, for living space and shops, the insulation: the first send makes a multi-scope project with an Insulation scope (or updates the project's Insulation scope), the way the Roofing & Siding Designer's roof and siding do. From an Insulation job it sends the insulation only. Garages are sent without insulation unless you tick Insulate garages too (Rules → Insulation sent to BidRidge). When the design sends the Insulation scope, the baffles and air sealing are priced there, not on the Rough carpentry rows.
Construction details. The Fastening & anchoring details sheet draws the sill or bottom plate with its anchor bolts (size, spacing, within 12 in. of the plate ends, washers), hold-downs where you count them, each header size with its king and jack studs and cripples, the top plate splice and lap, corners and T's, rafters at the plate with the birdsmouth and ties, the ridge, truss bearing and bracing, joist hangers and beam bearing, and the sheathing nailing. The plans are tagged where each applies, and the editors (and each opening's header) open them. They are typical details, not engineered ones: not to scale, and every detail says to verify it with your building department and the maker's installation instructions.
Steel partitions moved (1.72). Steel stud partitions now have their own designer, the Metal Stud & Drywall Designer. A Rough Carpentry design that already has steel partitions still opens them, with a button that moves them to the new designer (the wood stays behind). The three paragraphs below describe the steel features, which work the same way there.
Commercial: steel stud partitions (1.61). Set Project type to Commercial and the Steel partitions mode appears. Partition types takes each type from the drawings' partition schedule (stud size and spacing, board layers each side, insulation, rating, STC, to the deck or above the ceiling, the deflection head and the UL or GA design number, or pick a listed design), or paste the schedule. Draw the partitions with Partition, then add doors and other openings, soffits and backing; each partition is framed stud by stud with its elevation. The checks flag studs over the allowable height (the SFIA limiting-height tables, or your supplier's value), a deck without a deflection head, a rated wall at the deck without a head-of-wall joint system, a rated wall that stops at a ceiling and a type that falls short of a listed design (the IBC 721 items, UL U419, U465, U412, U435, U451 and the shaft walls U415, U417, U438, U467, U469 are built in, with the head-of-wall systems HW-D-0032, -0269, -0418 and -0908; other UL and GA numbers are checked against the limits you type). Sent to a quote, the steel framing goes to Rough carpentry (the Steel framing (commercial) lines), the board to Drywall and the batts and head-of-wall joints to Insulation. The steel sheets and the Submittal set come with BidRidge Commercial. Step by step: chapter 41 of the designer guide.
Exterior walls and typical floors (1.63). A partition type set to Exterior wall is a wind-load stud wall: structural studs, the wind pressure from the drawings (strength level, taken at 0.6 for the table, or service level), the cladding (it sets the deflection limit: brick L/600, stucco L/360, EIFS and panels L/240), infill with a deflection head or bypass with a slide clip at each stud and floor, and exterior sheathing (to the Rough carpentry lines). Its allowable height comes from the SFIA curtain-wall table, or your supplier's when you type it. Typical floors in the steel settings frames the plan again on other levels at their own heights; every quantity counts each floor and the drawings show the plan once.
Steel partitions: rooms, buy and cut lists (1.62). Room names the space you tap inside (its outline follows the partitions; the box around them stands for the building walls); Find rooms names every closed space at once, a long narrow one as a corridor. The rooms are tagged on the plan and the sheets and listed in a room schedule. Sent to BidRidge, Rough carpentry gets one row per room with its share of the steel, Drywall rows name the rooms each partition type is in, and the files sent carry the steel buy list (studs and track by size, gauge and stock length, board by type and size, screws, fasteners, accessories) and the cut list. A design without rooms sends as before.
Plan background (1.62). The Plan background panel puts a PDF page or a picture of the floor plan under your drawing, the way it works in the Ceiling Designer: Import PDF or image, Set scale on a dimension you know and Check it on a second. The drawing tools snap to its lines. What Trace makes depends on the mode: in Building, Trace room inside a building on the drawing makes a building of it (grown by the stud depth to the outside of the framing; an L-shaped outline becomes rectangles); in Walls, Trace walls adds the interior walls (2x6 when the drawn wall is over 5 1/4 in. thick) and leaves out the ones on the exterior walls; in Steel partitions, Trace walls adds partitions in the type that matches each wall's drawn thickness and Trace room puts partitions around a room. Trace walls shows what it found first: Use or Cancel. The background is saved with the design and never printed.
Metal Stud & Drywall Designer
For commercial interiors (1.72). Start here offers a sample office floor, a sample medical clinic or a blank floor. Enter the partition types from the drawings' schedule (or paste the schedule), draw the partitions in each type, then add the openings, soffits, shaft walls and backing; each partition is framed stud by stud with its elevation. Everything the Rough Carpentry Designer's steel mode did is here: the limiting-height and deflection checks, rated walls and head-of-wall joints, Find rooms, typical floors, the steel buy and cut lists, the drawing set and the Submittal set. Sent to BidRidge it prices across Rough carpentry (the steel framing), Drywall (board by type and layer, soffit faces) and Insulation. Step by step: chapter 41 of the designer guide.
Soffits of any shape. Soffit drags a rectangle; Soffit, any shape taps the corners, for an L, an angled or a curved soffit. In its panel each edge can be curved (its rise at the middle) and Add a step inside draws a tray 12 in. higher. Where two soffits meet, the face is the step between their bottoms; a soffit inside another takes its area out of the outer one. The takeoff counts the plan area, the hangers, the bottom framing, the faces to wrap and the curved faces on their own line (they need bent track and flexible board).
Exterior steel walls. A type set to Exterior wall is a wind-load stud wall (the pressure from the structural drawings, the deflection limit by the cladding, infill or bypass at the slabs) and takes the water-resistive barrier (sheet or fluid-applied) and continuous insulation (thickness and board) over the sheathing. The barrier and insulation are counted on the wall face less the openings, the cavity batts and the continuous insulation go to Insulation as their own rows, and a wall with no barrier is flagged (IBC 1403.2).
Division 10 Designer
For Commercial (and Education) licenses; a Residential license sees a short note. Draw the restroom's walls, place the water closets, urinals, lavatories and floor drains, then lay a row of toilet compartments along a wall: standard, wheelchair accessible, ambulatory and urinal screens, each with its door (width, swing, hinge side), heights, mounting (overhead-braced, floor-anchored, ceiling-hung, wall-hung or floor-to-ceiling) and material. Showers (transfer, standard and roll-in) and dressing compartments go in too. Accessories go on the walls: grab bars, toilet paper, seat cover, napkin disposal, towel and soap units, hand dryer, mirror, baby changing station, hooks and shelves. Under Codes, turn on the codes the job is built to: the 2010 ADA Standards, ICC A117.1-2009 and ICC A117.1-2017 (with New building or Existing building); each flag names the code and section it fails. The checks are flags, not a certification.
The drawing set has the dimensioned plan, partition and mounting elevations, the blocking plan and list for the GC, details and the schedules; Sheets for > Submittal set makes the architect's review set. Sent to a quote, it comes in as the Division 10 / Specialties trade, priced at the job's wage basis. Step by step: chapter 30 of the designer guide.
Plan background (1.62). The Plan background panel puts the architect's restroom plan (a PDF page or a picture) under your drawing: Import PDF or image, Set scale and Check. Trace room makes the restroom from the outline you click. Every tool that puts something on a wall snaps to the drawing, so a grab bar, dispenser or mirror tapped on the architect's mark lands at that spot along the wall. While the plan shows, the room is see-through on screen. Saved with the design, never printed, works with no signal.
Glazing Designer
For Commercial (and Education) licenses; a Residential license sees a short note. Draw each elevation (its length, height and floor lines), then the rough openings on it in a system: storefront, entrances, curtain wall, window wall, punched or Type V windows, fire-rated framing, skylights or interior storefront. Grid each opening into bays and rows, put a door (or a pair) in a bay with its stile and hardware set, and tap a lite to make it vision, spandrel, shadow box, a vent or a panel, or to pick its glass. Walls and openings can also come over from a Roofing & Siding Designer commercial project file.
The checks run as you draw: safety glazing in the hazardous locations (glazed tempered and marked T), the wind zones and each mullion's deflection at the design pressures you enter, the doors, the energy values for the climate zone and fire-rated glazing. The drawing set has the elevations, sections, the glass order list, the door and hardware schedule and the cut list; Sheets for > Submittal set makes the architect's review set. Sent to a quote, it comes in as the Glazing (Division 08) trade, per sf of system or itemized, priced at the job's wage basis. Step by step: chapter 37 of the designer guide.
Plan background (1.62). The Plan background panel puts the architect's elevation sheet under your elevations. Set the scale on a dimension you know (and check it on a second). Trace room inside a storefront or window on the sheet (any lite of it) adds that opening to the elevation under it, in the system you picked, with its mullions and horizontals where the sheet draws them; inside a wall's face it makes the whole elevation with all its openings and lines the sheet up with the base line. Check each opening's system, doors and lite types after. The drawing tools snap to the sheet's lines; it is saved with the design and never printed.
Masonry Designer
For every license; its Commercial mode needs a Commercial (or Education) license, and a Residential license sees a short note when it picks Commercial. Draw each wall as an elevation (its length and height, in the wall system picked: brick veneer, CMU, a cavity wall, stone, thin brick or glass block), then the openings, piers and bands on it; Joint adds or removes a movement joint. Walls and openings can also come over from a Roofing & Siding Designer commercial project file or a Glazing Designer project file.
The checks run as you draw: veneer ties and air space, veneer height, flashing and weeps at every base, head, sill and shelf angle, the movement joint spacing, lintel bearing, the coursing of the heads and sills, and cold and hot weather. The drawing set has the coursed elevations, the plan, the reinforcing elevations, typical details and the unit, lintel and accessory schedules; Commercial adds Sheets for > Submittal set. Sent to a quote, it comes in as the Masonry trade, per sf of wall or itemized, priced at the job's wage basis; the trade's quick rows also price brick veneer or a CMU wall by the sf without the designer. Step by step: chapter 39 of the designer guide.
Plan background (1.62). The Plan background panel has a switch: Elevations puts the architect's elevation sheet under your walls; Floor plan shows a floor plan on its own. Set the scale on a dimension you know. On an elevation, Trace room inside a wall's face makes the wall with every opening drawn in it (a door or storefront when it sits on the base, a window otherwise) and lines the sheet up with the base line; inside an opening of a wall you already have, it adds that opening. On a floor plan, Trace walls makes a wall of each straight run of the building's outline (measured on the outside face), in the wall system you picked. Check the opening types, heights and coursing after. The drawing tools snap to the sheet's lines; it is saved with the design and never printed.
Residential work (1.63). The Residential work card prices work with no drawing: chimneys (new, rebuilt above the roof, or crown, cap and flashing, with a cricket over 30 in. wide), fireplaces (new, relined, or a new face, with the hearth extension sized), steps and stoops, garden and seat walls, retaining walls (segmental block or reinforced CMU), outdoor kitchens, columns and mailboxes, and repairs: repointing, brick replacement, cleaning and sealing, parging and crack repair. Type the sizes; each prices its own units, mortar, accessories and hours and flags the IRC items it checks (chimney height above the roof, firebox depth, riser and tread, landings, retaining walls over 48 in.). Products & prices shows production as brick and block a mason lays in a day with the tenders you set. Open the Sample Repair Job to see it.
Parapet rebuilds (1.71). Under the Residential work, Parapet rebuild takes the parapet's length, how high it is and how far down to take it, the wall (brick or CMU), how much brick is salvaged and the coping (cast stone, stone, metal or none), with flashing and a joint reinforcing option. It counts the tear-down and haul, new and salvaged brick, block, mortar, through-wall flashing, the coping and the staging, and flags a parapet taller than three times its thickness for the engineer to verify.
Drawings from the sizes (1.72). Each residential work item now draws itself from the numbers you type: a chimney's side elevation with the roof pitch, crown, cap and flashing and its plan with the flues and cricket; a fireplace; steps in section and plan; garden, seat and retaining walls; outdoor kitchens; columns; and the repairs (the repointing joint, the brick replaced, the parging, the stitched crack, the parapet). With no walls drawn, the plan shows a board of these drawings; tap one to open its item. Residential work drawings in the drawing set (on by default) puts them on the sheets at a scale that fits.
Low-Slope Roofing Designer
For Commercial (and Education) licenses; a Residential license sees a short note (residential flat roofs stay in the Roofing & Siding Designer). Draw each roof area (tap the corners or drag a rectangle) at its deck height and set its edges: parapets with their height, walls of a taller roof, gravel stops, drip edges, gutters. Place the drains, scuppers, curbs, penetrations, expansion joints and walkways. Pick the roof system (TPO, PVC, EPDM, modified bitumen, built-up or a coating), the insulation assembly and the slope; flat-roofed sections can also come over from a Roofing & Siding Designer commercial project file.
The tapered insulation is laid out to the drains as you draw: panel rows marked A, B, C... with their fill, saddles between drains and crickets on the upslope side of curbs. The checks cover the minimum slope for the membrane, drainage and overflow at your rainfall rate, a tested edge system, the R-value and the drains, recover limits and the wind pressures you enter. The drawing set has the roof plan, the tapered plan, the attachment zone plan, the details and the schedules; Sheets for > Submittal set makes the architect's review set. Sent to a quote, it comes in as a commercial Roofing job on the trade's Low-slope (commercial) lines, priced from your Roofing rate book at the job's wage basis. Step by step: chapter 40 of the designer guide.
Production per crew-day (1.63). The price book shows each line's hours as what the crew does in a day (squares, feet or pieces) for the crew size you set at its top; type either one.
Plan background (1.62). The Plan background panel puts the architect's roof plan (a PDF page) or a picture of a roof survey under the roof plan: Import PDF or image, Set scale from a dimension you know and Check it. The tools snap to its lines; a drain tapped on the drawing's drain stays on its center. Trace room makes a roof area (or a curb, as Trace room makes says) from the outline you click. Trace walls reads the parapets: a closed parapet makes the roof area inside it, and roof area edges along a traced wall become parapets. Saved with the design, never printed on the sheets, works with no signal.
The warranty fee (1.62). With no rate in your book and none priced in the designer, the manufacturer's warranty line shows as a flagged line to fill in (in the estimate and the review list), never a silent $0. A low-slope template sent to a Residential license gets the Commercial note, as Glazing and Division 10 do.
Coatings, spray foam and roof surveys (1.71). A roof system can be a fluid-applied coating over the existing roof (silicone, acrylic or urethane, each with its solids): type the dry film and the coats and the gallons are worked out from the solids, with the primer, the power wash, fabric at the seams and flashings, repairs and granules; or sprayed polyurethane foam with its thickness (taper too) and a coating on top, the foam's R-value counting toward the insulation. Core cut and Wet area record an existing-roof survey on the plan (wet areas hatched, cores circled), with the survey and coating schedules; a recover or a coating is checked against the survey (IBC 1512.2.1.1), and wet areas come out and are replaced on their own line.
Construction details
Seven designers draw typical construction details from the job's own numbers: the Roofing & Siding, Deck & Fence, Rough Carpentry, Concrete, Hardscape & Landscape, Countertop and Ceiling Designers. Tap the item a detail belongs to (a flashing schedule row, a ledger, a header, a joint, a top) or a Detail button to see it, and tick its details sheet in the drawing set. Window & door jobs get their sill pan and head flashing details in the Job Pack. They are typical details, not engineered ones: not to scale, and every one says to verify with your building department and the manufacturer's installation instructions.
Drawing tools and open checks
Drawing tools (Deck & Fence and Hardscape & Landscape). While you draw, type a length (like 12'6) and press Enter; press Tab or type @ to set the angle (on a phone, use the Length and Angle boxes). Hold Shift to keep lines at 0°, 45° or 90°. Points snap to corners, edges and midpoints (Snap in the toolbar turns it off; hold Alt to draw freely); Grid under the plan sets the grid step. A drawn shape's width, length and rotation can be typed in its panel. Drag on an empty spot to select several things, or Shift-tap; move, duplicate (Ctrl+D) or delete them together, and nudge with the arrow keys (Shift for bigger steps). Measure checks a distance; Dimension and Leader add notes that print on the drawing set and never change the quantities. Pinch to zoom and pan with two fingers on a phone; on a computer, scroll to zoom and hold Space and drag to pan. Tap ? for every shortcut.
Open checks. In every designer, a layout that still has failing checks says so when you save or send it, and sheet 1 of the drawing set gets a red OPEN CHECKS box. The checks follow the IRC and NKBA guidelines as written; they are a help, not a code review, so verify with your building department.
Getting a design into BidRidge
- Send it. Opened with Design it in the app? Tap Update the job in BidRidge (or Open in BidRidge): the designer closes and the job shows what changes. On the website, tap the account button at the top (it shows your company name once you're signed in). The first time, tap Turn on saving and enter your company's sync passphrase (the one from BidRidge's Sync screen). Then tap Send to BidRidge app: it arrives as a template on every device with sync on, and BidRidge says "Arrived from the designer". No sync? Tap Save BidRidge template and, in BidRidge, Import template file on the Templates screen. Using BidRidge in the same browser at bid-ridge.com/app/? Open in BidRidge puts the template straight in.
- Price it. On the Templates screen (from Fast quote), tap Use on the template. The customer and address from the design are filled in; check the answers and tap Save. You get a normal estimate (or a multi-scope project) with the design's quantities.
- Files come along. The drawing set, cut list and buy list are attached to the job's Job Pack (see Designer files). The extra cut, miter and curve labor the layout creates is priced for you.
Changing a design: update the job
A design you open with Design it remembers the job it came from: the designer's BidRidge card says Linked to the BidRidge job with the job's name. When you change the design and send it again, Send as is set to Update the job (pick New quote for a separate estimate instead). If the designer is already showing a design for another job, it asks whether to use that design for this job, start a new design, or leave it as it is.
- Review before it changes. Inside the app the review opens as soon as the designer closes; from the website, open the job and tap Review the update. BidRidge shows the old and new total, the items added, removed or changed, and the answers and selections the design changes, before you apply it.
- Your work stays. Only what the designer made is replaced. The customer, other scopes, items you typed, answers and selection details you changed, your price overrides, discount, your own lines and your part of the job note are kept, and the review says what was kept.
- Sold jobs. A sold or signed job isn't changed: the update becomes a draft change order for the difference.
- Two designers on one job. A Finish carpentry job can have the Finish Carpentry Designer's trim and the Cabinet Designer's cabinets. An update from one never changes or removes the other's rooms, and never counts them as items typed here. Answers both designers send (ceiling height, new doors, removing the old trim, paint or stain grade) keep your own answer; otherwise the last design sent wins, and the review says so.
- Older jobs and designs. Jobs made from a design before 1.28 update the same way; if BidRidge can't tell which items came from the designer, it asks whether to keep or remove them. A design with no link (or sent as New quote) makes a new template, as before.
Saved designs. With saving turned on, tap Save to account in the designer's account box to keep the drawing itself. Saved designs are listed under Designs on the BidRidge home screen (see Library); tap one to open it in its designer, signed in, and carry on drawing.
What the designers fill in on the estimate
- Tile: boxes, thin-set, cuts and trim from the Tile Designer, plus Mosaic sheets to order and Deck mud for pans & mud beds (bags). Both show on the room (under More) and on the Job Pack shopping list; the deck mud's cost is in the Mud shower pan line.
- Decks & fencing: the designer's framing, board and footing quantities; face screws for pressure-treated boards; Stair stringer supports with their piers, concrete and posts; a handrail check for each flight (see Decks & fencing).
- Hardscape & landscape: the Edge restraint type of each patio or walk, Needs an engineered design? and Guard on top for walls, and step handrails (see Hardscape & landscape).
- Flooring: each room's floor type and size, Product to order (it replaces floor sf plus your waste % for that room's material), sheet seams and Heat-weld rod, Flash cove with its corners, cove stick and cap strip, Rubber / vinyl wall base by height with its corners, VCT floor finish, pattern layout and extra cuts. They show on the room under More → Specialty for this room and price on their own lines; the starting prices are placeholders to set in Settings → Flooring → Rate book. The Job Pack shopping list adds the adhesives, weld rod, cove stick, cap strip, base coils and preformed corners.
- Roofing: one card per roof section with every length filled in, plus Ice barrier (sf), Metal trim (LF) and Snow guards (LF) from the drawing, and the Purlins / furring strips extra when the roof has furring (wall furring turns on the siding's rainscreen).
- Siding: one wall card per wall section, with its siding type and Section area, Openings and their trim, corners, Rainscreen on this wall, rake and Transition trim where two sidings meet.
- EIFS: one wall card per EIFS section with its system, foam, finish and Section area, Impact mesh, Starter track, Opening perimeter, Corner mesh and Z-flashing at terminations, plus its reveals, bands, quoins, expansion joints and sealant joints.
- Concrete: one card per slab and per footing, wall, pier or step, with the exact area, Concrete (CY) (thickened edges included), base, forms, Control joints, isolation joints, Rebar from the bar list, vapor barrier, radiant PEX, anchor bolts and the Frost insulation skirt. Each prices on its own line.
- Finish carpentry (cabinets, when the countertops are priced in BidRidge): Countertop cutouts (sink or cooktop, at the fabricator's price), Countertop finished edge upgrade (LF; it starts at $0, so set your fabricator's upcharge for bevel, bullnose or ogee in Settings → Finish carpentry → Rate book) and Countertop overhang brackets / corbels.
- Finish carpentry (Finish Carpentry Designer): one row per room with the exact Baseboard, Shoe, Crown, Chair rail and Picture rail LF, the doors, closets and windows to case, Casing (LF), Backband and Craftsman headers, and the wall treatments (Panel wainscot / paneling, Board & batten with its Battens, Shiplap, Beadboard wainscot, Grid / geometric, picture-frame boxes, plinth blocks); one row per stair with the Stair skirt board, Stair trim on the rake, Raked panels, Stair rake transitions and corners, rail, balusters and newels. They show on the room under More → Casework, doors, stairs & extras.
- Rough carpentry (Rough Carpentry Designer): one row per building with the exact wall LF by stud size (Exterior wall 2x6, Exterior wall 2x4, interior walls), Headers, Blocking & backing, Fire blocking, floor framing and Subfloor, Floor beams, Ceiling joists, Rafters or Roof trusses, wall and roof sheathing net of the openings, Metal connectors, the Sill plate and anchor bolts. They show on the row under More → From the designer (clear one to go back to the estimate from the area). Insulation: the walls by stud size, the attic floor with its eave length for baffles, vaulted ceilings, floors over a crawlspace and the rim joists at the code R-values, the plates and rough openings to air seal, and the rated and sound walls. The truss maker's drawings list as Truss drawings in the Designer files.
- Ceilings: one card per ceiling area with its system, height, exact area and the designer's counts (grid mains and tees, tiles, hangers, carrying channel and furring, boards, panels, bracing groups and splay wires, lights and diffusers by kind), plus Soffits & bulkheads and Access panels from the drawing (see Ceilings).
- Countertops: one row per top: the runs with the exact area, finished edge and profile, splash, sinks, cooktops and holes, seams, waterfalls and miters, brackets, and the slab sf and slab count from the nesting; window sills and other tops with their sizes, cut from the same slabs' offcuts (see Countertops).
Rooms and schedule marks (1.62). The rows a designer sends name where the work is: tile surfaces carry their room number and name, the Finish Carpentry Designer's commercial finish lines come by room, steel partitions by room, Division 10 by room, glazing by elevation and masonry by wall. On the Division 10, Glazing and Masonry item rows that place is the Room, Elevation or Wall field: the proposal groups the lines by it and the Job Pack names it. The rows also name the schedule marks they cover (hardware sets, glazing openings and doors, masonry openings, Division 10 compartments and accessories, low-slope drains, scuppers and curbs), so the estimate can be checked against the drawing set. The protection lines (Drywall, Rough carpentry, Finish carpentry) count real rooms: a designer row for doors and hardware, finish material, soffits or one wall of cabinets is not a room.
9Multi-scope projects and scheduling
A project is one customer with several trades, for example drywall, painting and flooring after a remodel: one proposal, one schedule that follows your crews, and one job pack.
- Tap + Multi-scope project on the home screen, or + Add another scope on any estimate.
- Fill in the customer, phone, address and proposal date once; they apply to every scope and save as you type.
- Under Scopes, tap + (trade) for each trade. Room sizes are copied from the scopes you already have. The biggest scope carries overhead, base consumables and minimums, and the others are set as add-ons, so nothing is charged twice. Only the scope with the most demolition keeps its dumpster or haul-off (roofing, siding, hardscape and concrete always keep their own: their tear-off and spoils go in their own loads). If gutters are priced in both a roofing and a siding scope, or poured concrete in both hardscape and a concrete scope, the project page tells you so you can drop one. A Bathroom remodel scope already prices the bathroom's tile, drywall and paint: leave the bathroom out of any Tile, Drywall or Interior painting scope in the same project (the project page reminds you).
- Tap Open & price this scope → on each: it opens the scope's measuring step (Rooms, Measure, or Project & room for a bathroom). Fill in that and the other steps.
- Back on the project, use ↑ ↓ to reorder scopes or Remove from project to drop one, pick Good, Better or Best for each scope, and check the schedule. Documents (send or save the project proposal and the project job pack) sits near the top of the project page, under the customer, with links that jump to the proposal preview, the schedule and the project total.
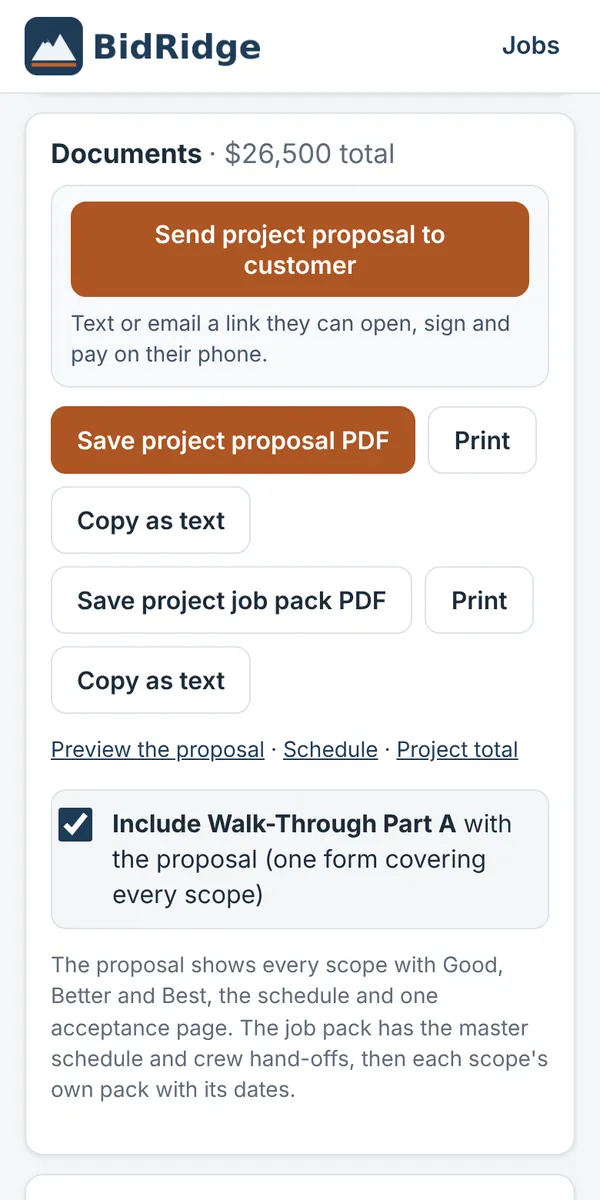
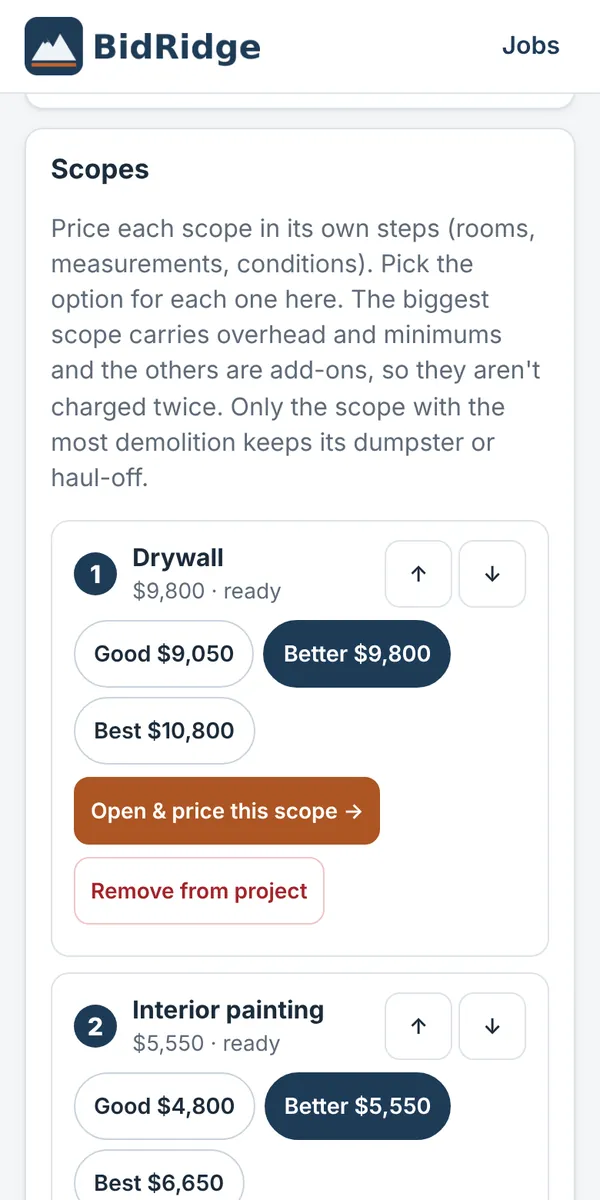
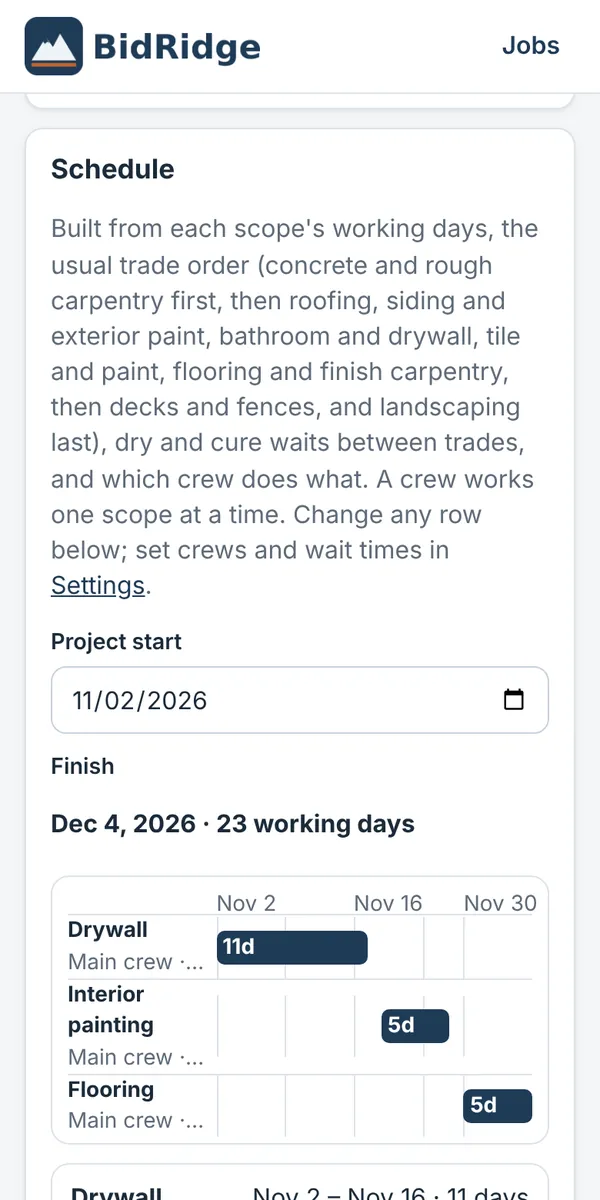
The schedule
BidRidge puts scopes in the usual order (concrete and rough carpentry first, then roofing, windows and doors, siding, EIFS and exterior painting, bathroom, insulation and drywall, ceilings, tile and paint, flooring, finish carpentry, countertops and epoxy floors, then decks and fences, and landscaping last), adds dry and cure time between trades, skips weekends and (if you choose) major holidays, and books one scope at a time per crew. Set the project start. For each scope you can change the crew, when it starts (after the previous scope, alongside it, or on a date you pick) and its working days. Warnings tell you when a scope starts before the one before it is dry, or a crew is double-booked. Reset to the automatic schedule undoes your changes.
Crew calendar (1.81). Field office → Crew calendar shows a week at a time: a row for each crew, with the sold jobs it is on (each job's start date and working days from its Job Pack; a multi-scope project by its own schedule). A crew booked on two jobs the same day is shown in red. Change a job's start date or crew right there. Text the week (or Copy the week) sends the crew lead their week; add the lead's phone in Settings → Crews & schedule. Jobs starting this week have Text a reminder for the customer and On my way, which texts them that you're on the way in 15 to 60 minutes. Sold jobs with no start date are listed at the bottom. On a weekend it opens on the coming week.
Bids, deadlines and your phone's calendar (1.82.19). Under the crews, a Bids & deadlines row shows each open bid's bid date, its pre-bid (red when it's mandatory), the deadline to register to bid, questions and answers due, its follow-ups, and unpaid invoices' due dates, listed again under the week. A bid has one set of dates: change the bid date or walk-through on the bid's card, or type a new Bid date on the sub quote, and the other places, the key dates and the calendar all follow; reading new bid documents (an addendum that moves the bid date) moves them too. A sold job's start date is the same one in the Job Pack, on the calendar and in a project's schedule. Add to my phone's calendar saves a calendar file with all of it from a week back to four months ahead: open it with your phone's calendar app (Google, Samsung, Apple or Outlook). Each event keeps its own id, so saving and opening it again later updates the events in most calendar apps instead of adding them twice.
Winter warning: if an outdoor scope (concrete, roofing, siding, EIFS, exterior painting, window & door replacement, decks and fences, or landscaping) lands in winter for the climate you picked in Location (November to March for a short season, December to February for four seasons), the schedule says how many of its days fall in winter. Plan cold-weather work or pin a spring start date. In a project, a quick-quote scope is called Additional tasks on the proposal and job pack.
Set up your crews and subs, the trades each one does, working days per week, the days until your next open start date, and the wait after each trade in Settings → Crews & schedule → Crews & scheduling.
Documents
The Documents panel has Send project proposal to customer, Save project proposal PDF (options by scope, the project schedule and one acceptance block where the customer picks an option for each scope) and Save project job pack PDF (master schedule, hand-offs between trades, crew plan and each scope's pack). Each scope is invoiced on its own, from that scope's Invoice step.
10After the sale
Job Pack
When the customer says yes, tap Mark sold on the Proposal step: pick the option they chose, the status (Sold), the start date, and whether the deposit is in (Yes records the deposit invoice as paid, with how they paid). A proposal signed online is marked Sold with the signed option for you. Then open the Job Pack step (the option sold and start date can be changed there too). Its top panel has Save PDF, Walk-Through Part A, the designer files and buttons that jump to each part: Summary, Schedule, Shopping and Checklist (each with how many are ticked, like "Shopping 0/11"), and Files, plus Specialty and Finishes (or Selections) when the job has them. You get the contract price, deposit and payment schedule, the day-by-day plan (weekends skipped), the planned finish and the date to promise the customer (with a weather buffer for exterior work), a shopping list with checkboxes (not on labor-only jobs), the finish schedule with order-by dates (see Finish schedules), and a crew checklist. Save PDF for the crew and the supply run. Walk-Through Part A can be saved or sent to sign from here.
New in 1.70. A design sent from a designer gets a shopping list made from the estimate's own material lines (the option sold, with waste and freight), so the crew buys what the price paid for; the designer's buy list stays in Files. Once the crew has clocked hours, the Schedule shows whether the job is on track, ahead or behind, and about how many working days are left at that pace. On a Commercial job, the designers' drawing sets go onto the submittal package's shop-drawing items by themselves.
New in 1.71. The Room Designer: lay out a kitchen or bathroom by dragging the fixtures and cabinets along the walls, with the clearances checked as you go, an elevation of every wall and one drawing sheet; it fills the Bathroom remodel estimate (or a kitchen's cabinet, tile, flooring and paint scopes), plumbing moves included. Reading plans: rooms with short names (a STAIR, MENS 218) are found, the title block and the gray shaded areas outside the scope are left out, a finish plan's hatched areas with their legend code (TILE1) come in as rows with their area, sheet titles come from each sheet's title block (combined PDFs without a sheet index), and the biggest sheets read faster. The Low-Slope Roofing Designer prices coatings and spray foam and records core cuts and wet areas; the Masonry Designer adds parapet rebuilds. In the Cabinet Designer's Plan view, tap a wall to edit it right on the drawing: drag the square handle at its end to make it longer or shorter, drag the round knob past its end to turn it at the corner (it snaps to every 15°), and drag the four-way handle to move an island or a facing run. The bar under the drawing has the same settings to type: the wall's length, the corner angle with 90°, 120°, 135° and 150° buttons, the plan's angle to the building grid, the angle of the wall at a free end, and an island's aisle. The handles take arrow keys too, and one Undo takes a whole drag back.
New in 1.72. The Metal Stud & Drywall Designer: steel stud partitions by type with soffits of any shape (angled, L-shaped, curved, stepped trays) and exterior steel walls with the barrier and continuous insulation; the steel partitions moved out of the Rough Carpentry Designer. In the Roofing & Siding Designer, sections of any shape: bays, towers, angled wings and curved walls, roof and siding. In the Masonry Designer, drawings of the residential work, made from its sizes.
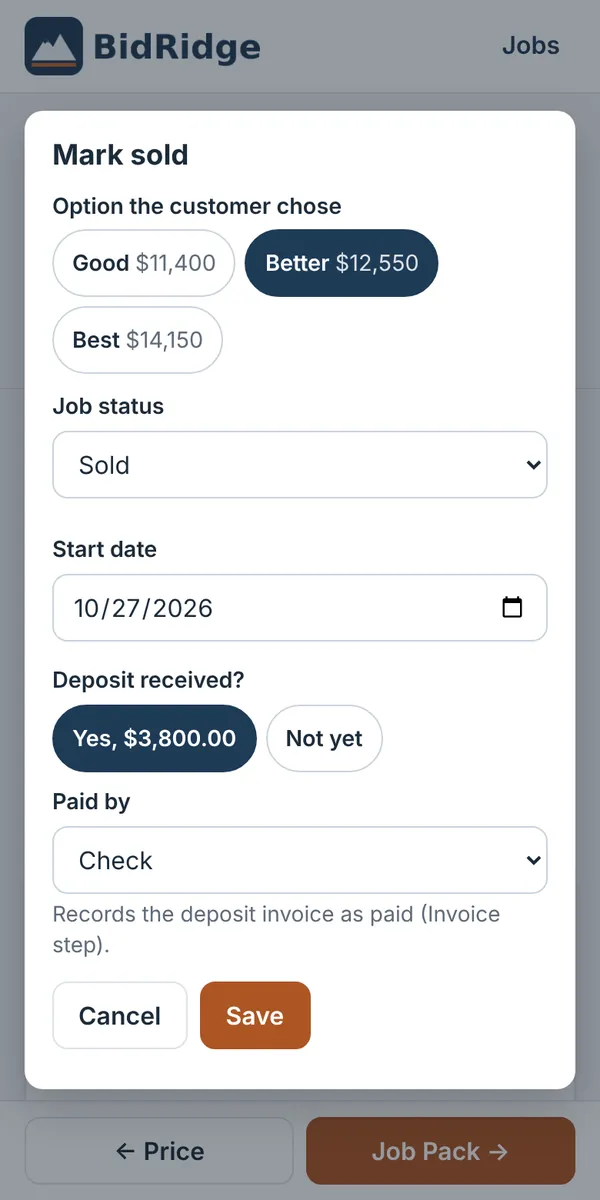
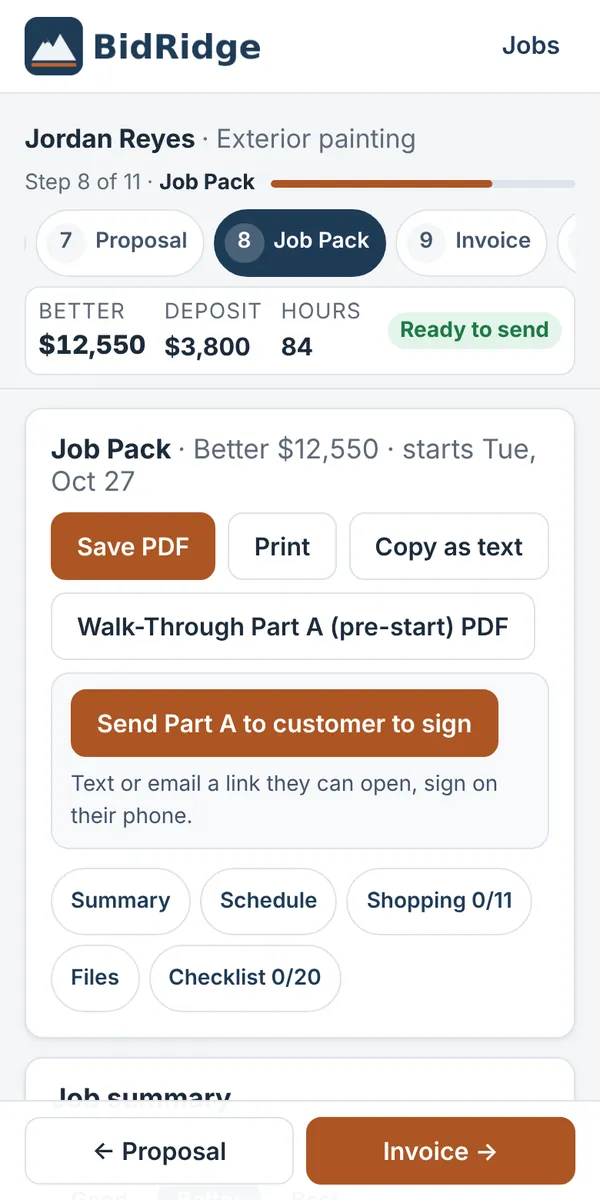
Designer files: drawings, cut lists and buy lists
A design sent from one of the designers brings its files with it: the drawing set (PDF, with the sheet settings you picked), the cut list and the buy list (CSV). The Templates screen shows "3 designer files" on that template. When you price it (Use, then save the fast quote), the files are attached to the job, or to the project when the design covers several scopes, and they're added again each time you use the template.
- Job Pack → Designer files lists each file. Open shows a drawing set in a new tab (on Android it opens through your PDF app), Show table shows a cut or buy list right on the screen, and Save downloads it. A project's files show on every scope's Job Pack and on the project page.
- Add a file attaches your own PDF, CSV or photo (up to 8 MB), such as a supplier quote or a site photo. Remove takes a file off the job.
- Save PDF on the Job Pack lists the files on a "Drawings & designer files" page and adds every page of the drawing set at the back, so the crew gets one PDF.
- With sync on, the files go to your other devices with the job. Files over 1 MB go through photo storage (app 1.37 or later; an older app keeps them on the device you added them on). Backup files include the files that are on the device.
Sending them to the customer. When you send a proposal, a project proposal or the selections / finish schedule, tick Include the drawing set in the Send dialog (it's ticked when the job has drawings; pick which files go). To send the drawings on their own, tap Send drawings to customer in the Designer files section. The customer's page shows a Drawings section where they can view each PDF in their browser and download it; signing and paying work as before. Each file can be up to about 1.4 MB and a link up to about 4.5 MB in all; cut and buy lists aren't ticked by default since they're for your crew. Cancelling the link deletes the files from the server too.
Job photos
Every job has a Photos section on the Customer, Proposal, Job Pack, Change orders and Close out steps. Use it for the walk-through, damage you find, progress and the finished work.
- Take photos opens the camera (on Android the photo also goes into a BidRidge album in your gallery). Add from gallery picks photos you already took. Each one is made smaller on your device (about 250 KB) so the app stays fast.
- Give each photo a caption and a room or scope, and pick Before, During or After. Photos you add on the Customer and Proposal steps start as Before, on the Job Pack and Change orders as During, at Close out as After.
- Where it goes: Job Pack only, On the proposal, or On change order N. Every photo is in the Job Pack PDF, two per row with captions, Before first. The proposal and change order PDFs show only the photos you picked for them.
- Download all (zip) saves every photo with a readable name and a captions.csv list.
- When you send a proposal or change order, its photos are ticked in the Send dialog and go with the link as encrypted files (up to 8 files, about 4.5 MB in all). Only the photos you tick go to the customer, and they disappear when the link expires. The customer sees them as a photo grid with your captions. The customer portal can show them too.
- With sync on, photos go to your other devices too (encrypted, through photo storage). The other devices show a small preview right away and download the full photo when you open it, print a PDF with it or send it. A photo that hasn't uploaded yet says Waiting to upload. Without sync, photos stay on the device that took them. Backups and Download all keep a copy.
Sub work orders
Selling the job and subbing out the work? On the Job Pack, tap New work order.
- Pick a sub, or + New sub to add one (name, trade, mobile, email, and when their insurance expires; it's flagged two weeks ahead). Subs are kept for every job.
- The work order starts with the estimate's labor for this job. Edit the lines and amounts, the start date and a note. PDF makes the work order.
- Send to the sub: they get a link with the scope, the job's drawings and the photos you tick. They accept at your price, or type their own price and a note, and sign. A counter-price comes back to you; Agree to it or talk it over.
- Each work order shows the agreed price against the estimated labor, payments you record, and a lien waiver received tick for each payment. Agreed prices fill in the job's actual sub cost for close-out.
- Work orders never show on the customer's portal.
Purchase orders
- On the Job Pack, POs from the shopping list makes one purchase order per kind of supplier (lumber yard, tile and stone, paint store, plumbing supply, electrical supply, flooring store, rental and disposal) from everything you haven't ticked as bought (designer buy lists feed that list). Customer selections on allowance (the vanity, faucet, tile the customer picks) are left off until they're chosen; add them with + Line. Items a sub installs, like shower glass, go on a work order instead. Tap it again later and it orders only what's not on a PO yet. Edit items, quantities and prices, the delivery date and address, and notes; on a phone each item gets its own line with quantity, unit and price under it.
- Pick a supplier or add one (name, email, phone, account number). PDF, Email draft (opens your email with the order written out), or Send a link the supplier confirms with a delivery note.
- Mark it Sent, Confirmed, Delivered or Short, and type what it really cost. Delivered POs fill in the job's actual materials for close-out.
- Supplier and product names you type are yours; BidRidge isn't tied to any supplier.
- Purchase orders never show on the customer's portal.
The sold price is kept (1.74)
When a job is marked Sold (or the customer signs online), BidRidge keeps the price of every option, the tax, the deposit and the payment schedule as they were that day. From then on the Invoice step, the milestones, the balance invoice, the job account and job cost use that price, even if you change your wages, material prices or markups later. The Price step shows a note: Sold at $X, kept since the date, and, if today's settings would price the job differently, what it would price at now. Use today's price instead moves the sold price to today's (it asks first; invoices already made keep their amounts). More work is a change order, not a new price. Moving the job back to Estimate or Sent lets go of the kept price; marking it sold again keeps the new one. Jobs sold before 1.74 are kept at the price they had when you first open 1.74.
Invoices
- Payment schedule: tap Create invoice on each payment (deposit, milestones, balance) when it's due.
- Other invoice: any amount with your own description.
- Change orders: only approved change orders count toward the job and can be invoiced; tap Invoice … change order(s).
- For each invoice: Send (text a link they can pay from), PDF, Copy. When they pay by check, cash or anything else, choose the method and tap Mark paid. Online payments mark themselves paid.
- Paid by mistake? Tap Undo next to "Paid". Only unpaid invoices can be deleted.
- Creating the first invoice marks the job Sold. The Job account panel shows contract, change orders, invoiced, paid and balance.
Invoice numbers, due days, payment instructions and the bottom note are in Settings → Company → Invoices & walk-through forms.
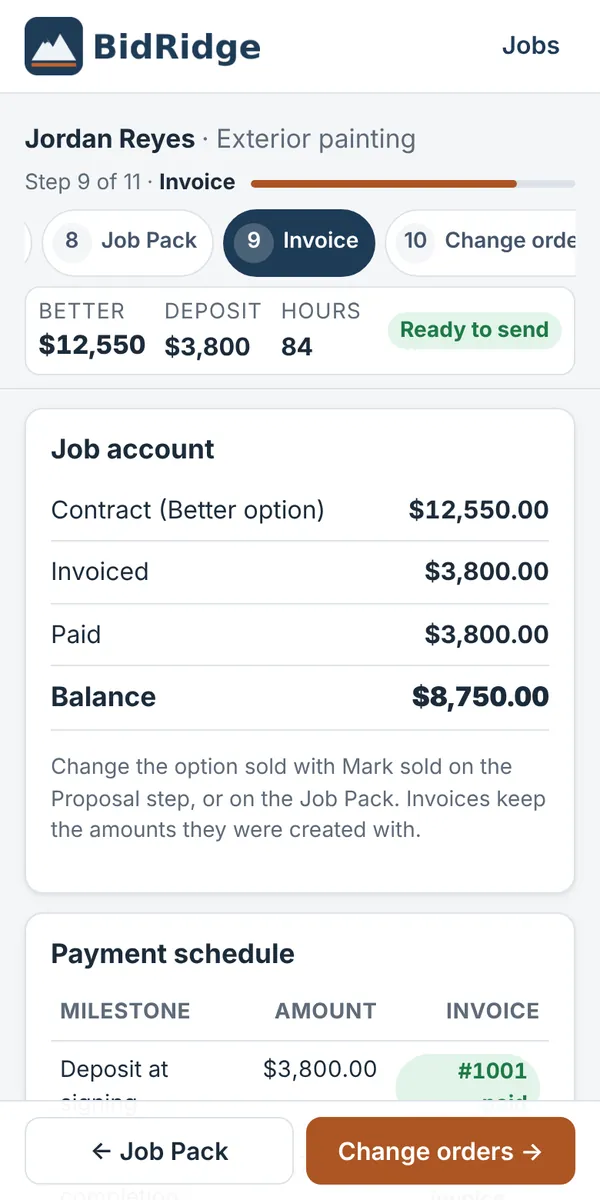
Finish schedules
Tile, flooring, finish carpentry, drywall and bathroom jobs have a Finish schedule step (roofing, siding, hardscape, concrete, decks & fencing, insulation, epoxy floors, windows & doors, ceilings, countertops and EIFS call it Selections; codes R, S, L, K, E, N, Y, W, G, Q and X) right after the proposal: every product, color and size you'll install, where each one goes, and the customer's signed approval. (Interior painting has its own paint schedule on the Paint schedule step.)
- + Add a selection. Each one gets a code (T1, T2 for tile; F for flooring; C for carpentry; D for drywall; B for bathrooms). Pick what it is (floor tile, grout, base, casing, vanity…), then the product, color or finish, and size, pattern or profile. Mark anything the customer hasn't picked as To be selected with a Customer chooses by date. Add an Order by date and supplier for items with lead times.
- Room by room (tile, flooring, carpentry, drywall): for each room, pick which selection goes on the floor, walls, grout, base and so on. Bathrooms: pick a selection for each allowance (wall tile, vanity, faucet, glass…) plus grout and paint.
- Send to customer to approve texts a link to the finish schedule. The customer checks it and signs; you see "Dana approved the finish schedule." and the step shows Approved by with the date. Change a selection afterwards and it says Changed since then, so send it again.
Bathroom allowances: enter the Price each of a selection (per sf or each, like the allowance). The step compares it with the allowance for the option sold, × the quantity: "Wall tile: B1 at $14.00 vs $8.00 allowance × 91 +$546.00". Tap Change order for $546.00 to draft a change order for the difference (reason: Allowance overage); review and send it from Change orders. A selection under its allowance shows the credit. Labor-only jobs skip this.
The schedule also prints on the proposal (selections and rooms) and the Job Pack (with order-by dates and suppliers), on screen and in the PDFs. Save finish schedule PDF makes a one-page schedule with an approval line.
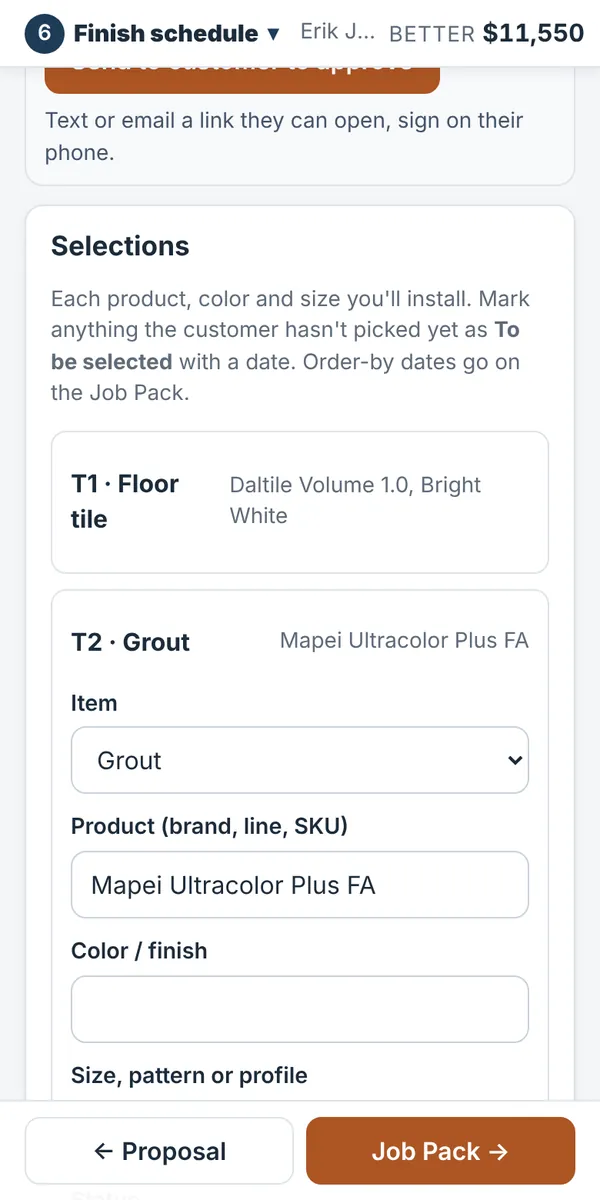
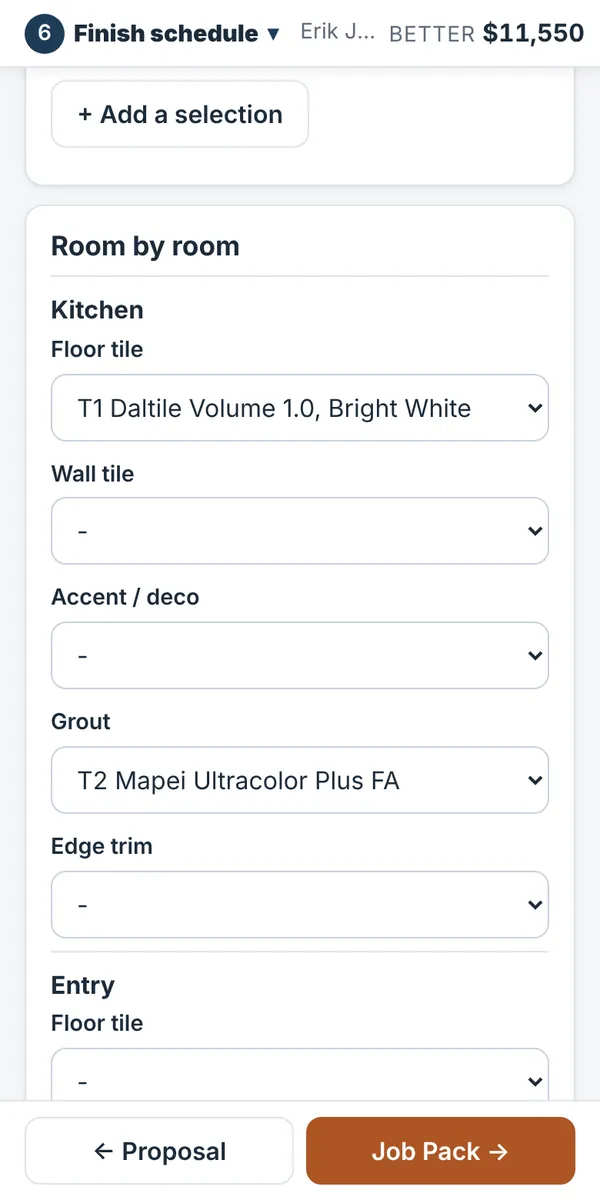
Review requests
Google reviews bring in new leads, and the best time to ask is right after the job, while the customer is happy. When a job is paid in full (every invoice paid and nothing left on the balance) and you tap Mark paid on the last invoice, BidRidge offers to text a review request right away (on a computer the button is Copy it). After an online payment it shows a note instead. Either way it lists the customer on the home screen under Ask for a review until you ask or skip. For a multi-scope project, it asks once, after every scope is paid.
- Once: get your review link from your Google Business Profile (on Google search or Maps, open your business and tap Ask for reviews or Get more reviews, then copy the link). Paste it into Settings → Follow-ups & reviews → Your Google review link.
- When a customer pays in full, tap Text it on the pop-up, or later Text under Ask for a review on the home screen. On a computer it's Email when the job has their email, otherwise Copy. The message thanks them by name and ends with your review link.
- Already asked or Skip takes them off the list. The Invoice step shows Paid in full with the date you asked, and a button to ask again.
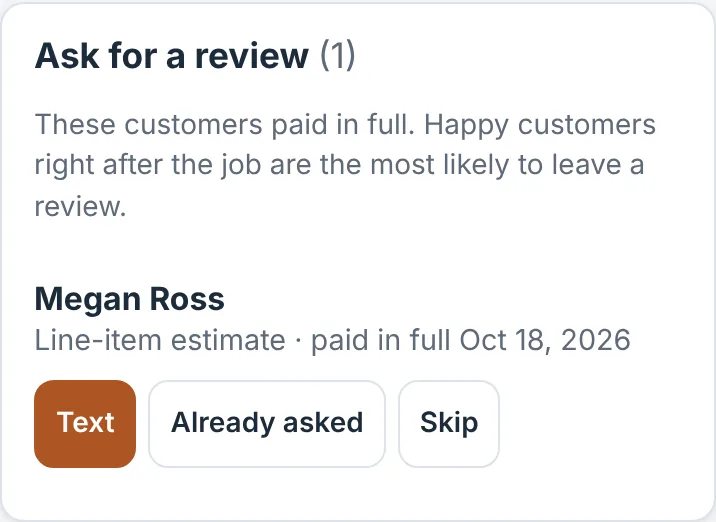
QuickBooks Online
Connect your QuickBooks Online company once, and BidRidge sends your customers, invoices and payments to QuickBooks for you, so your books match your jobs without typing anything twice. It comes with a BidRidge license (not during the free trial). The sample job is never sent to QuickBooks, so practice data stays out of your books, whichever button you tap. To try QuickBooks, use a real job.
- Open Settings → Company and open QuickBooks Online. Tap Connect to QuickBooks.
- QuickBooks' own sign-in page opens. Sign in, pick your company and approve BidRidge. BidRidge never sees your Intuit password.
- Come back to BidRidge (on Android, switch back to the app). It shows Connected to your company. If it doesn't, tap Check status.
- Check the choices: Income account for your sales (usually Services or Sales), Deposit payments to (Undeposited Funds groups payments into your real bank deposits), Send invoices and payments automatically, and Use BidRidge's invoice numbers. If you use BidRidge's numbers, set BidRidge's next invoice number (Invoices & walk-through forms, lower on the same tab) higher than your last QuickBooks invoice so numbers don't repeat.
What goes over:
- Invoices, as soon as you create them, with your invoice number, date, due date and each line. Each trade becomes a service item in QuickBooks ("Interior painting", "Change orders", "Other charges"), so QuickBooks reports show your sales by trade. Sales tax is sent as BidRidge figured it.
- Customers, the first time one of their invoices goes over. If QuickBooks already has a customer with exactly the same name, BidRidge uses it; the scopes of a project share one customer.
- Payments, when you tap Mark paid or the customer pays online, applied to that invoice.
Each invoice on the Invoice step shows ✓ In QuickBooks, waiting to send (offline, or QuickBooks was busy; it goes by itself later), or the reason it couldn't go, with Try again. With automatic sending off, each invoice has a Send to QuickBooks button instead. Send … waiting now in Settings sends everything waiting.
- Deleting an invoice that's already in QuickBooks asks to void it there too.
- Undo on a paid invoice doesn't remove the payment from QuickBooks; delete it there if it was a mistake.
- Estimates, change orders that aren't invoiced, and job costs stay in BidRidge. Bank reconciliation and Stripe fees are done in QuickBooks, by you or your bookkeeper.
- QuickBooks Online only. QuickBooks Desktop isn't supported.
- Disconnect stops sending; everything already in QuickBooks stays there.
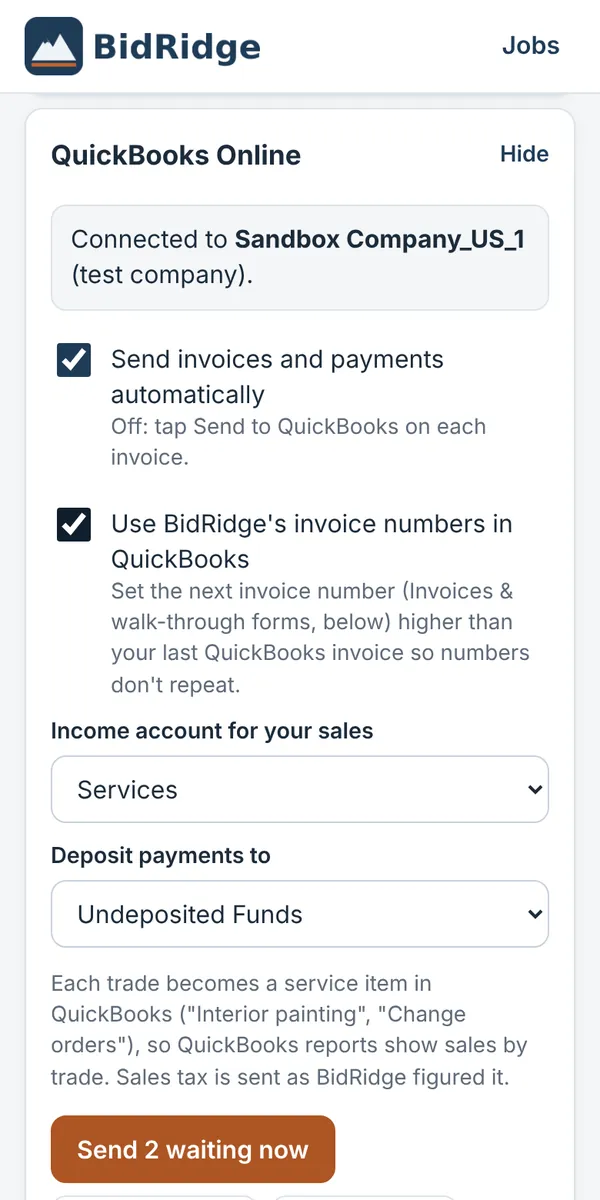
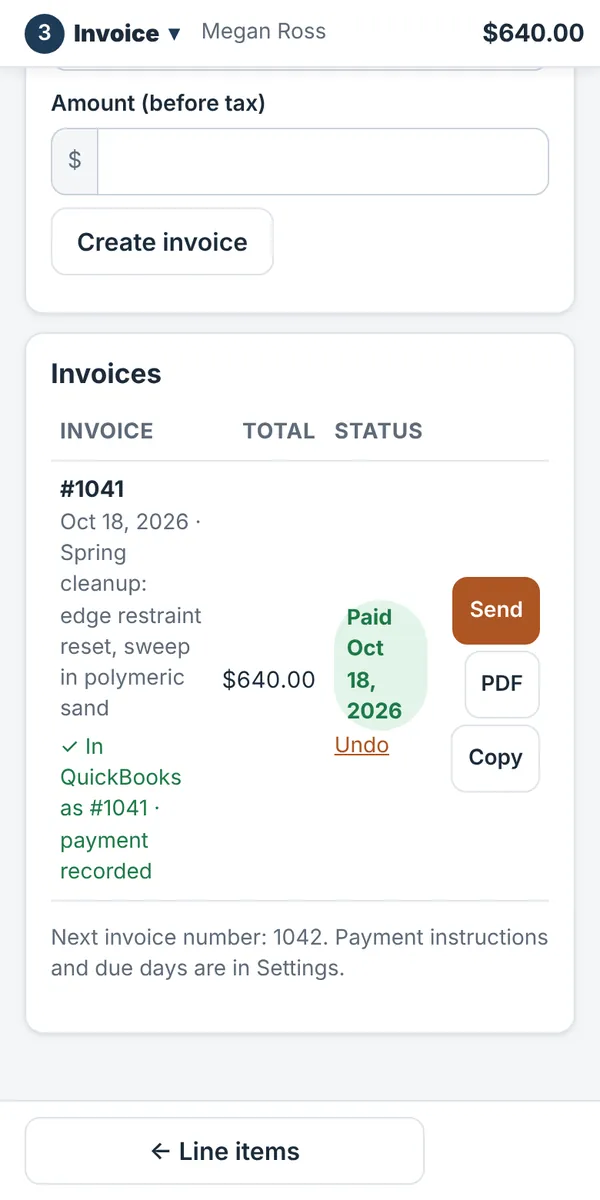
Change orders
- On the Change orders step tap + Add to the original scope (more of the same work, priced from this job's rate book) or + Start a new scope (work that wasn't in the proposal; price it from any trade's rate book or your own lines).
- What's changing: a short title, the reason, a description for the customer and the date.
- Work items: add lines from the rate book or custom lines with quantity, hours, material and sub cost per unit.
- Pricing: labor rate and burden, a difficulty multiplier, material and sub markups, overhead and profit, any fee or minimum, or set the price yourself. Add working days and payment terms. BidRidge warns you if margin is under 15%. Save your markups as defaults.
- Review & send: Send to customer to sign, or save the PDF and get it signed on paper, then tap Customer approved. Approved change orders are locked; Reopen to edit if something changes (only before it's invoiced). Then Create invoice.
While a change order is open, the buttons at the bottom of the screen move through its four parts (← back, next →, then Done back to the list); the tabs at its top jump straight to one.
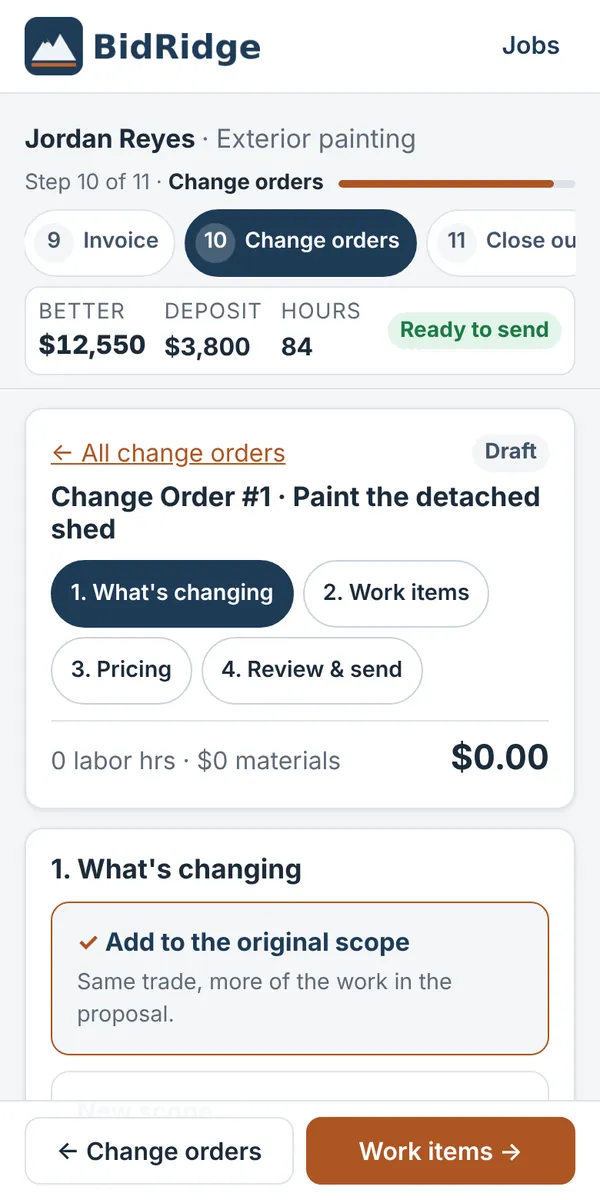
Close out
At the end of the job, walk it with the customer using Walk-Through Part B: the trade checklist, cleanup, a punch list the contractor completes within 10 working days, and the sign-off with the final payment (you may hold back no more than 150% of the punch-list total). Save the PDF or send it to sign.
Then, under Close out this job, enter what really happened: the final price collected, total labor hours for the whole crew, materials and rentals spent, subs and permits paid, working days, and notes. BidRidge shows estimate vs actual. Tap Mark job done at the bottom of the screen. Your track record updates.
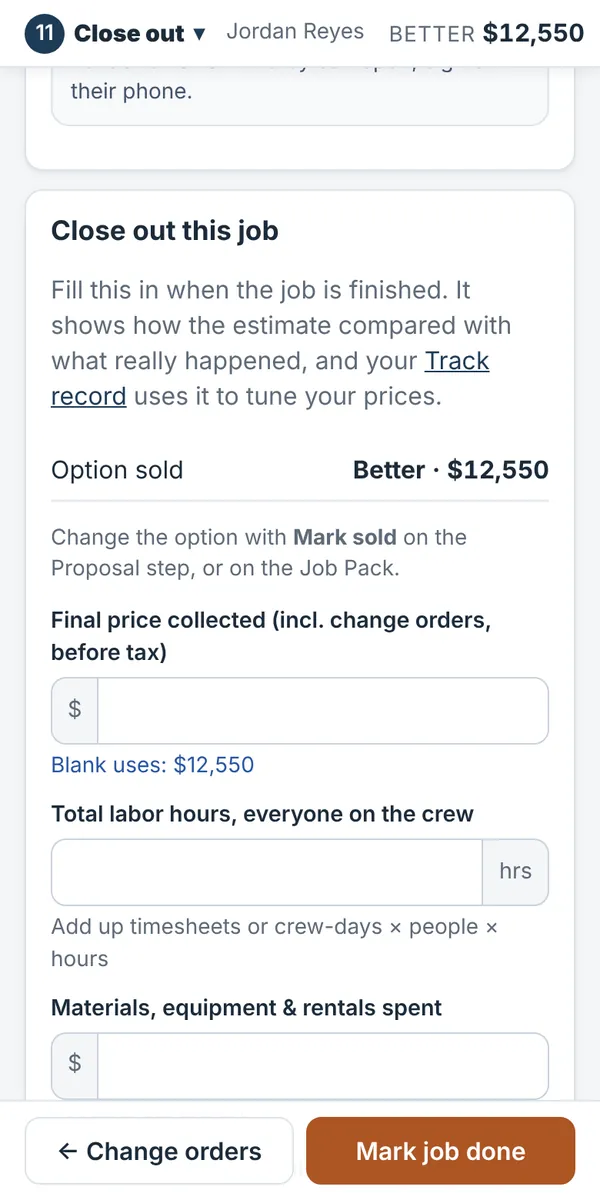
Crew & time (1.65)
On the home screen, Field office → Crew & time. Add your crew under Workers: name, trade (classification) and the wage you pay. Prevailing wage & payroll details (open on its own once you have a prevailing wage job) holds the last 4 of the ID only, apprentice level, fringe paid in cash or to plans, and, for Alaska payrolls, the domicile and mailing addresses. On Clock in, pick the job and tap Clock in beside each worker (with the classification of the work; each worker starts on the one they last clocked in with), or Clock everyone in for the whole crew at once; Clock out makes the entry, to the quarter hour, less a meal break on shifts over 6 hours (Payroll setup). A worker clocked in on one job can't be clocked in on another. When everyone is out, the foreman picks their name in Approved by (the phone remembers it) and taps Approve today's hours: approved hours are locked on the timesheet until it's undone, and the timesheet shows who approved them. Timesheets shows a job's week, worker by worker and day by day: type hours for a crew that doesn't clock in (the totals update as you type), add a row for a second classification, and Approve the week. It works offline and syncs with the rest of your work: when the foreman's phone and the office both change the same job before syncing, the time, logs, RFIs, submittals, payroll, invoices, change orders, work orders, purchase orders, pay applications, extra-work tickets and the bid from both are kept, entry by entry (a change to the estimate itself still keeps the other version as a copy; see Sync). Overtime across jobs (1.75): when a worker on the timesheet also worked other jobs that week, Every job this week under the table shows their hours on all of them and the overtime, and how much of it falls on this job (overtime goes to the hours worked last in the week). A job's time is on the job; for a scope of a multi-scope project it's on the project, split by scope.
Job cost (1.65)
Each sold job has a Field step (after Job Pack; a project has the same panels on its page). Job cost shows the hours used against the hours estimated and the labor cost against the estimate's labor (at the wage determination's rates on a prevailing wage job, with payroll burden), by scope on a project. Since 1.75 the labor cost includes overtime: the hours over your overtime limits (Settings → Overtime) cost half again, counting each worker's hours on every job that week, and the panel says how many overtime hours and what they added. It warns at 90% and when the job runs over. Use … hours in Close out puts the hours in the close-out, so your track record learns from them. On a project, Use the hours in each scope's Close out gives each scope its own hours, and shares the hours not split by scope by each scope's estimated hours.
Expenses (1.76)
Log what you spend on a job as you spend it: the hardware store run, a rental, fuel, dump fees, a permit. On the job's Field step, + Expense from a receipt opens the camera; snap the receipt and type the amount (the box is ready for it). Or + Expense to type one. From the home screen, Field office → + Expense asks which sold job it's for and opens it there.
- Each expense has the date (today), vendor (the last one you used, with a pick list of earlier ones), category (materials; tools & equipment rental; fuel & travel; dump & disposal; permits & fees; subcontractor; other), amount and tax, who paid, a note and the receipt photo.
- Paid by a worker: pick them under Paid by and it shows as owed back to them until you fill in Paid back on.
- Job cost: the panel shows what's spent so far against the estimate: materials, rentals, fuel and the rest against the materials and equipment estimated, and subs and permits apart.
- Close out: materials and subs fill in from the expenses plus delivered purchase orders and agreed work orders, so you don't add up receipts at the end. You can still type over them.
- Expenses CSV gives your bookkeeper one row per expense with the job, vendor, category, tax and who paid.
- With sync on, expenses from the foreman's phone and the office merge entry by entry; receipt photos travel like job photos.
Certified payroll (1.65)
On a Davis-Bacon or Alaska Pamphlet 600 job, the Field step has Certified payroll. The contract number, contract amount and the date work started fill in for you on a GC job that's marked awarded (the subcontract or PO number, the subcontract amount plus approved change orders, and the first day anyone clocked in); check them and fill in the estimated completion (on Alaska jobs also the agency and Department of Labor project numbers, and tick the Notice of Work and Notice of Completion when you file them). Every week from the first hours shows as filed, to file, missing (no hours and no no-work statement) or no work. Open a week: each worker's straight time and overtime by day (from the timesheets; overtime over 8 a day and 40 a week per Settings → Overtime, counting a worker's hours on all your jobs that week, so 30 hours here after 20 on another job is 20 straight and 10 overtime; the hours on other jobs show on the worker's line), the rate paid, fringe and gross, and the deductions you type from your payroll service (tax withheld, which starts at the amount saved on the worker; another deduction and what it's for; gross for all work; FICA is figured). Before you sign, BidRidge flags a rate under the determination's base, wage plus fringe under the package, overtime under 1½ times, a classification that isn't on the determination, an unexplained deduction and an apprentice ratio to check; marking a flagged week filed asks first. WH-347 PDF is the federal payroll in landscape with the statement of compliance (rev. January 2025 content) to sign. Alaska payroll PDF is the weekly certified payroll (form 07-6058 page 1 content); the state's Statement of Compliance must be its own form signed in ink, so the PDF lists what to write on it. The Alaska form asks for each worker's full Social Security number: type them in the box that opens for that printout; BidRidge never saves or syncs them (leave one blank to write it by hand). Alaska upload files (CSV) makes the two files the state's online filing takes in its bulk upload (certpay.dol.alaska.gov): the employees (with the full SSNs you type for that file and the domicile and mailing addresses) and the week's payroll (straight time, overtime and fringe by day with the Pamphlet 600 class code, gross, deductions, net and the check number or direct deposit date you enter for each worker). Tick Revised when it replaces a payroll already filed. On a DOT project the state also asks for race and gender codes, which BidRidge doesn't collect: add them in the state's system. On a job that's both federal and state (the higher of the two), both forms are offered. Payroll data (CSV) (1.80, any prevailing wage job) has the WH-347's columns, one row per worker and classification: hours by day, rates, fringe, gross, deductions and net, with the last 4 of the ID only. A prime that collects payrolls in LCPtracker or another portal takes them in its own upload template: copy the columns across.
Daily logs, RFIs and submittals (1.65)
Daily logs: Today's log fills the crew and hours from the timesheets; add the weather, the work done, delays, visitors and inspections, and safety notes, and save a PDF for the GC (one day or all of them); the photos taken on the job that day go in the PDF. On a phone, the PDF can be shared straight to email or text. RFI log: numbered RFIs with the question, drawing or spec reference, who it's to (on an awarded GC job, the GC's project manager from the award; before then, the first GC on the bid), when the answer is needed, the answer and any cost or schedule impact; an open RFI past its date shows Overdue. Read a designer's RFI list (CSV) brings in the RFIs a designer's Submittal set drafted from its checks (its RFI log export). Each RFI has its own PDF, and the log has one. Submittal log: what you owe and where it stands (not sent, sent, approved, approved as noted, revise and resubmit, rejected) with sent, due and returned dates and the revision; Add the spec's submittals lists what the spec checklist read, and Add designer sets the drawing sets linked to the job. Resubmit raises the revision and dates it.
Bids to GCs (1.75)
Every job and project whose proposal style is Sub quote to a general contractor is a bid. On the home screen, the Bids to GCs filter (or Field office → Bids to GCs) lists them by bid date: this week, later, no bid date, bid date passed, then decided. Each card shows its bid date or result, and how many things are left to do (a follow-up due, an addendum not acknowledged, a GC not yet sent the quote); bids to chase also shows under the search box. On top: your hit rate and how far above the low number your lost bids were, + New bid and New bid from documents. (1.80) Type the next number on a bid you won (the second bid, when the GC tells you) and the top line shows how far under it you were on average, with a warning when you won by more than 10% (money left on the table, or something missed); once a won job has crew time logged, it shows the hours used against the hours bid. (Until 1.75 these were on a separate bid board.)
A new bid. + New bid opens the new bid form. Paste the GC's email into Paste the GC's invitation to bid and tap Read the invitation: the project, GC, estimator (name, email and phone), bid date and time, walk-through and location are filled in for you to check (it's read on your device; nothing is sent anywhere). Or type them. Start the bid makes a commercial job set up as a sub quote, with the GC's contacts on its Customer step.
The bid on the job. Everything about a bid is on the job's Quote step (a project's is on the project page): the bid date, time and walk-through, the GCs bidding it (estimator and contact; Remove this GC takes one off), the addenda (the ones the bid set reader finds are added, ready to tick acknowledged), follow-ups with a date, and the result. Each GC has Quote PDF and Email: the quote with that GC's name on the To line, recorded as sent that day at that day's price, so you always know the exact number each GC got. Won opens the award; Lost or No bid marks the job Lost (for a loss, add the low number, who got it and why), so the Sold and Lost filters, lead sources and your track record count them.
Subs: pay requests, retainage, agreements and lien waivers (1.65)
On a sub work order (Job Pack step), the sub's details add the workers' comp and license expiry dates; a warning shows 30 days before any expires. Set the retainage held, and save a Subcontract agreement PDF (scope, price, payment, changes, insurance, warranty, flow-down, and the prevailing wage terms on a PW job; a starting point for your attorney to review). New pay request takes the percent complete of each line and works out the amount due (done to date, less retainage and earlier payments); Approve and record records the payment. Each payment has a conditional and an unconditional lien waiver PDF (use your state's statutory form where it has one). Tick Carry this sub's price in my sub quote to the GC to add the sub's price, with your sub markup, to the quote's price.
Jobs for a general contractor (1.74)
A job or project whose proposal style is Sub quote to a general contractor runs the way a commercial sub works: it's quoted, awarded, billed with monthly pay applications and retainage, changed with extra-work tickets and change requests, and closed out with the GC's paperwork. The homeowner parts step aside: the Price step gives one price (no Good, Better and Best), the Proposal step is called Quote and the Invoice step Pay applications; the deposit, the design agreement, the customer portal, follow-up texts and review requests, the final walk-through and sending the finish schedule to approve don't show (the architect approves finishes through submittals). A multi-scope project quoted to a GC as one price keeps the award, pay applications, tickets and closeout on the project page.
The GC on the Customer step. A GC job's Customer step asks for the GC company and office address, and the estimator, project manager and superintendent (name, phone and email each), plus the project name and site address. RFIs, submittals, pay applications, lien waivers and extra-work tickets are addressed to them.
From the bid documents. When the bid set reader finds the wage law, the Quote step offers one button: Price it that way sets Davis-Bacon, Pamphlet 600 or the higher of the two on every scope, with the wage determination number. When the documents call for bonds, Include a 1.5% bond in my price adds it to the Insurance & bonds line.
The award
When a GC awards you the work, tap Mark awarded on the Quote step (or pick Won as the bid's result). Pick the general contractor that awarded it from the GCs on the bid (or Another GC…), and enter the subcontract amount (it starts at the price you last sent; change it to the number agreed after scope review), the retainage held (10% unless you change it), the subcontract number and the GC's PO or job number, the start date, the day of the month pay applications are due, and whether the insurance certificate was requested and received by the GC. Saving marks the job Sold at the subcontract amount (the price is kept), makes that GC the customer and starts the schedule of values from your quote, scaled to the subcontract amount. Edit on the award changes any of it later.
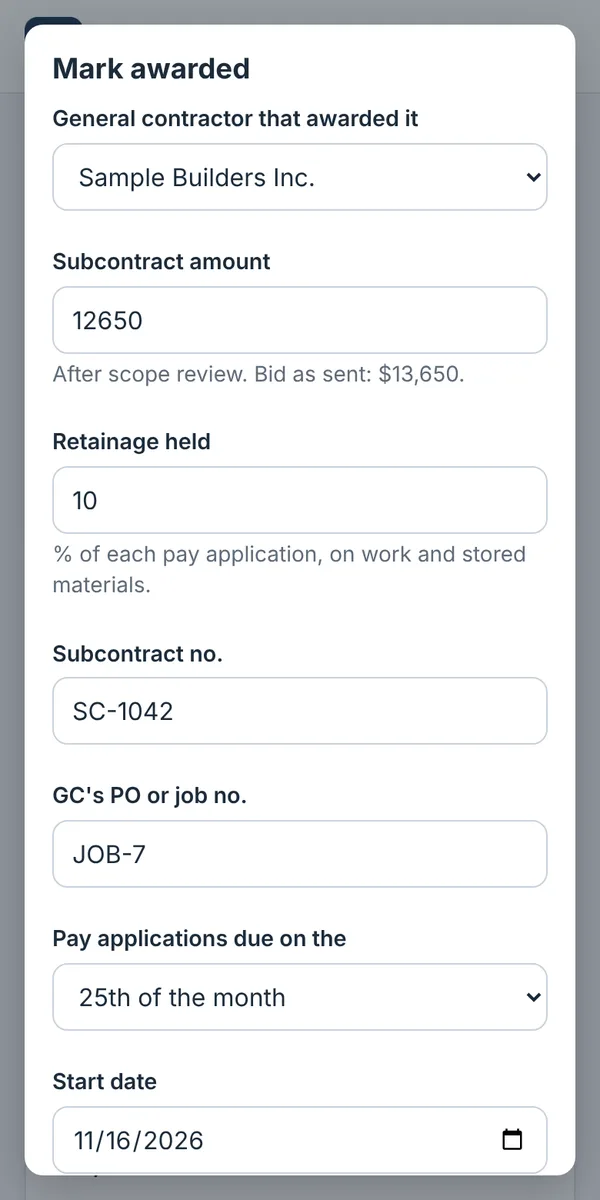
Pay applications and lien waivers
- On the Pay applications step (the project page for a project), tap New pay application. The lines are the schedule of values from your quote, plus each change order the GC approved as its own line. Start over from the quote resets the schedule before the first application.
- Set the period to and application date, then the percent complete of each line and any materials stored on site and not yet installed. Percents carry forward from the last application. BidRidge works out completed and stored to date, retainage, earlier applications and the amount due this application, with the balance to finish.
- Pay application PDF: the application summary and the continuation sheet in the layout GCs expect (on a prevailing wage job it notes the certified payrolls for the period are attached). Mark sent when it goes to the GC; the conditional lien waiver is offered with it.
- When the GC pays, Record payment: the date and amount. The unconditional lien waiver is then ready. Undo payment and Back to draft undo either step.
- On the last one, tick Final: release the retainage: the retainage held is billed with it and the final lien waivers come from it.
The home screen shows Pay applications waiting on GCs with what's due, and the Unpaid filter includes them. Lien waivers are a starting point: use your state's statutory form where it has one.
GC billing portals (1.80). Each application also has Continuation sheet (CSV): the same lines and columns as the PDF (scheduled value, from previous applications, this period, materials stored, completed and stored, percent, balance to finish, retainage) and the summary, to copy into the GC's portal (Textura, Procore, GCPay and others take the numbers in their own screens or spreadsheet). Under Billing the GC and lien rights, type where pay applications go and the portal's link; the next due date comes from the day set in the award, and it turns red when that day passes with nothing marked sent.
Lien and payment bond deadlines (1.80). Pick the law (Alaska, Washington, a federal job under the Miller Act, or another state with the days you look up), tick a public job and whether you have a contract with the prime, and the first and last days you worked or delivered (the timesheets fill them in until you type them). BidRidge lists each notice, claim and suit deadline with the statute it comes from, and colors one due in the next 14 days or passed. Type the dates you record a notice or a lien, and on Alaska jobs the date an owner records a notice of completion (that can cut the time to 15 days). The deadlines are from the statutes as written in November 2026 and aren't legal advice: a contract or a bond can shorten them, so check with a construction attorney before one you can't miss.
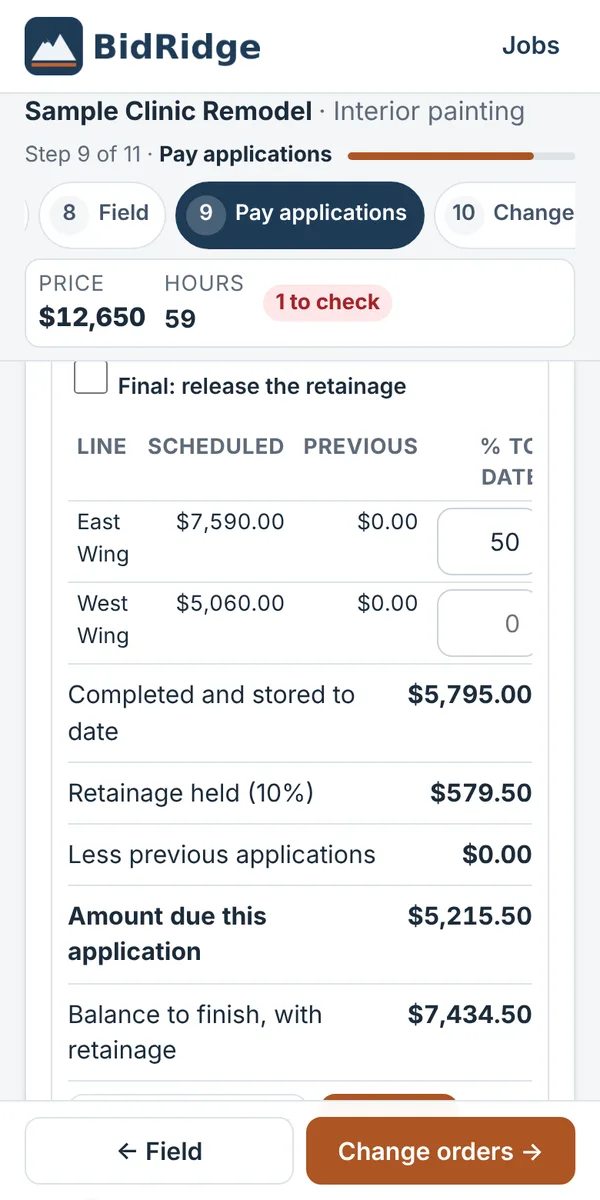
Extra-work tickets and change requests
Extra work the GC asks for in the field goes on a ticket the same day. On the Change orders step (the project page for a project) tap New ticket: the date, where the work is, what was asked for and who directed it (the superintendent from the award), the crew with their hours and overtime (Copy the crew's hours on this date takes them from the timesheets; trim them to the extra work), materials and equipment. Hand the phone to the super: Sign on this phone, their name and title, and Save signature. Ticket PDF for their records. Signed tickets become a change order priced at your rates and markups, ready to check and send. The Change requests with the GC log lists each change order as pending, approved or rejected, with the GC's CO number and the amount; approved ones become lines on the next pay application.
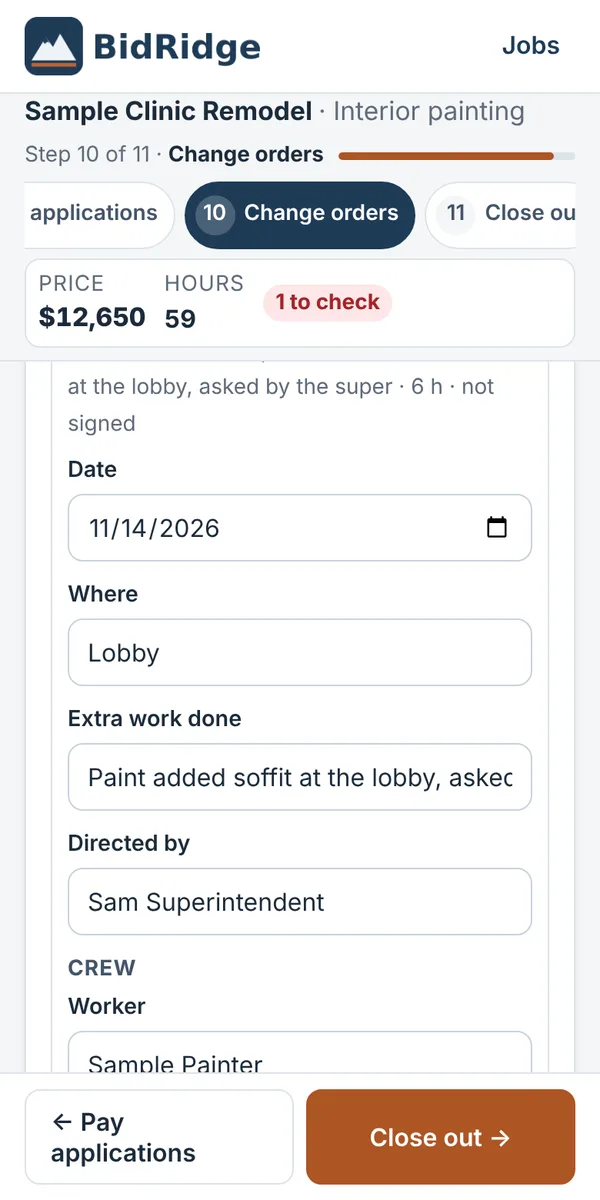
Closeout package
The Close out step of a GC job (the project page for a project) starts with the Closeout package: set the substantial completion date (warranties start there), then tick each item as it's turned over. Warranty letter PDF, with the warranties the spec checklist read (one year if the spec named none). Extra stock turned over: the attic stock from the spec, with the quantity and where it's stored, on a Transmittal PDF the GC signs. O&M and product data: O&M binder PDF merges the product data you attached on the submittal package behind a transmittal. As-builts and punch list signed off, the final lien waiver and retainage released follow the final pay application. Then enter the close-out numbers as for any job.
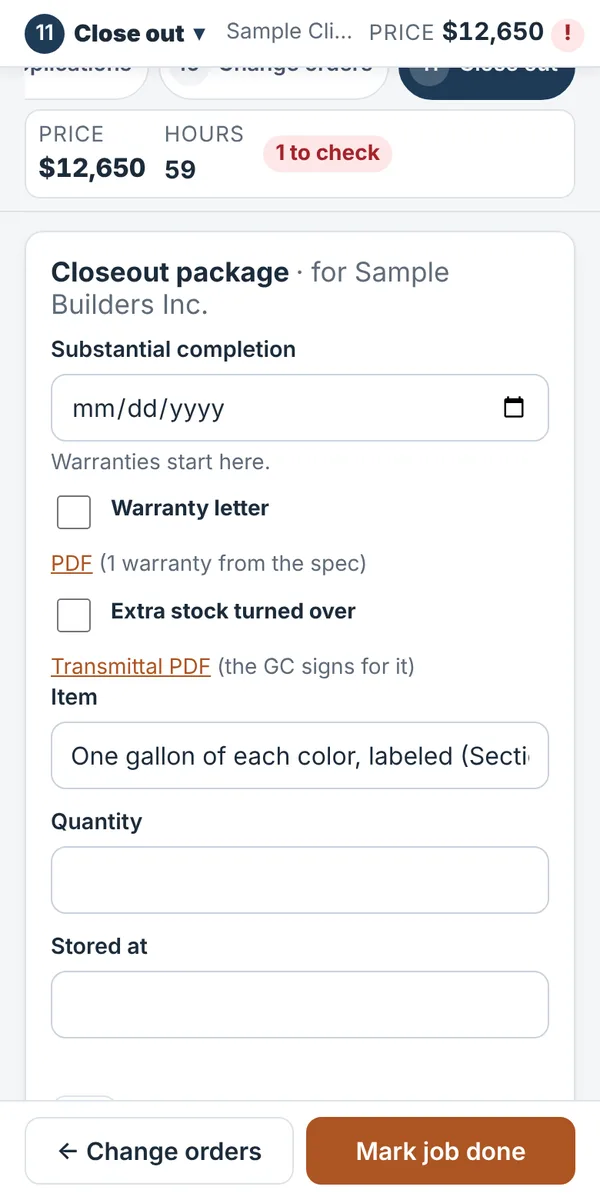
Purchase orders from supplier quotes
On the Job Pack, a job with supplier quotes has POs from the supplier quotes: one PO per quote, to that supplier at the quoted prices (rows marked skip are left out). New PO for the rest of the shopping list leaves out the lines a quote covers; check it doesn't repeat them.
11Leads
Add a lead by pasting
- Tap + Add a lead on the home screen.
- Paste the whole lead email or text from Angi, HomeAdvisor, Thumbtack, Facebook, Google, Yelp, Nextdoor, Houzz, your website form, or anywhere else, and tap Fill in.
- Check the name, phone, email, address, trade, lead source, size and what they asked for, then tap Add lead at the bottom of the screen. For a phone call, skip the paste and type it in.
The project line of the lead ("Project: Tile installation – kitchen floor and backsplash") goes into What they asked for and the job's notes, and helps pick the trade. If the lead gives a size ("about 180 sq ft"), it goes in Size: for exterior painting that's the home size; for room trades (interior paint, tile, flooring, drywall, carpentry) the first room starts at that area (180 sf → 15 × 12 ft, named from the lead, for example Kitchen) and the job opens on the Rooms step so you can check the size and measure the rest. Without a size it opens on the Customer step.
The new job starts with status Lead and the details in its notes. If the same person already came in within two weeks (same phone or email), BidRidge opens the existing job instead of making a duplicate.
On Android: in Gmail, Messages or any app, tap Share on the lead and pick BidRidge. It opens already filled in.
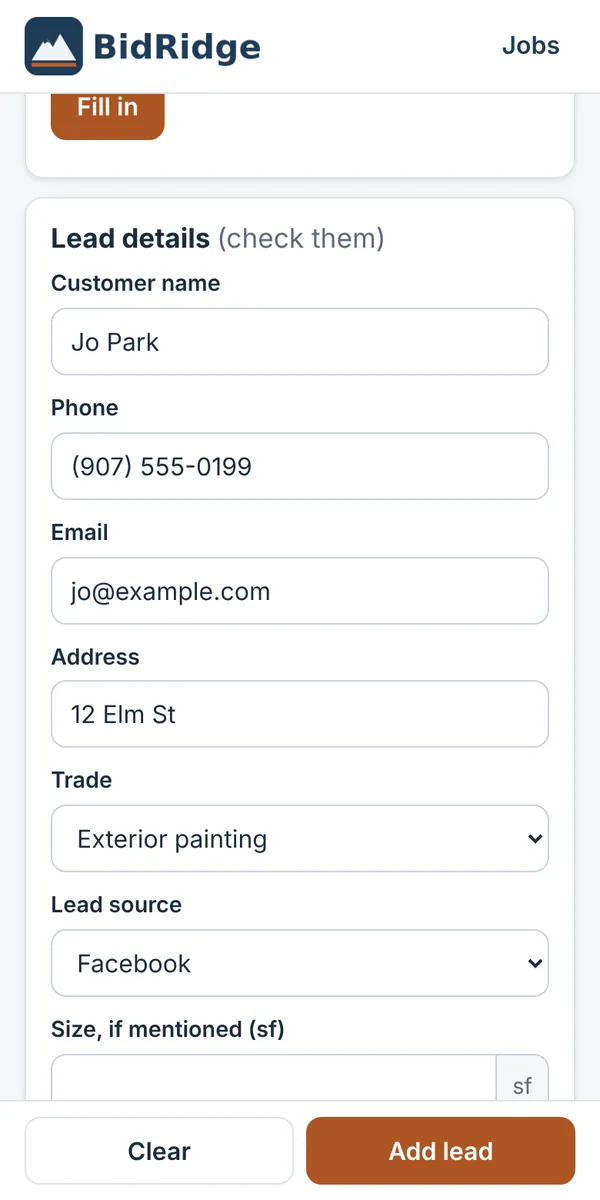
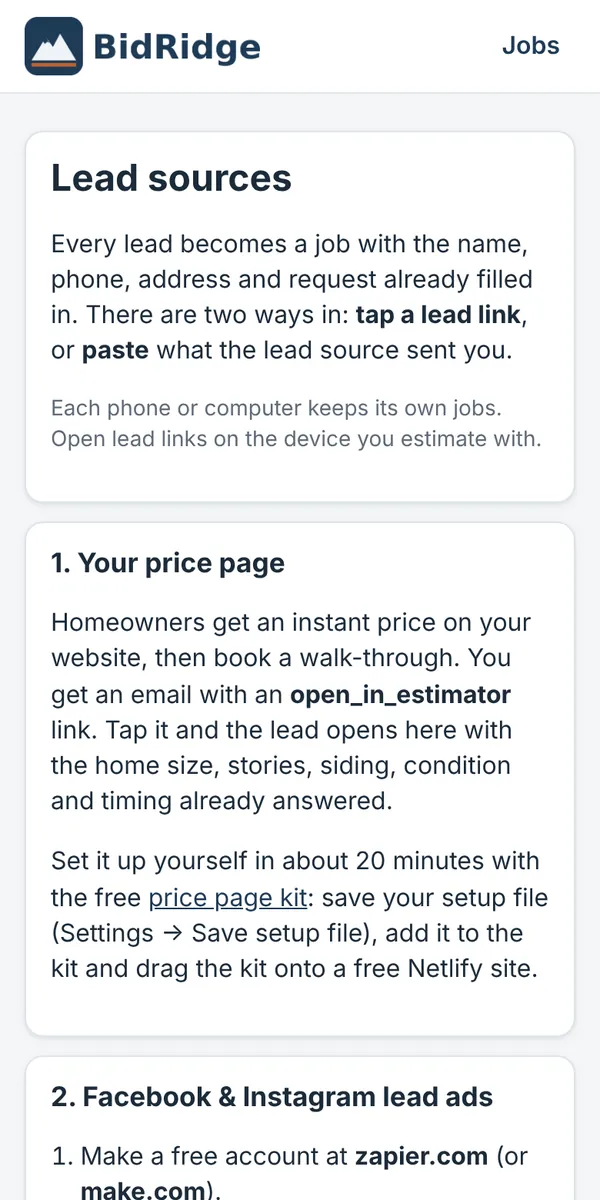
Automatic lead links
Lead sources shows how to get leads into BidRidge with one tap, with copy-ready links and step-by-step instructions:
Your request page, any trade (1.81). In Lead sources, Make my request page gives you a page of your own where customers ask for a walk-through or a quote: name, phone, email, address, the kind of work (the trades you tick), what they need and when. It shows your company name, phone and service area, and a line you write. Each request is emailed to your license's email and shows up in BidRidge as a new lead (source "Request page") the next time the app is open. Put the link on your website, Google Business Profile, Facebook page and cards. Requests are kept on the server encrypted only until the app picks them up (30 days at most). It needs a license.
Let customers pick a time (1.82). On the request page settings, tick Let customers pick a time for the walk-through, then pick the days, the hours, how long each visit takes, the soonest and how far ahead, and any days off. The page then shows your open times; a time a customer picks is taken for them, so no one else can book it, and their request comes in as a lead with the walk-through on it. Booked walk-throughs show on the crew calendar in their own row, with a button to text the customer a confirmation and one to cancel, which opens the time on your page again. Customers can also pick "None of these work" and you call them.
- Your price page: a free page for your website that gives homeowners an instant exterior painting price and books a walk-through. You get an email with a link that opens the lead in BidRidge with the home's size, stories, siding, condition and timing filled in.
- Facebook & Instagram lead ads and Google Ads lead forms: through a free Zapier or Make account, each new lead texts or emails you a link that opens in BidRidge.
- Your website's contact form, and paste-in for the lead sites.
Open lead links on the device you estimate with (each device keeps its own jobs unless sync is on). Add a test lead shows you how it works.
12Track record and exporting
Track record
Once you've closed out jobs, Track record (from the home screen) compares what each job really took with what your current settings would estimate, per trade: win rate, actual hours and materials vs estimate, and margin estimated vs actual. After three closed-out jobs in a trade it suggests adjustments, for example "production hours ×1.08", with an Apply button. To change one back later, edit that trade's rate book in Settings or reset the tab. It also lists sold jobs that still need a close-out.
Export to a spreadsheet or CRM
To export only a few jobs, pick them in Select mode and tap Export. For everything, Export CSV on the home screen opens the export page:
- What to export: Customers & jobs, Invoices, Payment schedules, Change orders, or Close-out results.
- Which jobs: by status, trade and job date; include sample jobs or not.
- Columns: tick the ones you want (Select all, Clear, Default columns).
- Download: check the preview and tap Download CSV. It opens in Excel or Google Sheets and imports into most CRMs. Money has no $ sign and dates are YYYY-MM-DD, so they sort and add up correctly.
13Settings
Settings apply to every estimate, including ones you've already saved: each estimate re-prices from your current settings whenever you open it. Invoices keep the amounts they were created with, and a signed proposal keeps its signed copy. Settings are saved on the device, included in backups, and shared by sync.
The tabs across the top: Company · Crews & schedule · Exterior painting · Interior paint · Tile · Flooring · Drywall · Bathroom · Rough carpentry · Code tables · Finish carpentry · Quick quotes, plus Roofing, Siding, Ceilings, Countertops, EIFS, Insulation, air sealing, fire & sound, Window & door replacement, Epoxy & resin floors, Concrete, Hardscape & landscape and Decks & fencing when you offer them.
Each tab is a short list of sections. Tap a section's name to open it (Show / Hide); the app remembers which ones you keep open on this device.
Company
- Company & logo (including License, bond & insurance, see the setup questions), Your work & scopes you offer (turn trades on or off), Location (regional starting prices and painting season) and Sales tax: the same questions as setup.
- Invoices & walk-through forms: next invoice number, due days, how to pay, the note at the bottom, milestone billing by default, attach Walk-Through Part A by default.
- Change orders: default markups, fee, minimum, terms, and whether to show the cost breakdown.
- Send, sign & get paid online (see above; once connected, Open Stripe setup and Disconnect are here), QuickBooks Online (see QuickBooks Online), Follow-ups & reviews (opened notifications; follow-up reminders on or off, up to 5 follow-up days, separate first, second and "third and later" texts, and Reset these texts; review reminders on or off, your Google review link and the review text; see Follow-up reminders and Review requests) and Line-item estimates & quick invoices (default deposit, days valid, terms; see above).
- License, Share job data to improve pricing (optional and off unless you turn it on; it never includes names, phones, emails, addresses, notes, photos or your company name), and Setup: Run setup again, Save setup file, Load setup file.
Crews & schedule
- Overtime (your hourly crew): your state's rule, or a flex plan, weekly-only, your own limits or none, and what it adds to each crew-day length.
- Crews & scheduling: crews and subs and the trades each does, skip holidays, working days per week, days until your next open start, and the wait after each trade.
Exterior painting
- Labor (crew cost per labor-hour or your painter's wage), costs and profit (margins, minimum price, rounding), proposal and measuring (deposit, how many days a quote is valid, local price-per-square-foot checks), Good / Better / Best, property factors (stories, prep, access, siding, coats, color change, season), the rate book and shopping-list prices.
Each trade's tab
- Labor: lead and helper wage, the helper's share of hours, burden, hours per crew-day and default crew size. It shows your resulting crew cost per labor-hour. If the crew-day runs past your state's overtime limit, the overtime is added to the labor cost and the estimate's checks show how much.
- Materials, costs & profit: material price factor (for example, Alaska and Hawaii run about 1.15), waste, overhead, margins, minimums, rounding.
- Proposal & market check: deposit, valid days, and the local price range used by the checks.
- Good / Better / Best, Job factors, the Rate book (production rates and materials for every item, including specialty items), and work-height multipliers where they apply. On a phone each rate-book item is a card: the item name across the top, then its labeled boxes (Hrs/sf, Mat $/sf, Equip $/job, Flags), so nothing scrolls sideways. Interior paint also has Default paints & prices; Quick quotes has the hours and material for every task.
- Bathroom has its own: labor and job costs, separate margins for your own work, sub work and allowances, the payment schedule, inspection and tile-cure days, license and RRP settings, allowances and the assembly book.
Per day (1.63). Each rate book has a Per day column beside Hrs/unit: what one worker does in an 8-hour day at those hours (for example 889 sf of board hung). Type either one and the other follows.
Reset these settings at the bottom of a trade's tab puts only that trade back to the built-in defaults. On Exterior painting it resets exterior painting pricing and the change-order markups; your company, location, tax, scopes, crews, invoice numbers, templates, online payments and jobs aren't touched. The defaults are the built-in starting numbers, so afterwards tap Re-apply under your area's starting prices (Location) if you use them. Careful: Re-apply resets wages, material prices, overhead, minimums and checks in every trade, not just the one you reset.
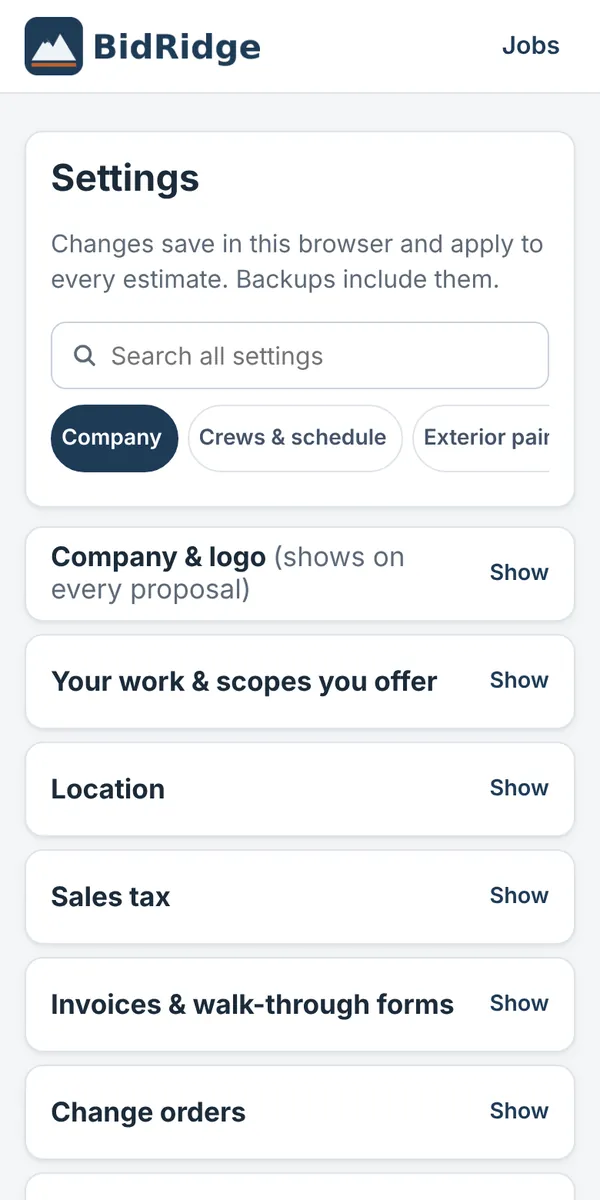
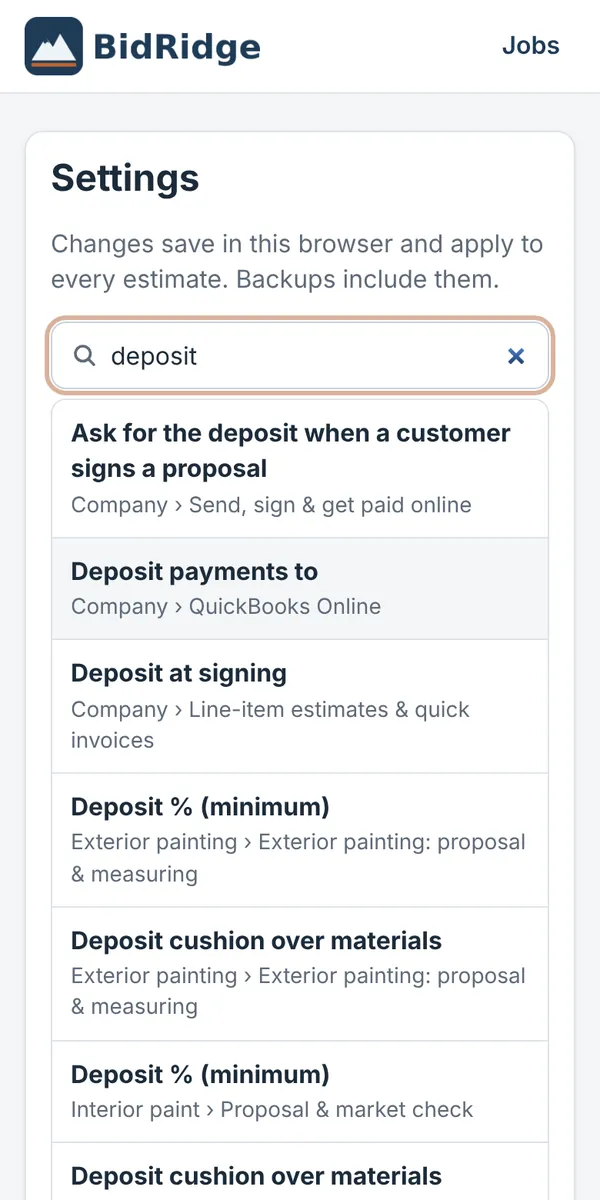
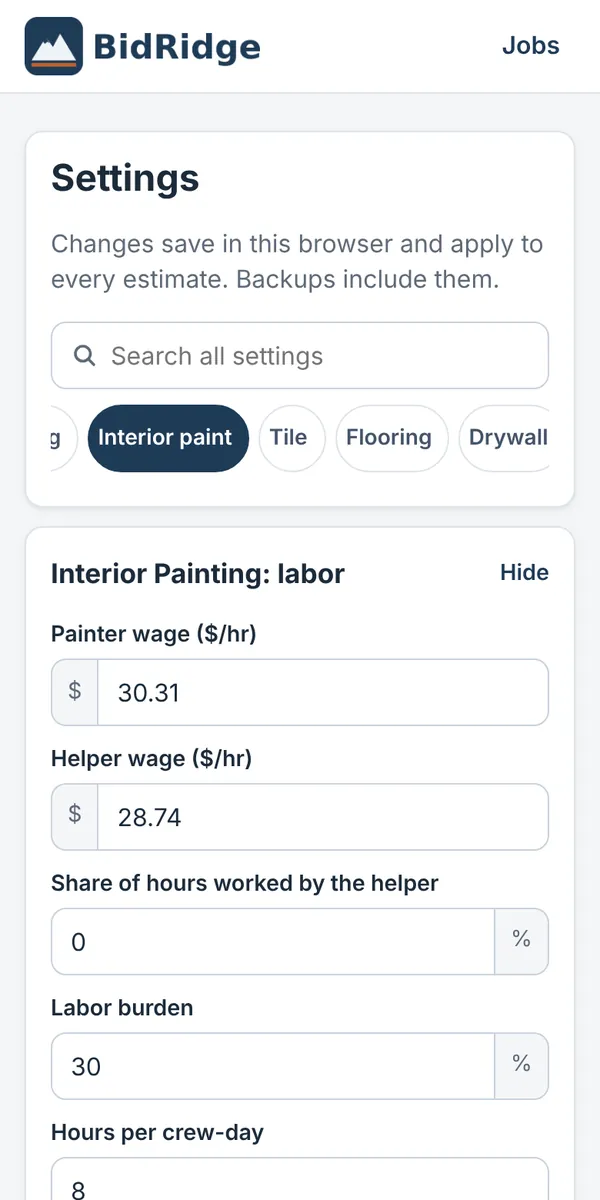
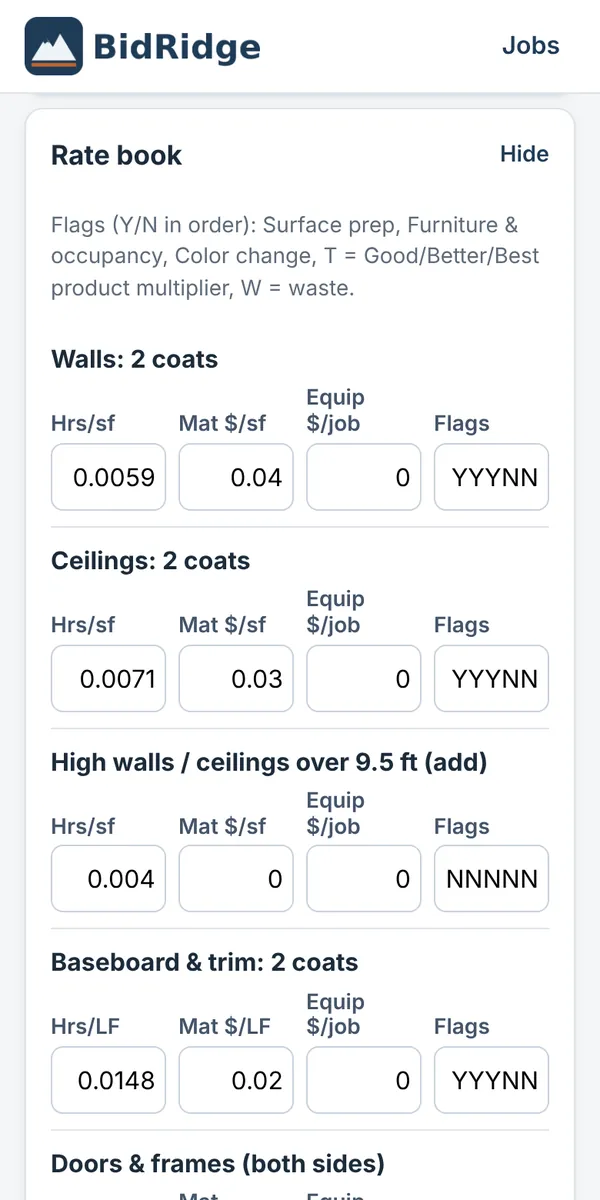
14License, trial and devices
- Free trial: 14 days per device, starting the first time it goes online. A brand-new install with no signal works for a few days before it needs to connect once.
- Plans: Residential is $49.99 a month, or $599 once for a lifetime license; Commercial is $99 a month or $1,799 once and adds the designers' Submittal sets, the Division 10 Designer, the commercial wage settings and the project management, submittal and bond lines (one-time licenses include 12 months of updates; see bid-ridge.com/pricing). Buy on the License screen of the web and desktop app (1.75: both Residential and Commercial, monthly or once) or on the BidRidge website; licenses aren't sold inside the Android app. Your key looks like
BR-XXXX-XXXX-XXXX-XXXXand is shown on the page you land on after paying. Copy it somewhere safe. Stripe emails your receipt. - Commercial and Residential (1.58): every license bought before 1.58 is Commercial already, and the free trial includes Commercial. A Residential license keeps everything else, and where it meets a Commercial feature it shows one short note. A Residential one-time license upgrades to Commercial for the difference ($1,200) with Upgrade to Commercial on the License screen of the web and desktop app (1.75), or on bid-ridge.com/pricing with its license key; a monthly plan switches under Manage subscription. The app and the designers pick up the change the next time they check in (Check now on the License screen).
- Education licenses (1.58): free for trade unions, apprenticeship programs and students, by request (support@bid-ridge.com). They open every designer with its details and Submittal sets, but not the estimating app (quotes, proposals, job packs, QuickBooks), and their drawings say EDUCATIONAL USE - NOT FOR BIDDING OR CONSTRUCTION.
- Activate: open License (from the banner at the top, or Settings → License → Open License), type the key and tap Activate.
- Devices: one license works on up to 5 phones and computers. To move it, open License on the old device and tap Remove from this device, or remove it from the device list on the Sync screen (shown when sync is on).
- Offline: the license works without signal and checks in automatically when online (monthly plans need to connect at least every two weeks, lifetime every two months).
- Lost your key? On the License screen, enter the email you bought with and tap Email my key.
- Think someone else has your key? (1.77) On the License screen, open Think someone else has your key? and tap Email me a link to replace my key. The link goes to the license's email address; nothing changes until you open it and tap Replace my key. Then you get a new key, every phone, computer and designer is signed out (enter the new key on the ones you use), and your jobs, photos, sent links, online payments and QuickBooks stay. The emails about a new device on your license have the same link.
- During the trial estimates, proposals, PDFs, sending and signing work; online payments, sync and QuickBooks need a license.
- When a trial or license ends your jobs are safe: you can open them and save backups. New estimates, PDFs, printing, copying, fast-quote saving and sending need an active license.
- Manage subscription (monthly plans, shown on the License screen while the license is active; not in the Android app) updates your card or cancels. If a subscription has already lapsed, subscribe again on the BidRidge website, then tap Check now on the License screen or enter the new key.
The AI add-on (1.64). Everything above works without AI. The AI add-on, a monthly subscription added on the License screen when it's offered (Add AI takeoff), turns on the AI buttons: AI takeoff, Tidy with AI, Read with AI, Draft with AI, Word with AI and Ask AI. Each needs the internet and counts against the month's AI pages (a plan sheet counts 5, everything else 1; the pages start again on the 1st). A plan, spec or question is sent only when you press an AI button, through the BidRidge license server, and nothing is kept after the answer comes back. What AI gives you lands on the same review as the free readers: nothing is priced until you check it, and AI never sets a price. Without the add-on an AI button says it isn't available on your license.
Ask (1.64). In Help, type a question in Ask: Find in the guide shows the parts of this guide that answer it (offline, no AI). With the AI add-on, Ask AI writes a short answer from those parts, with links to them.
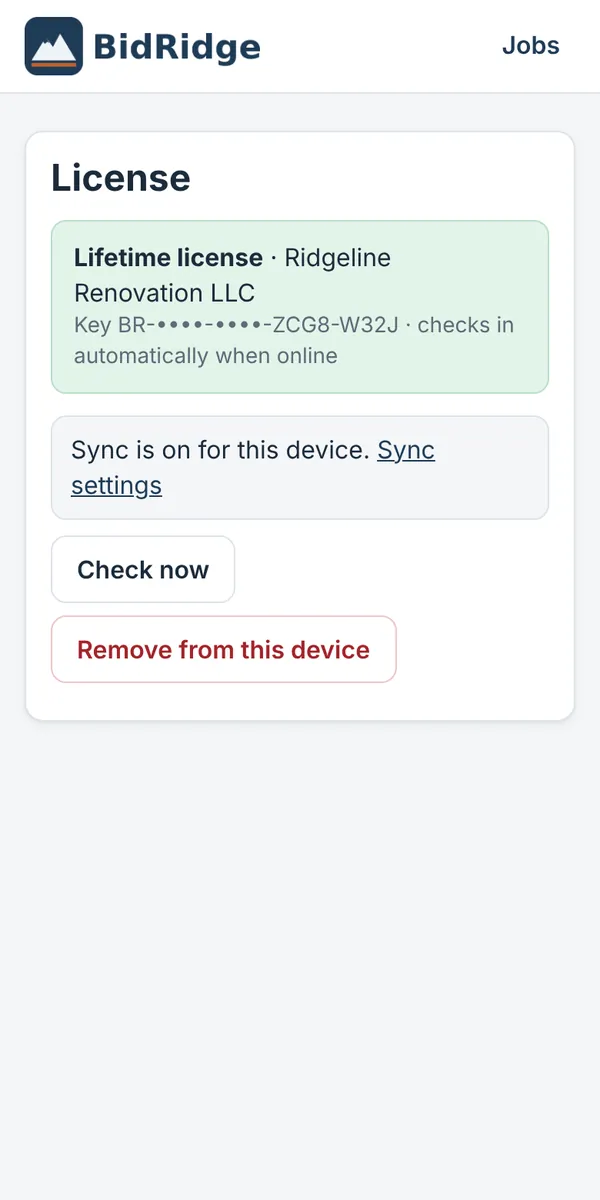
15Sync and backups
Sync: the same jobs on every device
Sync keeps your jobs, multi-scope projects and company settings (rates, logo, crews, templates) the same on every device on your license. Everything is encrypted on your device with your company's sync passphrase before it leaves; BidRidge can't read your jobs or customers, and can't recover the passphrase. Sync needs an activated license.
- First device: activate your license, then tap Set up sync on the home screen. Choose a passphrase of at least 10 characters (four everyday words work well, like "ladder maple trim Tuesday"), type it again, tick that you've written it down, and tap Turn on sync.
- Every other device: activate the same license, open Sync, enter the same passphrase and tap Join sync. That device's jobs are added, and your company settings replace its settings.
Sync runs every couple of minutes, shortly after each change, and when you come back online. Offline changes wait and upload later. If the same job is changed on two devices before they sync, BidRidge merges them entry by entry: time, logs, RFIs, submittals, payroll weeks, invoices, change orders, work orders, purchase orders, pay applications, extra-work tickets, the bid's GCs and addenda, and the closeout ticks from both devices are all kept, and something deleted on one device stays deleted (1.75 added the office and GC records). Only when the estimate itself was changed on both is the other version kept as a copy; look for "(conflict copy)". The Sync screen shows the devices on your license, with Remove for an old phone.
Sync now syncs right away. Turn off sync on this device keeps its jobs but stops sharing changes; your other devices keep syncing. Under Devices on your license you can remove a lost phone to free its seat.
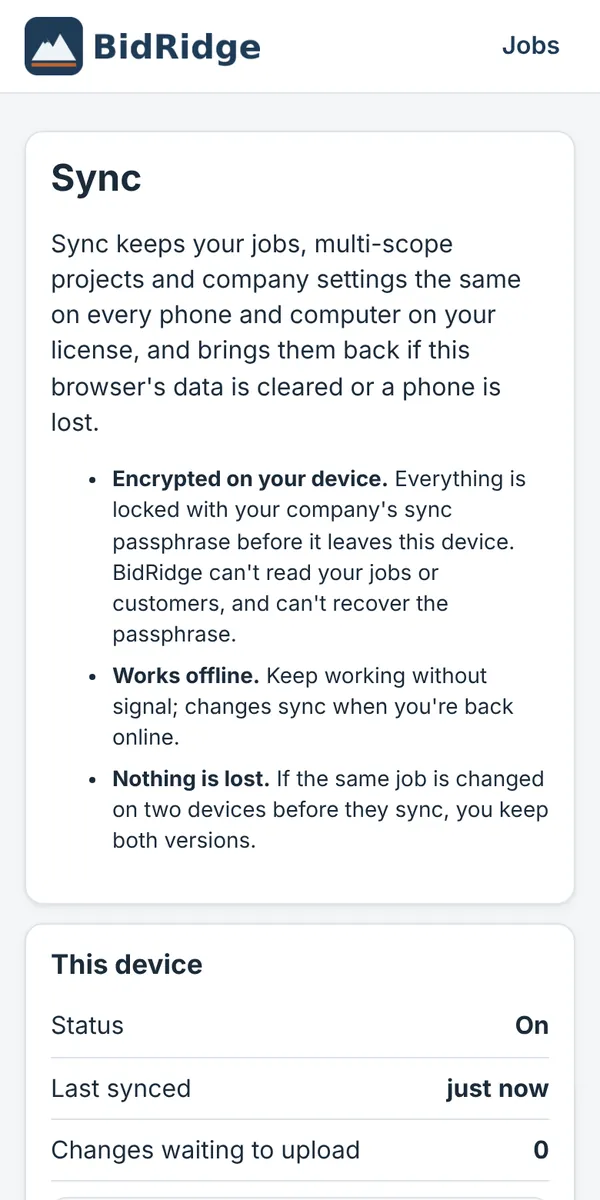
Photo sync
From app 1.37, job photos and files over 1 MB sync too. They're too big to travel inside the job, so each one goes to your company's photo storage on the license server, encrypted on your device with the same sync passphrase as your jobs. Nobody at BidRidge can see your photos.
- Where photos live. The phone that took a photo keeps it and uploads it in the background. Your other devices show a small preview at once and download the full-size photo the first time you open it, print a PDF with it or send it to a customer; after that it's kept on that device too. Photos you took before 1.37 upload by themselves once, after you update with sync on.
- Offline. Take photos anywhere; they upload when you're back online. On a device without a connection, opening a photo shows the preview with a note, and a PDF uses previews for photos that aren't downloaded yet and says so on screen. Save it again when you're online for full-size photos.
- Settings → Sync → Photos shows how much photo storage your license uses, how many photos are waiting to upload, and:
- Upload photos on Wi-Fi only: photos wait for Wi-Fi instead of using cell data. It works on phones that report their connection (Android does); a computer that doesn't say uploads on any connection.
- Free up space on this device: removes the full-size copies of photos from jobs you haven't opened here in 30 days. They stay safe in photo storage and download again when you open them; previews stay. Photos that haven't uploaded yet are never removed.
- Storage. Each license has 10 GB of photo storage (about 40,000 photos at 250 KB). If it fills up, new photos stay on the phone that took them and Settings → Sync says storage is full; delete photos you don't need from old jobs (deleting a photo or a job deletes it from storage too).
- "Photo sync needs the 1.37 license server update." The app couldn't reach photo storage on BidRidge's server when it last checked. Until it can, photos stay on the device that took them, exactly as before, and the app checks again every day (or tap Check again). Still there after a day online? Email support.
- Devices with an app older than 1.37 show the small previews of synced photos; they can't open the full-size ones. Update them.
Backups
- Save backup file (home screen, Sync and backup) saves all your jobs, projects and settings in one file (
bidridge-backup-DATE.json). Keep it somewhere safe, like email or cloud storage. Without sync, do this every week: clearing the browser's data or losing the phone loses the jobs on it. - Import backup file adds the jobs from a backup. Jobs already on the device are updated only if the backup's copy is newer. It asks whether to also replace this device's settings.
- How much it holds: the Sync and backup panel on the home screen shows how many jobs are on this device and how much space they use. Jobs are kept in the browser's quick storage until it's full (about 500 jobs), then BidRidge moves them to the device's app database, which has room for thousands. You don't need to do anything; the panel says "(in the device's app database…)" once that has happened.
- Setup file (Settings → Save setup file) holds only your settings, no jobs. Use it to set up a crew lead's phone or a new computer exactly like yours.
16Troubleshooting: messages and what to do
| You see | What it means / what to do |
|---|---|
| "Not priced yet" | Enter the job's size: the living area or measurements (exterior), rooms with sizes, or tasks with how many. Tap the button on the Price step. |
| REVIEW FLAGS / "N to check" | Open the Price step and read each CHECK line; it says how to fix it. Common: price under walk-away (raise the price or remove work), deposit doesn't cover materials (raise the deposit in Settings or bill by milestone), a paint with no price, wall area not measured. |
| The price looks too high or too low | Look at Cost breakdown and Scope lines on the Price step to see which line drives it. Check your wages, burden, overhead and margin in Settings, and the trade's rate book. Make sure you didn't add the same work twice (for example a Tile estimate for a bathroom that's already in a Bathroom remodel). |
| "Your free trial has ended. Your jobs are safe…" | Buy a license on the website and enter the key on the License screen. |
| No notification when a customer opens a link | Turn on Settings → Follow-ups & reviews → Notify me… and allow notifications for BidRidge in your phone or browser settings. BidRidge must be open or in the background; a closed app can't check. You'll still see the note the next time you open it. |
| The review text has no link | Add your Google review link in Settings → Follow-ups & reviews. |
| "Connect to the internet once to start your free trial." / "…so the app can check your license." | Get a signal or Wi-Fi for a moment and open BidRidge again. |
| "That license key wasn't found." | Check the key letter by letter (it starts BR-). Copy and paste it from the email if you can. |
| "This license is already on 5 devices" | Remove it from a device you don't use (on that device: License → Remove from this device; or, where sync is on, the device list on the Sync screen), then activate again. Still stuck? Email support. |
| "The subscription payment is overdue." / "This subscription has ended." | Update your card or subscribe again on the BidRidge website, then open the License screen and tap Check now (or enter the new key). |
| "Sending to customers needs a license or an active free trial." / "Activate your license on this device first." | Activate your license on this device, then send again. |
| "No connection. Try again when you're online." | Sending, cancelling links and checking status need internet. Your work is saved; try again when you have signal. |
| No "Let them pay…" box when sending | Stripe isn't connected or isn't finished. Settings → Company → Send, sign & get paid online → Check status, and finish what Stripe asks for. |
| "Set up online payments … before asking for payment." / "Online payments need an active license." | Connect Stripe (see Set up online payments) and make sure your license is active. |
| The customer says the link doesn't open | Some phones cut a link short. Open Sent: status & resend and tap Text link again, or Copy link and paste it whole. If they see "This link has expired" or "was cancelled", send a new version. |
| Customer's bank payment says processing | Bank transfers take a few business days. BidRidge marks the invoice paid when it clears, or shows "bank payment failed" (the customer can pay again). |
| "The QuickBooks connection has expired or was turned off" | QuickBooks connections end if BidRidge was disconnected inside QuickBooks, or after long periods without use. Settings → QuickBooks → Connect again. Invoices that were waiting go over by themselves once you reconnect. |
| QuickBooks: "Duplicate Name Exists Error" | A vendor or employee in QuickBooks already uses that customer's name. Add the property address on the job's Customer step, then Try again: BidRidge adds the address to the customer's name in QuickBooks. |
| QuickBooks: "Duplicate Document Number" | QuickBooks already has an invoice with that number. Raise BidRidge's next invoice number above your last QuickBooks invoice (Settings → Invoices & walk-through forms), or turn off "Use BidRidge's invoice numbers", then try again. |
| QuickBooks: "Pick the income account…" | Settings → QuickBooks → choose Income account for your sales, then Send … waiting now. |
| "Pick at least one scope you offer." | In setup or Settings, tick at least one trade under Scopes you offer. |
| A trade or template is missing | Turn the trade on under Settings → Company → Your work & scopes you offer. Built-in templates only show when you offer every trade in them. |
| No + Multi-scope project button | It's hidden when you offer only one trade. Tick a second scope in Settings. |
| The Designs filter says to turn on sync, or a design is missing | Saved designs come through sync. Turn on sync in BidRidge, and in the designer use the same company passphrase (account button → Turn on saving; inside the app it uses the app's sync by itself), then Save to account. Tap Sync on the home screen to fetch them now. |
| Jobs aren't on my other phone or computer | Each device keeps its own jobs until sync is on. Turn on sync on both (same license, same passphrase), or save a backup on one and import it on the other. |
| "Photo sync needs the 1.37 license server update." | The app couldn't reach photo storage when it last checked, so photos stay on the device that took them (nothing is lost). Tap Check again in Settings → Sync. See Photo sync. |
| "Photo storage for your license is full." | New photos stay on this device. Delete photos you don't need from old jobs, then tap Check again in Settings → Sync. See Photo sync. |
| "Small preview. No connection…" when opening a photo | The full-size photo is in photo storage and this device is offline. It downloads when you're back online. |
| "That isn't this company's sync passphrase." | Type the passphrase exactly as you set it on the first device (spaces and capitals count). Lost it? See Forgot the passphrase. |
| "…jobs were changed on two devices. Both versions were kept" | The estimate was changed on both devices. Open both jobs (one says "(conflict copy)"), keep the right one, delete the other. Invoices, change orders, time and the other records are on the original, not the copy. |
| "Couldn't save on this device. Save a backup file now" | This device is out of space, or saving is blocked (private browsing, for example). Save a backup file right away, free up space on the phone or computer, and use a normal browser window or the installed app. |
| "That isn't a backup from this app." / "That isn't a setup file." | Use the file BidRidge saved (bidridge-backup-….json for backups, setup.json for setup files), not a PDF or CSV. |
| "Couldn't find details. Type them in." | That lead's format wasn't recognized. Type the details in the boxes below the paste. |
| Can't find a PDF on Android | PDFs go to your Downloads folder, and the share menu opens so you can text or email them. |
| Windows says "Windows protected your PC" / Mac says it can't verify the developer | See Install it: More info → Run anyway (Windows), or Privacy & Security → Open Anyway (Mac). |
| "Text it" doesn't do anything on my computer | Windows computers don't have a texting app, so on a computer BidRidge emails instead: tap Email it (your email app), Gmail or Outlook.com. If Email it does nothing, your computer has no email app set up; use the Gmail or Outlook.com button, or set your default email app in Windows Settings → Apps → Default apps. |
| The customer says they never got the text or email | BidRidge sends from your own Messages or email app, so check your Sent messages or Sent email that it actually went (and to the right number or address, from the Customer step); emails sometimes land in the customer's spam folder. Or open Sent: status & resend → Copy link and paste it into an email or another app. Customers who open the link show as "opened". |
| The customer says the link has expired or was cancelled | Links last a set time (see Good to know), and sending a new version cancels the old link. Open Sent: status & resend and send a new version. |
| The customer signed the wrong option, or wants something changed after signing | Before work starts: change the estimate and send a new version for them to sign again; the newest signature sets the option sold. After work starts: use a change order. For product or color changes, edit the finish schedule and send it again. |
| A customer paid part of an invoice | Mark paid records the whole invoice. For a partial payment, delete the unpaid invoice (only unpaid ones can be deleted) and use Other invoice to make two: one for the amount they paid (mark it paid) and one for the rest. Enter amounts before tax (if you charge tax on the whole job, tax is added on top), and don't re-create the deleted payment from the payment schedule, or it'll be billed twice. Online payments are always for the full invoice. |
| The customer is tax-exempt | Your sales tax setting applies to every trade estimate; there's no per-job exemption yet. Use a line-item estimate and untick Taxable on each line, and keep a copy of their exemption certificate. |
| Where do job photos go? | Into the job: the Photos section on the Customer, Proposal, Job Pack, Change orders and Close out steps (see Job photos). With sync on they go to your other devices through photo storage (see Photo sync); without sync they stay on the device that took them, so save a backup or Download all (zip) now and then. |
| A job won't go to QuickBooks and stays "waiting to send" | The sample job is never sent to QuickBooks, whichever button you tap. Use a real job. For a real job, check the connection in Settings → QuickBooks Online and tap Check status. |
| No notifications in the Android app | Turn on Settings → Follow-ups & reviews → Notify me…, then allow notifications for BidRidge in Android: Settings → Apps → BidRidge → Notifications. |
| The app looks out of date | Close it fully and open it again while online. On the website copy, refresh the page. |
17Frequently asked questions
Where are my jobs stored? Can BidRidge see my customers?
On your device. With sync on, they're also stored encrypted on BidRidge's server, locked with your passphrase; BidRidge can't read them. Documents you send are encrypted too; only someone with the link can open them.
Does it work without internet?
Yes. Estimates, proposals, PDFs, job packs and invoices all work offline once installed. You need a connection to start the trial, for the license to check in now and then, to send links, and to sync.
Where do the starting prices come from?
From real contractors' estimating workbooks, adjusted to your area with U.S. Bureau of Labor Statistics wages and regional material prices and minimums. They're a starting point only. Change them to your real wages, rates and prices.
Why do my saved estimates' prices change?
Estimates price from your current settings, so a change in Settings changes the prices shown on saved estimates too. Invoices keep the amounts they were created with, and signed proposals keep their signed copy. Save the PDF of anything you send so you have a record.
Is the electronic signature legal?
The customer agrees to sign electronically, and BidRidge keeps a signature record (name, time, device and a fingerprint of the exact document). E-signatures are widely accepted under the U.S. E-SIGN Act, but rules for some contracts differ by state. If you're unsure, ask your attorney. Turn on the 3-day right-to-cancel notice if your state requires it for in-home sales.
What does online payment cost?
Stripe's standard fees: cards 2.9% + 30¢, bank transfer 0.8% (max $5). They come out of your payout. BidRidge takes no cut.
Can my crew lead use it on their phone?
Yes. One license covers up to 5 devices. Turn on sync and have them join with your passphrase, or send them a setup file if you only want them to have your settings.
How do I move to a new phone?
With sync: activate your license on the new phone and join sync. Without sync: Save backup file on the old phone, move the file to the new one, Import backup file. Then remove the license from the old phone.
How do I delete my data?
Delete jobs in the app (deleting a synced job removes it from the server too). To remove the synced copy from the server, open Sync, and under "Forgot the passphrase?" type DELETE and tap Start over (do this before turning sync off). For anything else, see bid-ridge.com/delete-data.html or email support.
Does BidRidge work with QuickBooks?
QuickBooks Online, yes: invoices, customers and payments go over automatically once you connect (see QuickBooks Online). QuickBooks Desktop isn't supported.
Can the customer sign off on tile, flooring and trim selections?
Yes. Fill in the Finish schedule step and tap Send to customer to approve. They sign on their phone, and the schedule prints on the Job Pack so the crew installs the right thing in the right room. See Finish schedules.
My customers buy the materials. Can BidRidge price labor only?
Yes. Tick Labor only in Settings → Your work & scopes you offer (or answer it in setup). Prices leave out material costs, proposals say the customer supplies the materials, and the Job Pack has no shopping list. Switch a single job either way on its Price step. Your website price page follows the setting too.
Can I show one price instead of Good, Better and Best?
Yes. Quick quotes are one price by default (answer Yes to "Offer Good / Better / Best?" on Job questions to get three). For any trade, tick One price on proposals in Settings → Your work & scopes you offer, or pick One price for a single job on its Price step. The proposal, the customer's signing page and the Job Pack then show one price.
Can I just type my own line items and prices?
Yes. + New estimate → Line items. Type each item and its price, then send it as an estimate or tap Invoice now to bill right away. Tax, deposit, sending, signing, payments and QuickBooks work as usual. See Line items: estimate or invoice.
I raised my wages after a job was sold. Will its invoices change?
No. Since 1.74 a job keeps the price it was sold at: invoices, milestones and job cost bill that price. The Price step shows what the job would price at today, and Use today's price instead moves it only if you ask. See The sold price is kept.
Can I bill a general contractor with a pay application and retainage?
Yes. Mark the GC job awarded (the GC, the subcontract amount after scope review, the retainage and the day pay applications are due), then make a pay application each month on the Pay applications step. See Jobs for a general contractor.
How many jobs can BidRidge hold?
Thousands. In testing, 1,000 full jobs (sent, signed, invoiced, with change orders) opened in about half a second. When the browser's quick storage fills up (about 500 jobs), BidRidge moves your data to the device's app database by itself. Keep sync on or save a backup file now and then: the jobs live on your device, so a lost phone without sync loses them.
Can I change, send or delete several jobs at once?
Yes. On the home screen press and hold a job (or tap Select), tick the ones you want, and use the bar at the bottom: Status, Export, Send invoices or Delete. See Library and bulk actions.
Where do I put my license number?
Settings → Company → License, bond & insurance. It prints on every proposal, change order, invoice and walk-through, and on the customer's signing page.
Does BidRidge text my customers by itself?
No. Follow-ups and review requests open your own messages app with the text ready; you tap send. Customers get texts from your number, and nothing goes out without you.
Can I take job photos in BidRidge?
Yes. Every job has a Photos section: take them with the camera or pick them from the gallery, add a caption, the room and Before / During / After, and choose whether each one goes on the proposal, a change order or only the Job Pack. With sync on they reach your other devices (10 GB of photo storage per license). See Job photos.
Can my customer see everything in one place?
Yes. The customer portal is one link per customer with every proposal, change order, selections and invoice you sent them, where each stands, the start date and the photos you chose.
Can I send work to my subs and orders to my suppliers?
Yes. From the Job Pack, a sub work order goes to the sub to accept or price and sign, and a purchase order goes to the supplier to confirm. Agreed sub prices and delivered POs fill in the job's actual costs.
Can I import my old customer list?
Not in bulk. Add customers as leads when they call back, or paste each one into Add a lead.
18Glossary: the words BidRidge uses
- Add-on estimate
- A second estimate for the same customer and visit. Answer Yes to the add-on question so overhead, base consumables and minimums are charged once, on the main estimate.
- Allowance
- On a bathroom, the amount each option includes for products the customer picks (tile per sf, a vanity, a faucet). A selection over its allowance is billed as a change order; one under it is credited.
- Base consumables
- A per-job charge for supplies and small equipment (tape, plastic, blades, rentals), added once per job.
- Change order
- A signed price for work added or removed after the proposal, with its own markups. Only approved change orders count toward the job and can be invoiced.
- Code tables
- Settings → Code tables: the code edition, local amendments, climate zone, snow load and lumber the Rough Carpentry Designer starts every design on; they also fill the Insulation code R-values. Defaults to verify with your building department.
- Construction detail
- A typical detail a designer draws from the job's own numbers (flashing, ledgers, anchor bolts, slab sections, seams, hanger wires) and prints on a details sheet. Not to scale and not engineered.
- Contingency
- A percentage added to the direct costs for the unexpected.
- Crew-day
- One crew working one day (crew size × hours per day).
- Customer portal
- One link per customer that lists everything you sent them, what needs them (sign, pay), the start date and the photos you chose. It updates itself.
- Deposit
- Due when the customer signs. It's at least your deposit percentage of the price and always enough to cover the materials plus the deposit cushion, so no company cash goes into materials, but never more than the price. On a bathroom the percentage is the first milestone's.
- Design agreement
- A signed agreement to bill for design work before the job is priced: a flat fee, or hourly with a cap, optionally credited toward the job.
- Designer
- One of the seventeen drawing tools, built into the app and on bid-ridge.com (room: kitchens and bathrooms, tile, flooring, roofing & siding, concrete, deck & fence, cabinet, hardscape & landscape, ceilings, countertops, finish carpentry, rough carpentry, masonry, and for Commercial work metal stud & drywall, Division 10, glazing and low-slope roofing). It draws the job and sends its quantities to the estimate.
- Finish schedule
- The list of products, colors and sizes for a job and where each goes, approved and signed by the customer.
- Good / Better / Best
- Three versions of the same job at different material grades, margins and warranties; Better is marked Recommended. Turn on One price to show only one.
- Gross profit
- The price minus everything the job costs: labor with burden, materials, subcontractors, equipment, contingency, the job's overhead, and sales and payment costs.
- Gross profit per crew-day
- Gross profit divided by the crew-days the job takes. It flags small or slow jobs that tie up a crew for too little.
- Job Pack
- The crew's packet for a sold job: start and finish dates, day-by-day plan, shopping list, finish schedule and checklist.
- Labor only
- Pricing for customers who buy the materials themselves: no material cost in the price and no shopping list.
- Line items (line-item estimate / quick invoice)
- A job you price yourself, one line at a time, with no rates or measurements. Send it as an estimate, or tap Invoice now to skip the estimate.
- Margin (target margin)
- Gross profit as a share of the price. Your target margin sets the price; the walk-away margin sets the walk-away price.
- Milestone billing
- Billing in stages (deposit, rough-in, completion…) instead of deposit and balance. Each milestone becomes an invoice.
- Minimum price / minimum gross profit
- The least you'll do a job for, and the least it must earn. Small jobs are raised to them.
- Multi-scope project
- Several trades for one customer on one proposal and one schedule.
- Open checks
- In the designers, checks a layout still fails. Saving or sending it says so, and sheet 1 of the drawing set gets an OPEN CHECKS box.
- Owner overhead per job
- A fixed amount added to each job for running the business: truck, insurance, phone, office and your time selling.
- Pay application
- A sub's monthly bill to a general contractor on the schedule of values: percent complete per line, materials stored, retainage held and the amount due. See Pay applications.
- Payroll burden
- Payroll taxes, workers' comp and insurance on top of wages, as a percentage (18–35% is typical).
- Photo storage
- Your license's space on BidRidge's server for synced photos and files over 1 MB (10 GB), encrypted with your sync passphrase.
- Production rate
- How long a unit of work takes your crew (hours per sf, per LF or each), adjusted for height, prep, access and condition.
- Punch list and holdback
- Items to fix at the final walk-through (Part B). The customer may hold back no more than 150% of the punch list's cost until they're done.
- Purchase order (PO)
- An order to your supplier from the job's shopping list. The supplier confirms it by link; what it really cost goes to the job's actual materials.
- Rate book
- Your list of work items with the hours and material per unit, in Settings for each trade.
- Ready to send / REVIEW FLAGS
- The result of the checks on the Price step: nothing to look at, or something marked CHECK to fix first.
- Retainage
- A share of each payment (often 10%) the GC holds until the job is done, released with the final pay application. BidRidge tracks it both ways: what GCs hold from you and what you hold from your subs.
- Sales / payment / admin %
- The share of the price that goes to selling, card fees and paperwork; it's built into every price.
- Saved design
- A drawing you saved to your account in one of the designers. It is listed under Designs on the home screen and opens in its designer.
- Select mode
- On the home screen, ticking several jobs to change their status, export, send invoices or delete them in one go.
- Setup file / backup file
- A setup file holds only your settings (for a new phone or a crew lead). A backup file holds your settings and every job.
- Sub work order
- The scope, drawings and photos you send a subcontractor. They accept your price or return theirs and sign; the agreed price goes to the job's actual sub cost.
- Sync passphrase
- Your company's password for sync. Jobs are locked with it before they leave the device; BidRidge can't read them or recover it.
- Track record
- How finished jobs compared with your estimates. After three closed-out jobs in a trade it suggests adjustments to your rates.
- Trim package
- In the Finish Carpentry Designer, a room's base, casing, window trim, chair rail, crown and wall treatment as one pick (16 built in, or your own).
- Walk-away price
- The lowest price that still earns your walk-away margin. Below it, take work out instead of discounting.
- Walk-Through Part A / Part B
- Part A, signed before work starts, records existing damage and conditions. Part B is the final walk-through: checklist, punch list and sign-off.
Still stuck?
Email support@bid-ridge.com. Tell us which device you use, what you tapped and the exact message you saw; a screenshot helps. Your app version is under Help → About.