BidRidge › Designers › Guide › Chapter 44

Chapter 44 · Flooring DesignerBeta

Sample Tenant Improvement: an eight-room office suite on one PDF sheet

Most commercial jobs start as a PDF. Open the floor plan sheet under the drawing, set its scale from one dimension on the sheet, and the designer can find the rooms (by the room names on the sheet) or the walls (by their double lines) for you. Every tool also snaps to the sheet's lines, so anything it does not find you trace in a few taps. Fourteen designers have the same Plan background panel; this chapter walks one sheet through the Flooring Designer and the Metal Stud & Drywall Designer.

Narrated walkthrough, 1:33. Captions on.

The sample in numbers

  • Rooms found
    8
    1,108 sf, named from the sheet
  • Scale
    1/4" = 1'-0"
    set from the 40'-0" dimension
  • Partitions found
    19
    115 ft of 4 1/2" walls plus the 6" outside walls
  • Designers
    14
    with the same Plan background panel

Step by step

Step 1: Open the plan sheet in the Flooring Designer

Step 1: Open the plan sheet

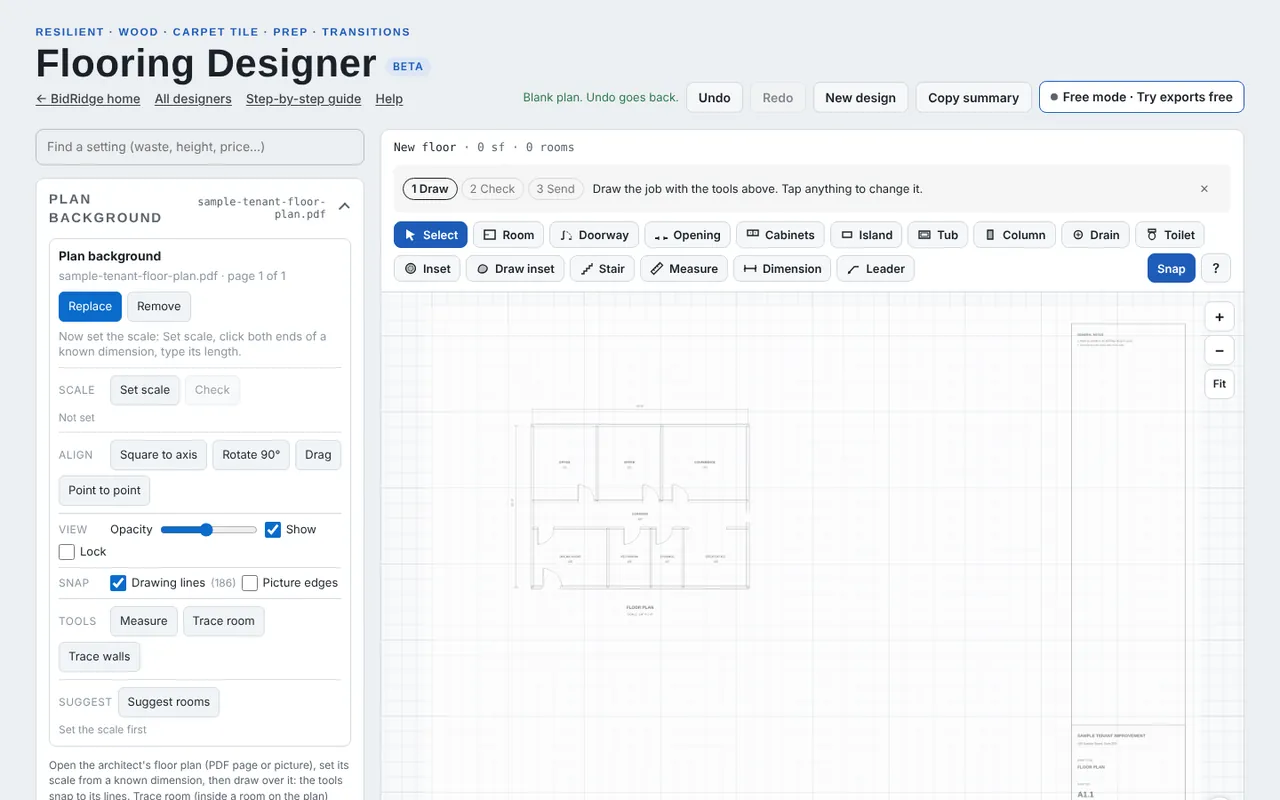
In the Flooring Designer, start a blank plan (New design, then Start blank) and open Plan background at the top of the side panel. Tap Import PDF or image and pick the PDF (a picture of a sheet works too). A sheet with more than one page asks which page. The sheet shows under the grid at its own size until you set the scale; the panel says what to do next.

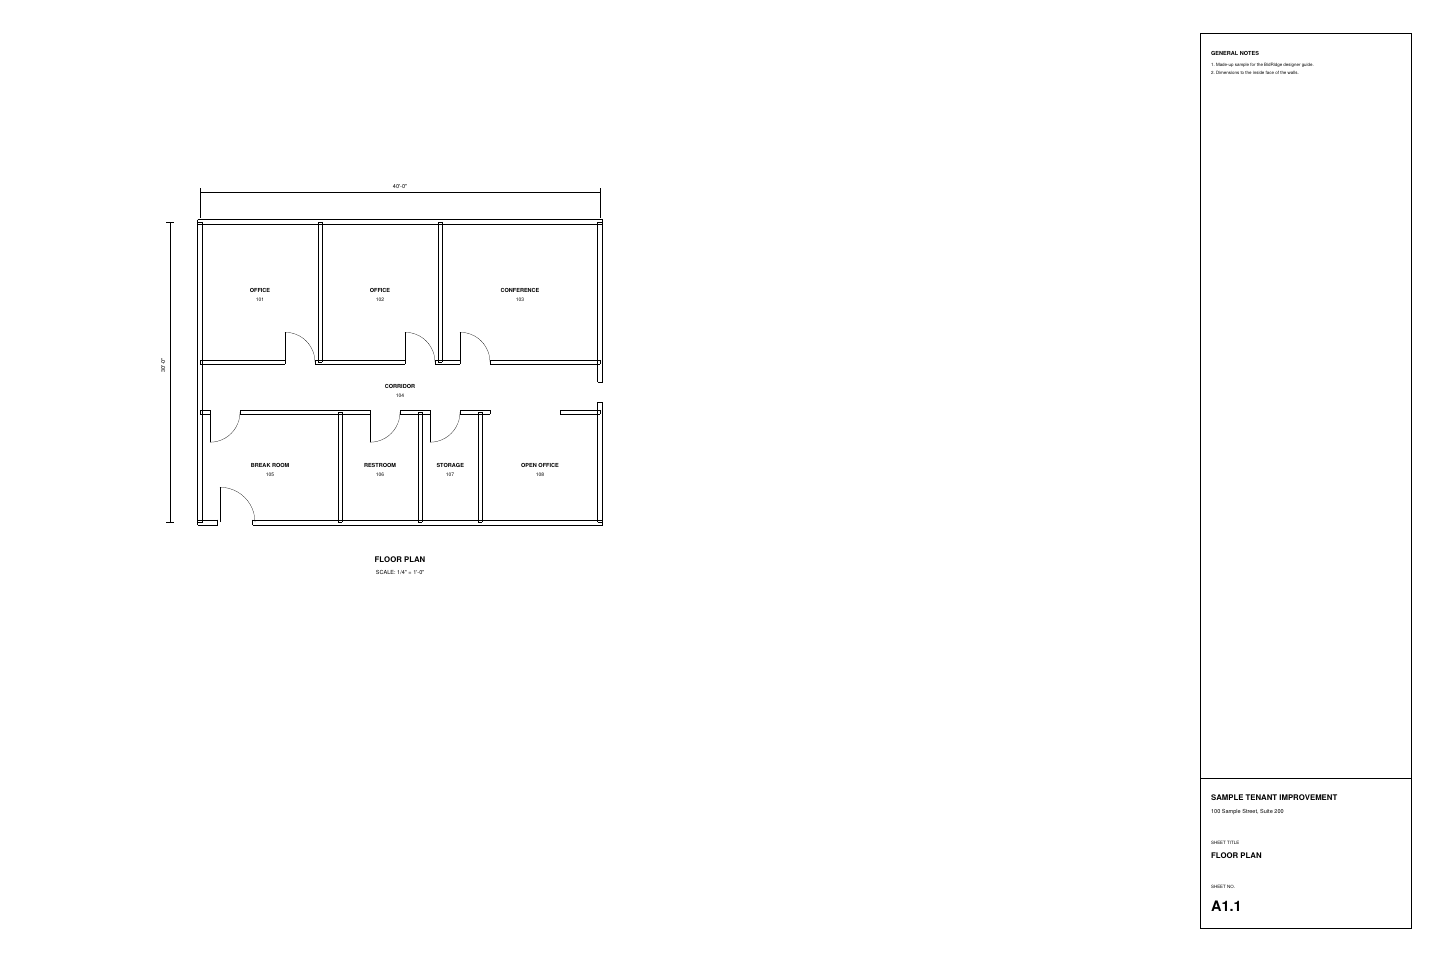
Field tip: Download the sample sheet below (sample-tenant-floor-plan.pdf) to follow along. It is a made-up suite with made-up room names.
Step 2: Set the scale from a dimension in the Flooring Designer

Step 2: Set the scale from a dimension

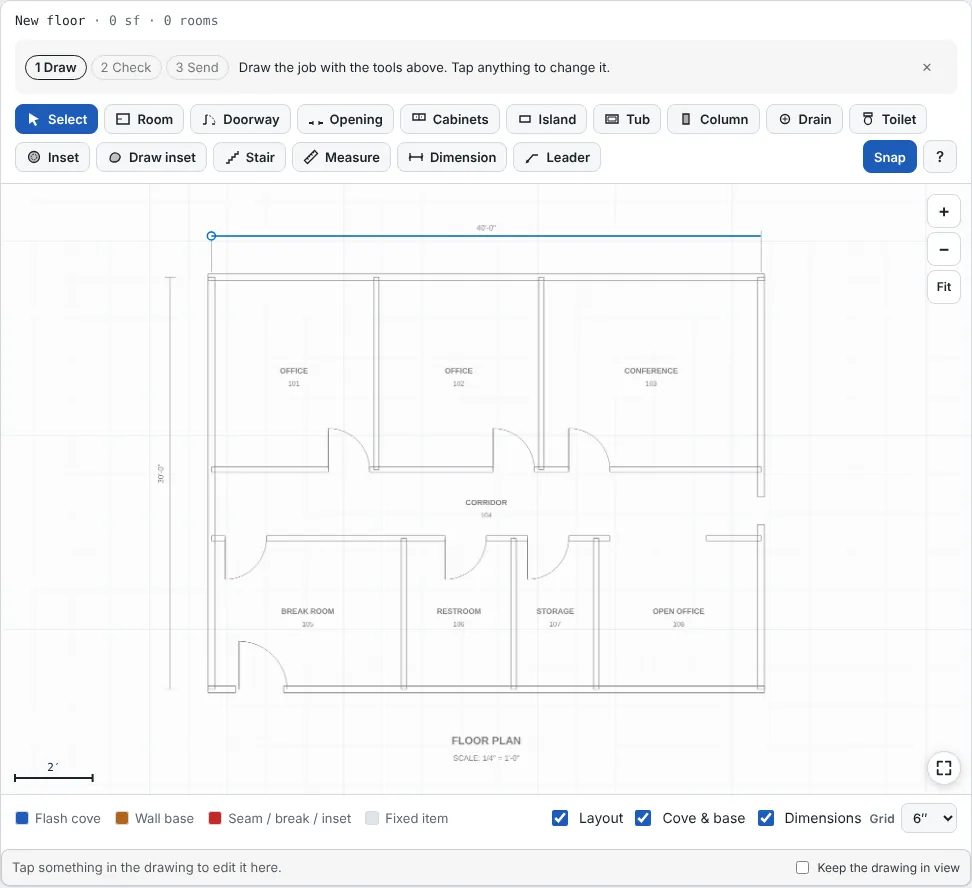
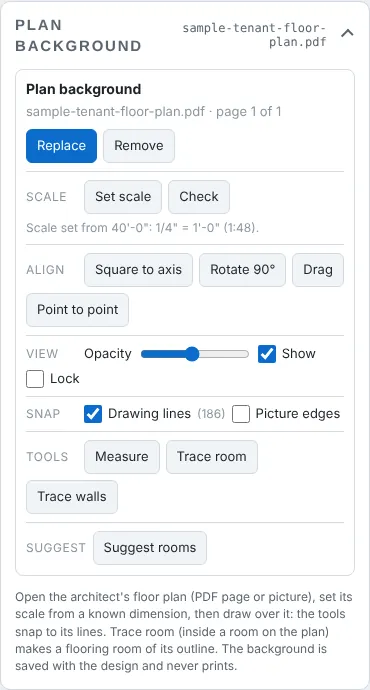
Tap Set scale, then tap both ends of a dimension you trust: here the 40'-0" across the top. The taps snap to the ends of the dimension line. Type its length (40' or 40'-0") and press Enter. The panel shows the scale it worked out (1/4" = 1'-0", 1:48) so you can match it to the scale printed on the sheet.

Field tip: Pick the longest dimension you can: a 40 ft dimension is ten times less sensitive to a slightly off tap than a 4 ft one.

Step 3: Check it, then line it up in the Flooring Designer

Step 3: Check it, then line it up

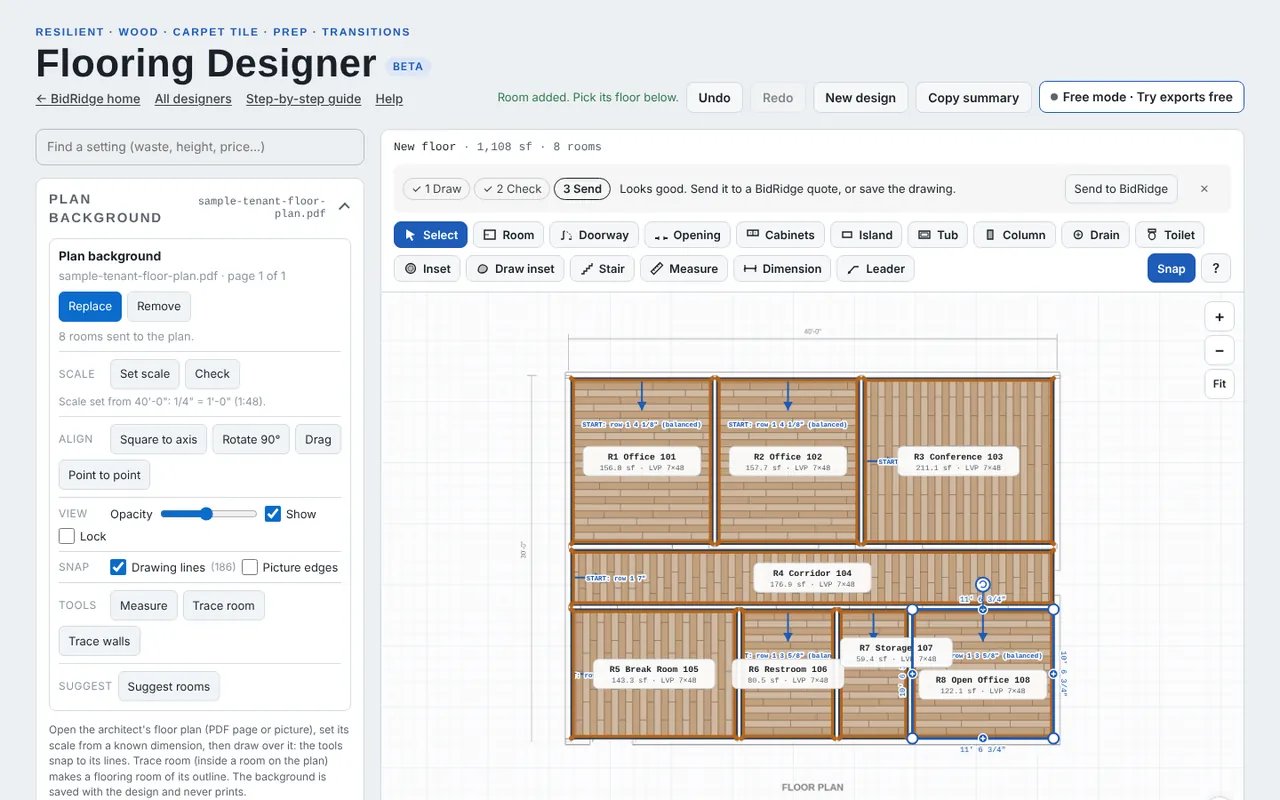
Tap Check, tap both ends of a second dimension (the 30'-0" up the side) and type its length: the panel says whether the scale agrees with it, so you know it is right both ways. Square to axis turns the sheet so a wall you tap runs straight across; Rotate 90° turns it a quarter; Drag or Point to point moves it under a drawing you already have. Opacity fades it, Lock stops it moving, Show hides it without removing it.

Field tip: Snap to Drawing lines is on for a PDF with real lines (this one has 186). For a scanned sheet, turn on Picture edges instead.

Step 4: Suggest rooms in the Flooring Designer

Step 4: Suggest rooms

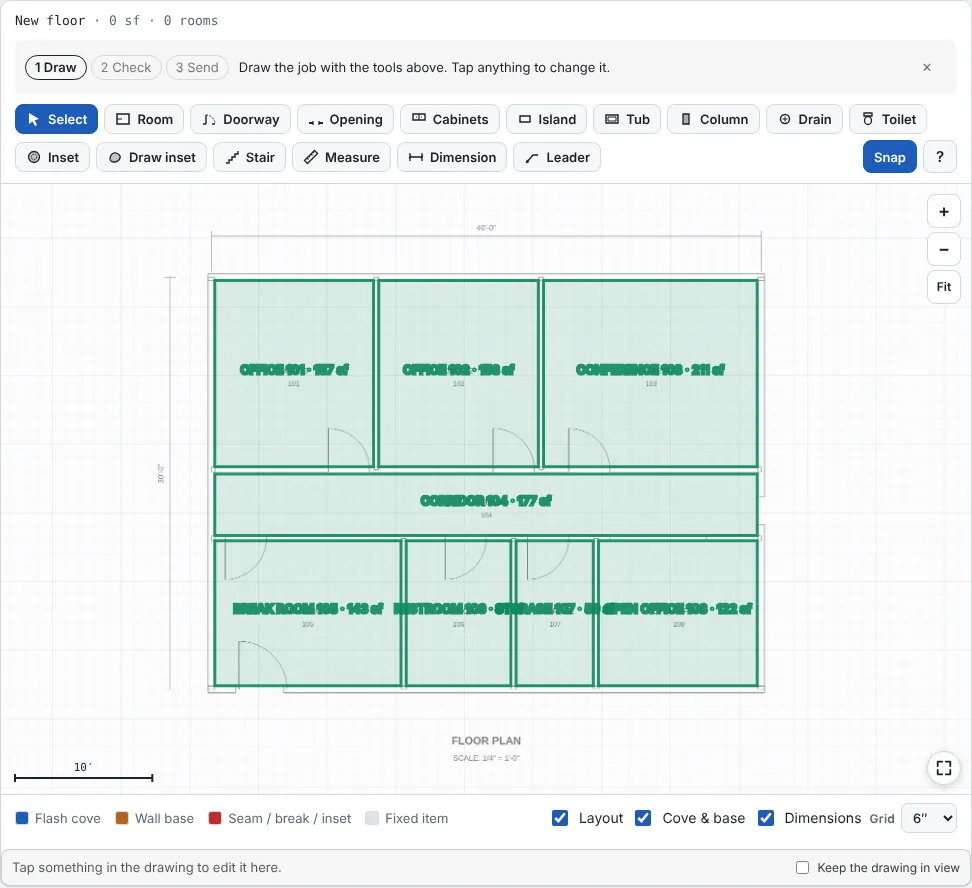
Tap Suggest rooms. The designer reads each room name on the sheet and closes it off by the walls around it: here Office 101, Office 102, Conference 103, Corridor 104, Break Room 105, Restroom 106, Storage 107 and Open Office 108, each with its area. Tap a room on the plan (or untick it in the list) to leave it out; tap it again to put it back.

Field tip: Rooms come from names printed on the sheet. A sheet with no room names, or a scan, gives nothing to suggest: use Trace room instead.

Step 5: Use them in the Flooring Designer

Step 5: Use them

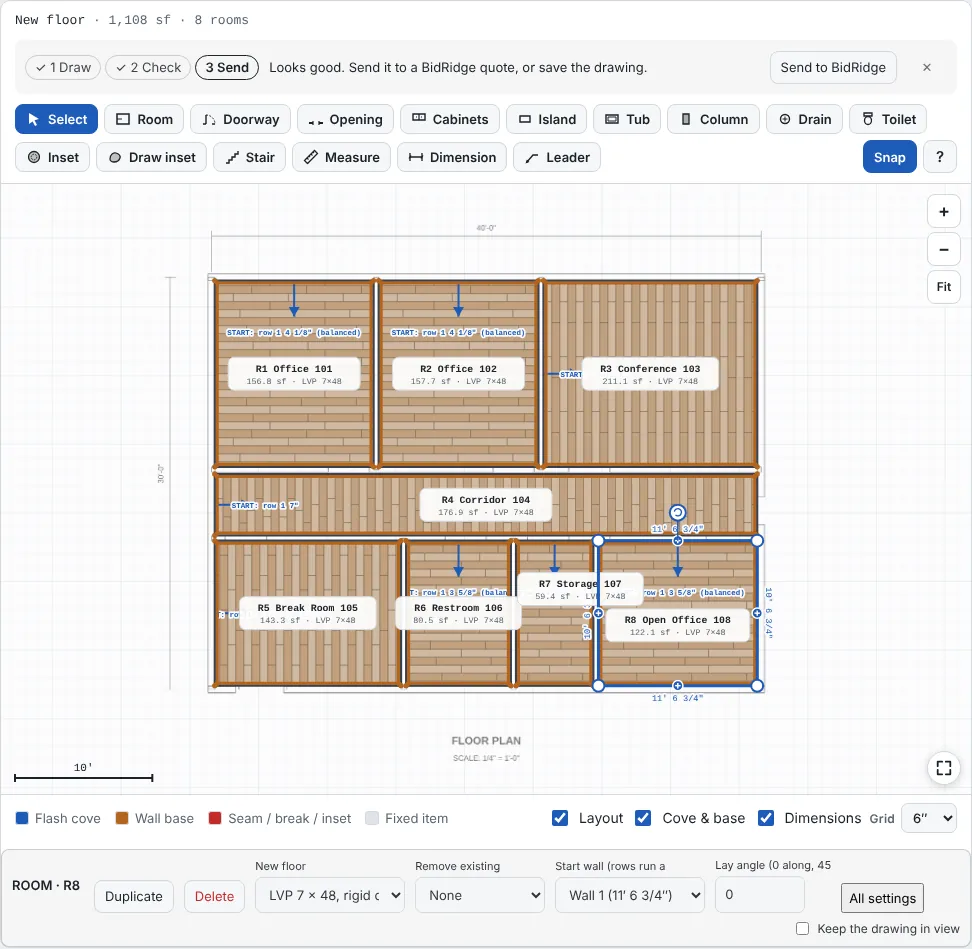
Tap Use. Each room lands as a flooring room with its name and its outline from the sheet, laid out in the default floor (LVP here) and with wall base around it. 1,108 sf in eight rooms, in a few seconds. Change a room's floor, start wall or lay angle in the strip under the plan, the same as a room you drew.

Step 6: Trace a room or a wall run

For anything Suggest missed, tap Trace room and click inside a room on the sheet: its inside outline becomes a room. Trace walls follows a wall run tap by tap, each tap snapping to the corners, ends and crossings on the sheet (hold Alt for a free point). Measure reads any distance on the sheet without drawing anything.

Step 7: The finished floor in the Flooring Designer

Step 7: The finished floor

The rooms sit exactly over the sheet, so a glance shows anything that does not match. From here it is an ordinary flooring design: transitions at the doors, the base, the takeoff, and Send to BidRidge. The background is saved with the design (Save project carries it), but it never prints: the drawing set and the takeoff are the same with or without it.

Step 8: Suggest walls (Metal Stud & Drywall) in the Flooring Designer

Step 8: Suggest walls (Metal Stud & Drywall)

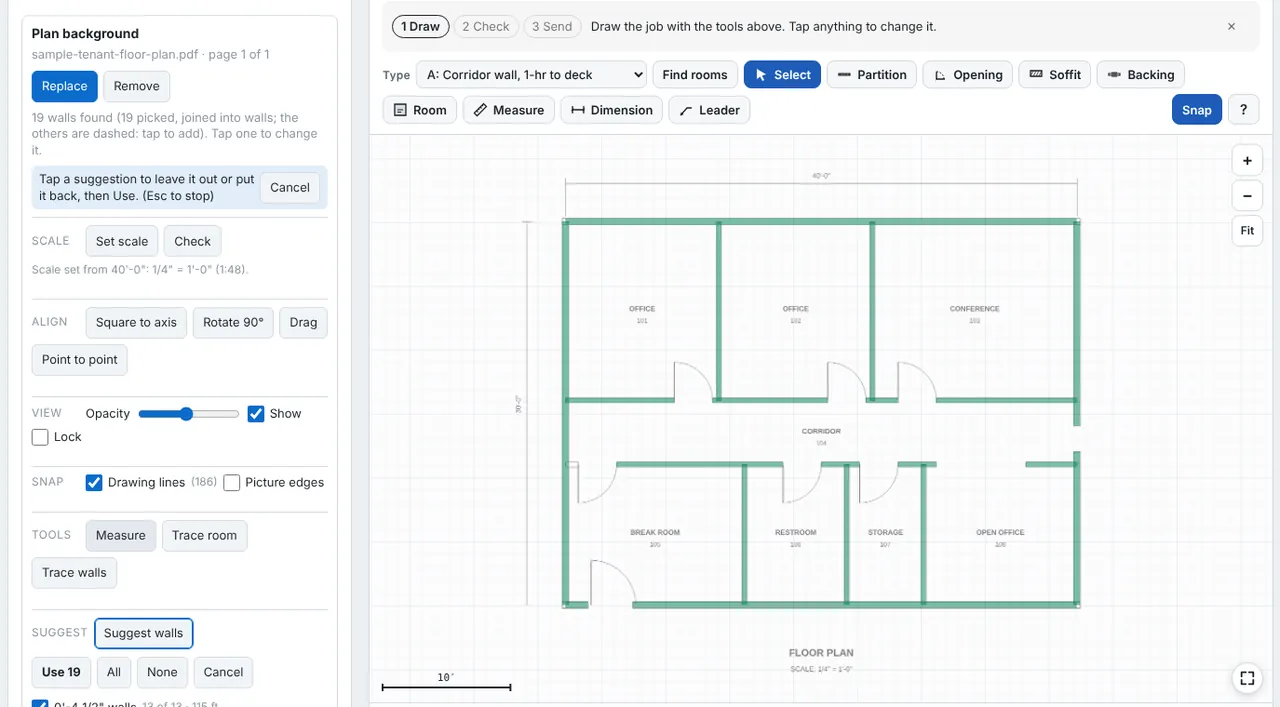
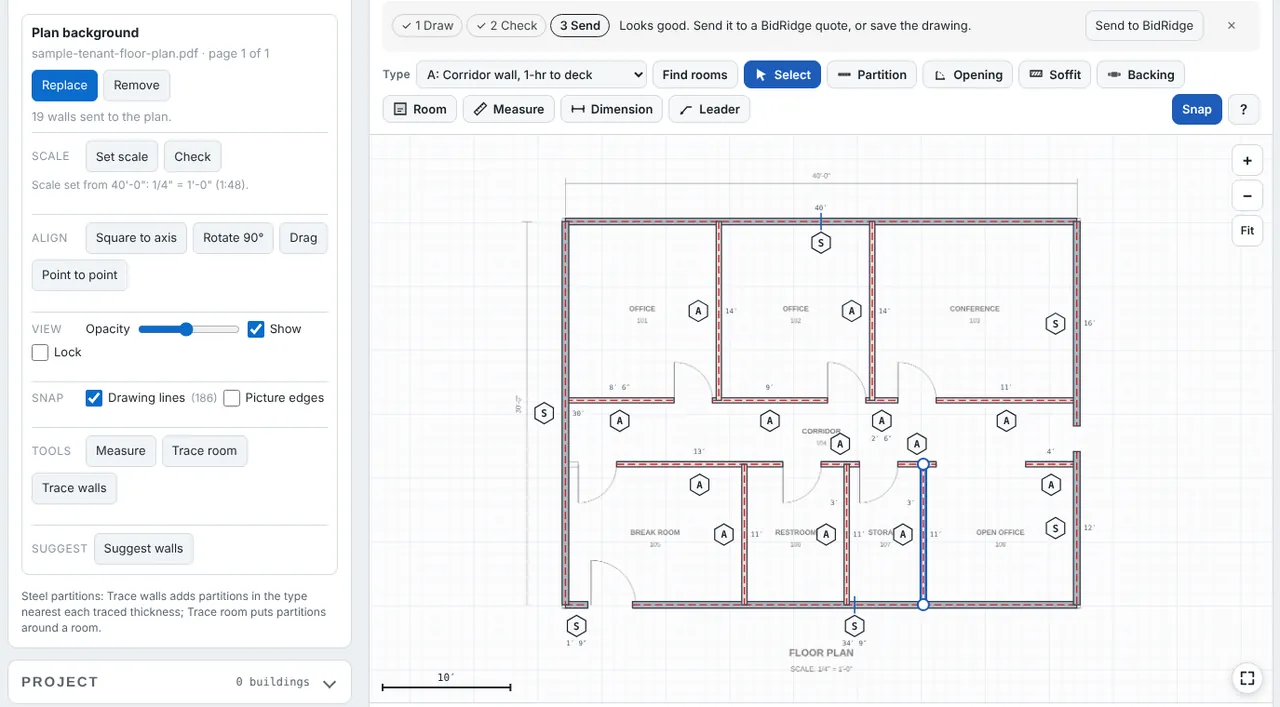
The designers that draw walls suggest walls instead of rooms. Here the same sheet is open in the Metal Stud & Drywall Designer with the scale set the same way. Suggest walls finds the double lines and groups them by thickness: 13 runs of 4 1/2" walls (115 ft) and the 6" outside walls. Untick a thickness, or tap a single wall, to leave it out.

Field tip: A dashed suggestion is one the designer was not sure of: tap it to add it.

Step 9: Partitions on the plan in the Flooring Designer

Step 9: Partitions on the plan

Tap Use: every wall becomes a partition of the type nearest its thickness (type A for the 4 1/2" walls, type S for the 6" ones), joined at the corners, with its length. Change a partition's type, or draw the openings and soffits, the same as partitions you drew; the studs, track, board and the 1-hour walls price from them.

Step 10: Which designer suggests what

Suggest rooms: the Flooring, Tile, Ceiling, Division 10, Finish Carpentry, Concrete, Landscape and Low-Slope Roofing designers. Suggest walls: the Metal Stud & Drywall, Masonry, Concrete, Landscape and Low-Slope Roofing designers. The Cabinet and Countertop designers work from the wall faces instead: Trace room inside the room (or Wall run along one wall) makes the cabinet runs, since suggested walls are centerlines. Suggest doors: the Finish Carpentry Designer, from the door swings on the sheet, grouped by width. The Glazing and Roofing & Siding designers have the panel for tracing and measuring.

Step 11: Scans and pictures

Suggest needs a PDF with real lines (most sheets exported from a drawing program have them). A scanned sheet or a photo is only a picture: open it the same way, set the scale, turn on Picture edges so the taps snap to dark edges, and trace the rooms or walls yourself. Straighten a crooked scan with Square to axis first.

What you get

The drawing set, the lists and the files

Real files from this sample, made by the designer. Tap a page to see it full size. Yours carry your company, the client and the address.

The sample sheet: A1.1 floor plan, 1/4" = 1'-0"

Try it on your own job

Open the sample, change it to your measurements, and send it to a BidRidge quote. Drawing is free; the drawing set, the lists and the quote come with a BidRidge license or the 14-day trial.

Sample designs: names, sizes and clients are made up. Prices are BidRidge's starting rates; set your own. The designers check against common guidelines (IRC, NKBA and the makers' published numbers) to help you catch mistakes. They don't replace your building department or the manufacturer's installation instructions: verify with them.