BidRidge › Designers › Guide › Chapter 19

Chapter 19 · Cabinet DesignerBeta

Sample Day Spa casework

We draw a day spa's restroom vanity and corridor wall: a floating vanity on concealed brackets with its checks, a veneer panel wall with fins and a floating bench, and two RFIs tagged right on the drawings with the RFI list sheet. Then Save PDF and Update the job for the quote.

In the designer, tap Open project and pick the sample file. It opens exactly as in the video.

Narrated walkthrough, 2:21. Captions on.

The sample in numbers

  • Floating counters
    2
    a 6'-0" vanity (also applies to Restroom 2) and a 6'-0" bench
  • Brackets
    14
    concealed flat-bar, both restrooms and the bench
  • Wall paneling
    116 sf
    4′-0″ module, 1/4″ reveals, Z-clips
  • Fins
    2
    1 1/2″, floor to ceiling
  • RFIs
    2
    tagged on the drawings, the RFI list sheet
  • Sheets
    4 sheets
    SD-200 cover to SD-203 RFIs, ARCH D
  • Quote
    $18,900
    Better, the whole project at the starting rates

Step by step

Step 1: A floating vanity on concealed brackets in the Cabinet Designer
  1. No boxes: the top on brackets into blocking by others

Step 1: A floating vanity on concealed brackets

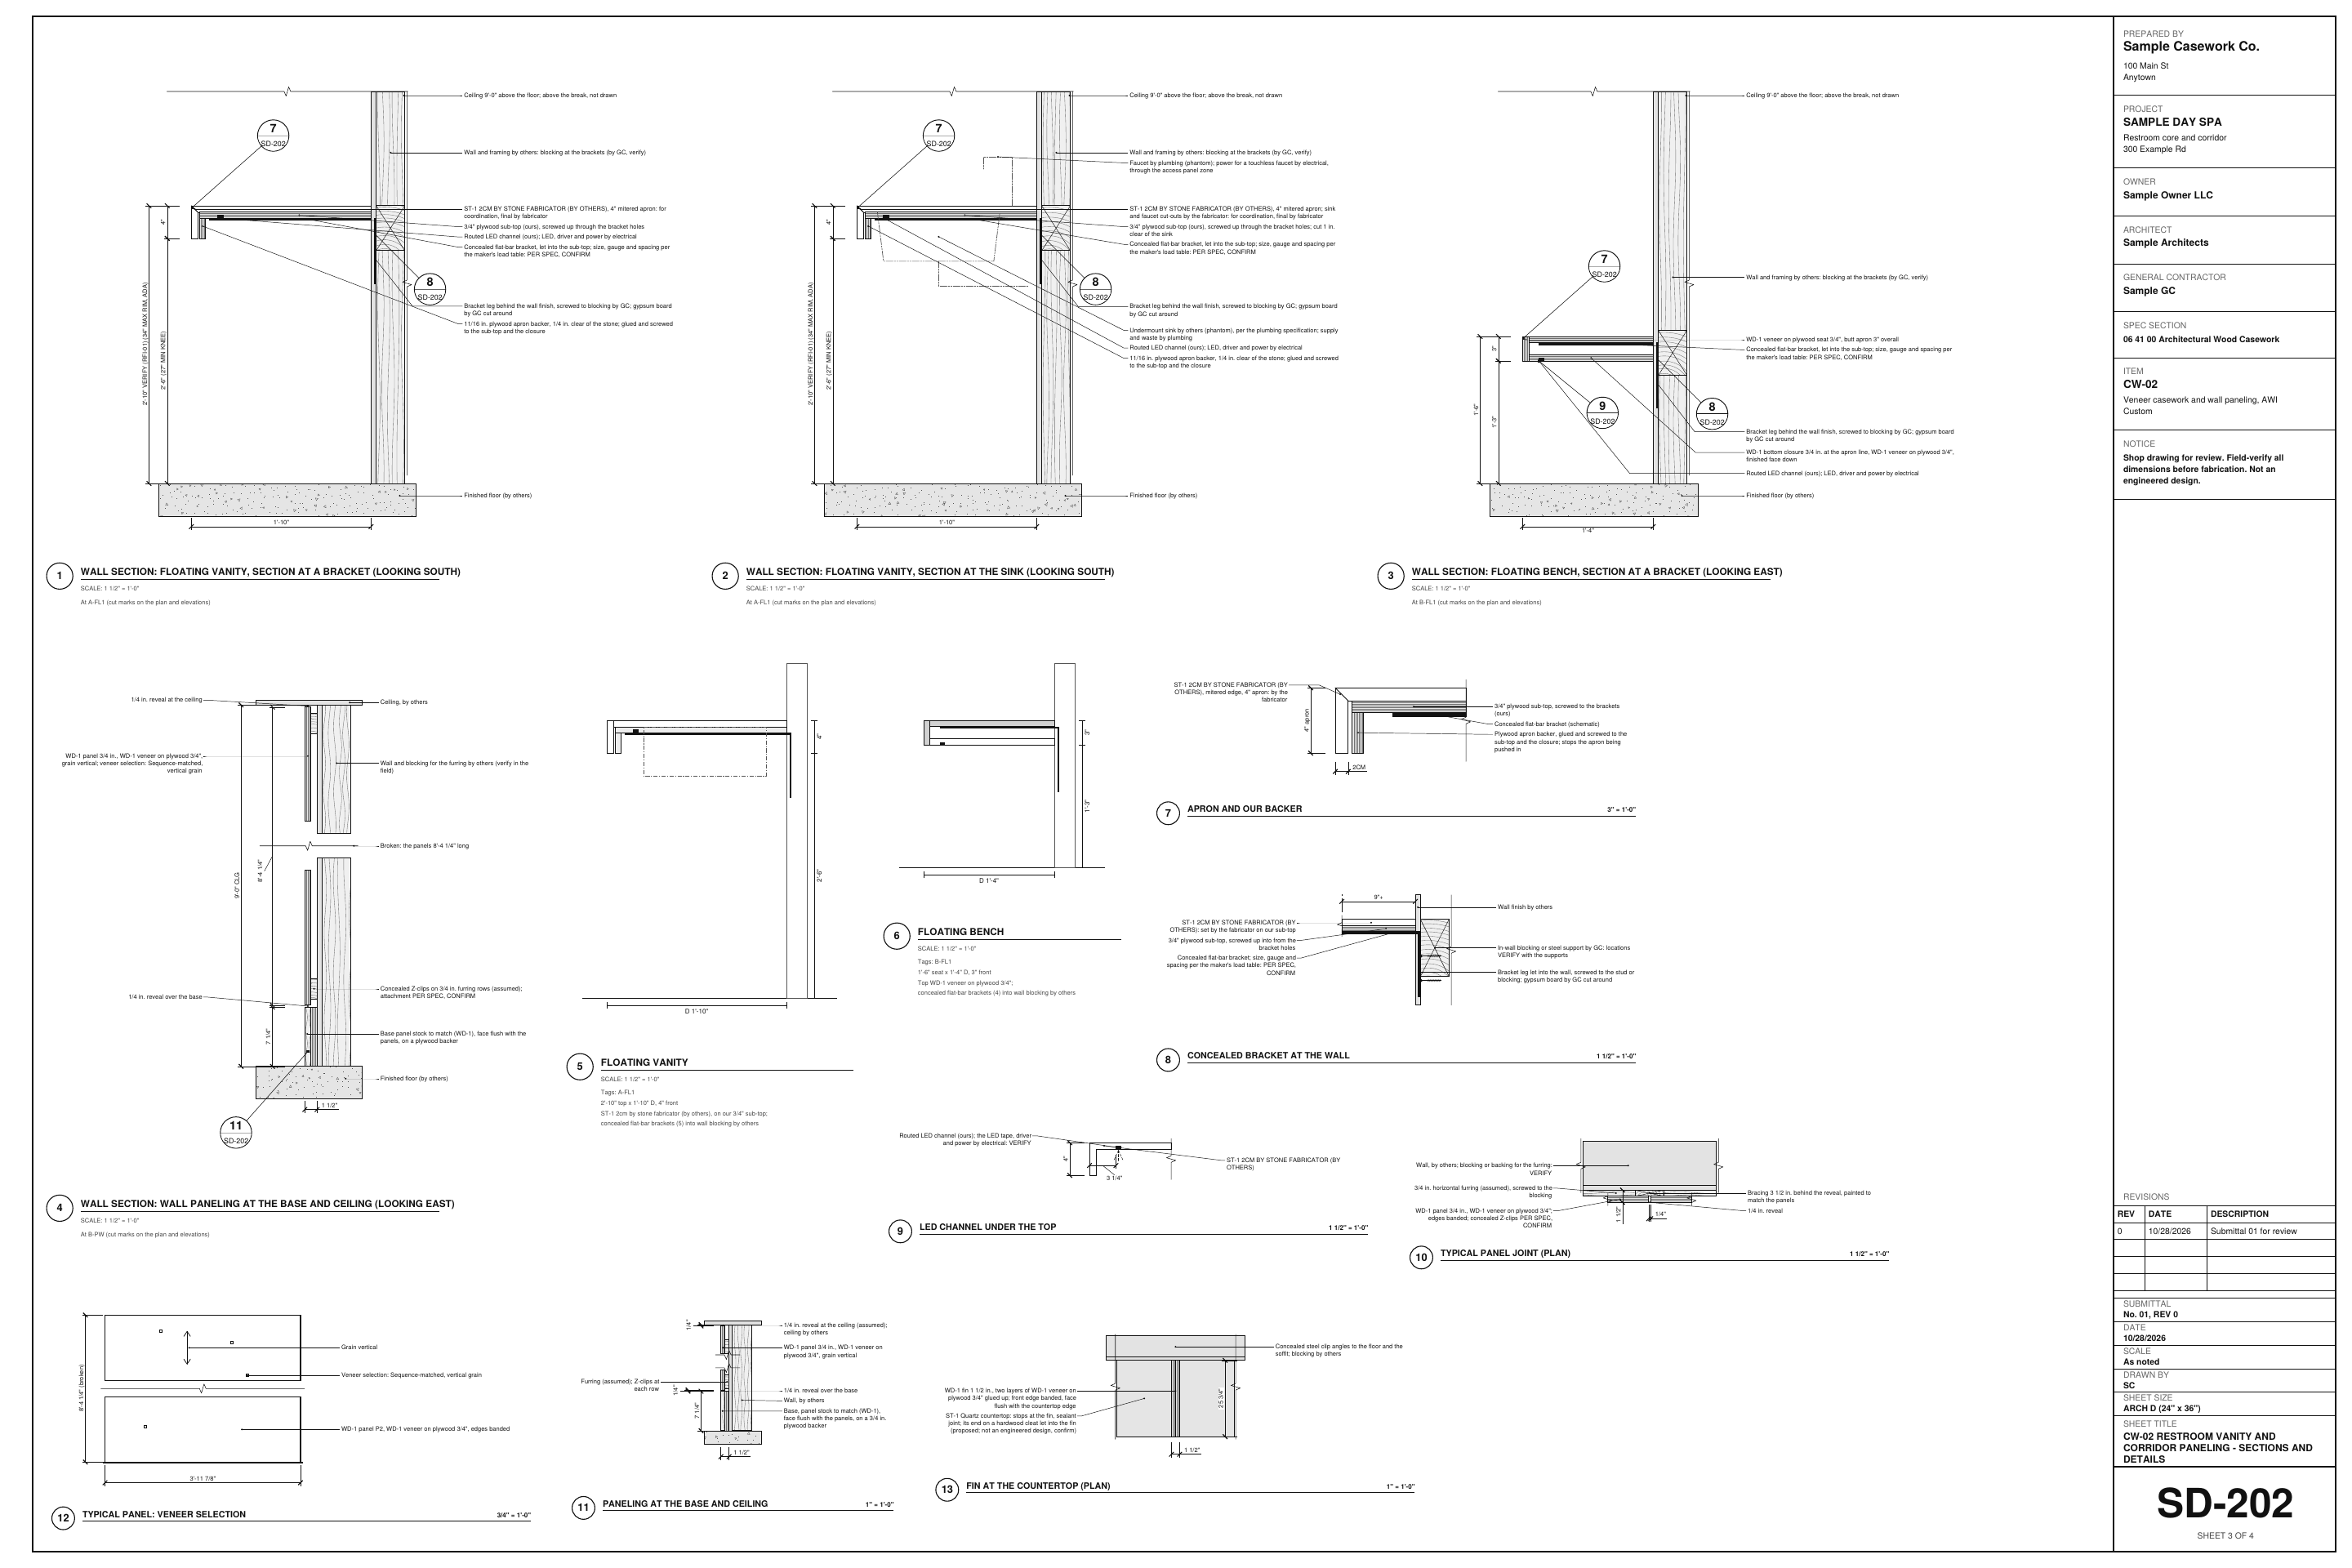
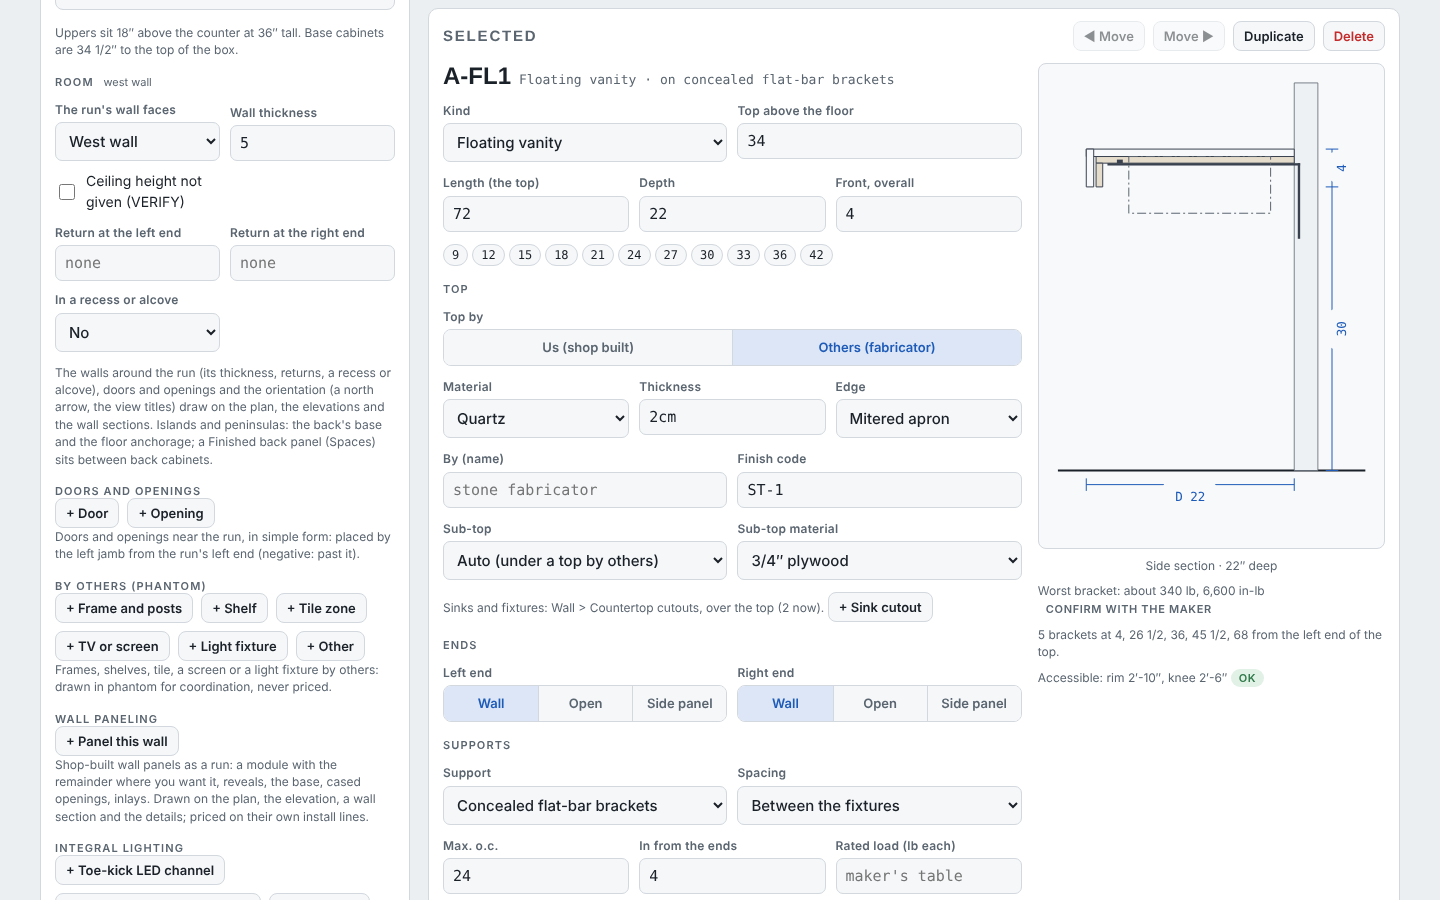
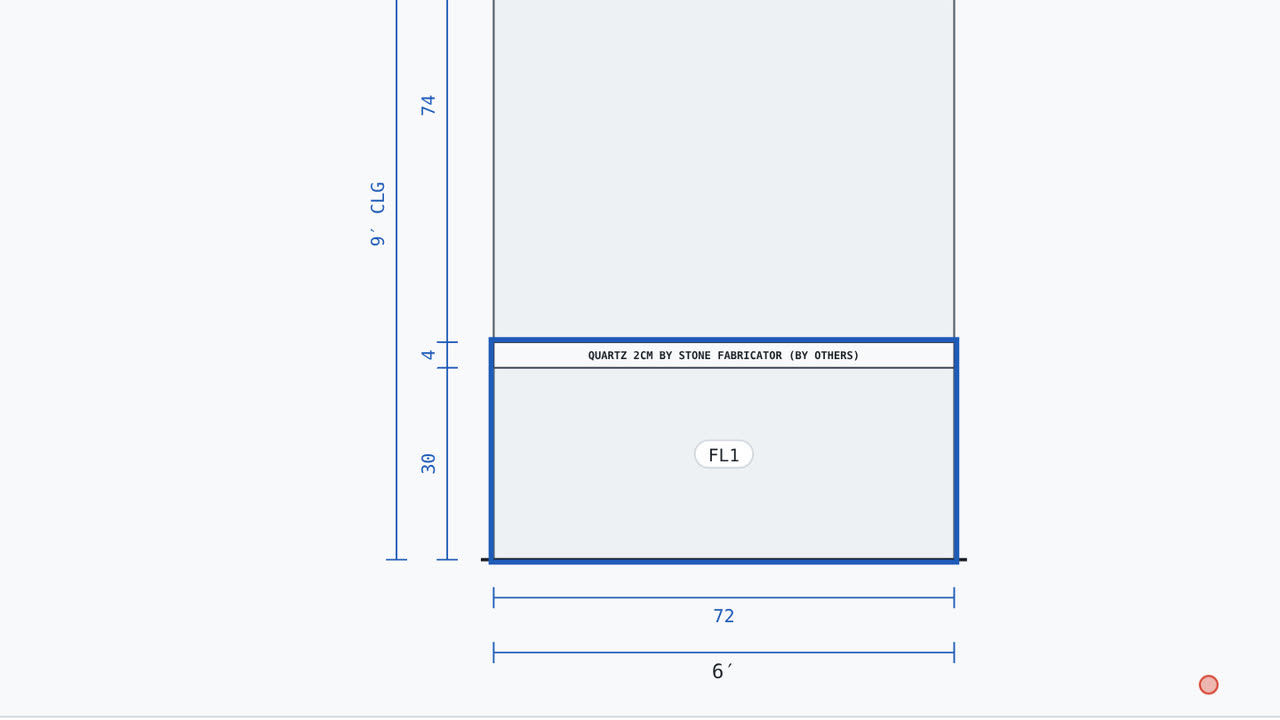
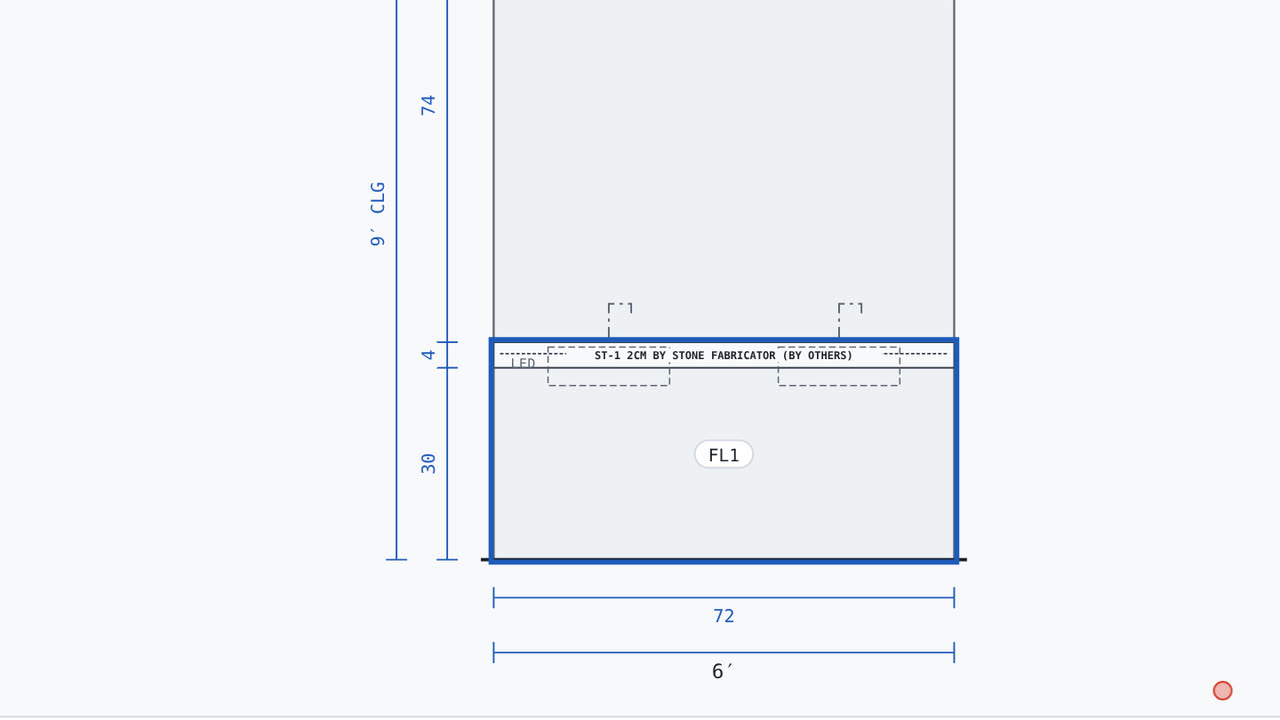
From the Vanity palette, Floating vanity, brackets adds a vanity with no cabinet boxes: the top hangs on concealed flat-bar brackets into wall blocking by others. Length 6'-0", top at 34", a 4" mitered apron, open underneath. Accessible is on in a Commercial project, so it checks the 34" rim and the knee and toe clearances.

Field tip: The palette's Floating counter and Floating bench work the same way.
Step 2: Quartz by others, two sinks in the Cabinet Designer
  1. Quartz by the stone fabricator, in outline

Step 2: Quartz by others, two sinks

Top by: Others (fabricator): the quartz is drawn in outline over our plywood sub-top and apron backer. Type the finish code ST-1 and tap + Sink cutout twice; the sinks are the run's countertop cutouts, by others for coordination.

Field tip: Brackets lay out between the fixtures, never under a bowl.

Step 3: The bracket check in the Cabinet Designer
  1. Not an engineered design: confirm with the maker's load table

Step 3: The bracket check

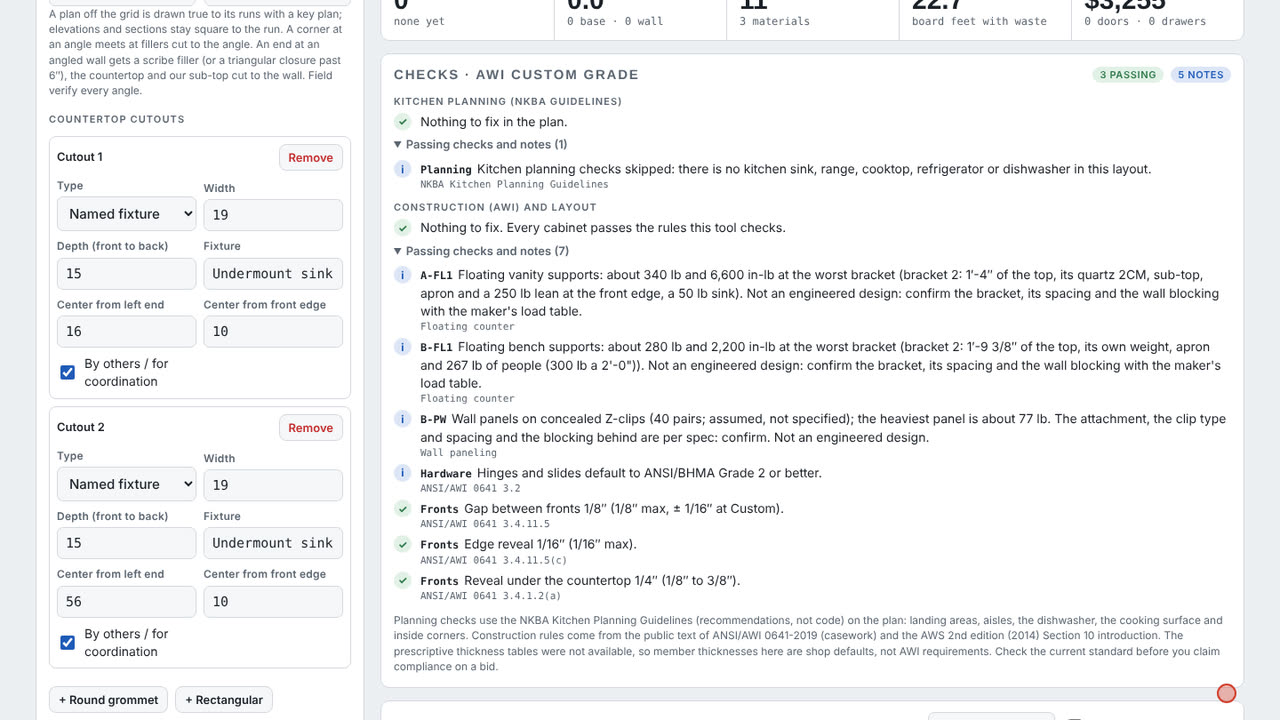
With the sinks 18" and 54" from the left end, two brackets end up 2'-0 1/2" apart with no room for one between: over the 24" maximum. Move the sinks to 16" and 56" (Wall > Countertop cutouts) and it clears. The load stays as an advisory: the worst bracket's load and moment, not an engineered design.

Field tip: Confirm the bracket, its spacing and the wall blocking with the maker's load table.

Step 4: A veneer panel wall in the Cabinet Designer
  1. 4′-0″ panels reveal to reveal
  2. The remainder panel at the end

Step 4: A veneer panel wall

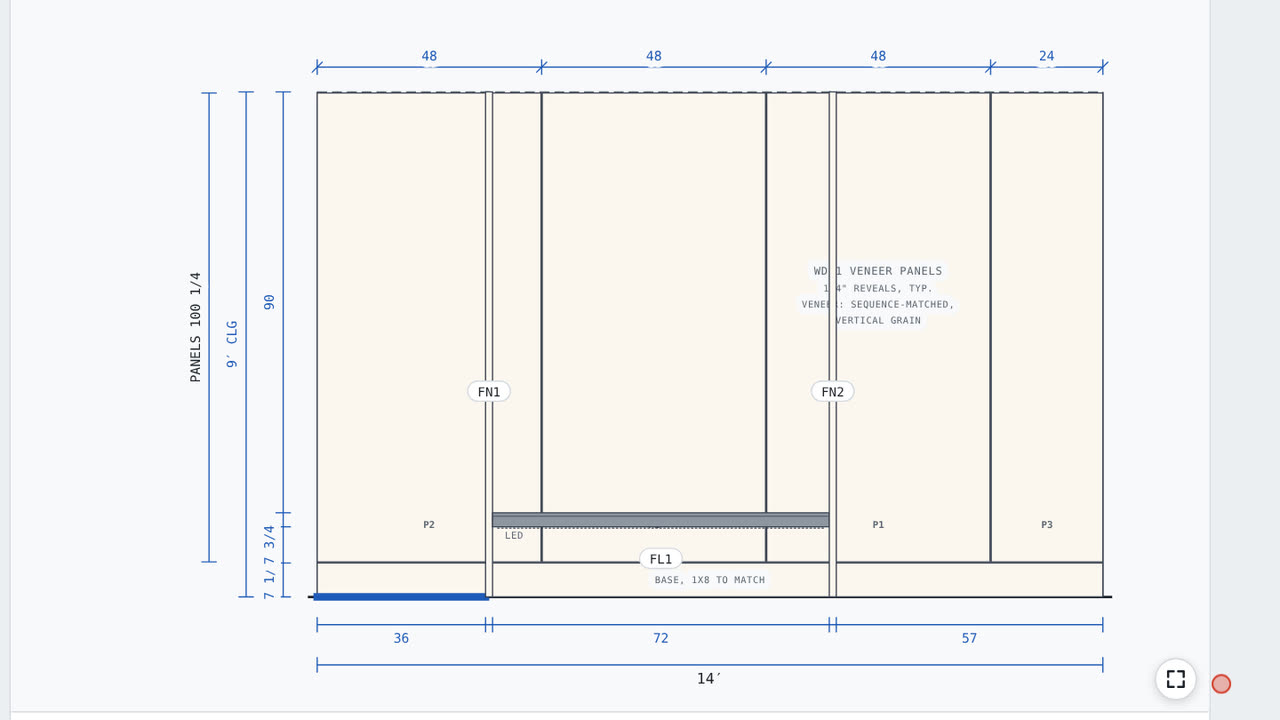
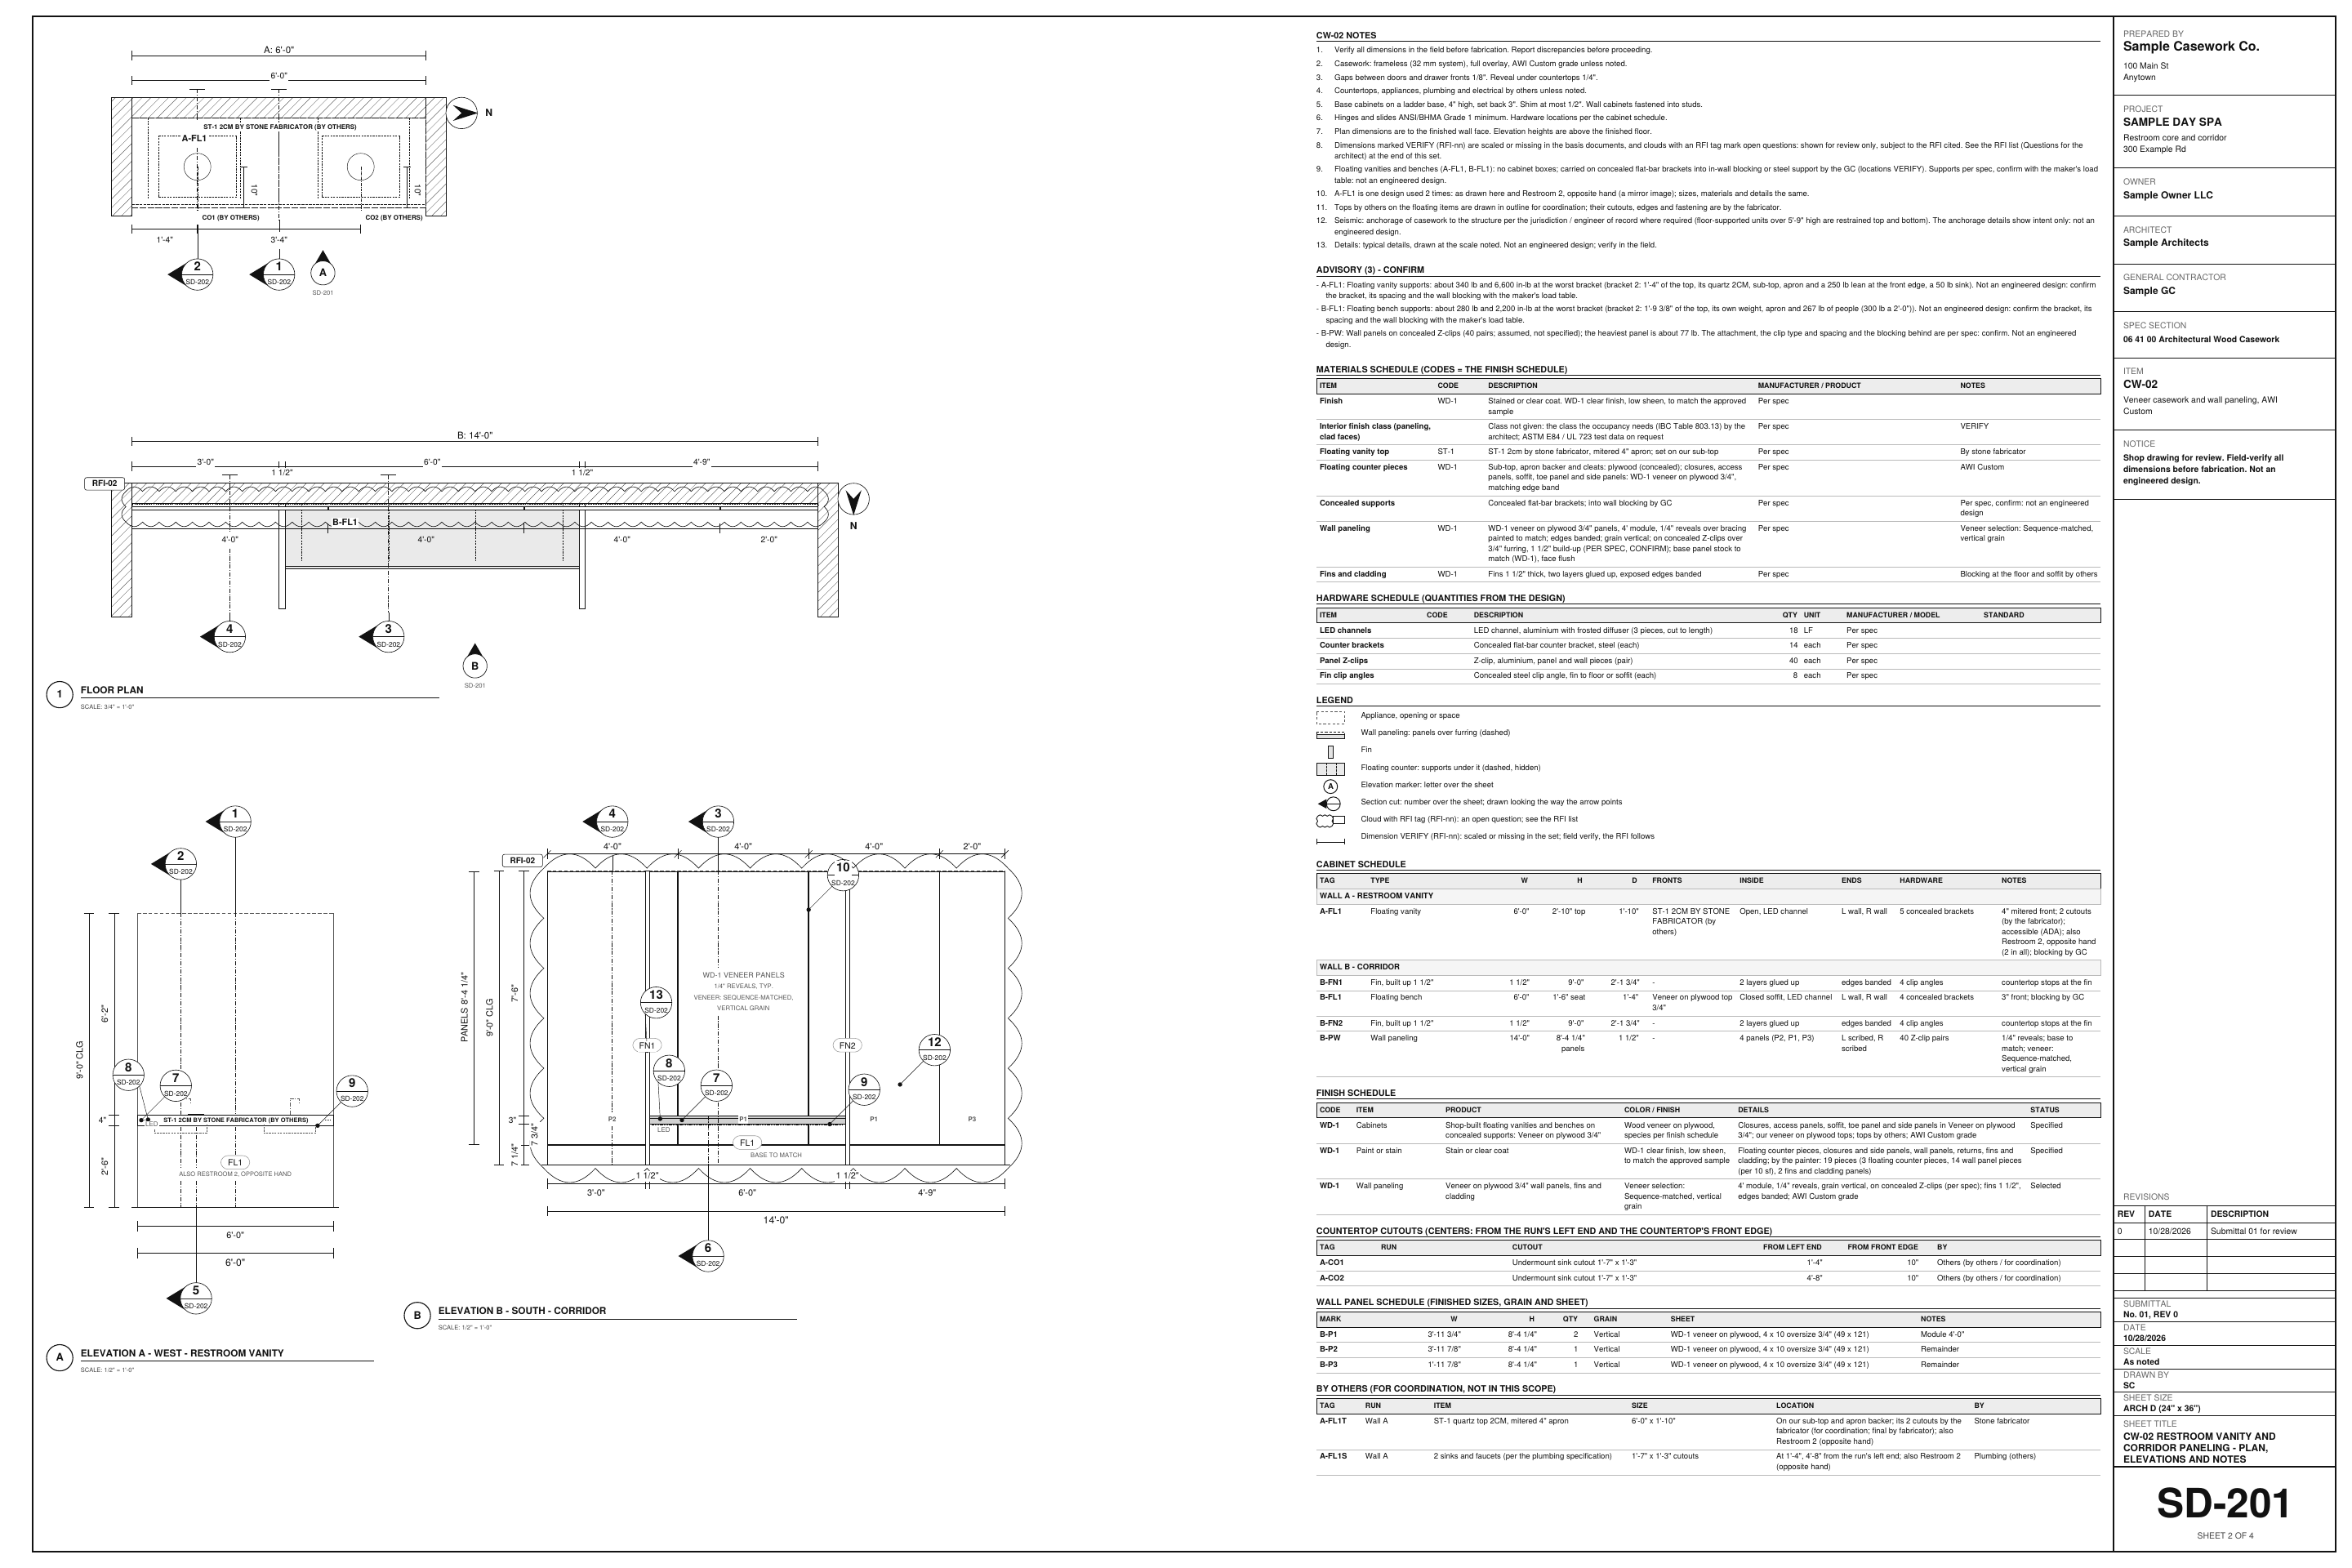
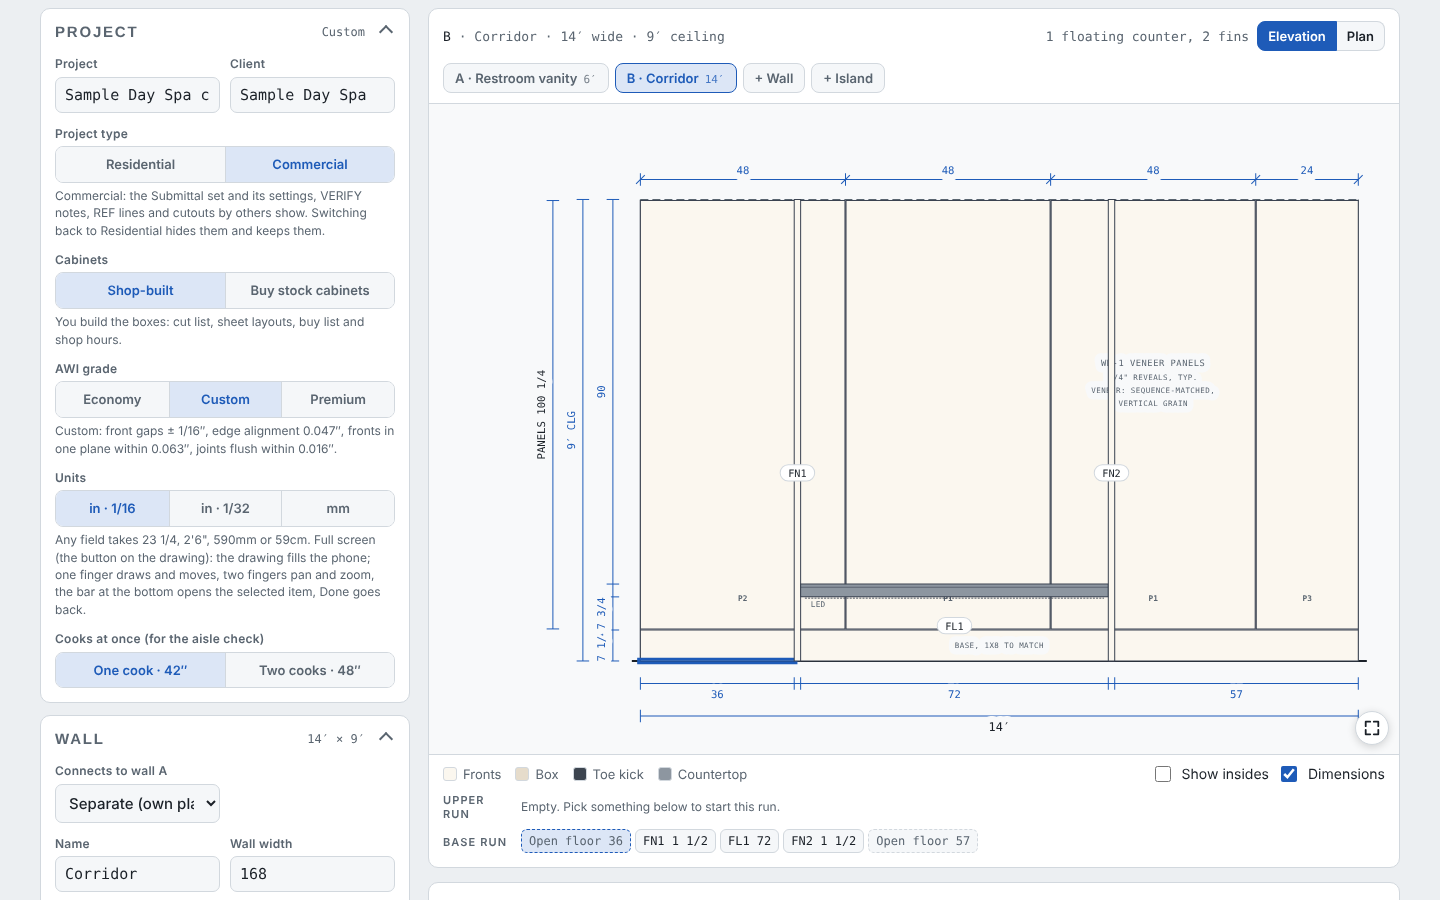
On the corridor, + Panel this wall lays out shop-built veneer panels on Z-clips over furring: a 4'-0" module reveal to reveal, 1/4" reveals, a 1x8 base flush with the panels and the remainder panel at the right end. Add the veneer selection note and the finish code WD-1.

Field tip: Panels taller than an 8' sheet come from the 4 x 10 oversize sheet.

Step 5: Fins and a floating bench in the Cabinet Designer
  1. Fins floor to ceiling
  2. Floating bench between them

Step 5: Fins and a floating bench

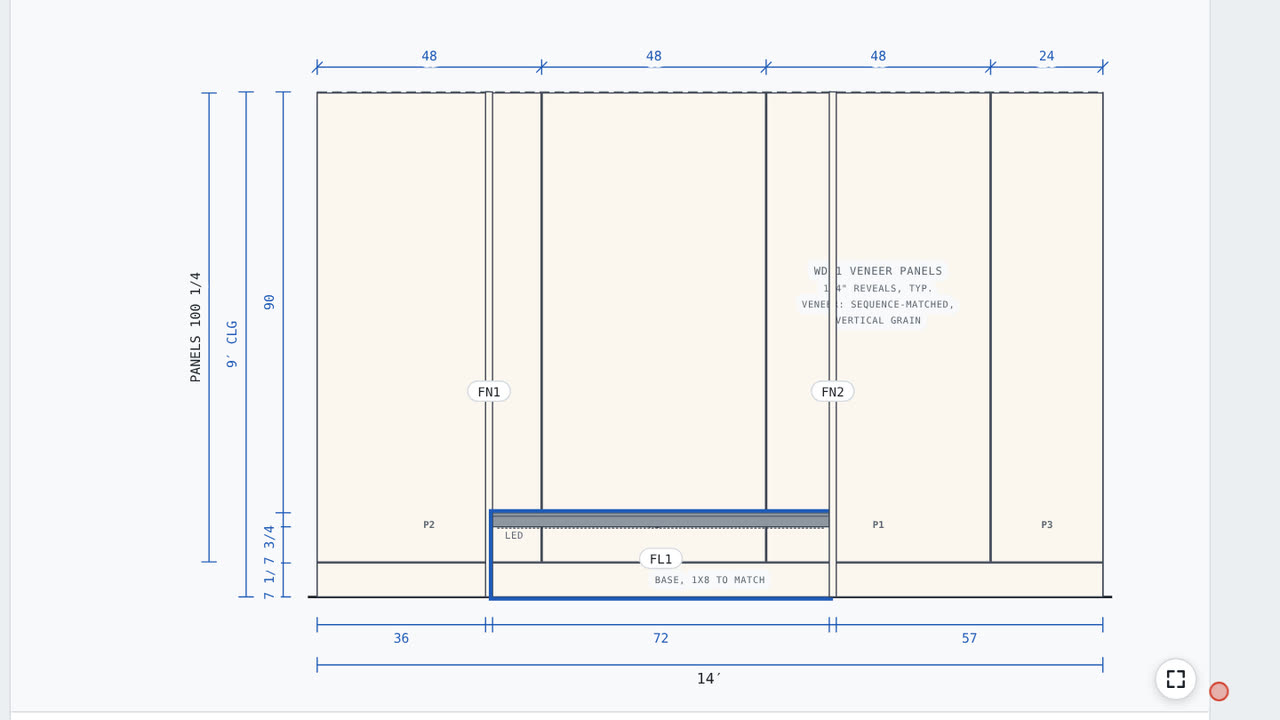
Fins (Spaces palette) run floor to ceiling, 1 1/2" thick on concealed clip angles. A Floating bench (Built-in palette) goes between them on brackets, with an LED channel under the seat.

Field tip: The bench gets its own load advisory: a people load along the seat.

A bench clad in solid surface and swept round a curve: chapter 25, Curved benches →

Step 6: Two RFIs on the drawings in the Cabinet Designer
  1. Cloud around B-PW, the paneling, with RFI-02

Step 6: Two RFIs on the drawings

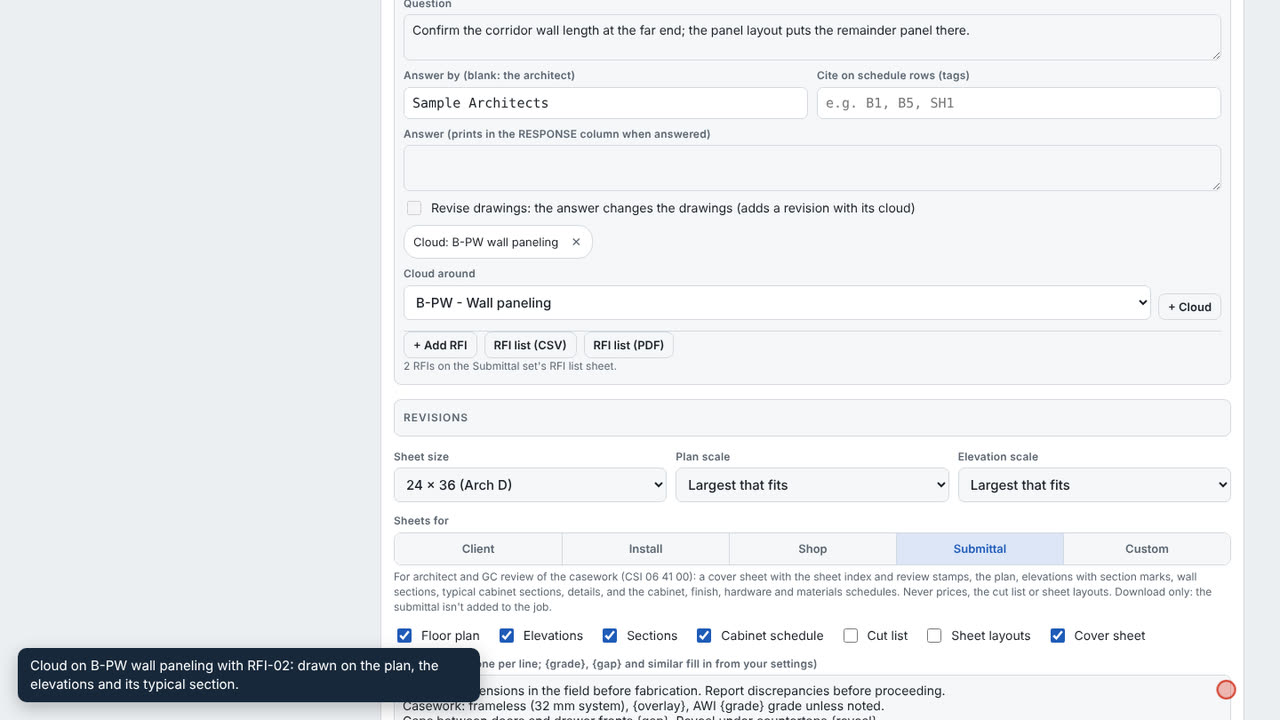
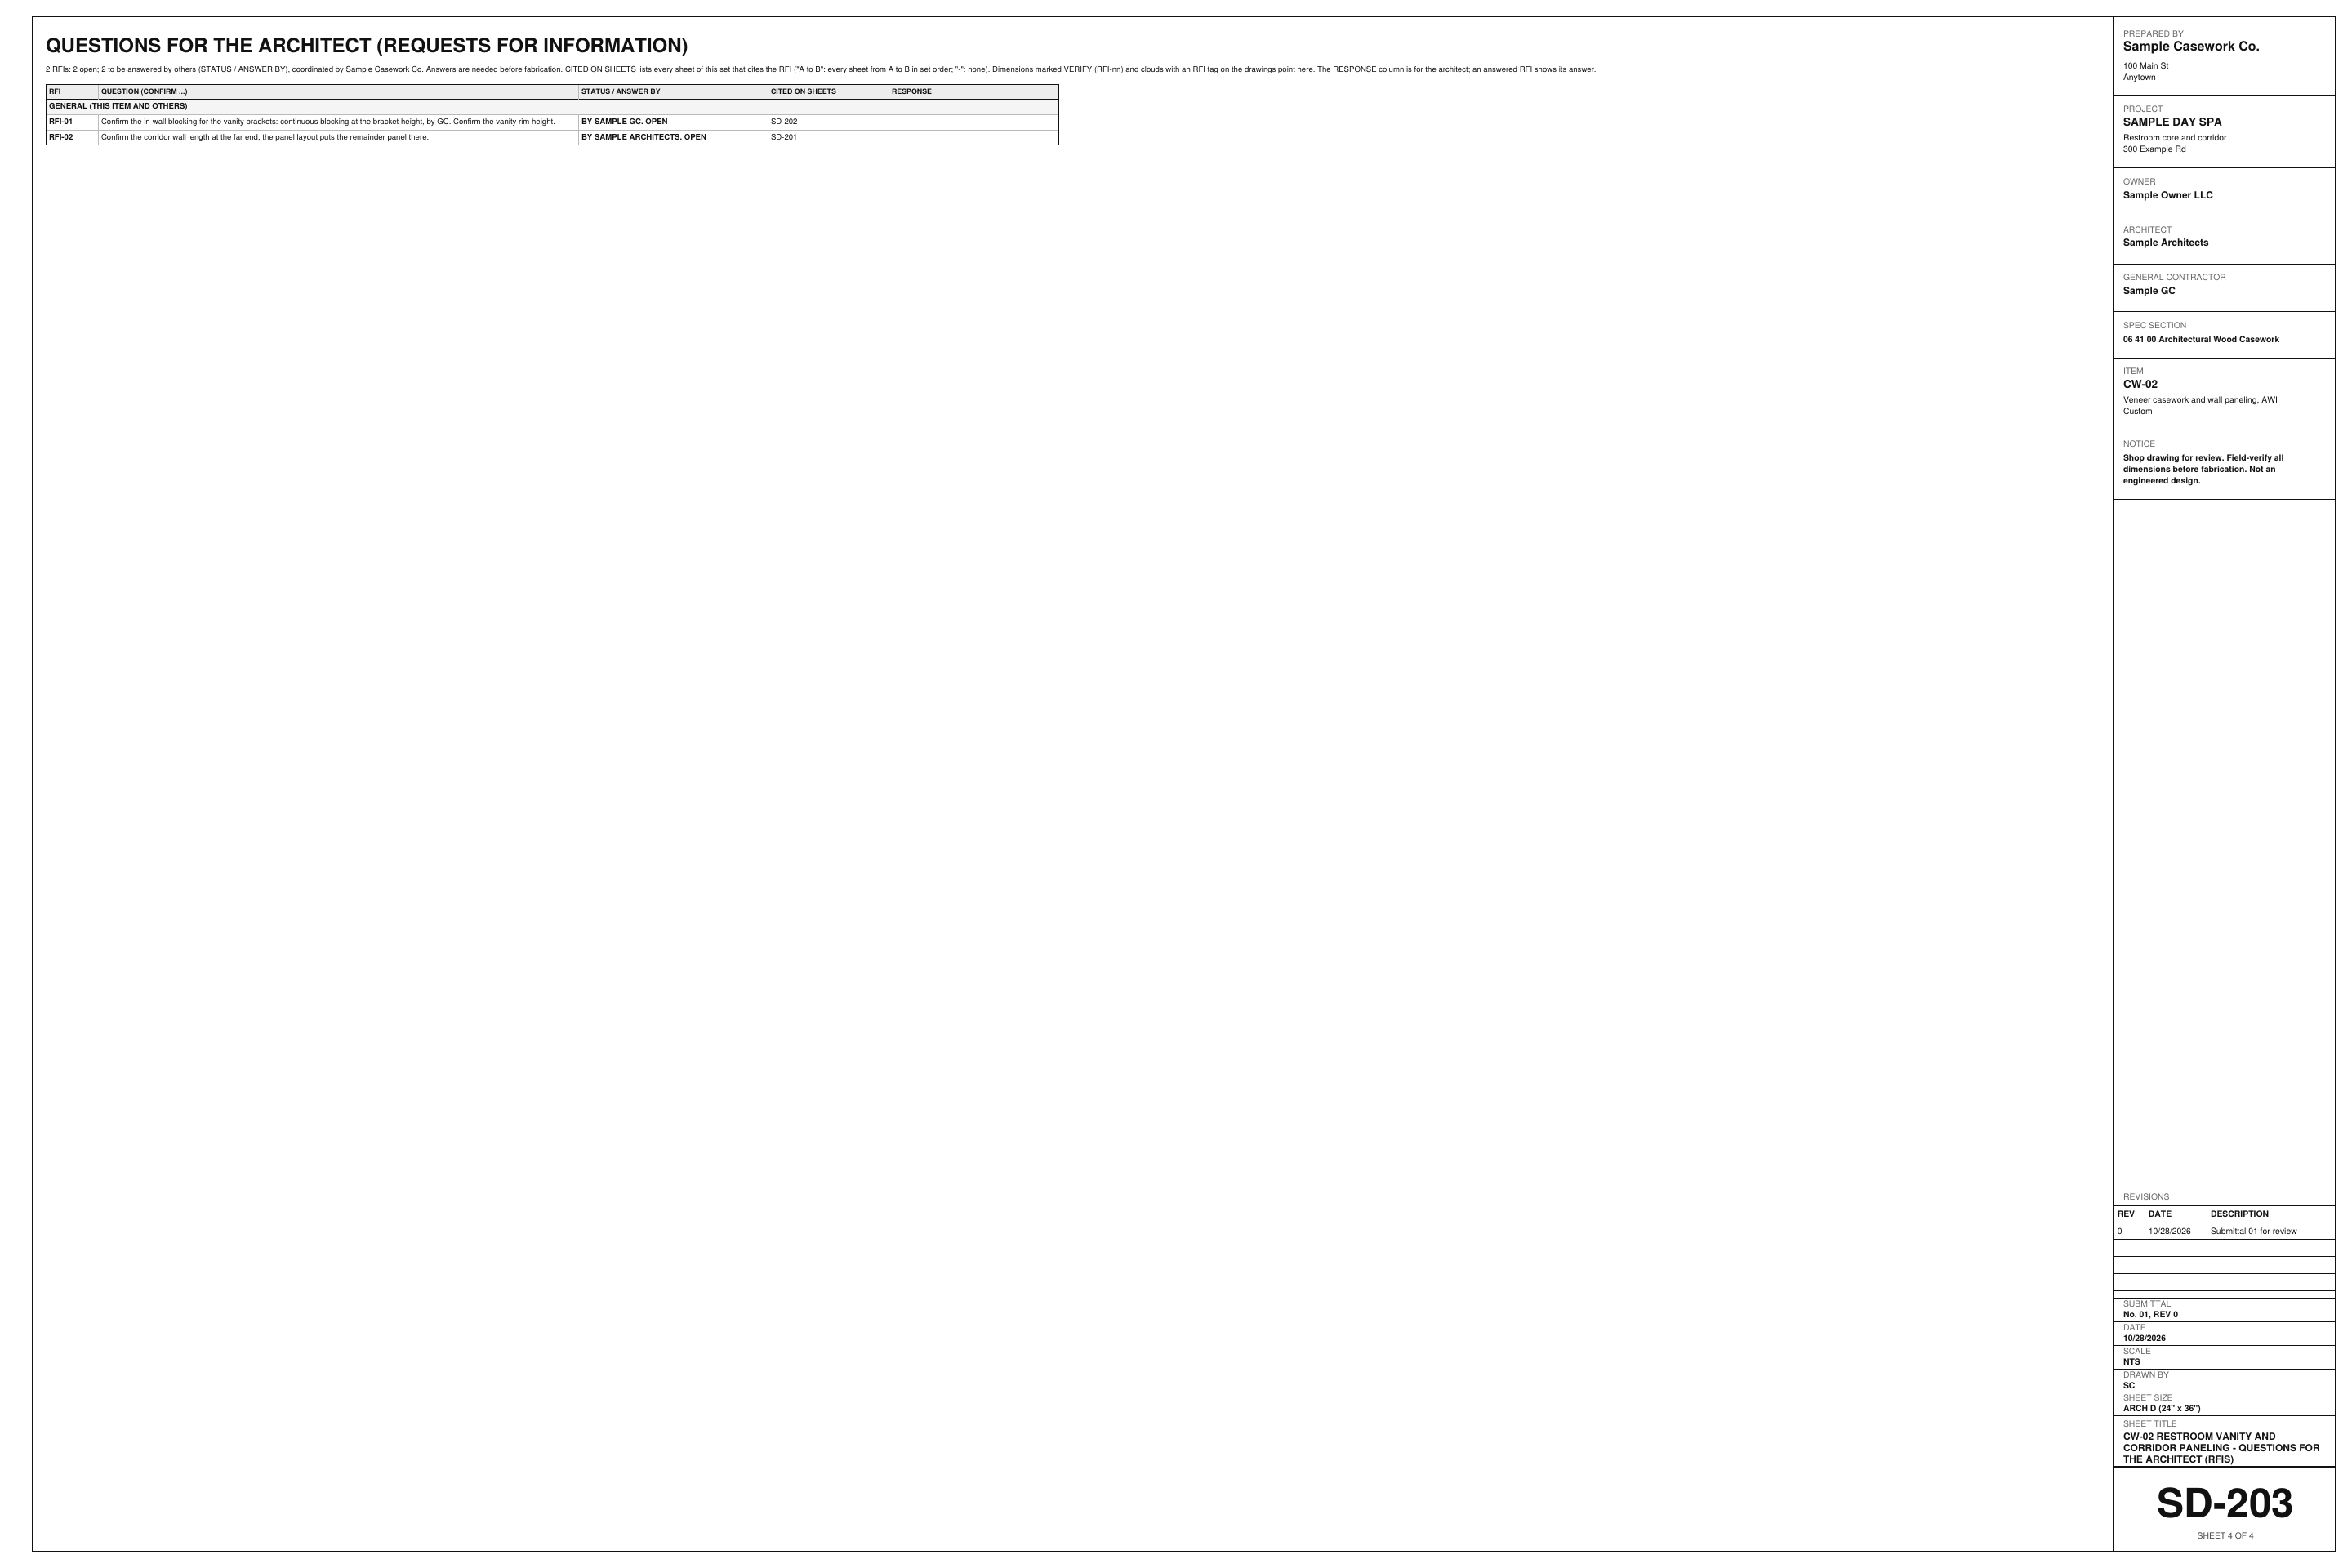
Questions for the architect (RFIs) in the Drawing set card holds the register: RFI-01 about the vanity blocking, RFI-02 about the corridor length. Under Wall, RFI tags on this run's dimensions: pick RFI-01 for the 2'-10" rim. For RFI-02, Cloud around B-PW - Wall paneling, then + Cloud.

Field tip: Answer by blank means the architect.

Step 7: VERIFY tags, clouds and the RFI list sheet in the Cabinet Designer
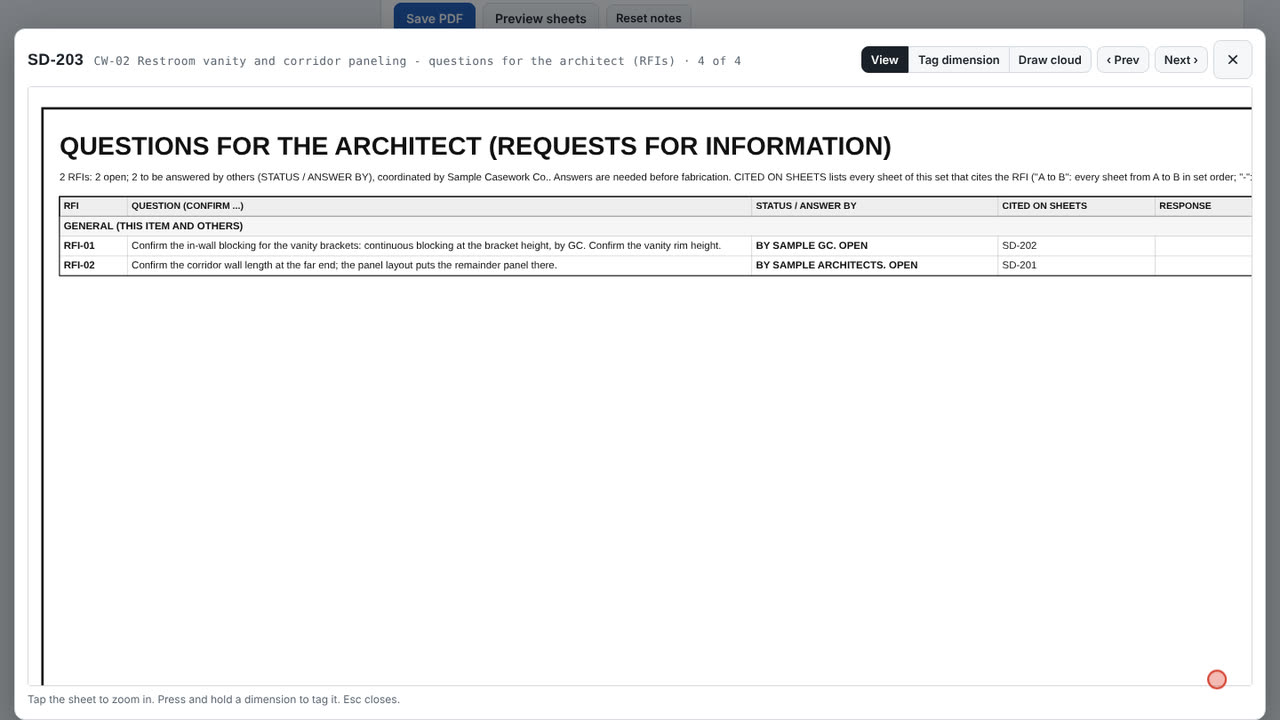
  1. RFI-01 and RFI-02: question, status, cited on sheets

Step 7: VERIFY tags, clouds and the RFI list sheet

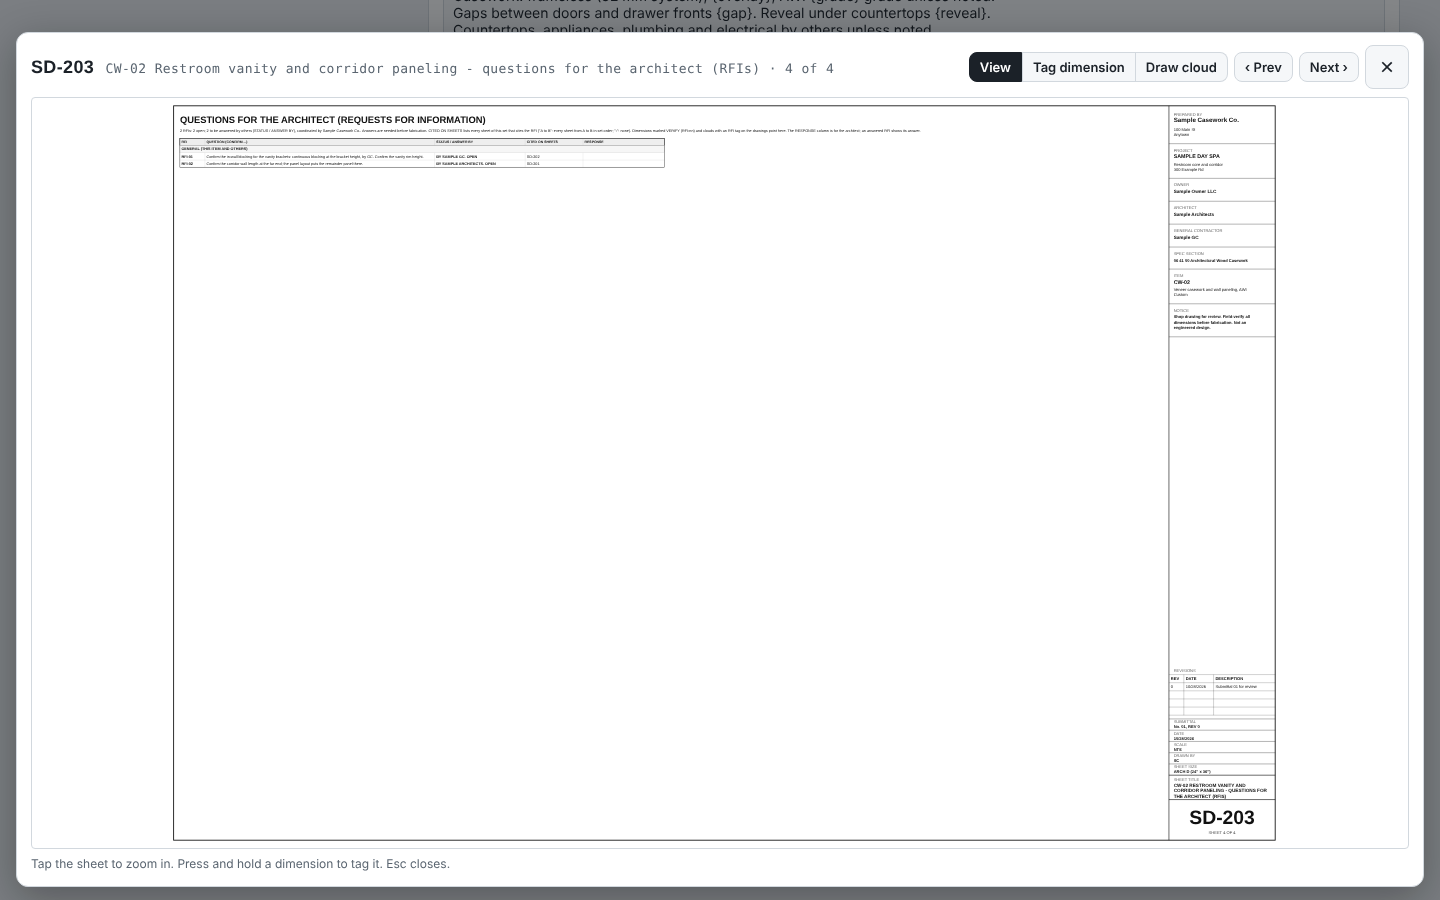
Preview the Submittal set and tap a sheet: the cloud with its RFI-02 tag on the corridor elevation, VERIFY (RFI-01) on the vanity's wall section, and the RFI list sheet after the last drawing: each RFI, its question, status and answer by, the sheets that cite it and the response.

Field tip: The RFI sheet comes last so the drawings keep their numbers.

Step 8: RFI list PDF and Save PDF in the Cabinet Designer
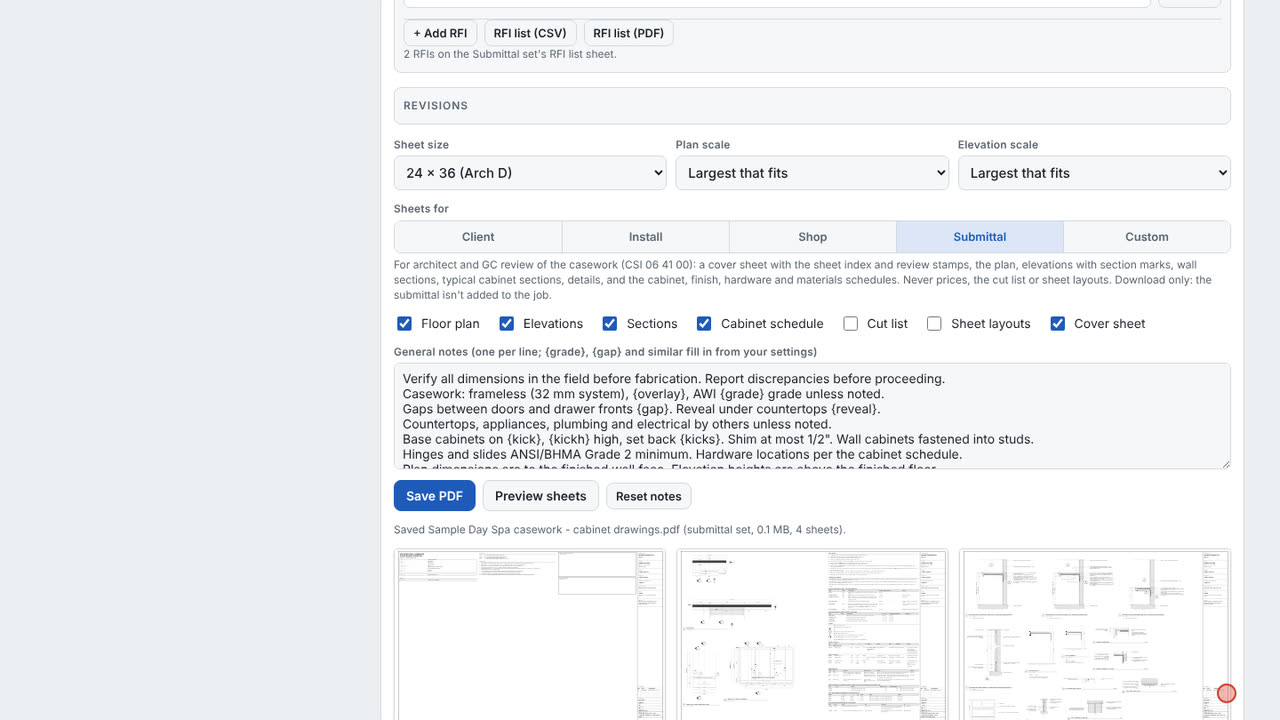
  1. Save PDF: the whole Submittal set, a download

Step 8: RFI list PDF and Save PDF

RFI list (PDF) saves the RFI sheet alone to send to the architect; RFI list (CSV) is the same list for a spreadsheet. Save PDF downloads the whole Submittal set.

Field tip: The submittal is download only: it isn't added to the BidRidge job.

Step 9: Update the job in BidRidge in the Cabinet Designer
  1. The casework quote at your rates
  2. Better (recommended)

Step 9: Update the job in BidRidge

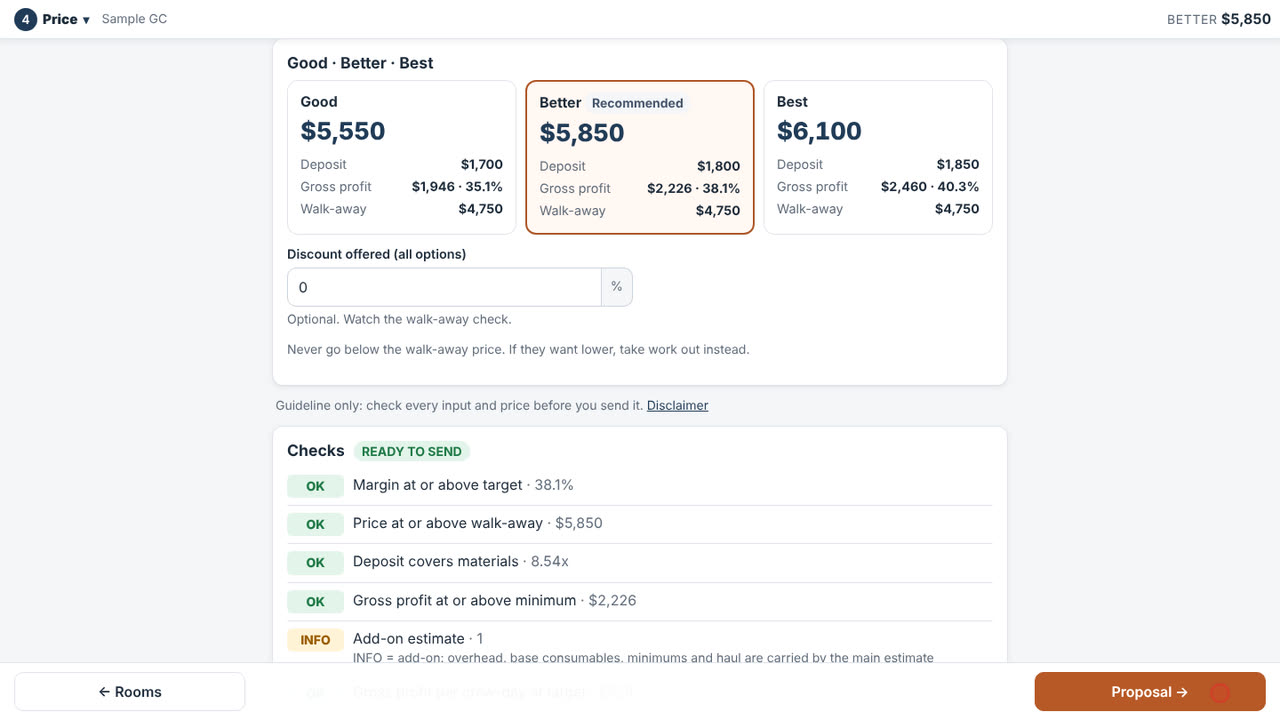
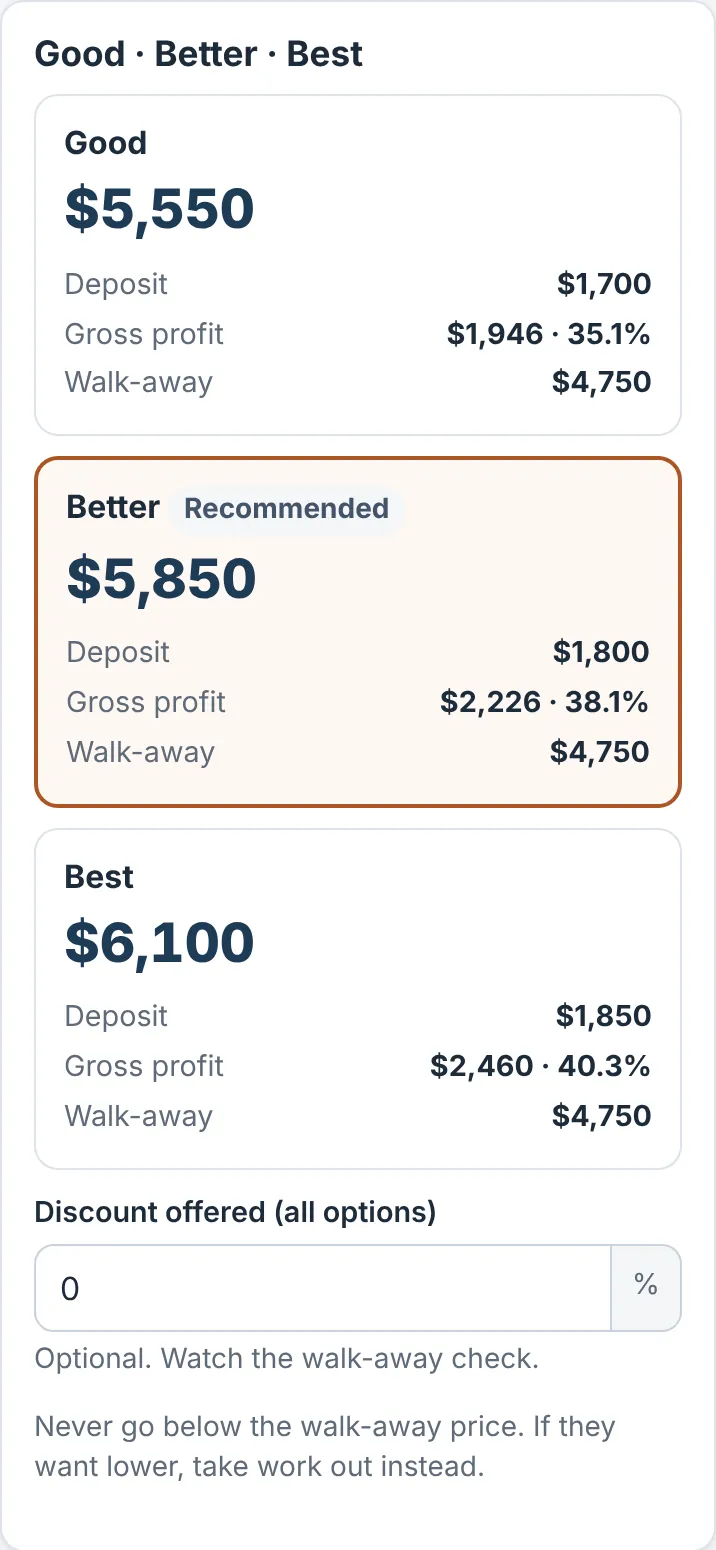
Update the job in BidRidge sends the floating counters by the foot, the brackets each, the wall panels by the square foot, the returns and the fins, each priced at your rates. At the starting rates the project comes to $18,900 for Better.

Field tip: Also applies to (the second restroom, opposite hand) doubles the vanity's lines.

What you get

The drawing set, the lists and the files

Real files from this sample, made by the designer. Tap a page to see it full size. Yours carry your company, the client and the address.

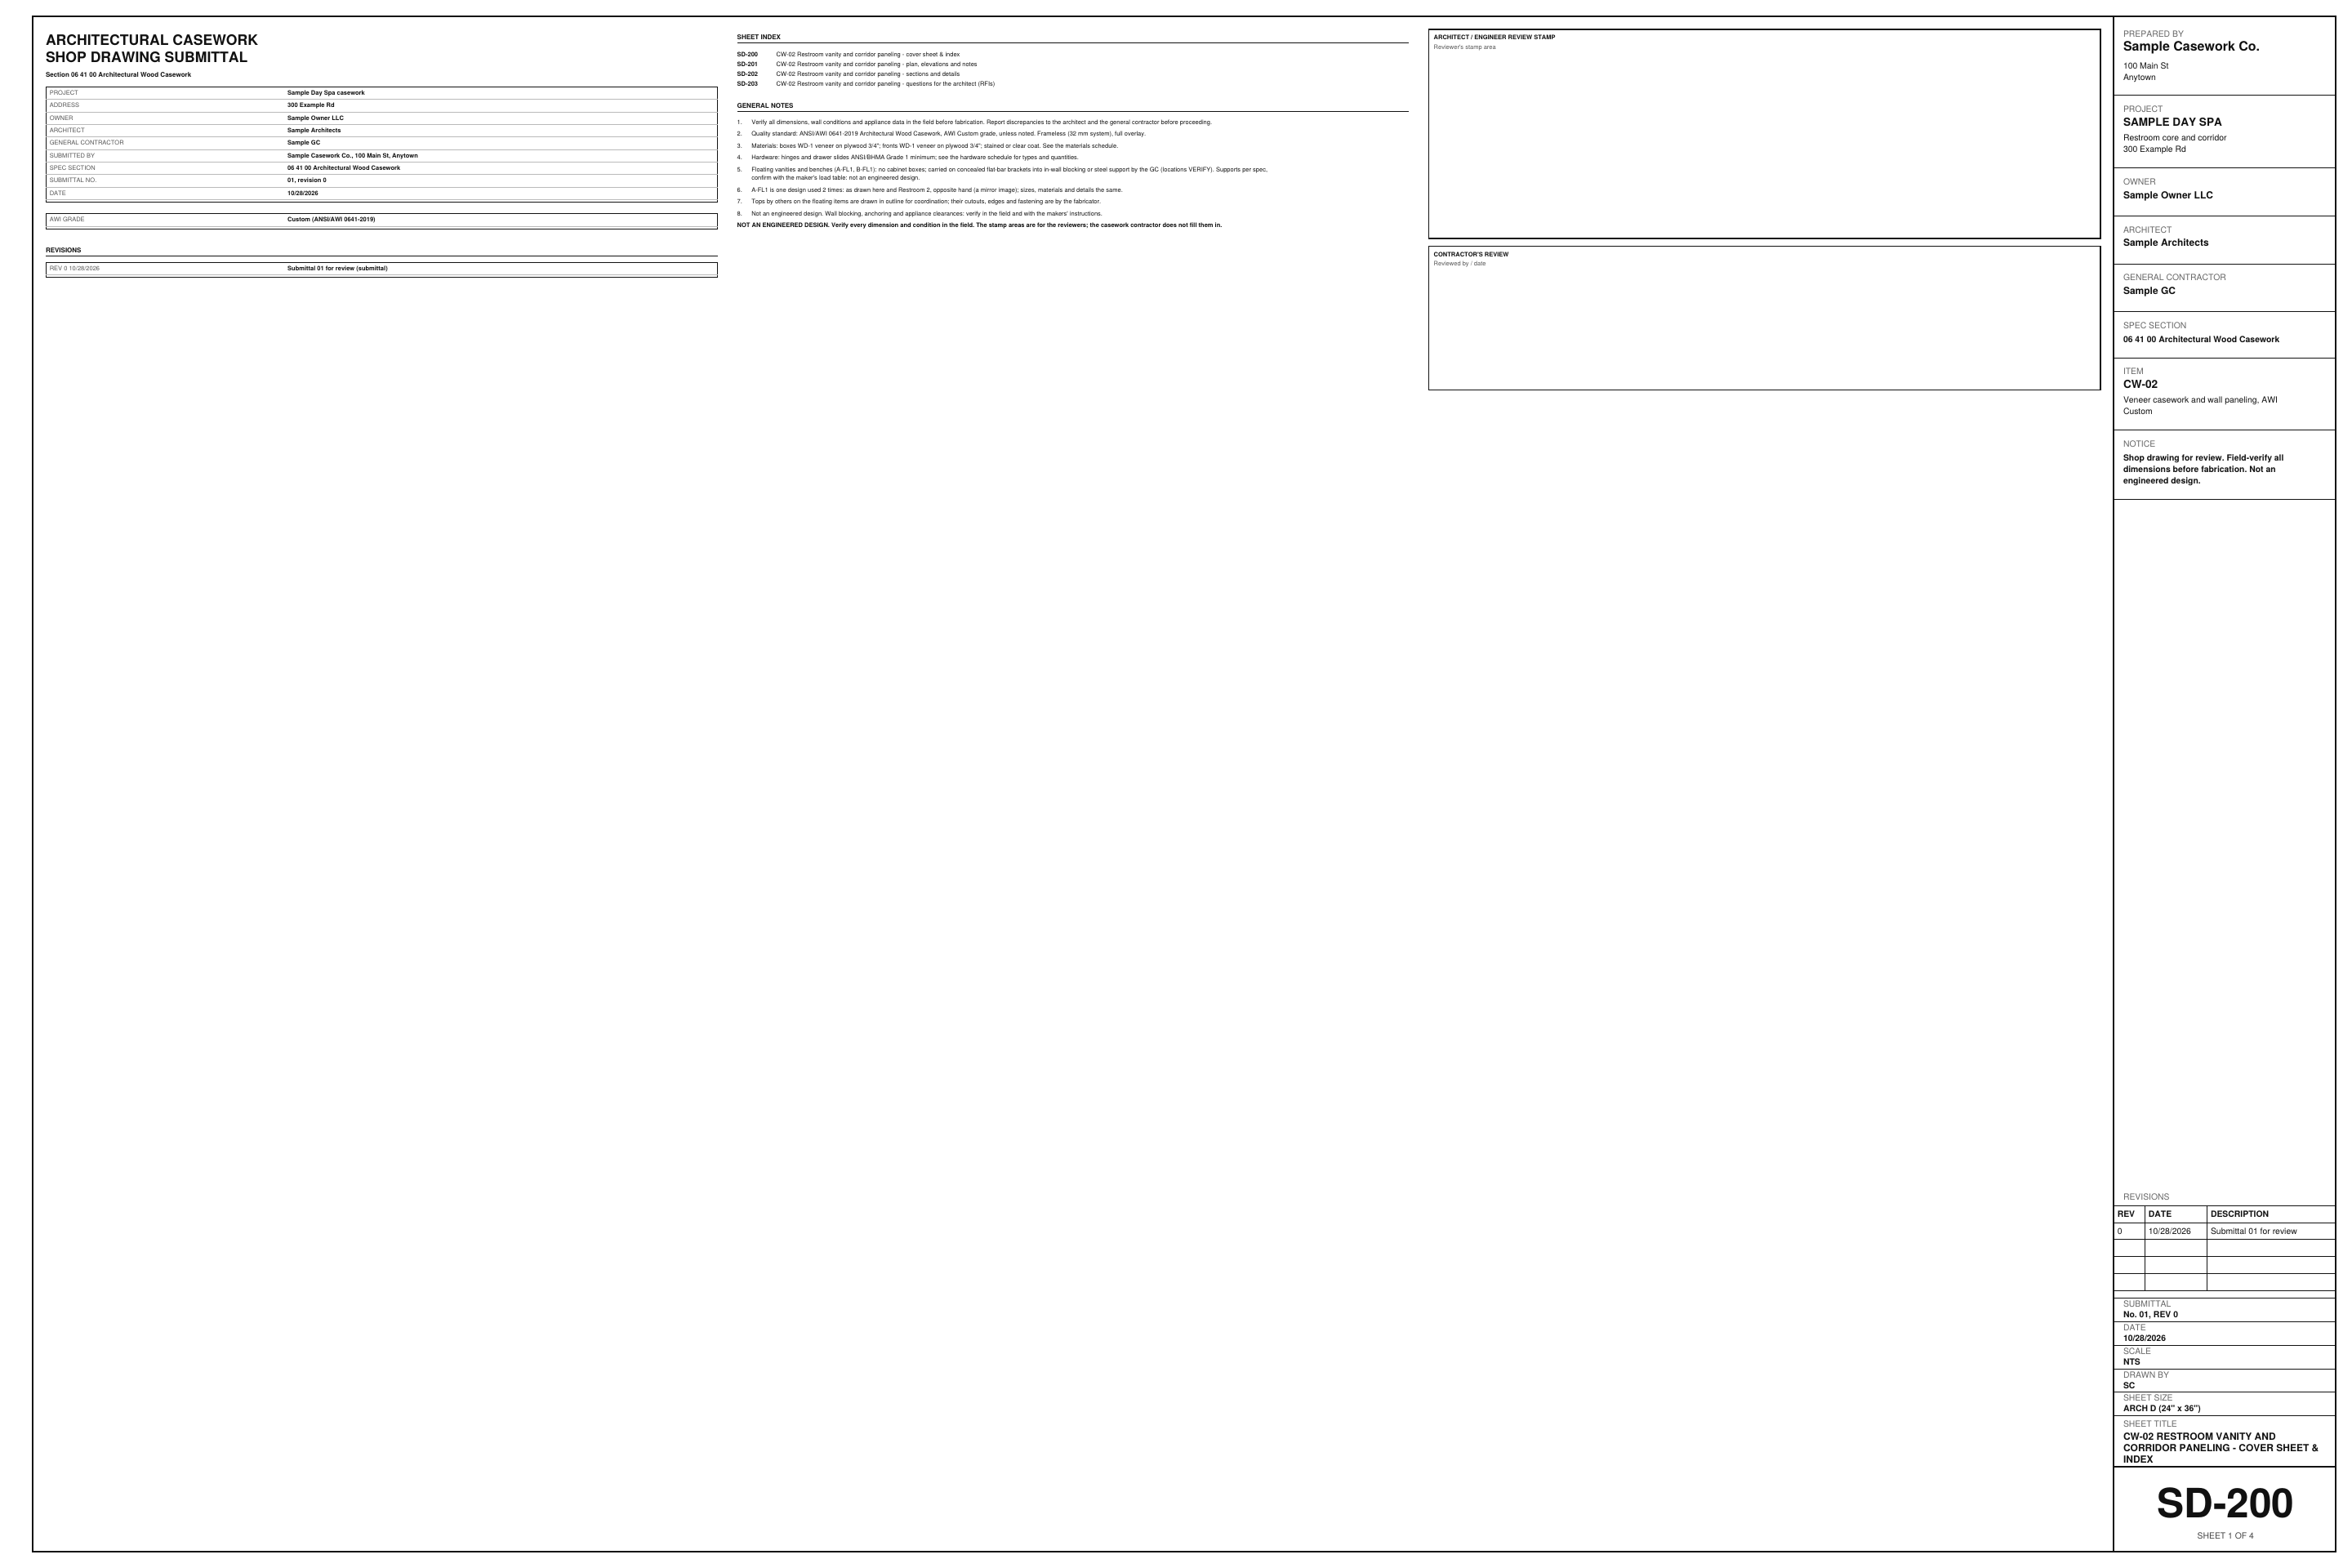
SD-200 CW-02 Restroom vanity and corridor paneling - cover sheet & index
SD-201 CW-02 Restroom vanity and corridor paneling - plan, elevations and notes
SD-202 CW-02 Restroom vanity and corridor paneling - sections and details
SD-203 CW-02 Restroom vanity and corridor paneling - questions for the architect (RFIs)
The RFI list sheet in the sheet view
The floating vanity in the editor: top by others, brackets, accessible
The corridor: veneer panels, fins and the floating bench
Questions for the architect (RFIs): the register

The BidRidge quote

Same numbers in the quote

The designer sends its quantities to BidRidge, and BidRidge prices the labor and materials at your rates.

  • Good
    $18,350
  • Better
    $18,900
    Recommended
  • Best
    $19,400
From the designSent to the quote
Floating counters2 · a 6'-0" vanity (also applies to Restroom 2) and a 6'-0" bench
Brackets14 · concealed flat-bar, both restrooms and the bench
Wall paneling116 sf · 4′-0″ module, 1/4″ reveals, Z-clips
Fins2 · 1 1/2″, floor to ceiling
RFIs2 · tagged on the drawings, the RFI list sheet
Sheets4 sheets · SD-200 cover to SD-203 RFIs, ARCH D
Quote$18,900 · Better, the whole project at the starting rates

The sample sent to a Finish carpentry job in the BidRidge app at its starting rates: the whole project (shop lines, Finish carpentry install). The submittal is not part of it. Your rates give your own numbers.

The sample opened as a quote in the BidRidge app: Good, Better and Best prices
The BidRidge app, at its starting rates.

Try it on your own job

Open the sample, change it to your measurements, and send it to a BidRidge quote. Drawing is free; the drawing set, the lists and the quote come with a BidRidge license or the 14-day trial.

In the designer, tap Open project and pick the sample file. It opens exactly as in the video.

Sample designs: names, sizes and clients are made up. Prices are BidRidge's starting rates; set your own. The designers check against common guidelines (IRC, NKBA and the makers' published numbers) to help you catch mistakes. They don't replace your building department or the manufacturer's installation instructions: verify with them.