1Step 1: Start a blank Commercial design
A curved bench is one section profile, swept along a plan path of straights and arcs. Tap New design, pick Commercial, and Start blank.

Chapter 25 · Cabinet DesignerBeta
One section profile swept along a plan path of straights and arcs: we type the path, set the seat, the raked back, the apron and the toe, leave the cushions to others, put an outlet on the apron, then read the elevation developed along the nosing, the thermoformed pieces in the cut list and the bench's own 11x17 shop sheet.
In the designer, tap Open project and pick the sample file. It opens exactly as in the video.
A curved bench is one section profile, swept along a plan path of straights and arcs. Tap New design, pick Commercial, and Start blank.
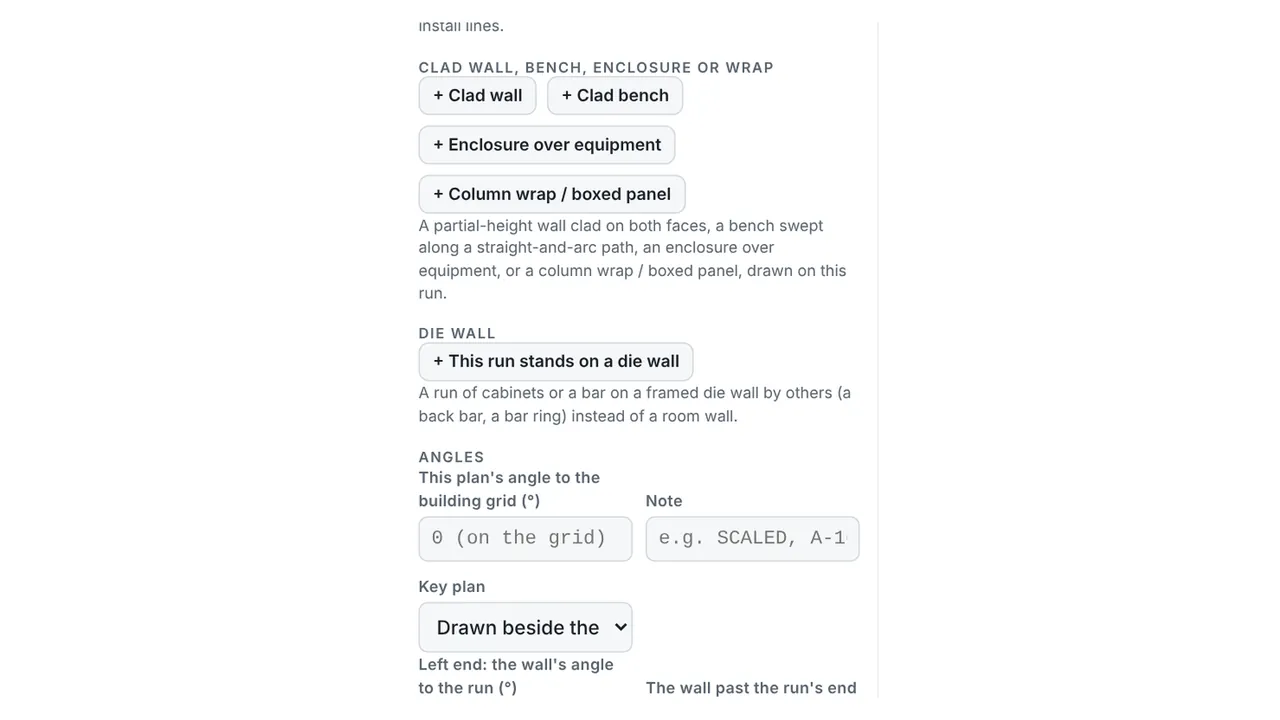
Name the run Waiting bench. In the Wall card, under Clad wall, bench, enclosure or wrap, tap Clad bench.
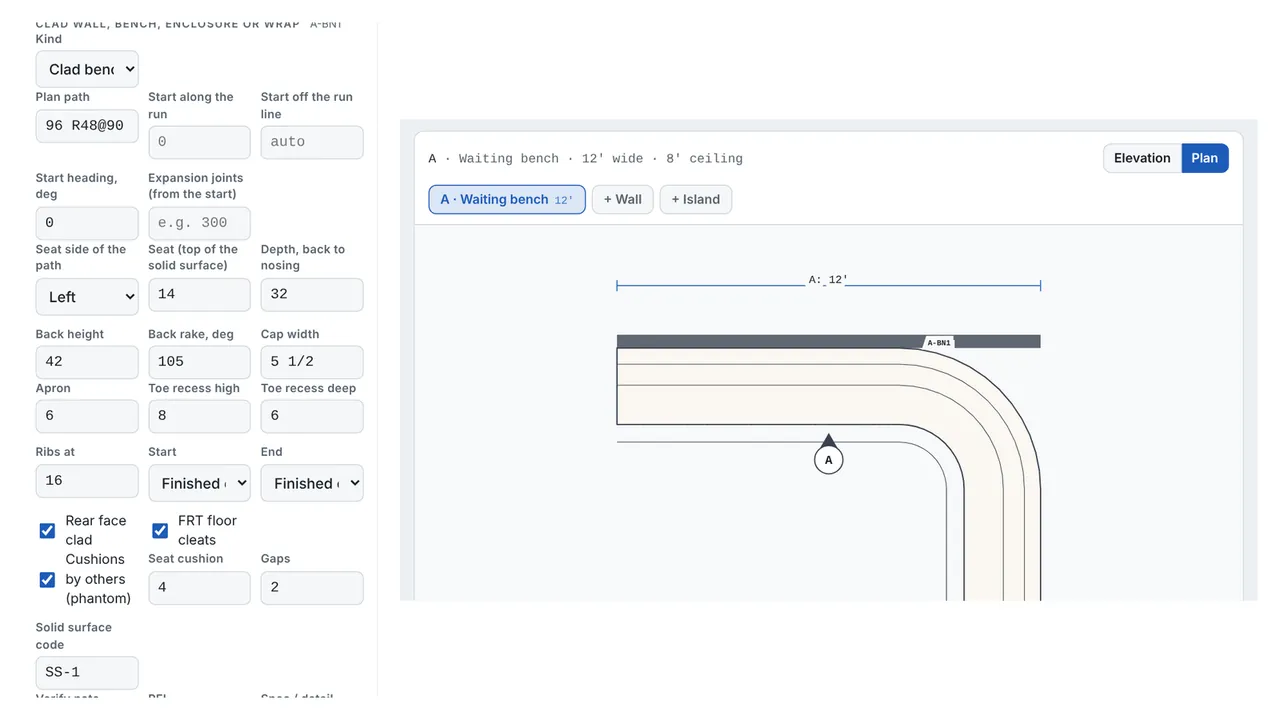
Type 96 R48@90 48: eight feet straight, an arc on a four-foot radius turning 90 degrees, then four feet straight. The seat is on the left of the path. Tap Fit the run to it.
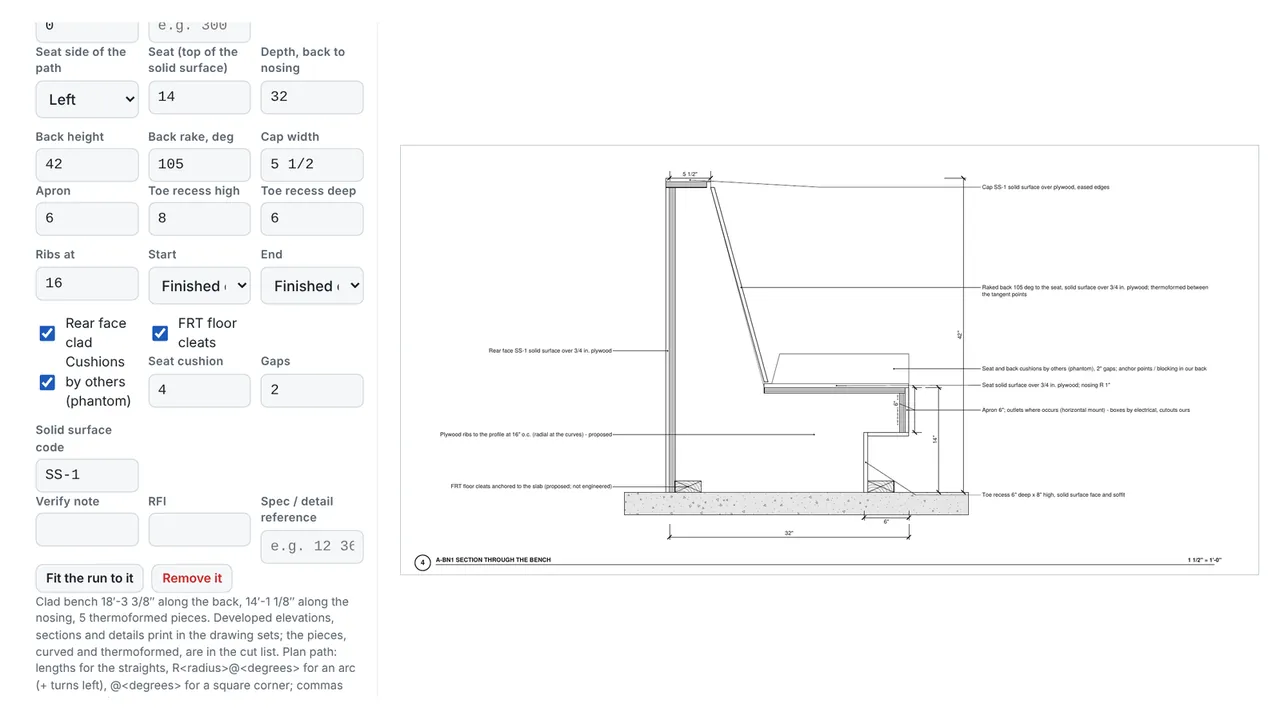
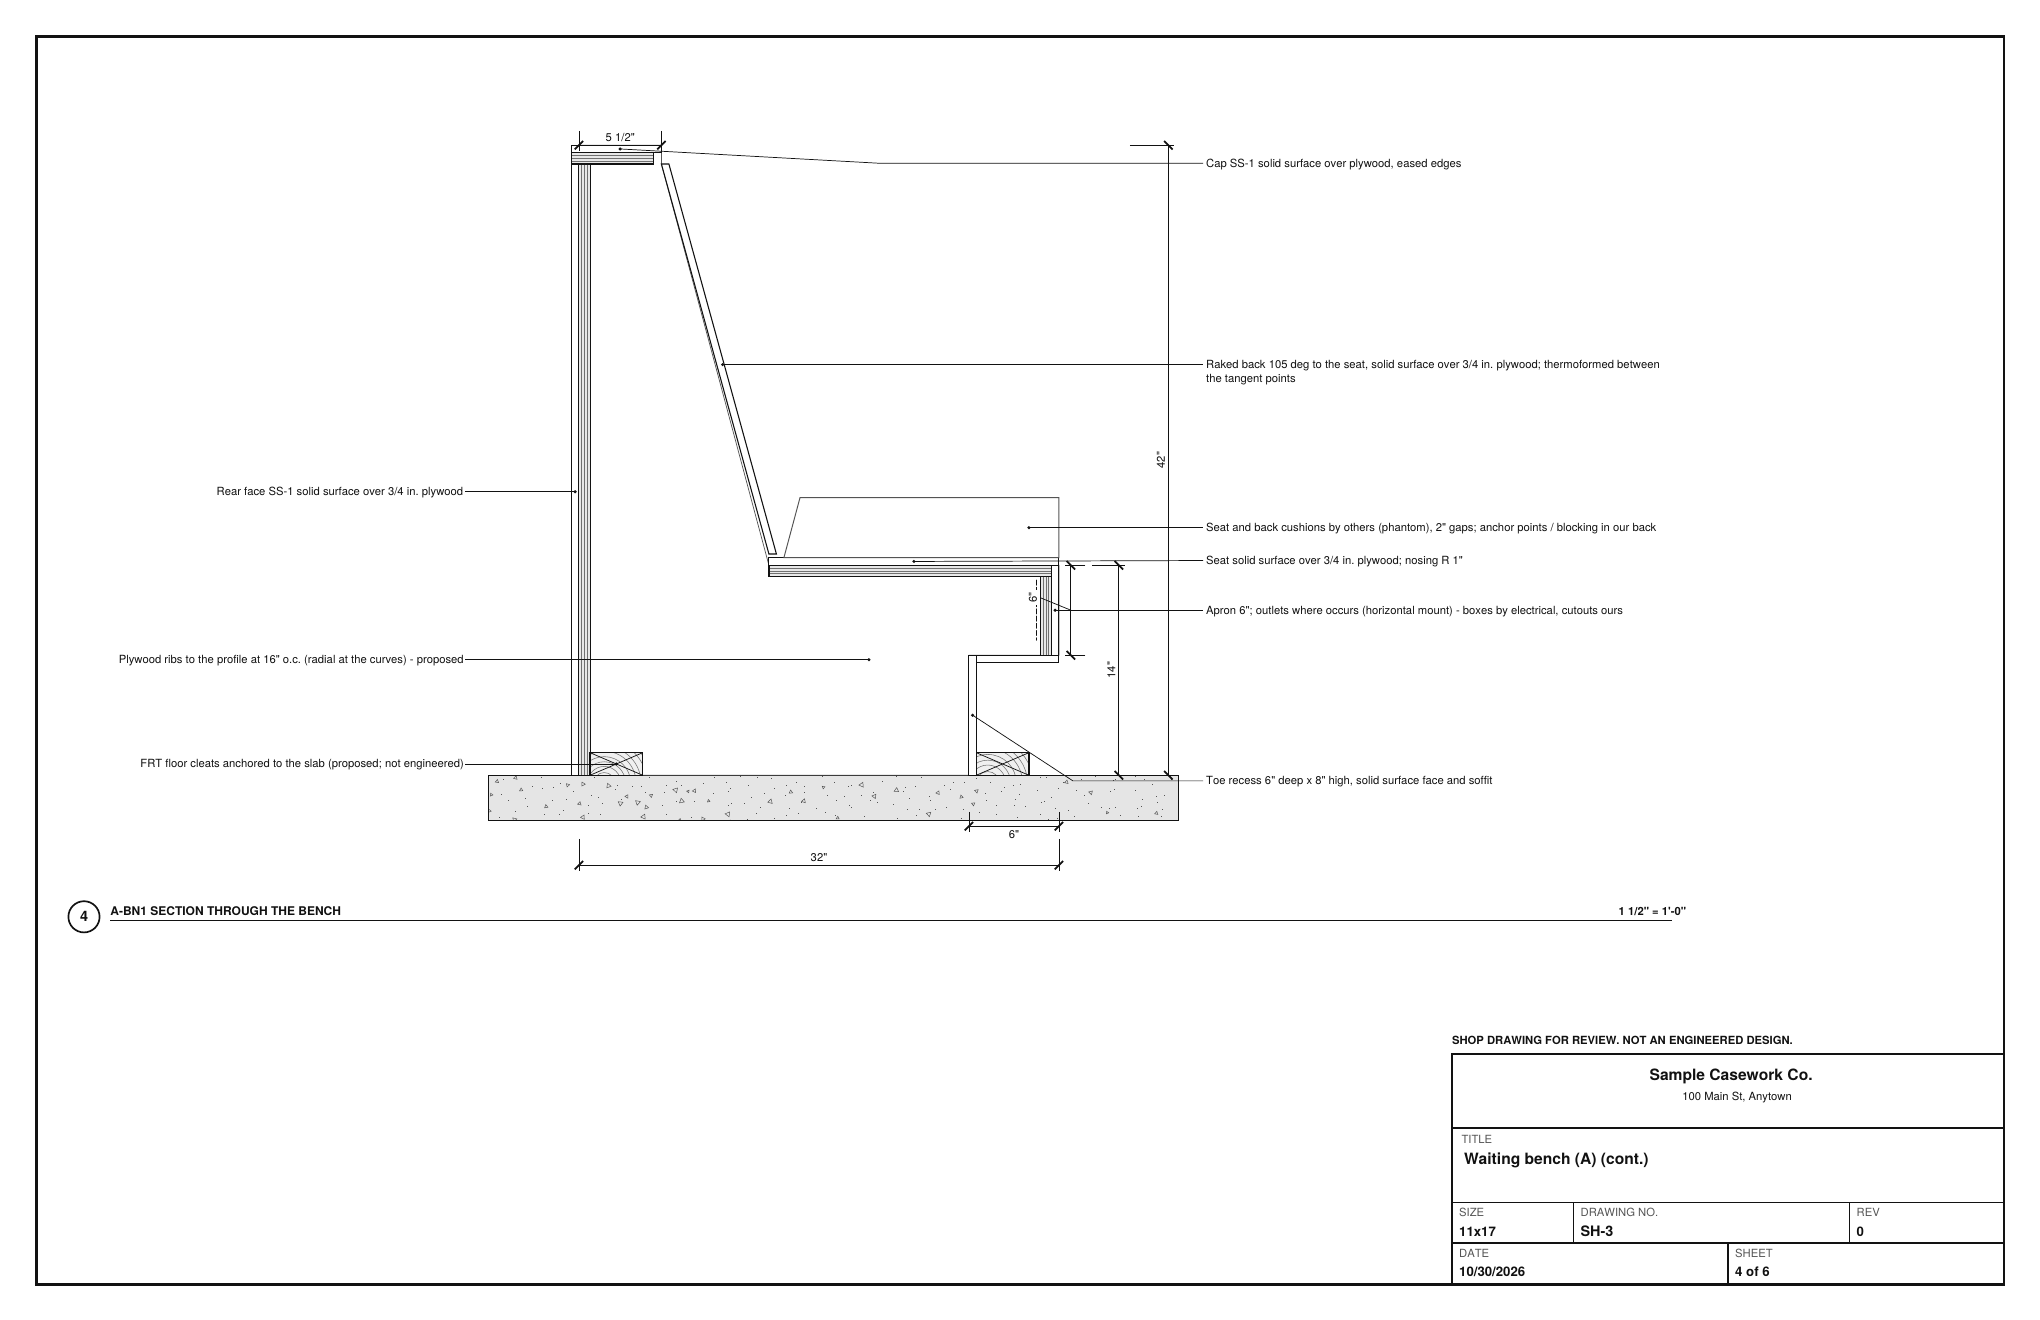
The seat is 14″ to the top of the solid surface and 32″ deep from the back to the nosing, with a 42″ back raked at 105 degrees, the cap, the apron and a toe recess. Plywood ribs every 16″, radial at the curve, on FRT floor cleats.
Field tip: Not an engineered design: confirm the anchorage.
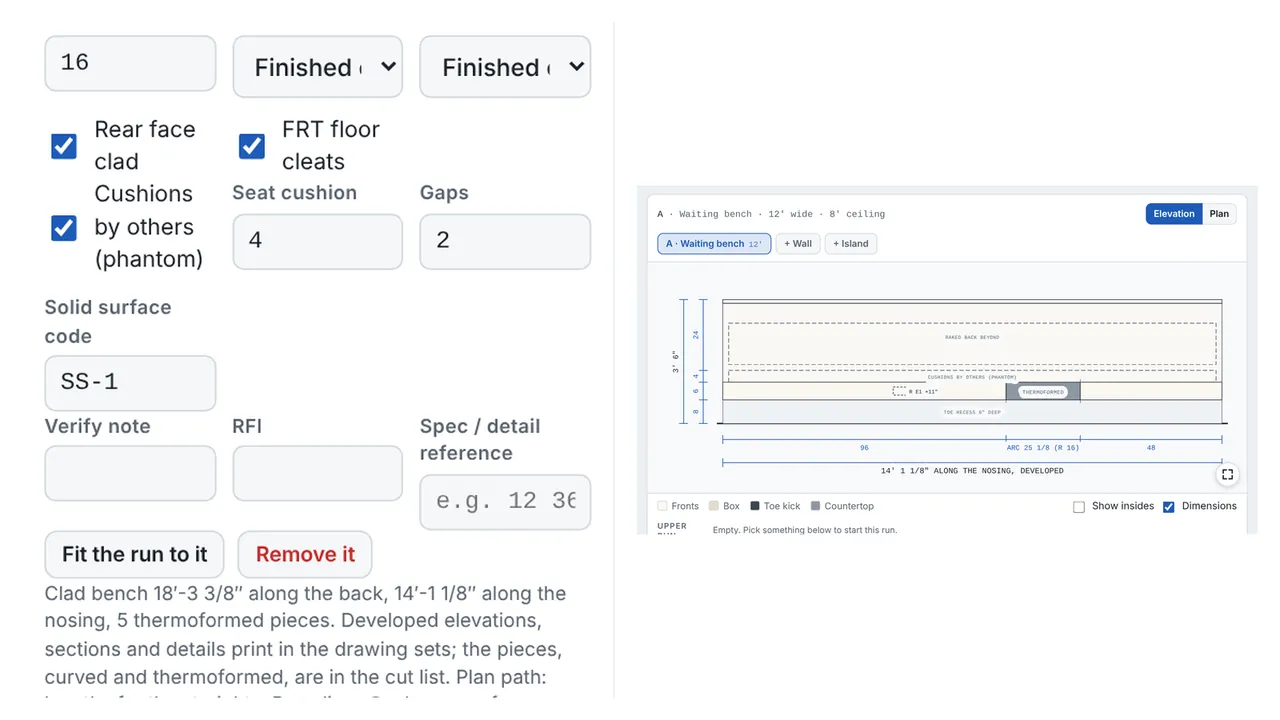
The seat and back cushions are by others: drawn in phantom and never priced.
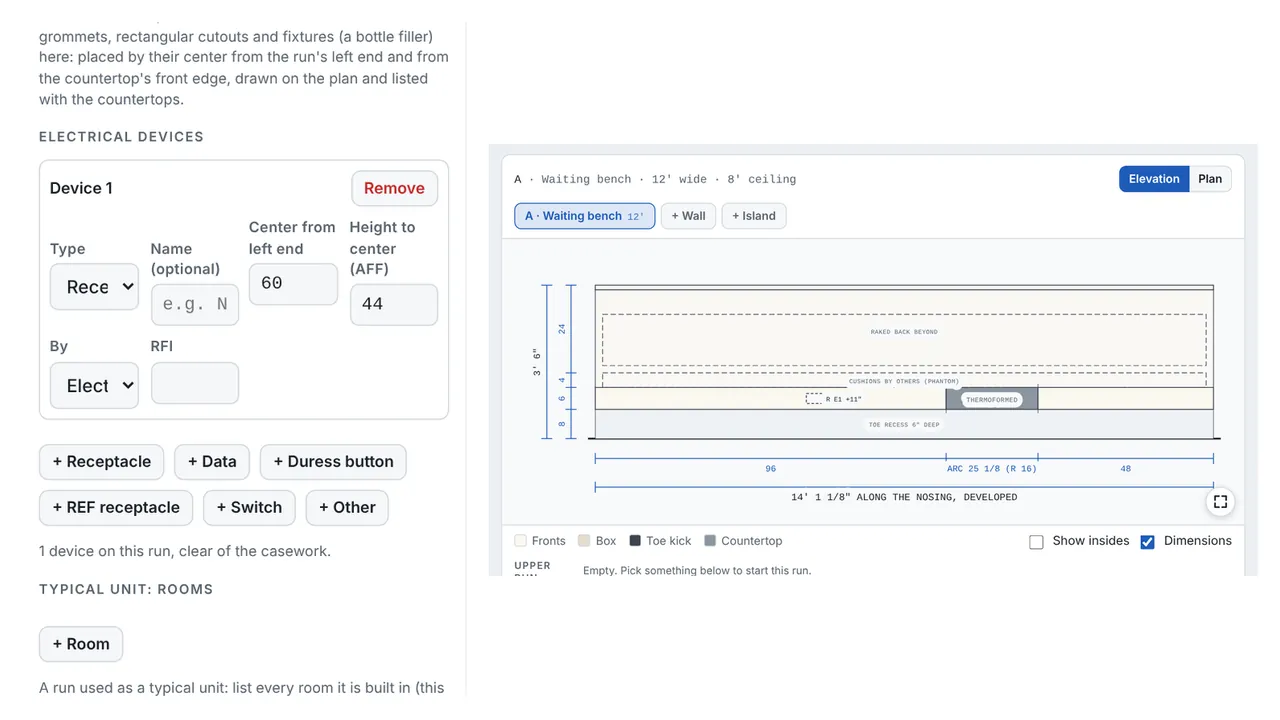
Under Electrical devices, tap Receptacle. On a bench it lands on the apron, mounted sideways; type where it sits from the left end (60″). The box is by electrical; the cutout is yours.
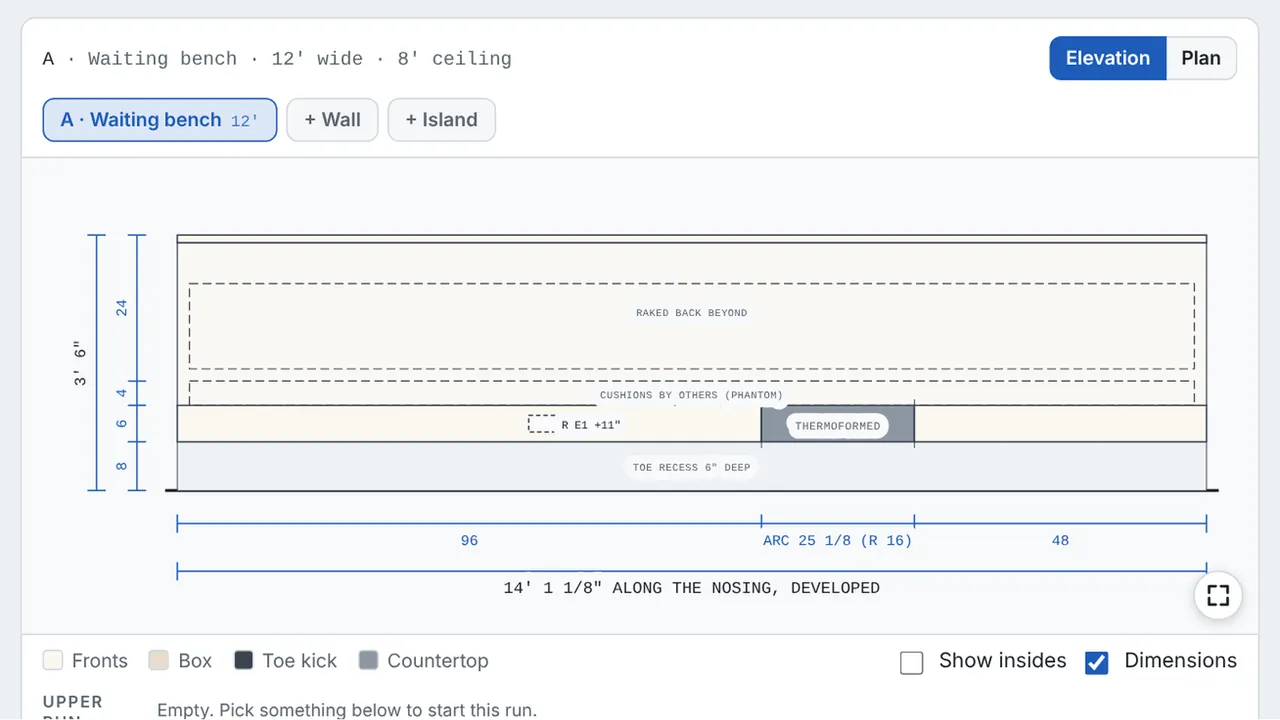
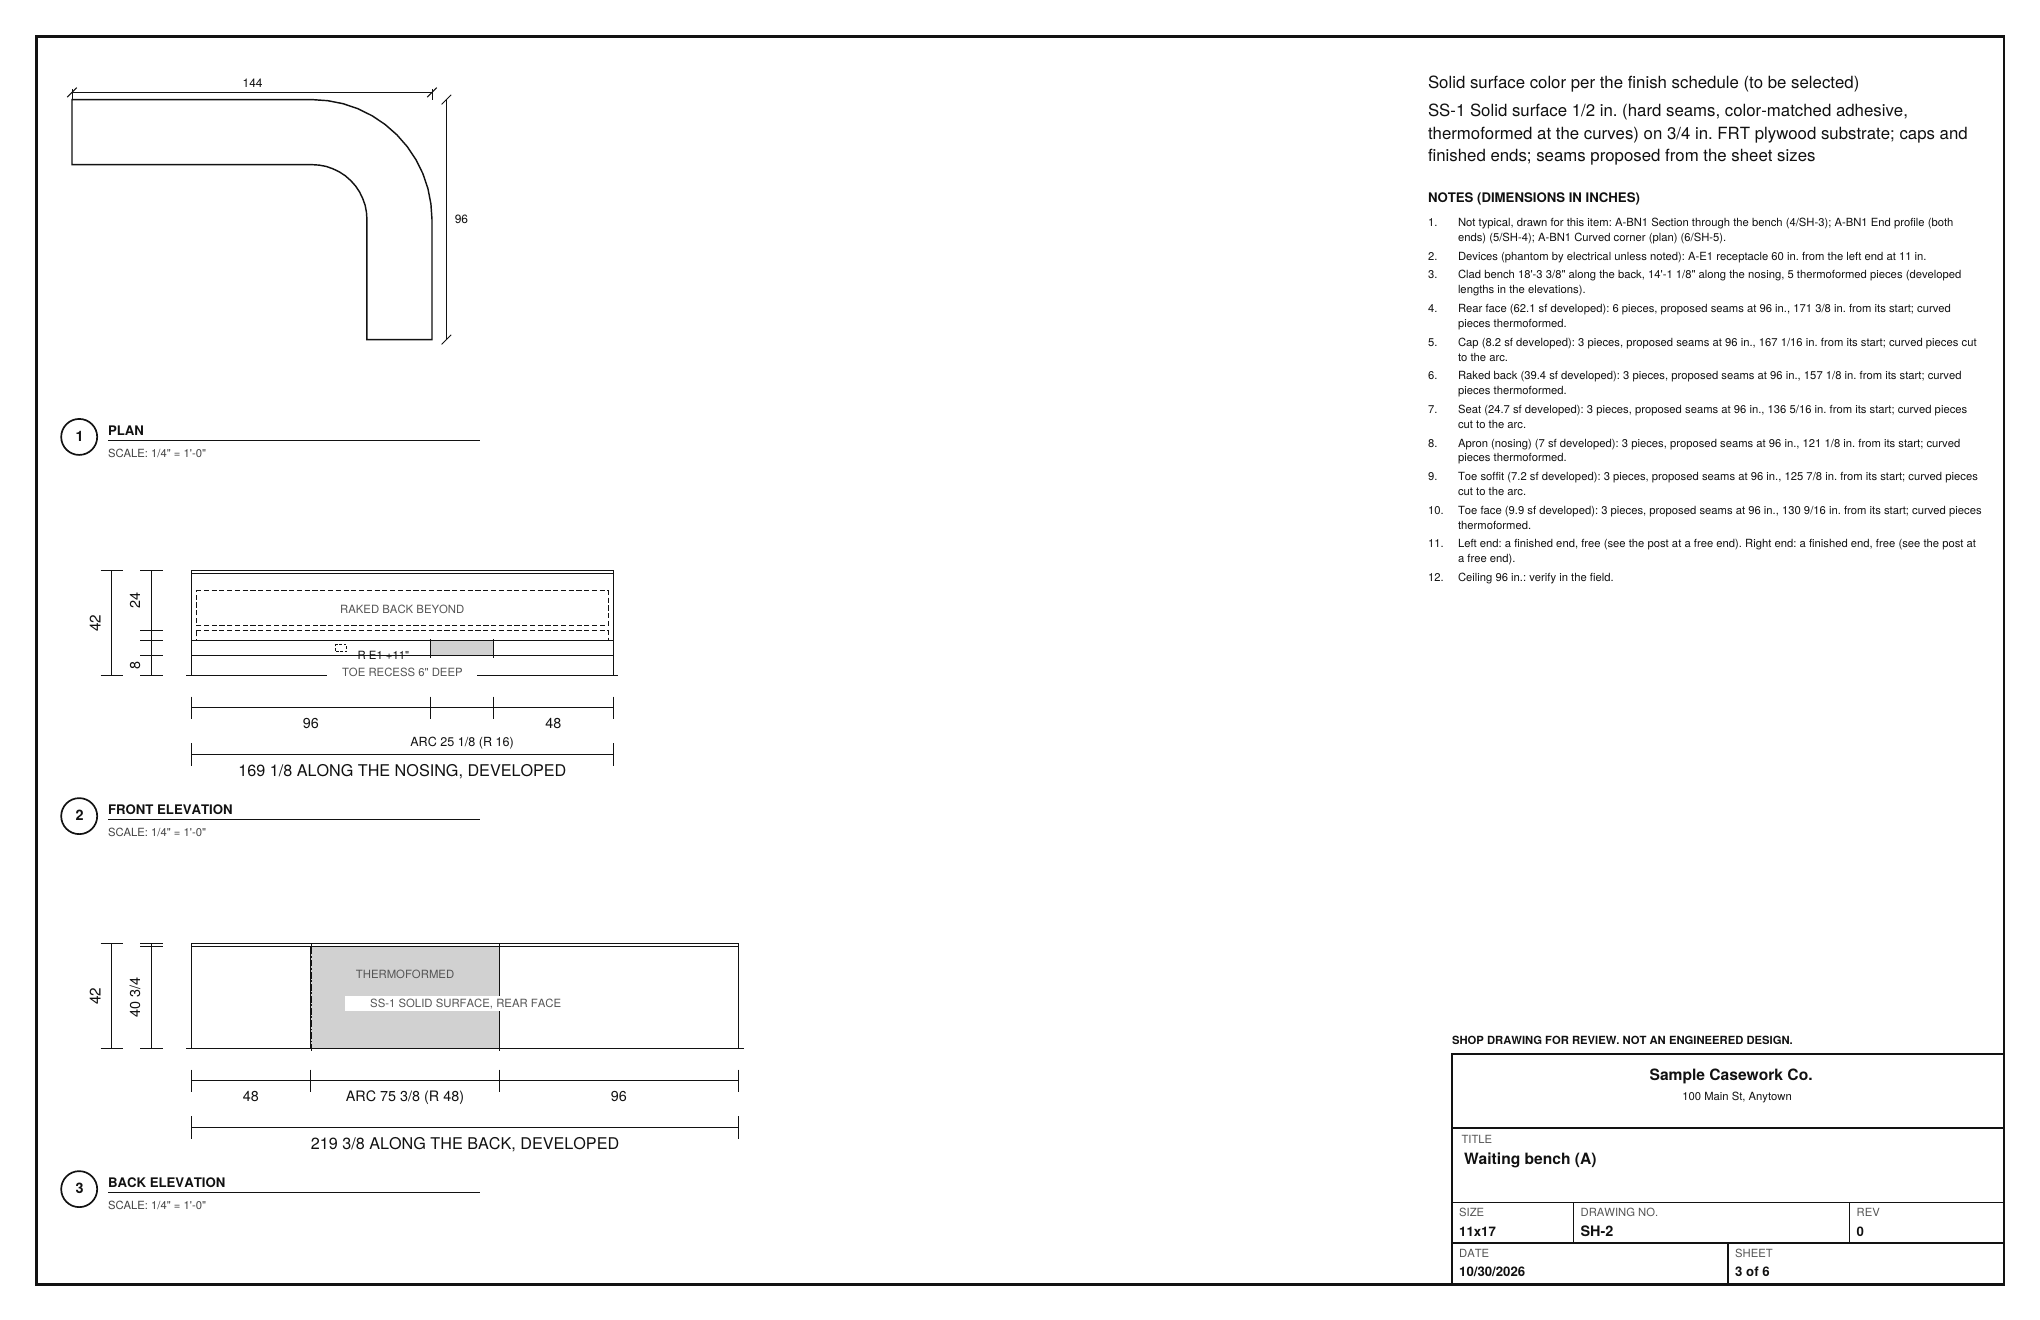
The elevation is developed along the nosing: each straight, the arc with its length and radius, the thermoformed zone between the tangent points, the cushions in phantom and the outlet on the apron.
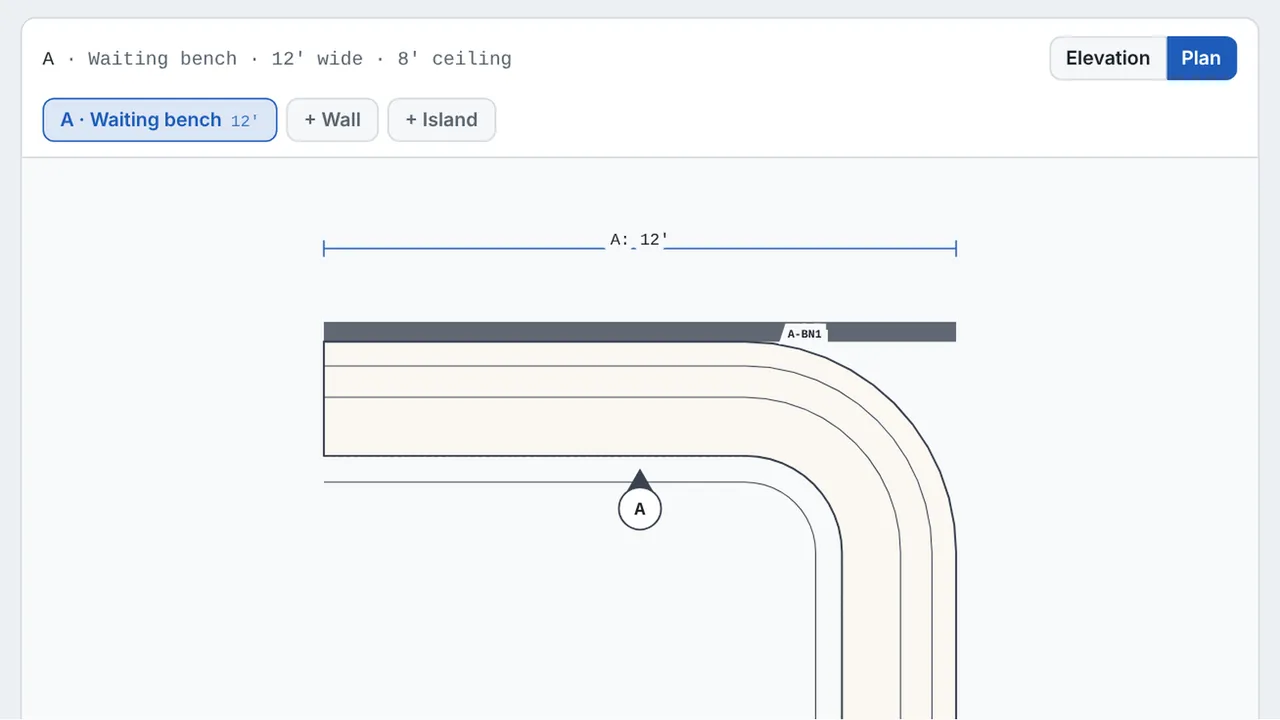
Tap Plan to see the bench on its path: the cap, the junction and toe lines, and the tag.
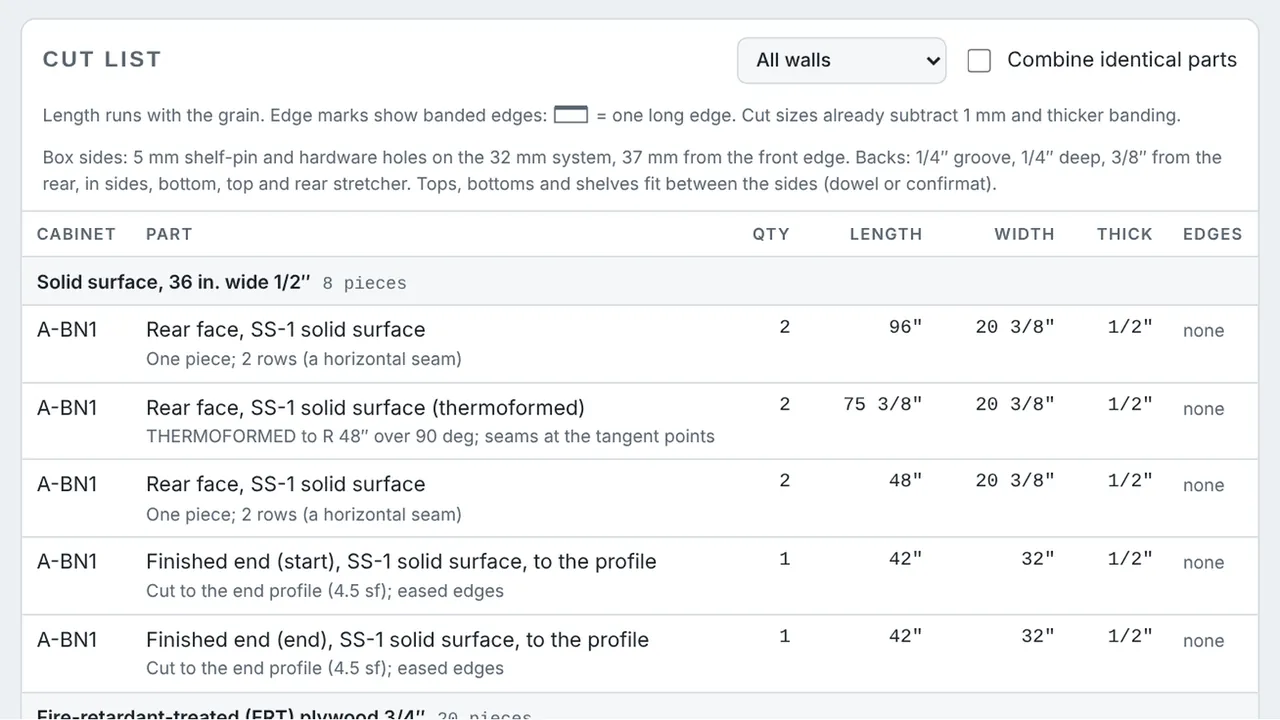
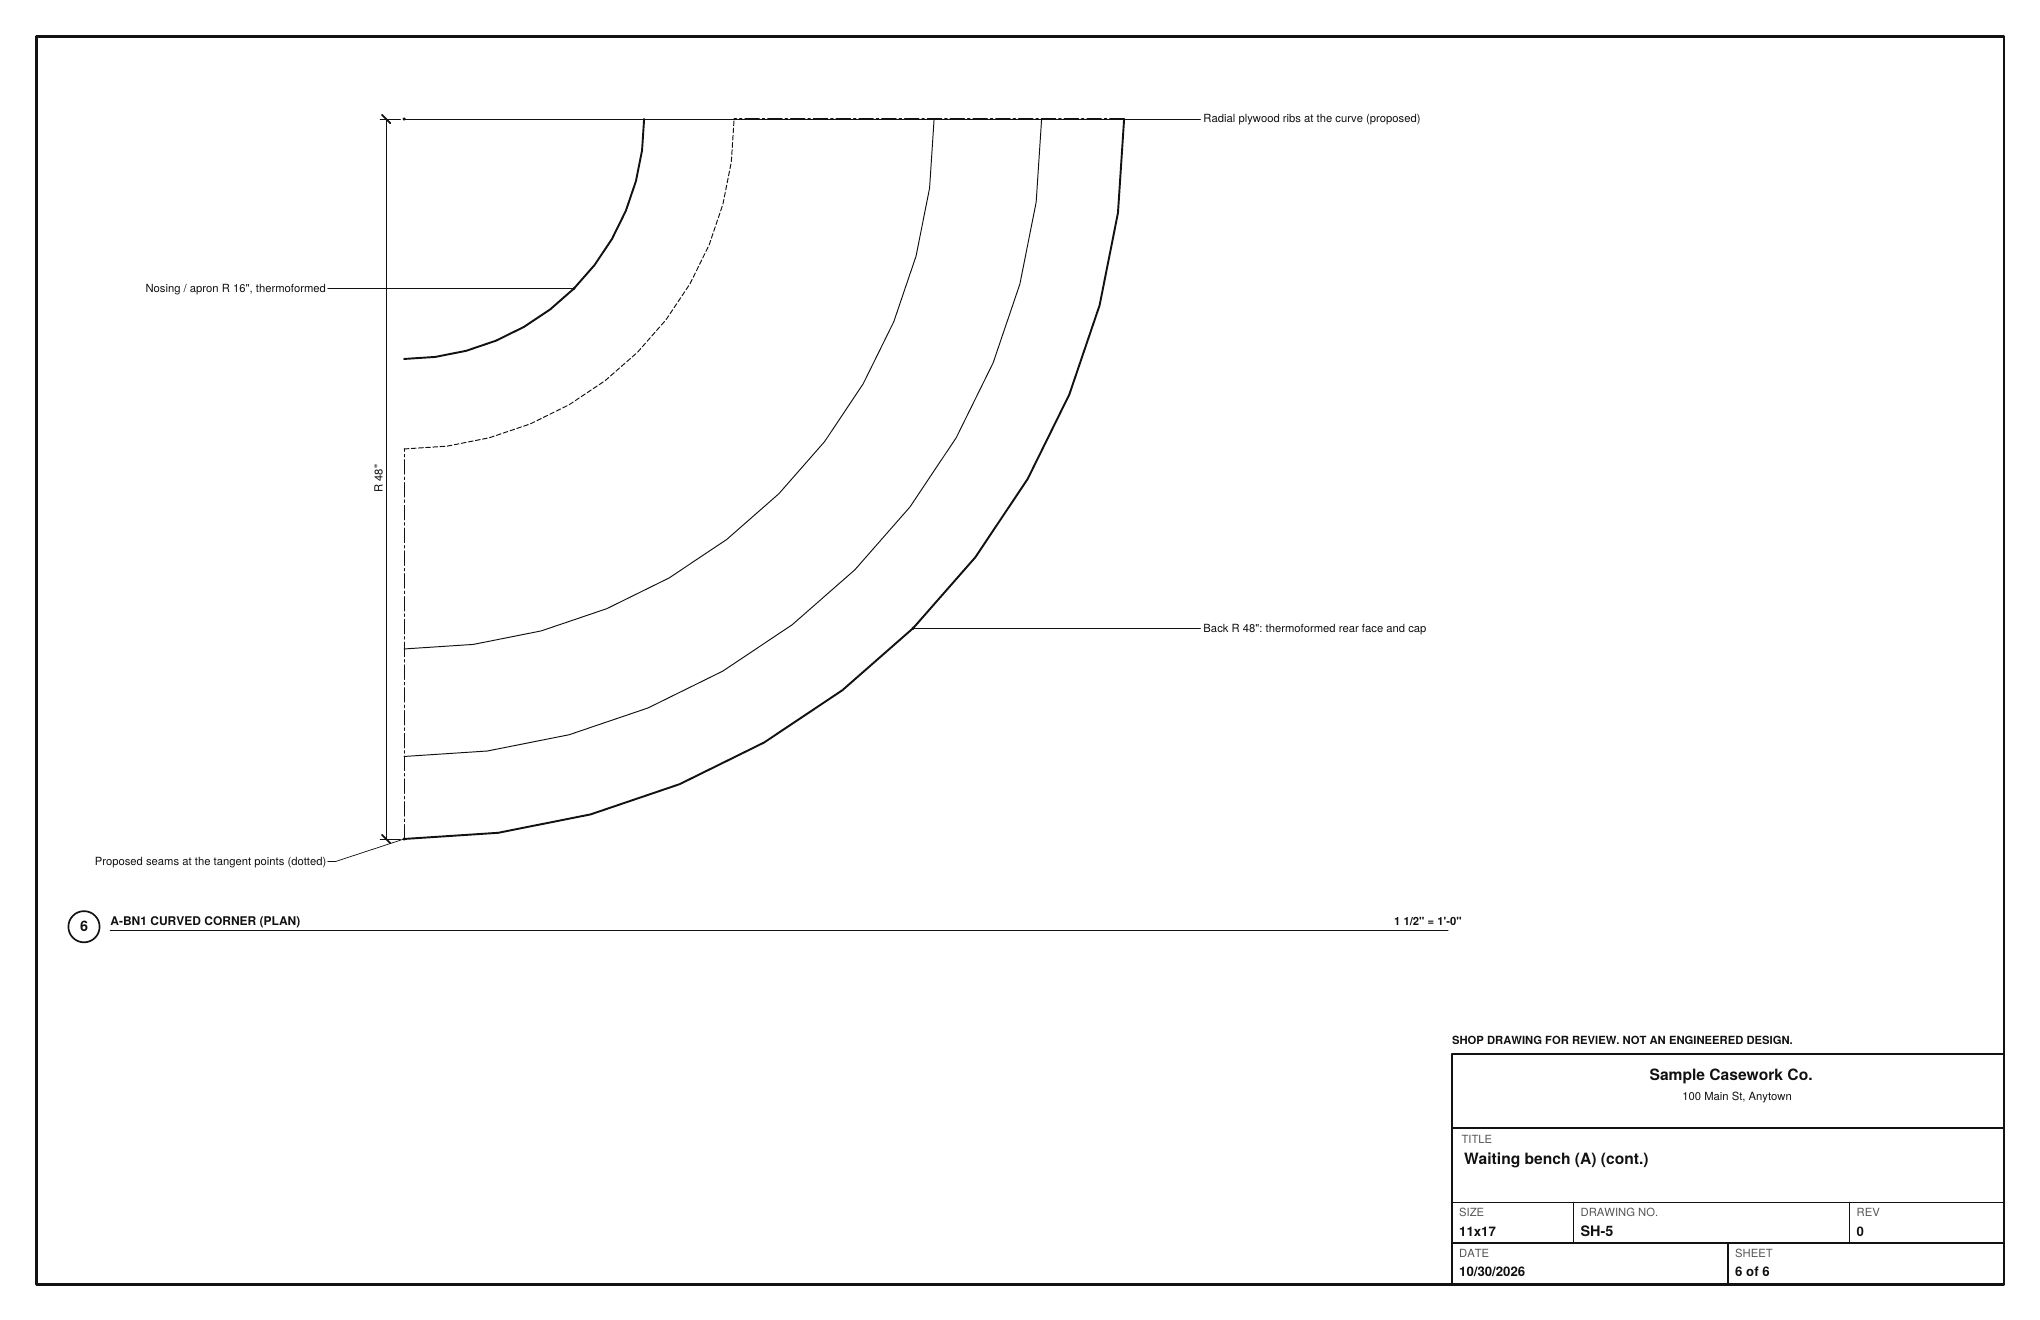
Each curved vertical face is one thermoformed piece, flagged with its radius. The seat and the cap are cut to the arc from flat blanks.
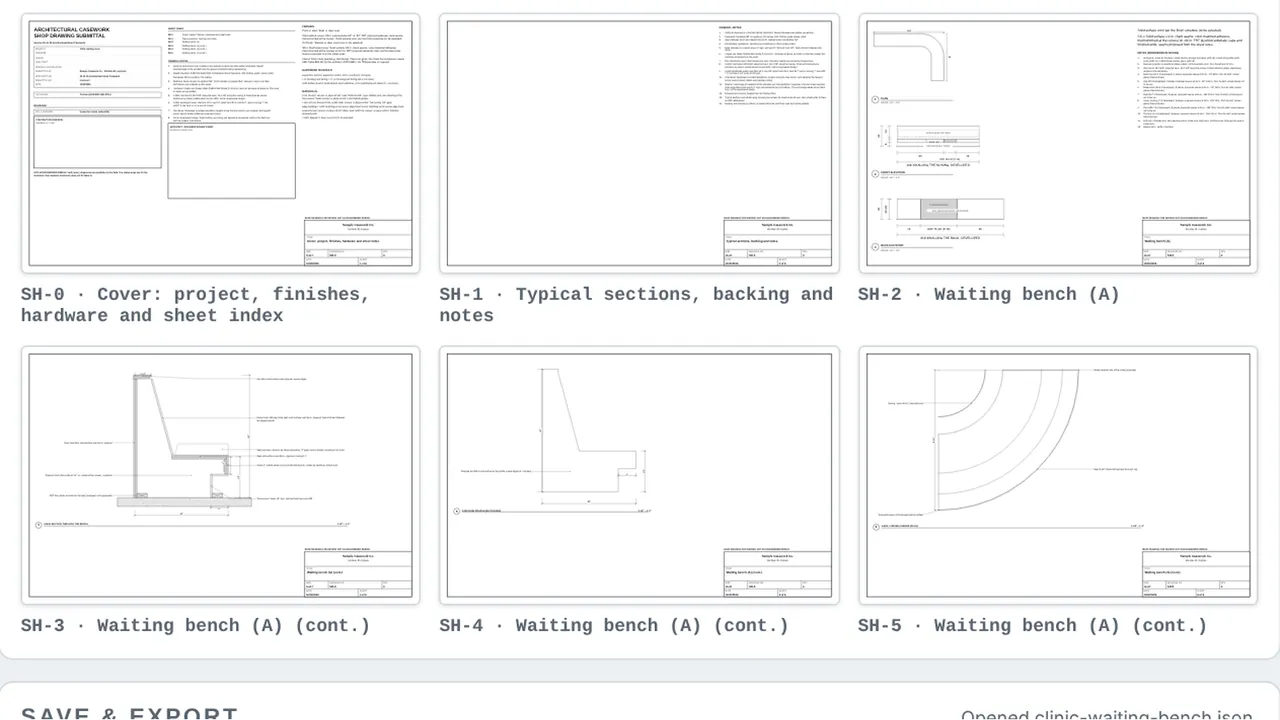
Drawing set: Sheets for Submittal, format Shop sheets, 11×17, and Preview sheets.
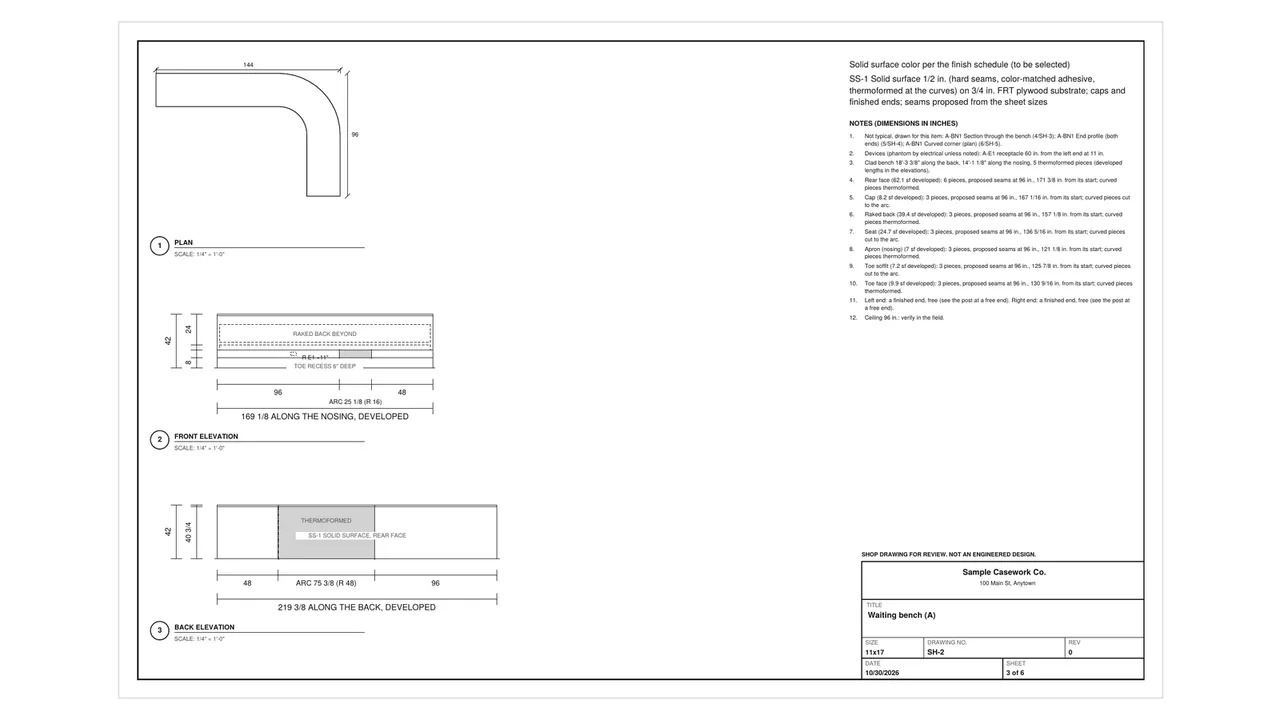
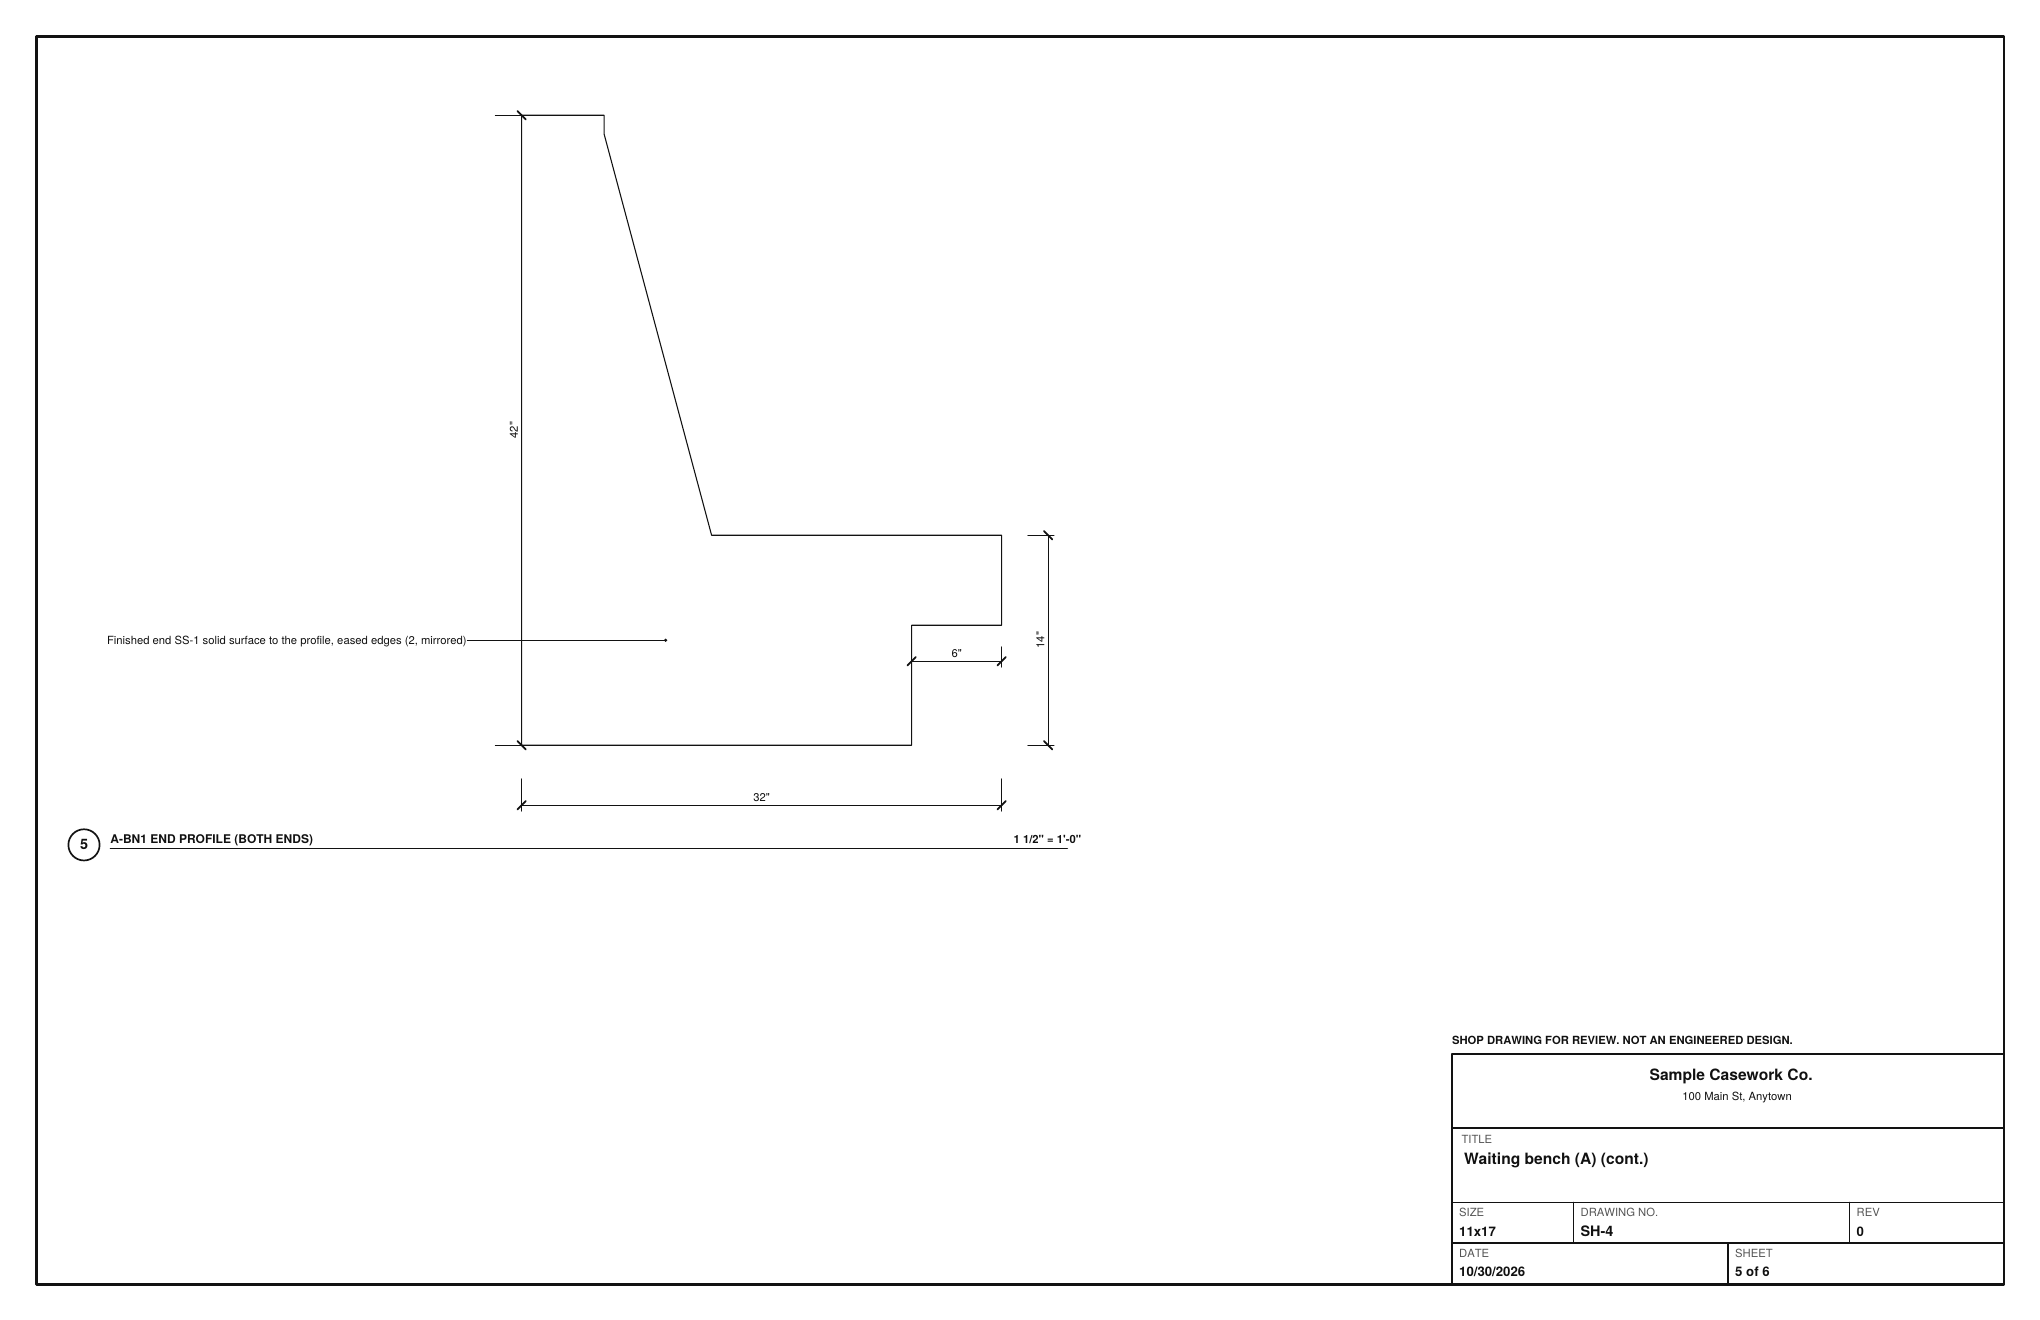
The bench gets its own item sheet: the plan and the elevation developed along the nosing, with the arc's length and radius. The section through the bench, the end profile and the curved corner follow on three continuation sheets, one each. Save PDF, and send it for review.
Field tip: The submittal is download only: it isn't added to the BidRidge job.
What you get
Real files from this sample, made by the designer. Tap a page to see it full size. Yours carry your company, the client and the address.
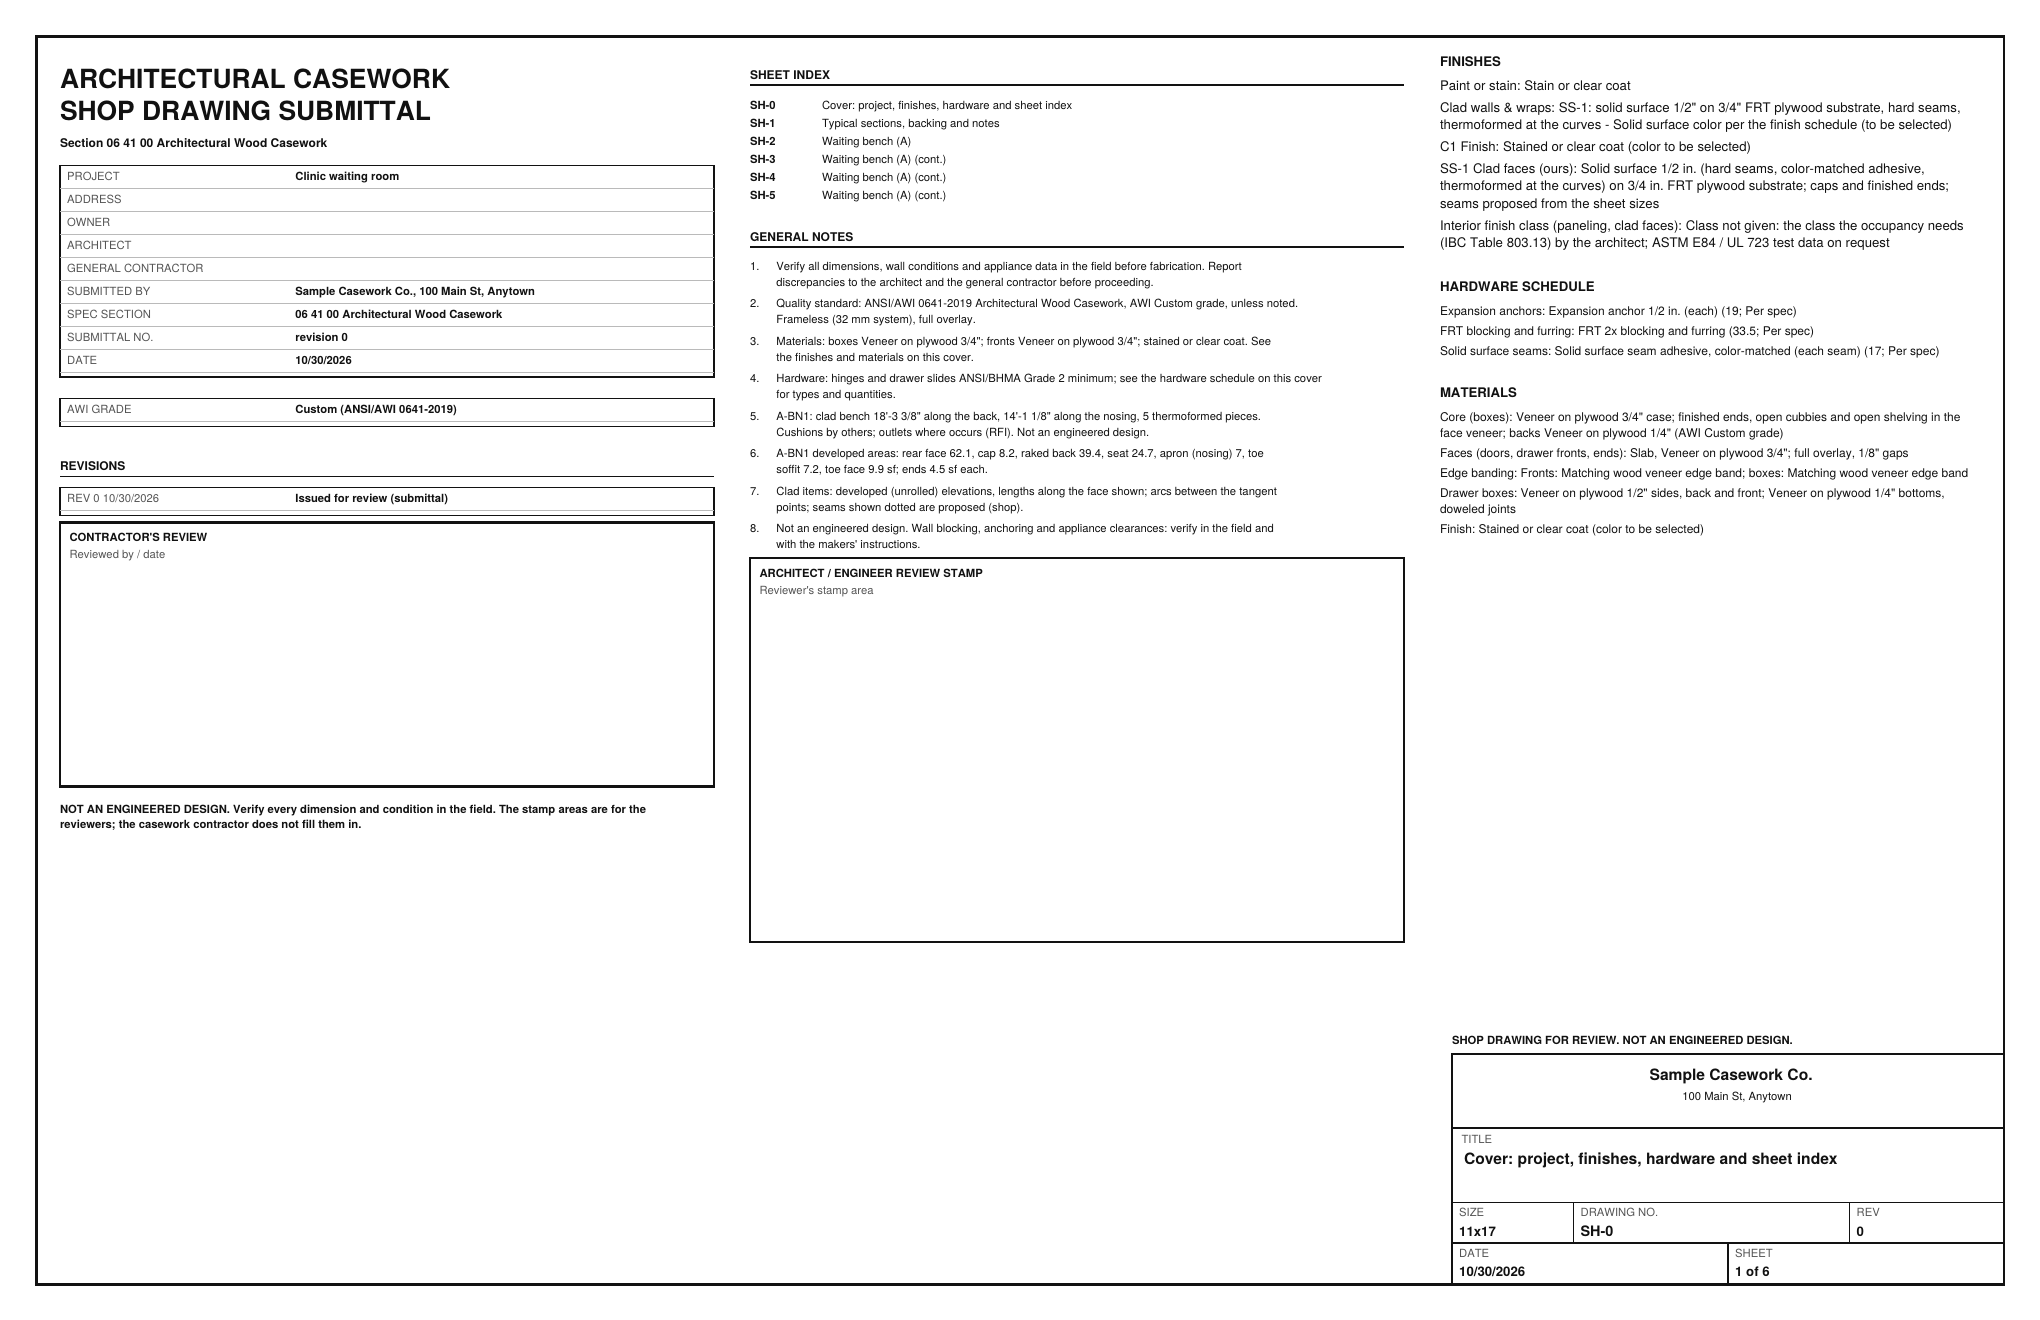
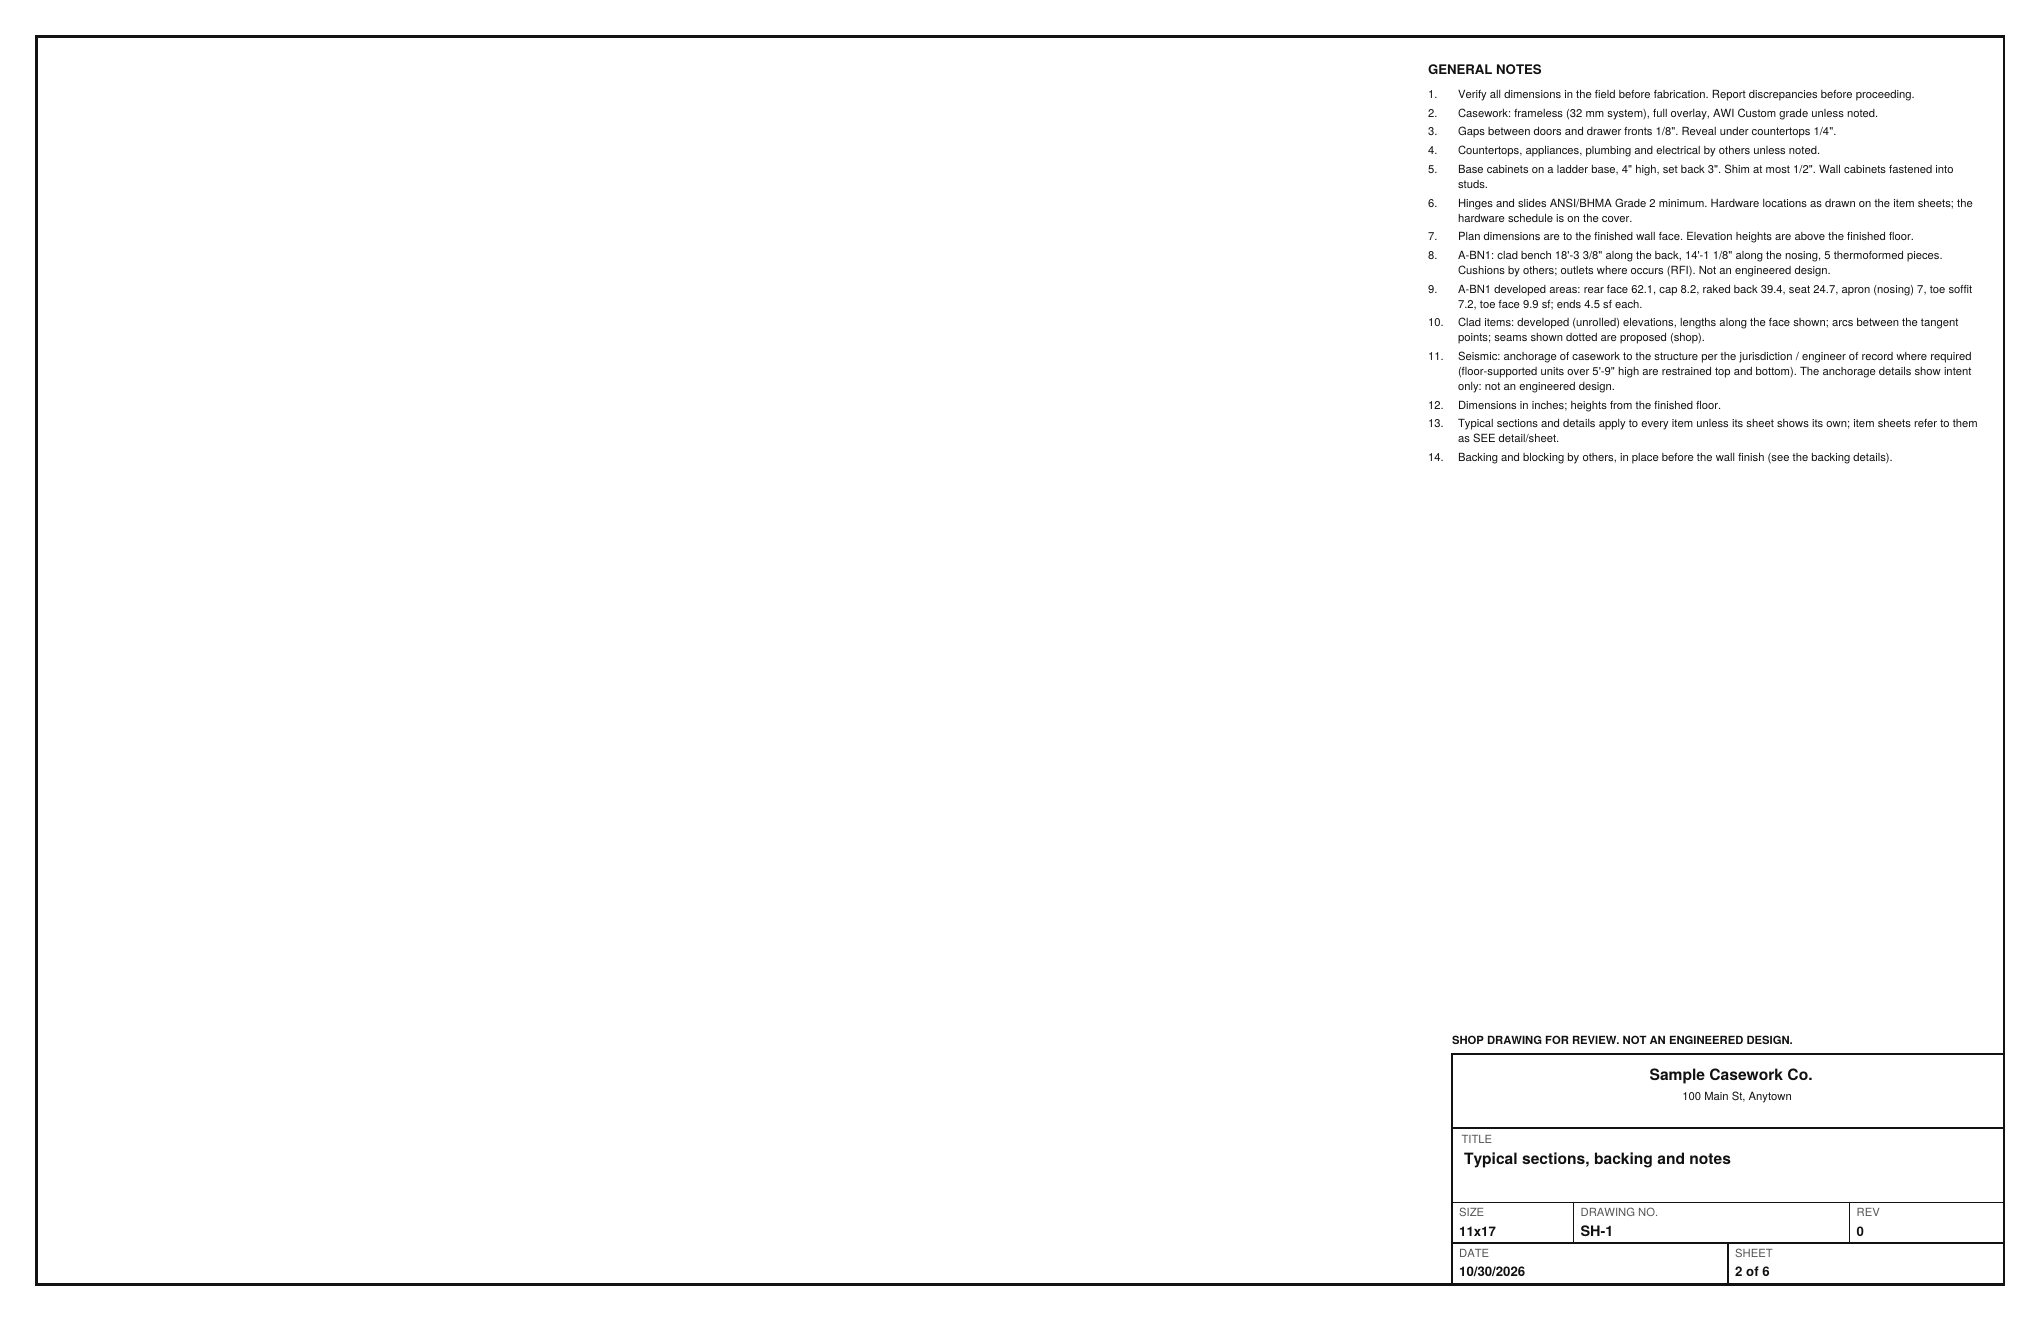
Open the sample, change it to your measurements, and send it to a BidRidge quote. Drawing is free; the drawing set, the lists and the quote come with a BidRidge license or the 14-day trial.
In the designer, tap Open project and pick the sample file. It opens exactly as in the video.
Sample designs: names, sizes and clients are made up. Prices are BidRidge's starting rates; set your own. The designers check against common guidelines (IRC, NKBA and the makers' published numbers) to help you catch mistakes. They don't replace your building department or the manufacturer's installation instructions: verify with them.