BidRidge › Designers › Guide › Chapter 11

Chapter 11 · Roofing & Siding DesignerBeta

Two-story office in EIFS

We put drainage EIFS on a two-story office: a foam band at the floor line, a reveal under the frieze, an entry bay framed by reveals, quoins at the corners and high-impact mesh at grade. The designer lays out the foam boards, builds the EIFS buy list and the drawing set, and updates the BidRidge EIFS job it was opened from.

In the designer, tap Open project and pick the sample file. It opens exactly as in the video.

Narrated walkthrough, 2:11. Captions on.

The sample in numbers

  • EIFS
    3,213 sf
    net · 16 sections on 4 walls · 31 openings
  • Foam boards
    557
    2 × 4 ft, 2″ EPS · 6,426 board feet
  • Reveals · band
    237 · 200 LF
    aesthetic reveals · foam band at the floor line
  • Quoins
    72
    at the outside corners, long and short by turns
  • Impact mesh
    951 sf
    at grade, up to 6 ft
  • Quote
    $77,900
    Better: EIFS $68,900 + soffit and gutters $9,000

Step by step

Step 1: Pick Siding and the EIFS preset in the Roofing & Siding Designer
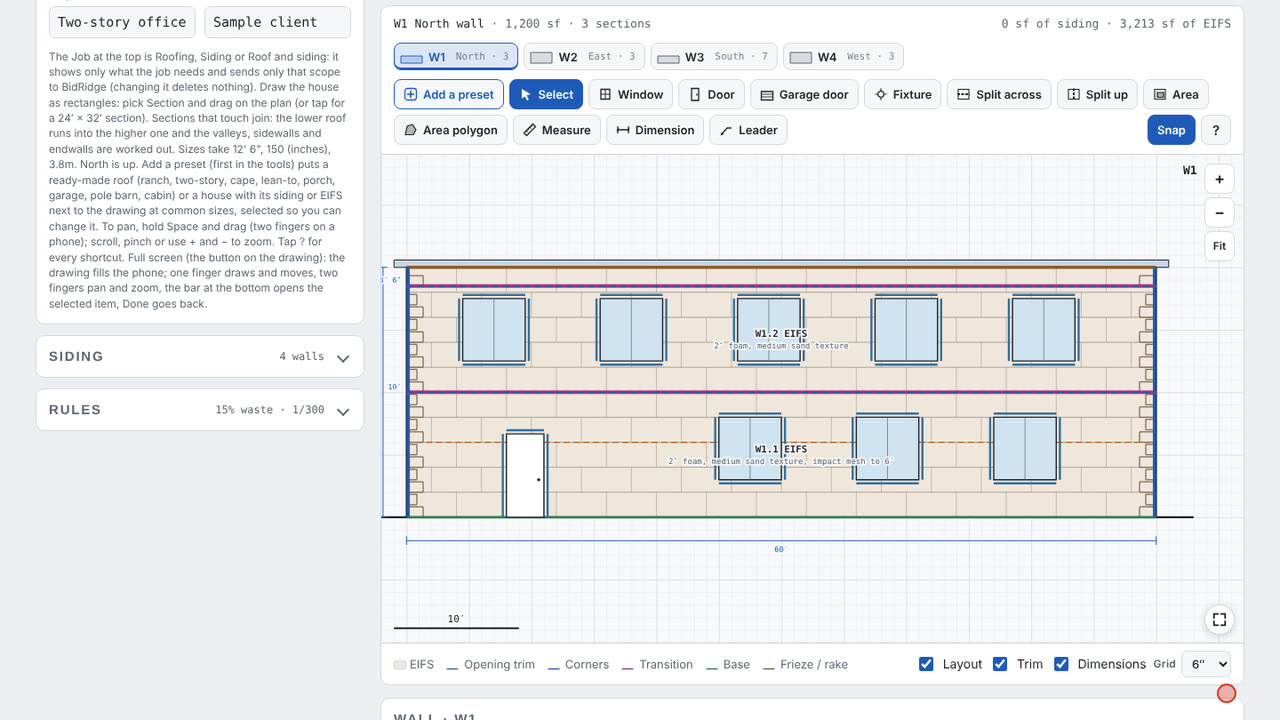
  1. A tab for each wall
  2. Foam band at the floor line
  3. 60 × 20 ft wall in drainage EIFS

Step 1: Pick Siding and the EIFS preset

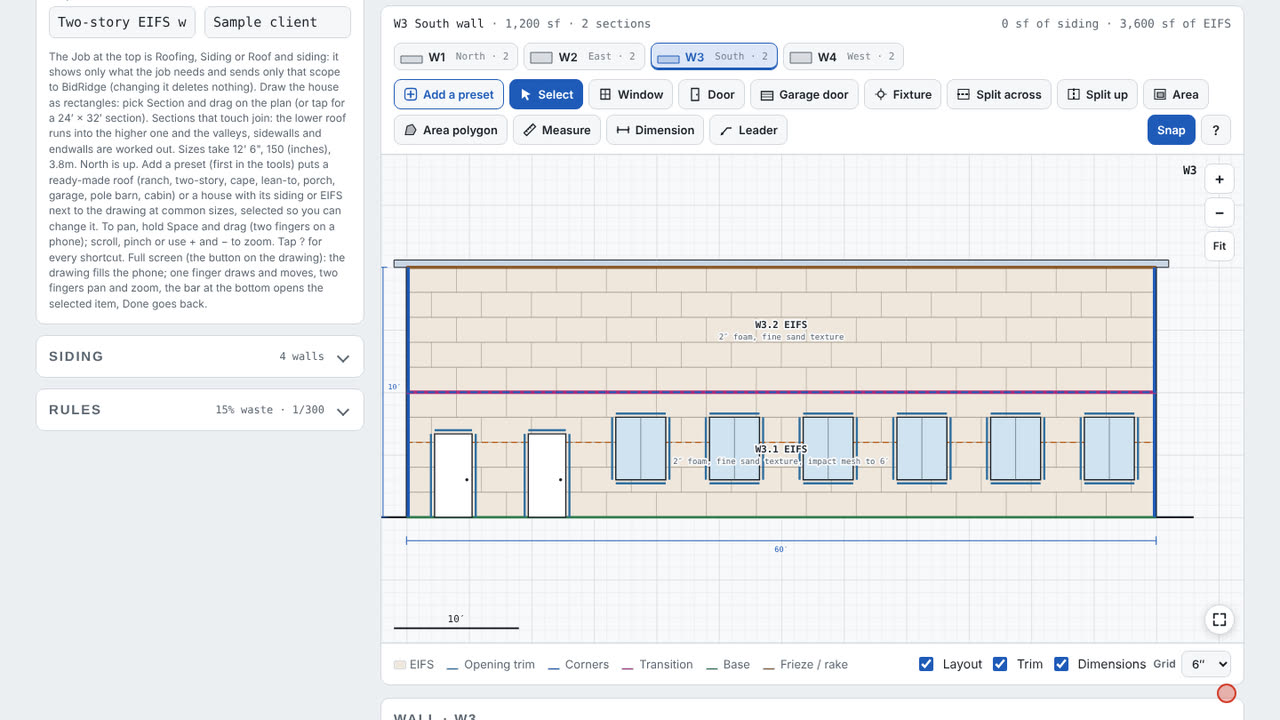
New design asks what we are designing. We pick Siding, then the preset Two-story EIFS with a band: a 60 × 40 ft building with 20 ft walls in drainage EIFS and a foam band at the second floor. Every size stays editable.

Field tip: A preset is only a start at common sizes. The EIFS one with a stone wainscot is there too.
Step 2: Set up the EIFS section in the Roofing & Siding Designer
  1. Quoins at the outside corner
  2. Impact mesh to 6 ft (dashed)
  3. Drainage EIFS, 2″ foam, medium sand

Step 2: Set up the EIFS section

Tap a section on the wall. The system is drainage EIFS over sheathing, since this is a framed wall. We pick 2″ foam, a medium sand finish, impact mesh up from grade (6 ft, set in Rules) and quoins at the outside corners.

Field tip: Over wood framing the designer expects drainage EIFS with a WRB (IRC R703.9.2); barrier EIFS only on concrete or block. Verify with the EIFS maker and your building department.

Step 3: The band and a reveal in the Roofing & Siding Designer
  1. Split across
  2. Reveal under the frieze
  3. Foam band at the floor line

Step 3: The band and a reveal

The line at the floor line is the foam band. Split across adds a line under the frieze, and we set its trim to an aesthetic reveal. A line between two EIFS sections is an expansion joint until we pick a reveal or a band.

Field tip: Each section between lines is its own row in BidRidge, so it can carry its own foam and finish.

Step 4: Frame the entry bay in the Roofing & Siding Designer
  1. Split up
  2. Vertical reveals
  3. Entry bay: coarse sand

Step 4: Frame the entry bay

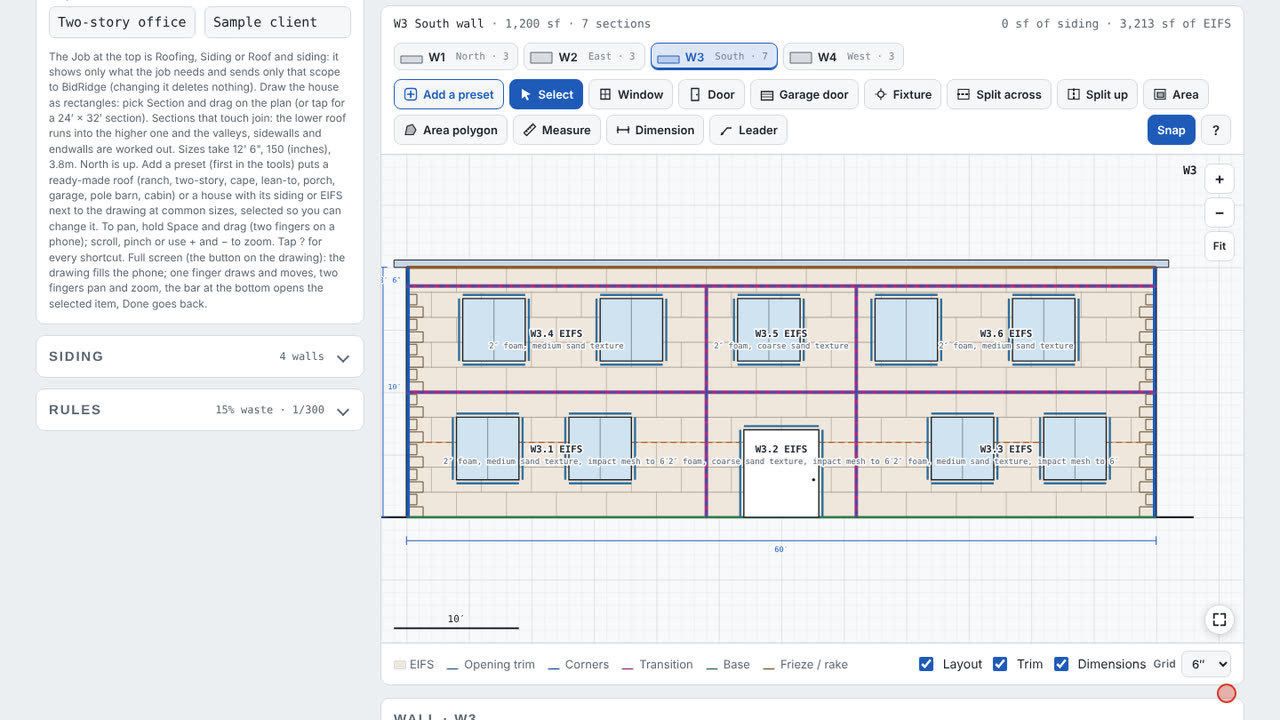
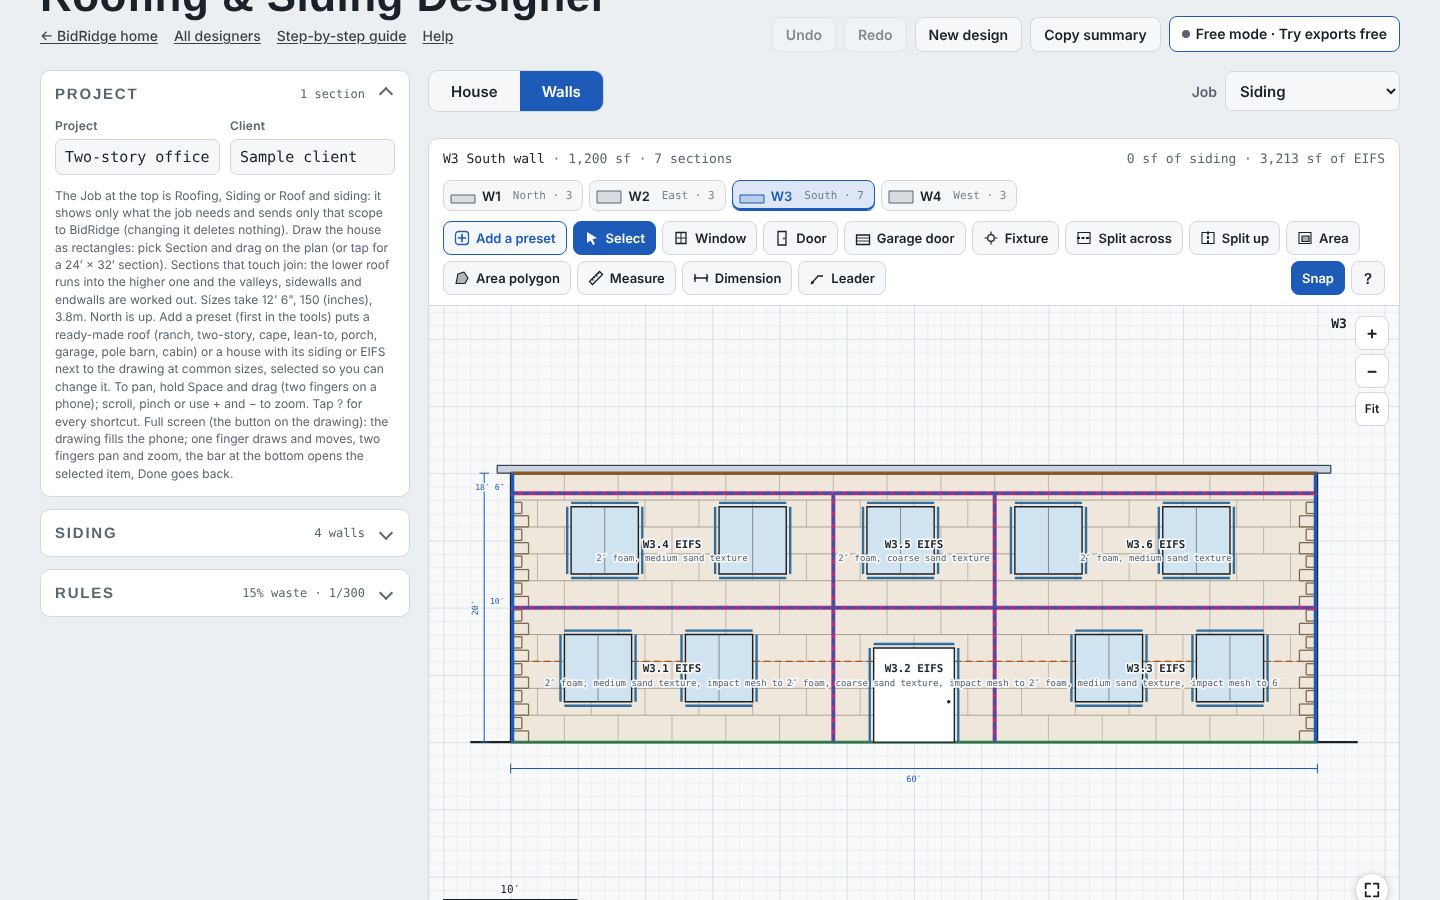
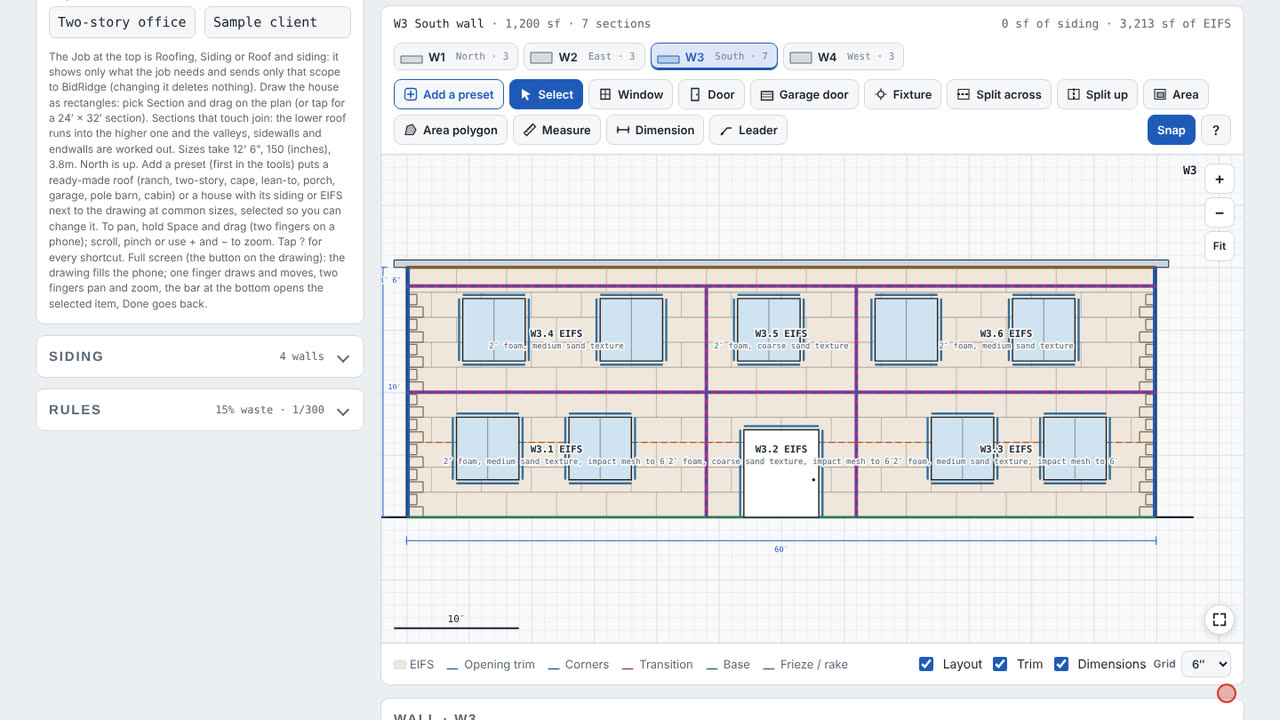
On the south wall, Split up twice frames the entry. The two vertical lines become reveals, and the bay gets a coarse sand finish so it reads from the street.

Step 5: Openings at their places in the Roofing & Siding Designer
  1. Window tool
  2. 2 windows 5′ × 5′, 42′ from the left, sill 3′
  3. Backwrap + sealant, head flashing, sill pan

Step 5: Openings at their places

We type the windows and doors in the wall table: how many, the size, how far from the left end, and the sill. Every opening gets backwrap and sealant, a head flashing and a sill pan.

Field tip: A blank position spreads the openings evenly; a blank sill puts windows at 36″ and doors at the floor.

Step 6: The board layout in the Roofing & Siding Designer
  1. Boards per section: board feet, L-cuts, impact mesh, quoins

Step 6: The board layout

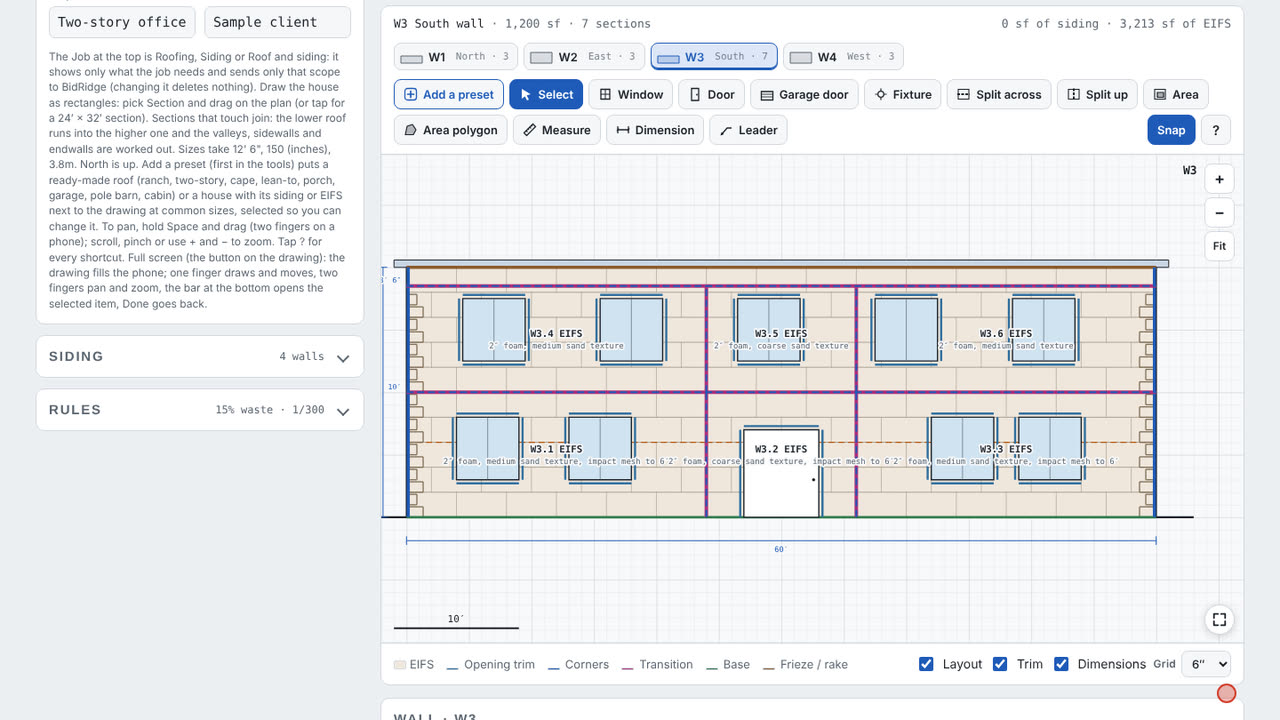
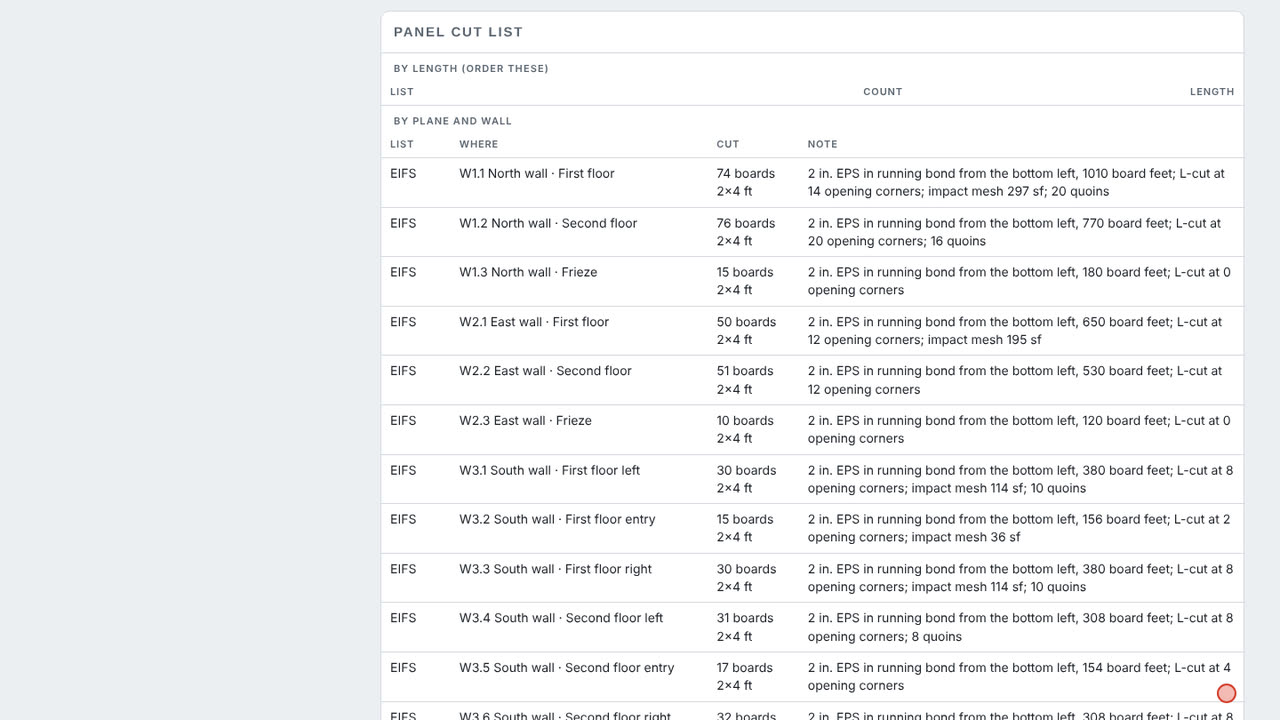
With Layout on, the wall shows the 2 × 4 ft boards in running bond from the bottom left. No joint lands on an opening corner: those boards get an L-cut. The cut list counts boards and board feet section by section, and the dashed line is the top of the impact mesh.

Step 7: The EIFS buy list in the Roofing & Siding Designer
  1. Finish by texture
  2. High-impact mesh at grade
  3. Sealant and backer rod

Step 7: The EIFS buy list

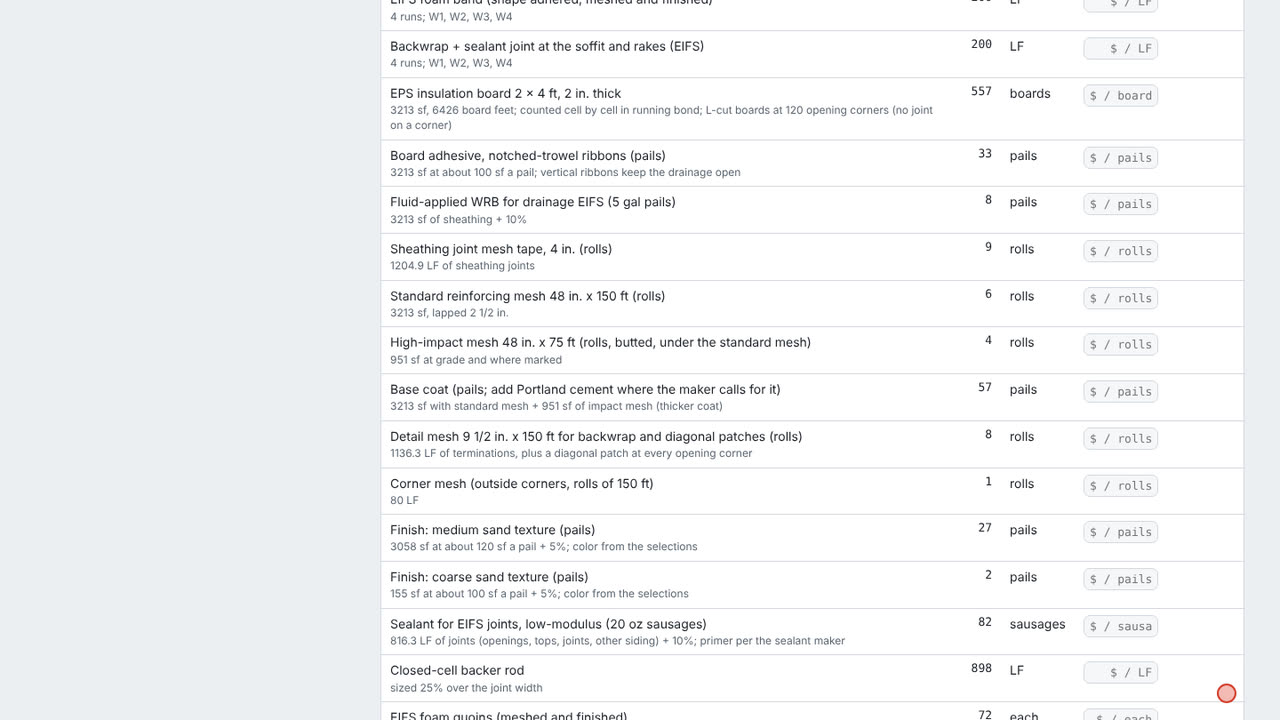
The EIFS group lists boards by thickness, adhesive, the WRB, mesh and high-impact mesh, base coat, finish by texture, sealant, backer rod and the quoins, plus the starter track and sill pans. Prices are ours and stay in the design.

Step 8: The drawing set in the Roofing & Siding Designer
  1. Save PDF: 9 sheets
  2. Preview sheets
  3. A wall elevation per wall

Step 8: The drawing set

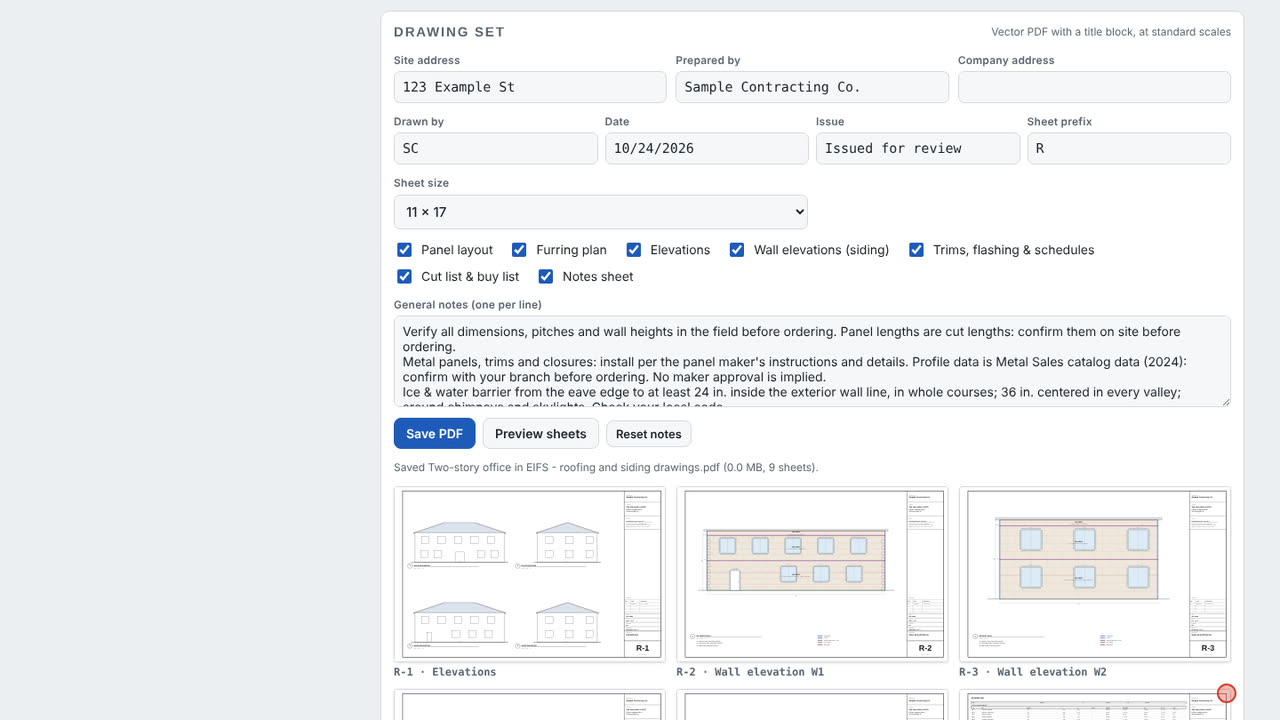
Save PDF makes the elevations, a wall elevation for every wall with its sections, lines and openings, the schedules with the EIFS sections and the flashing schedule, then the cut list and buy list.

Step 9: Update the EIFS job in BidRidge in the Roofing & Siding Designer
  1. EIFS: a row per section
  2. Siding: soffit, fascia, gutters

Step 9: Update the EIFS job in BidRidge

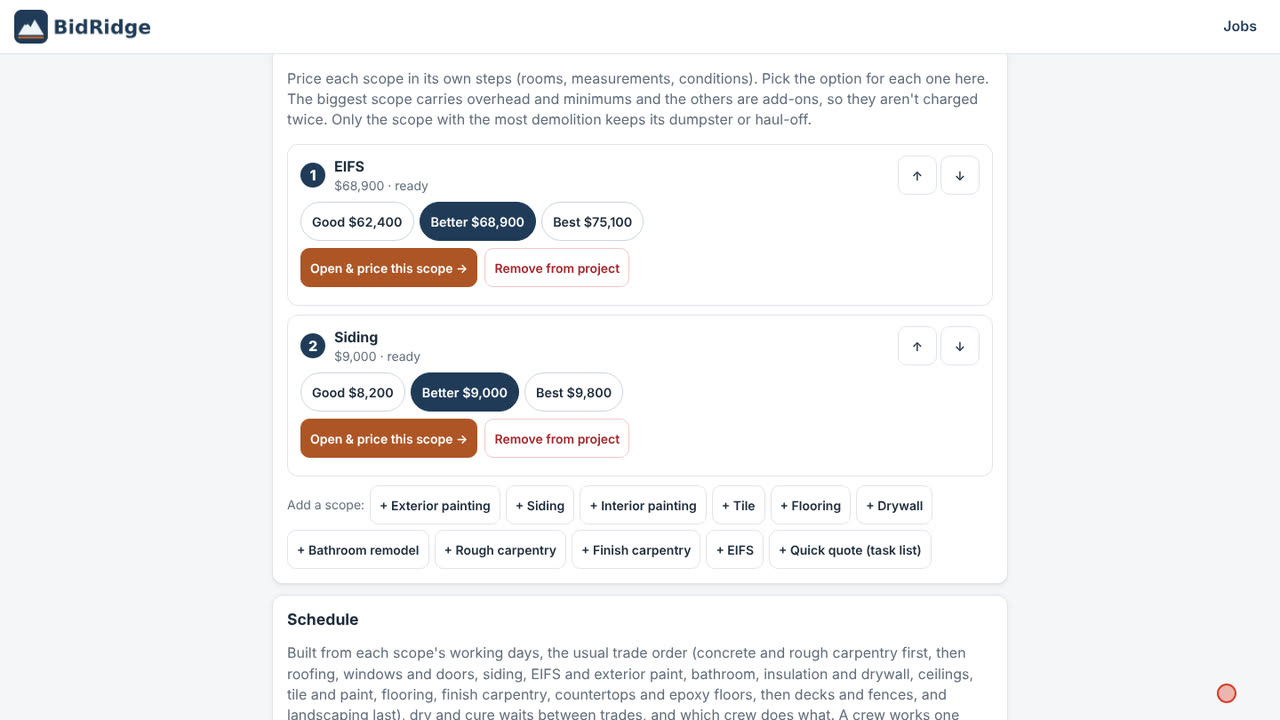
We opened this design from an EIFS job, so the card says Update the job in BidRidge. BidRidge shows what changes, then the EIFS goes to the EIFS trade with a row per section, and the soffit, fascia and gutters go in a Siding scope. Both are priced at our rates.

Field tip: One project, two scopes: the customer signs one proposal.

What you get

The drawing set, the lists and the files

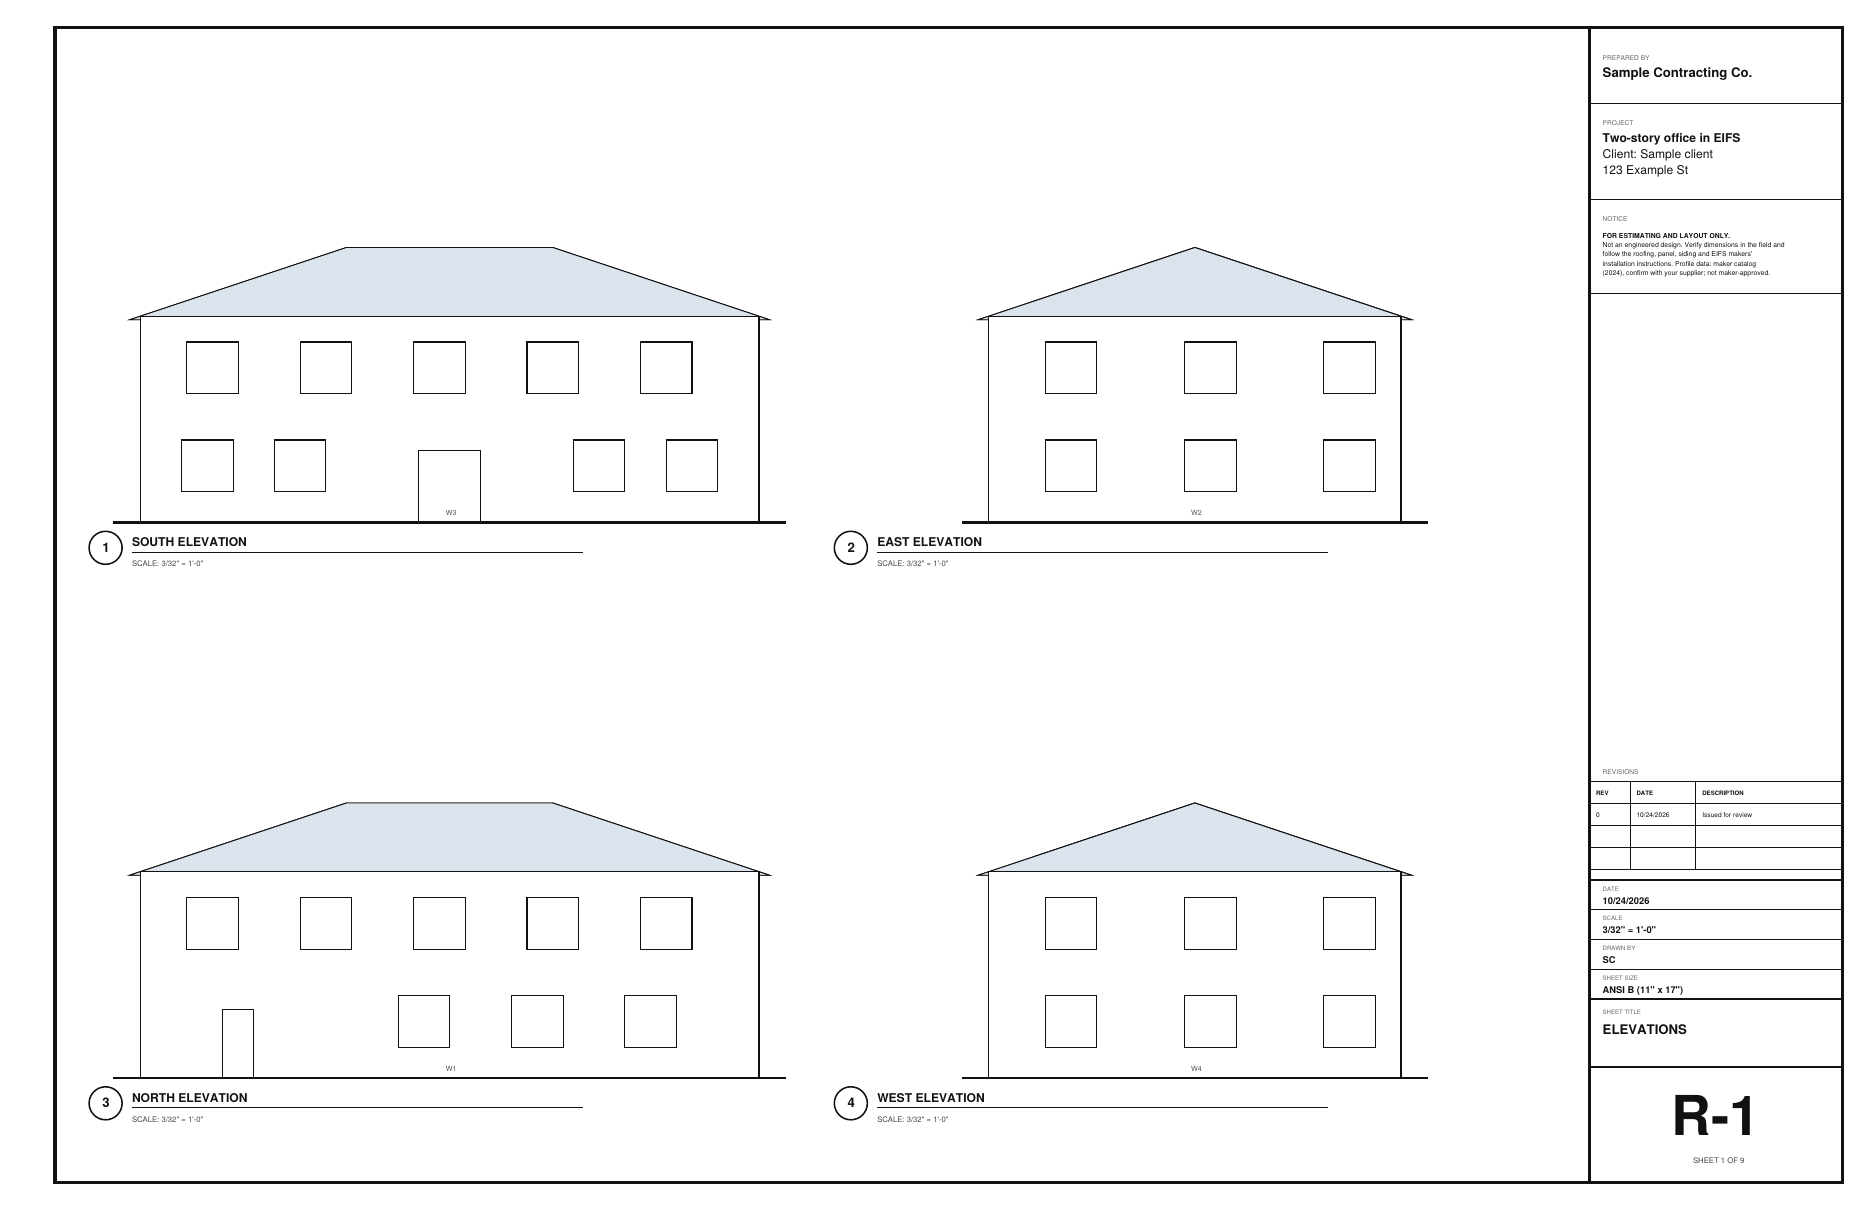
Real files from this sample, made by the designer. Tap a page to see it full size. Yours carry your company, the client and the address.

The south wall in Walls mode: the entry bay between reveals, the foam band, the reveal under the frieze, quoins and the board layout
R-1 elevations: all four sides with their openings
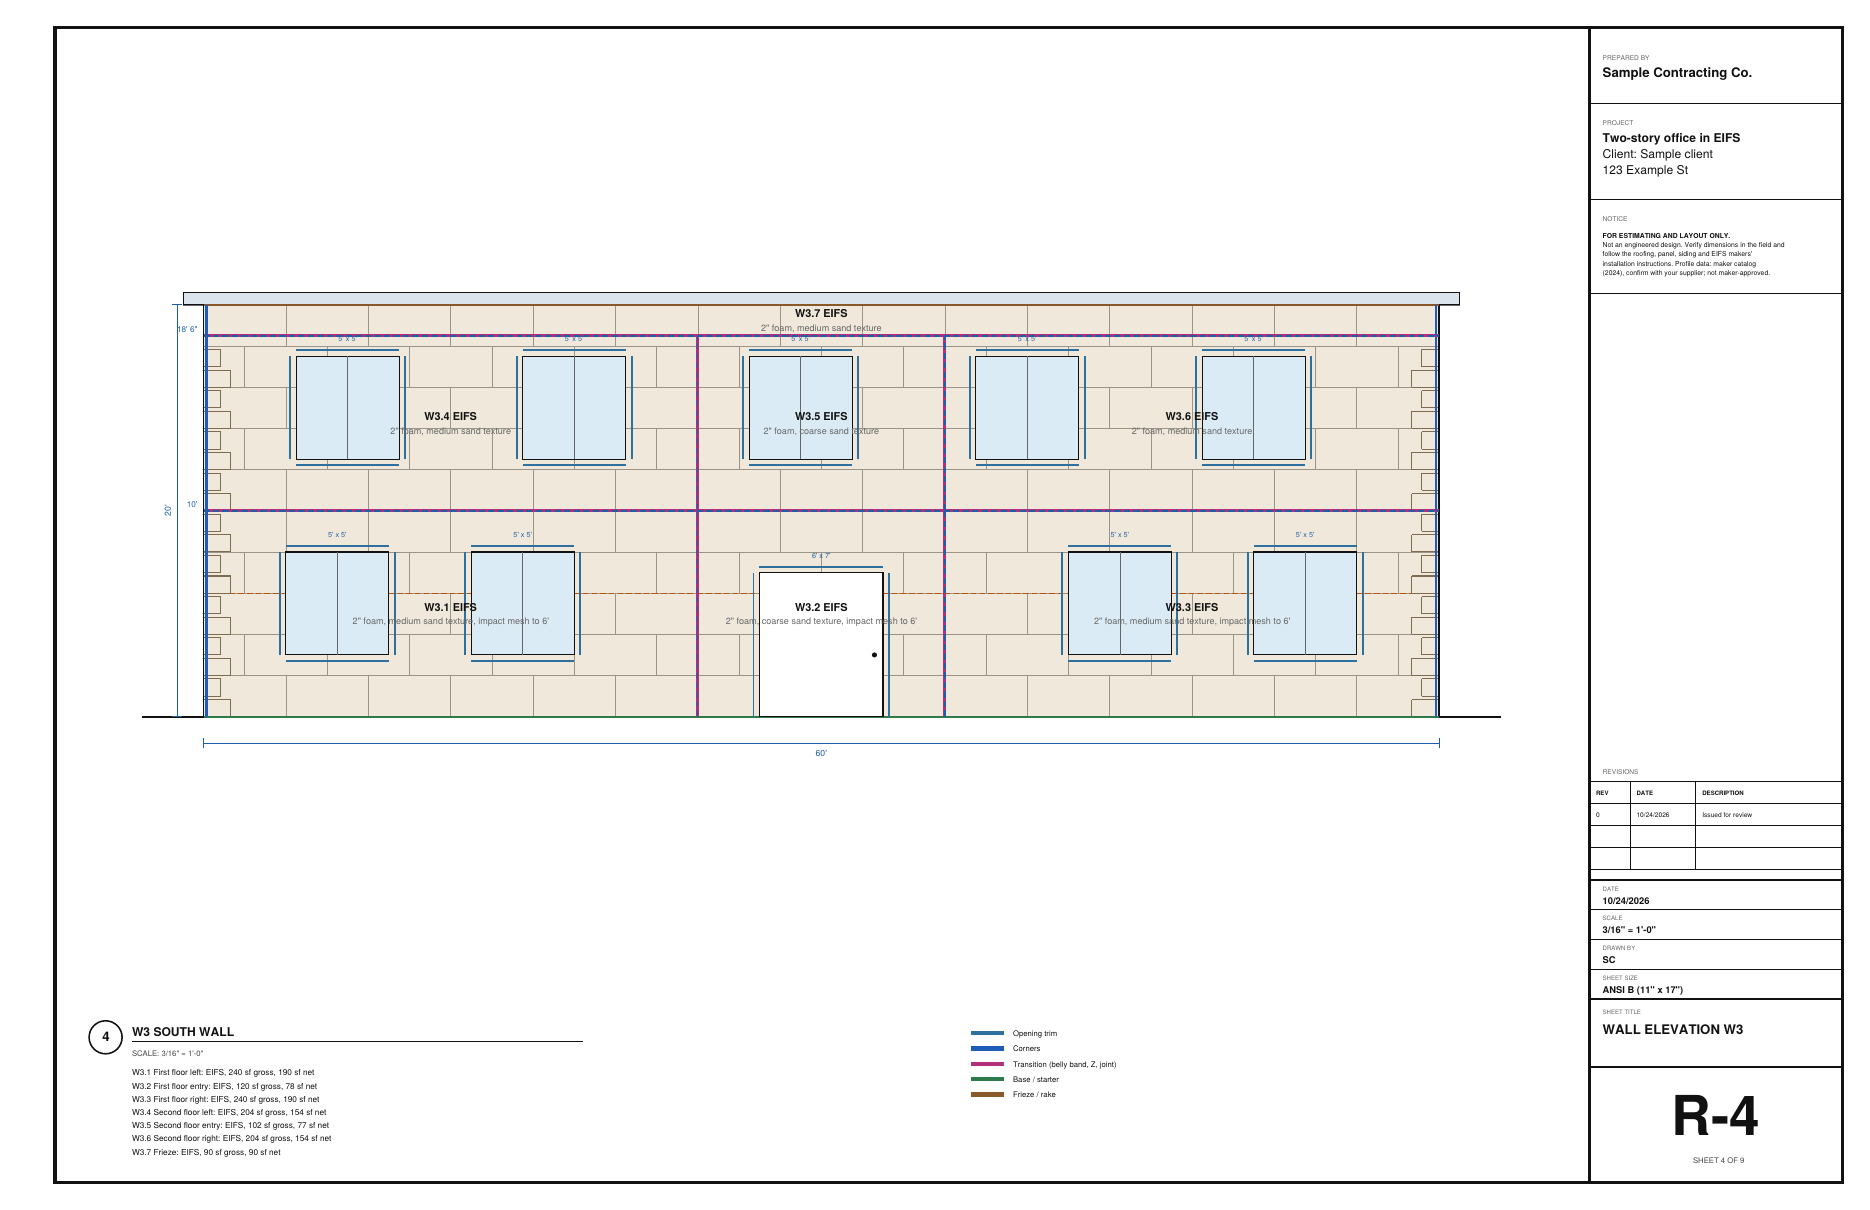
R-4 wall elevation W3: seven EIFS sections, the reveals and the band, the board layout and the openings
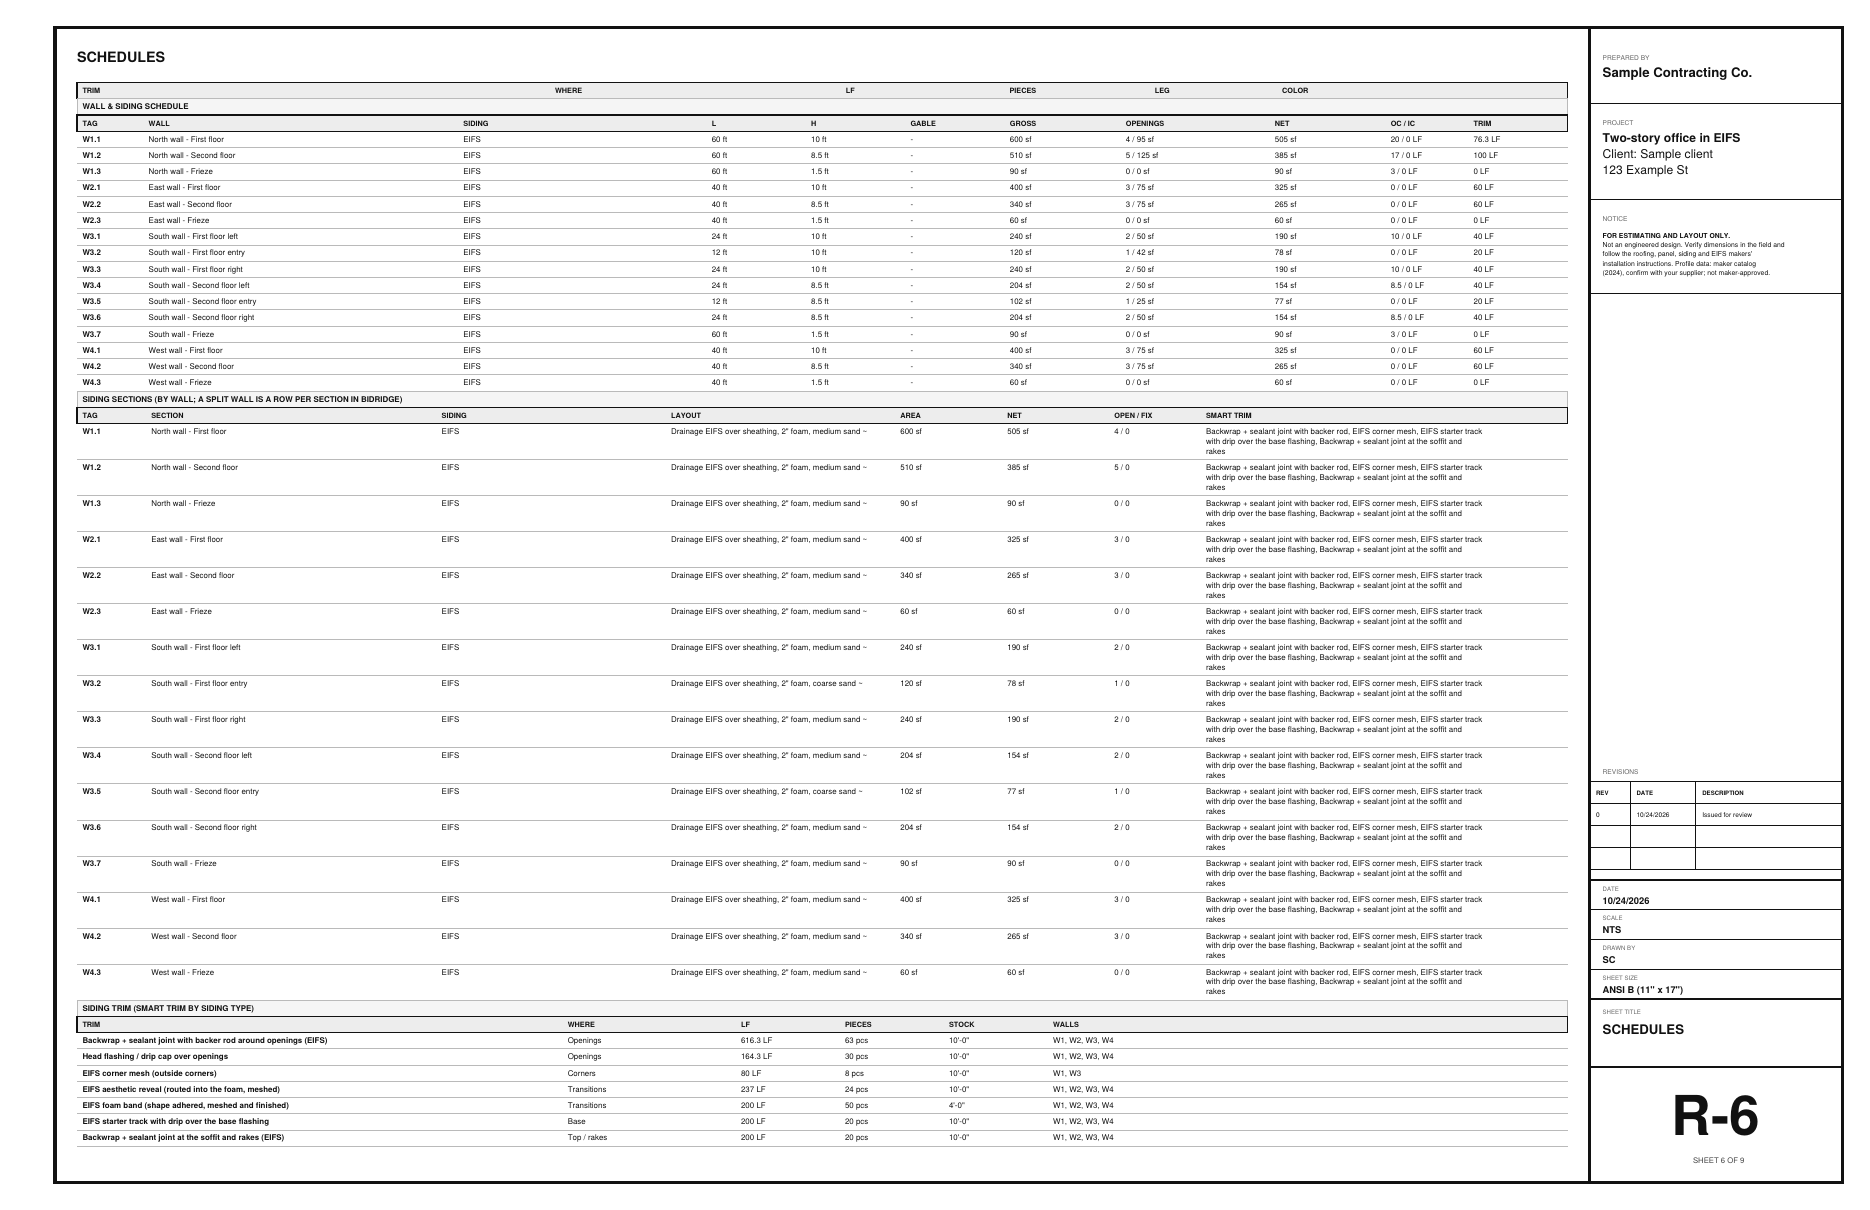
R-6 schedules: walls and EIFS sections, system, foam and finish, smart trim
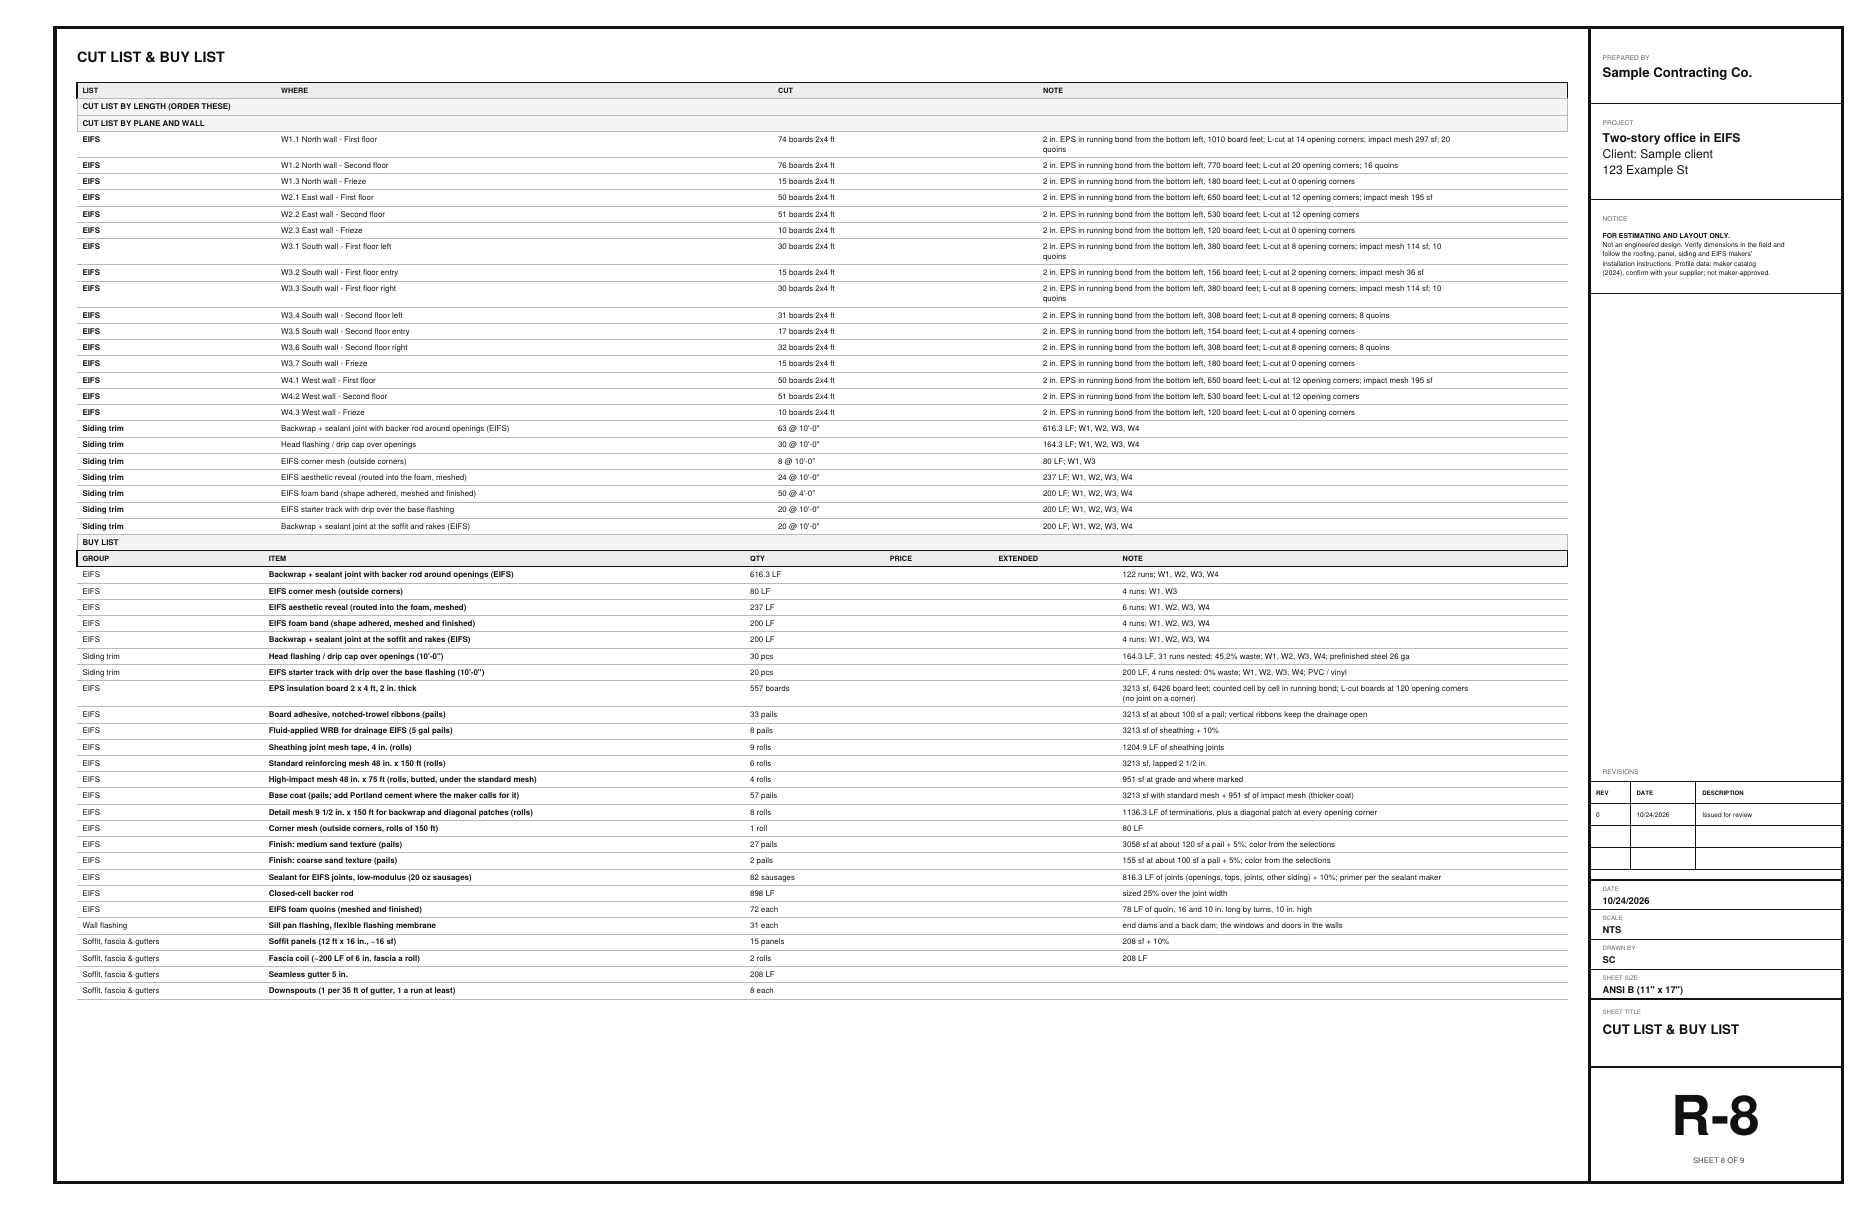
R-8 cut list and buy list: boards per section, the EIFS group

The BidRidge quote

Same numbers in the quote

The designer sends its quantities to BidRidge, and BidRidge prices the labor and materials at your rates.

  • Good
    $70,600
  • Better
    $77,900
    Recommended
  • Best
    $84,900
The design and the quote, line by line
ItemIn the designerIn the BidRidge quote
EIFS3,213 sf net, 16 sections, 31 openings3,213 sf of EIFS, 16 wall rows
Sealant joints816.3 LF (openings, top, joints)816 LF of sealant
Reveals and band237 LF reveal, 200 LF foam bandReveals 237 LF, foam bands 200 LF
Impact mesh951 sf at grade951 sf (from the designer)
Quoins7272
Soffit, fascia, gutters208 sf, 208 LF, 208 LF, 8 downspouts208 sf soffit, 208 LF fascia (Siding scope)

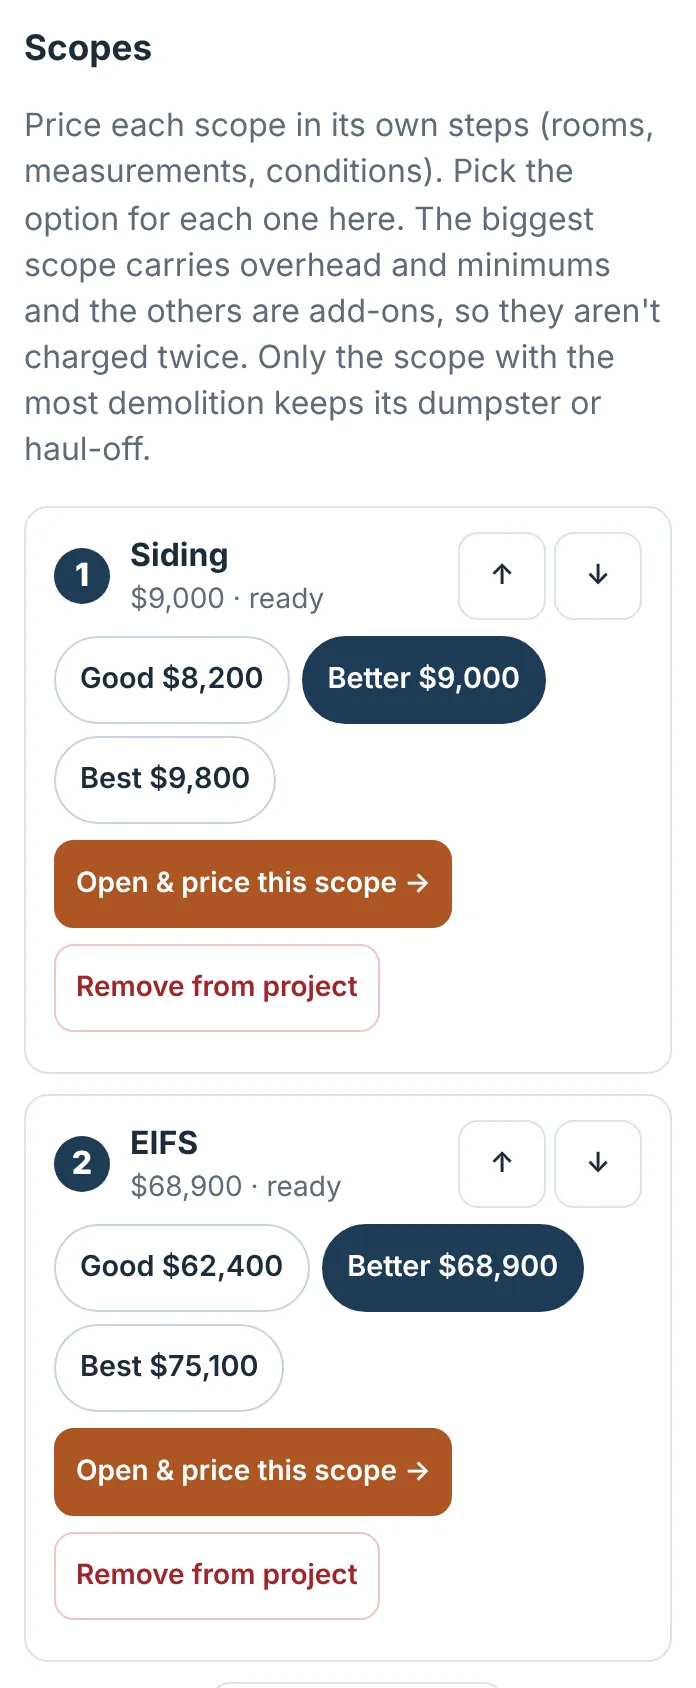
EIFS sample, opened in the BidRidge app at its starting rates: one project, two scopes. EIFS $62,400 / $68,900 / $75,100 and siding (soffit, fascia, gutters) $8,200 / $9,000 / $9,800 (Good / Better / Best), added together here. Your rates give your own numbers.

The sample opened as a quote in the BidRidge app: Good, Better and Best prices
The BidRidge app, at its starting rates.

Try it on your own job

Open the sample, change it to your measurements, and send it to a BidRidge quote. Drawing is free; the drawing set, the lists and the quote come with a BidRidge license or the 14-day trial.

In the designer, tap Open project and pick the sample file. It opens exactly as in the video.

Sample designs: names, sizes and clients are made up. Prices are BidRidge's starting rates; set your own. The designers check against common guidelines (IRC, NKBA and the makers' published numbers) to help you catch mistakes. They don't replace your building department or the manufacturer's installation instructions: verify with them.