BidRidge › Designers › Guide › Chapter 16

Chapter 16 · Countertop DesignerBeta

Kitchen re-top and hall vanity

We measure an L kitchen off the cabinets that are there, catch an out-of-square run with the diagonals, import the island from a digitizer DXF and trace the hall bath vanity from a photo of its luan template. Then the tops get edges, seams, slabs and CNC files like drawn tops, and update the Countertops job they came from.

In the designer, tap Open project and pick the sample file. It opens exactly as in the video.

Narrated walkthrough, 2:23. Captions on.

The sample in numbers

  • Tops
    68.5 sf
    5 tops · 3 from the cabinets, 1 DXF, 1 traced
  • Diagonals
    5/16″ out
    the sink wall, 9/16″ between the diagonals
  • Slabs
    2 slabs
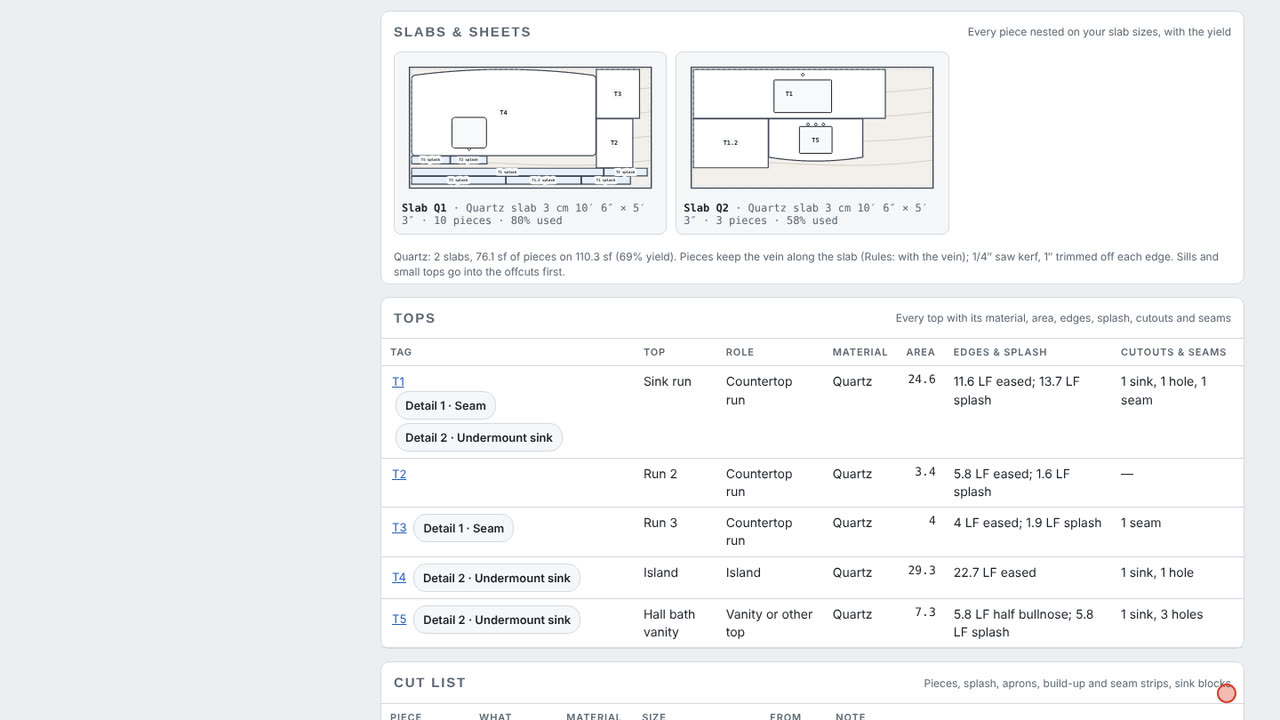
    Quartz 126″ × 63″, 3 cm · 69% yield
  • Seams
    2
    1 seam off the sink · the corner joint
  • Material
    $4,295
    slabs and supplies at the starting prices
  • Quote
    $18,150
    Better, at the starting rates

Step by step

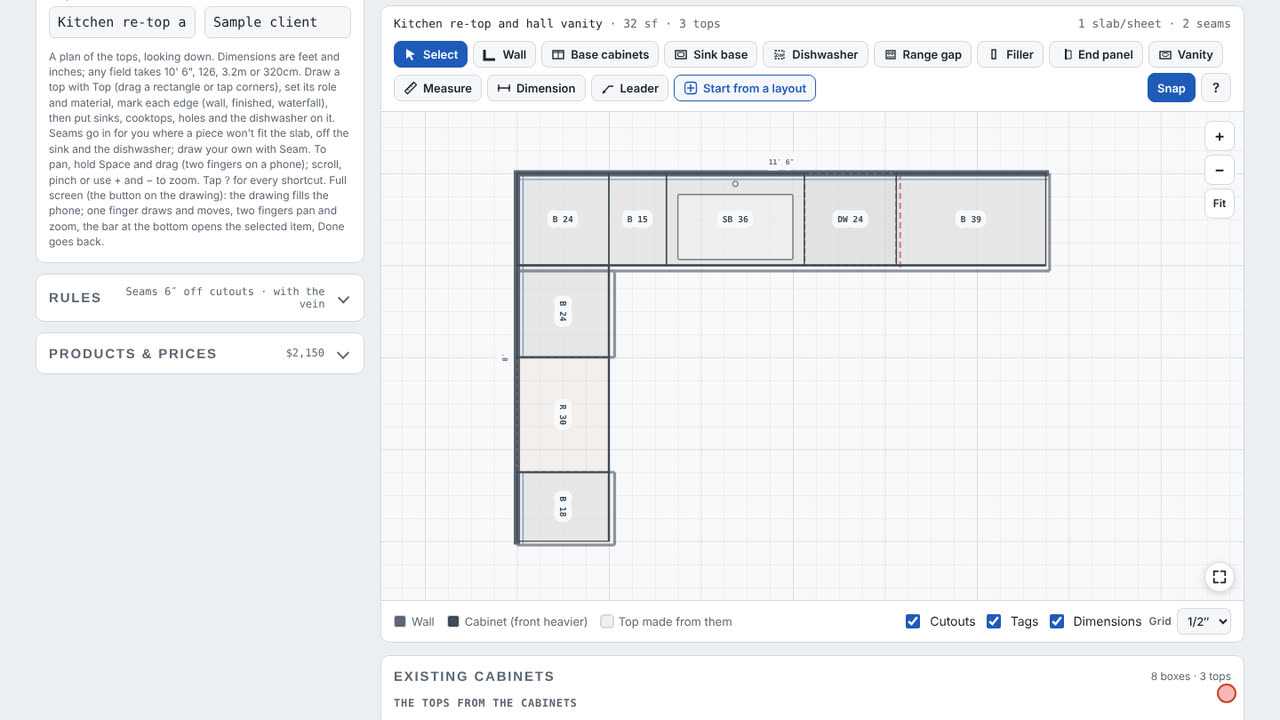
Step 1: Existing cabinets: start from a layout in the Countertop Designer
  1. Existing cabinets mode
  2. Sink wall: 11′ 6″ of boxes
  3. Sink base and the dishwasher gap
  4. Range gap: the top stops

Step 1: Existing cabinets: start from a layout

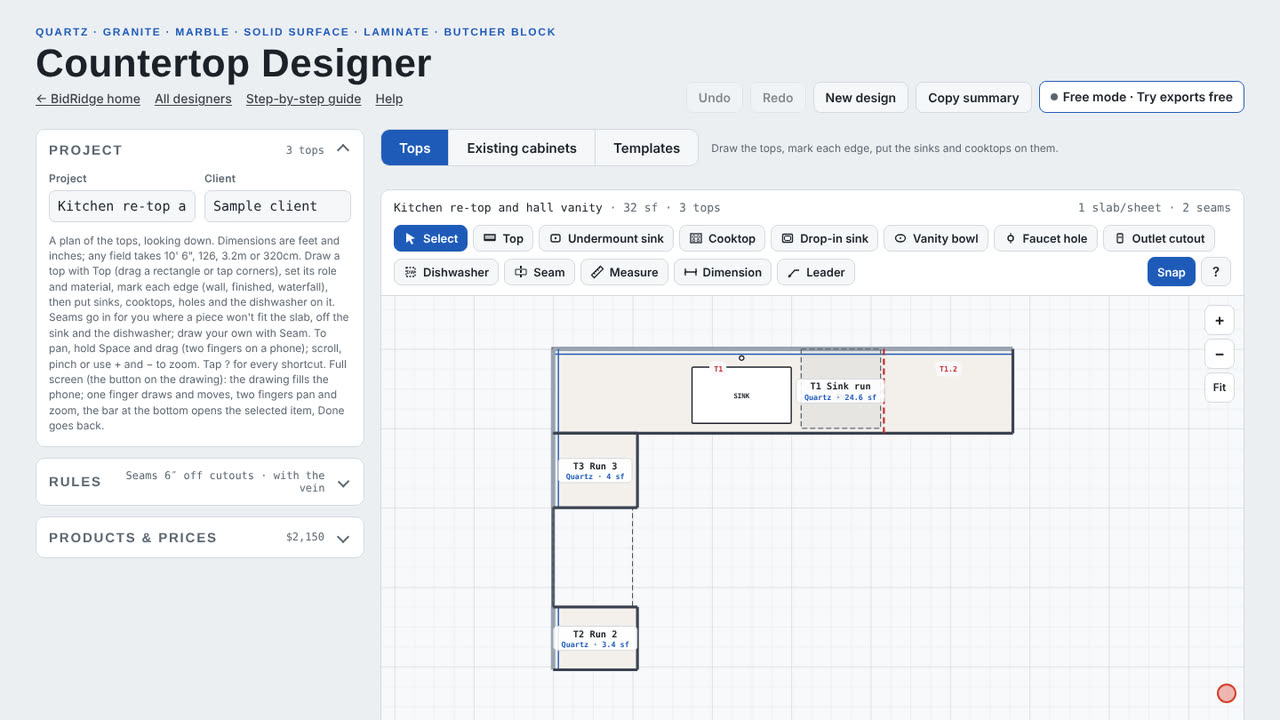
Switch to Existing cabinets and tap Start from a layout, then L-shape. Type what you measured: the last base on the sink wall is 39″, so the run is 11′ 6″; tap the wall and type its side to match. The sink base, the dishwasher gap and the range gap are boxes like the rest.

Field tip: Tap a box and use Add beside it (← Left, Right →) to build a run box by box.
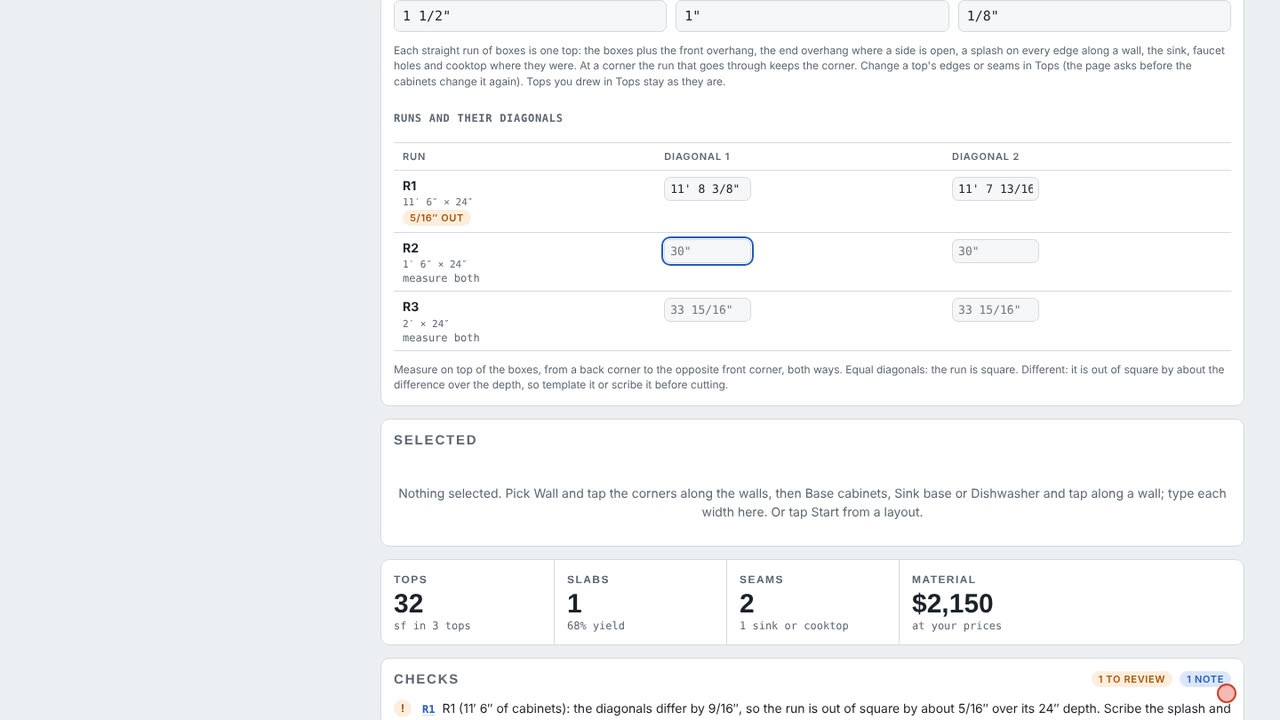
Step 2: The diagonals check in the Countertop Designer
  1. Diagonals, back corner to front corner
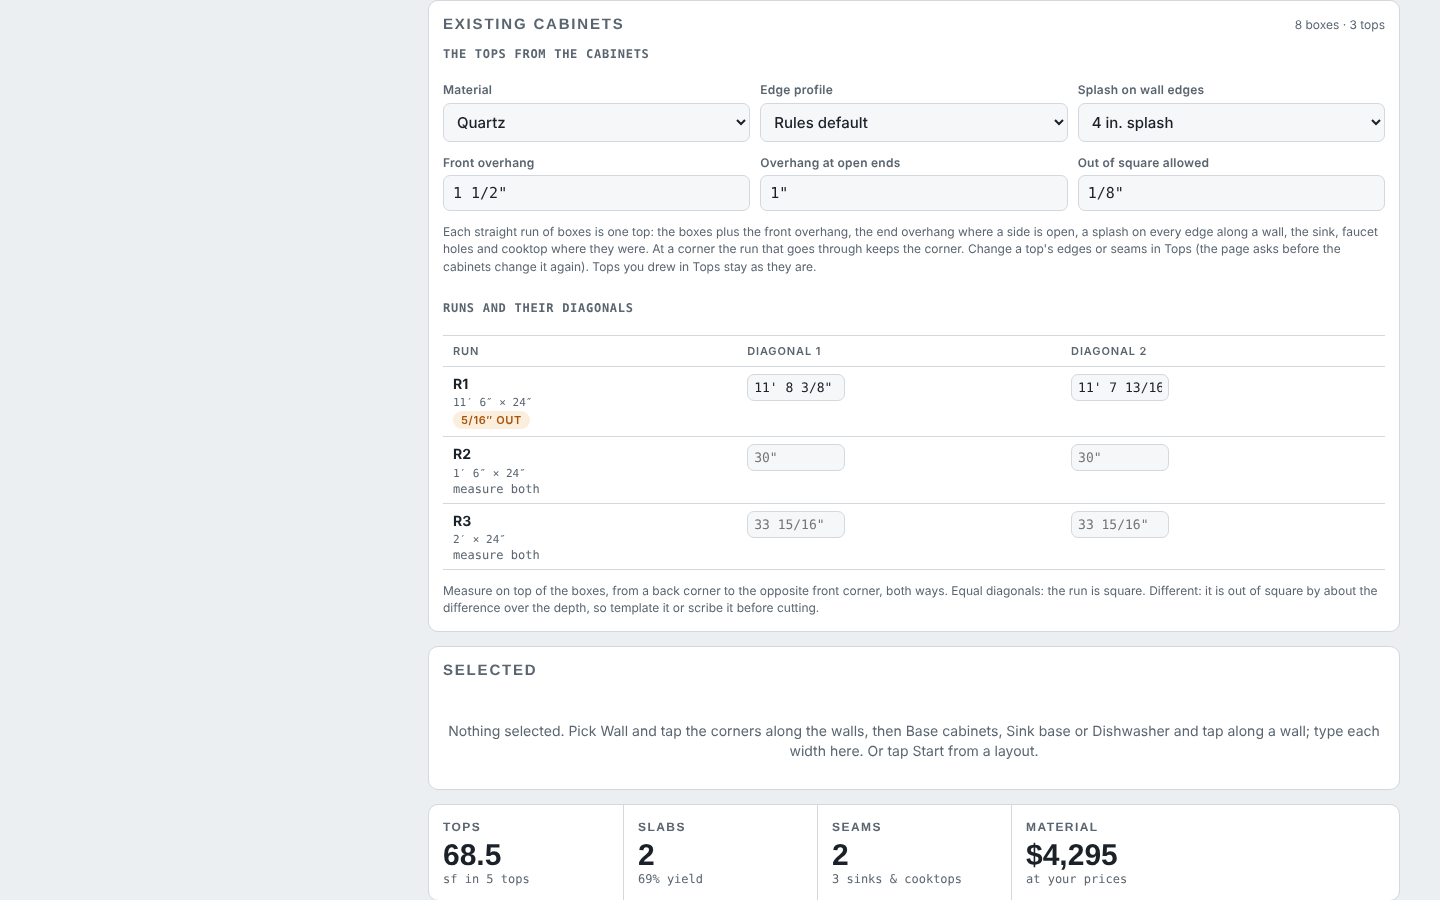
  2. 9/16″ apart: 5/16″ out of square

Step 2: The diagonals check

Tape both diagonals of each run, back corner to the opposite front corner, and type them under Runs and their diagonals. The sink wall reads 140 3/8″ and 139 13/16″: 9/16″ apart, so it is about 5/16″ out of square. The check says to scribe the splash and the ends, or template that run.

Field tip: Out of square allowed (1/8″ to start) is under The tops from the cabinets.

Step 3: The tops come out of the boxes in the Countertop Designer
  1. Tops mode: ordinary tops now
  2. Sink and faucet hole where the sink base is
  3. Dishwasher: no seam over it
  4. 4″ splash on the wall edges

Step 3: The tops come out of the boxes

Each straight run of boxes is one top: the boxes plus a 1 1/2″ front overhang, 1″ at an open end and a 4″ splash on every wall edge. The sink and its faucet hole go where the sink base is, no seam goes over the dishwasher, and the range gap stops the top. In Tops they are ordinary tops.

Field tip: Change a top in Tops and the page asks before the cabinets change it again.

Step 4: Import a DXF from a digitizer in the Countertop Designer
  1. Island from a digitizer: corners and curves kept
  2. Its prep sink and faucet hole

Step 4: Import a DXF from a digitizer

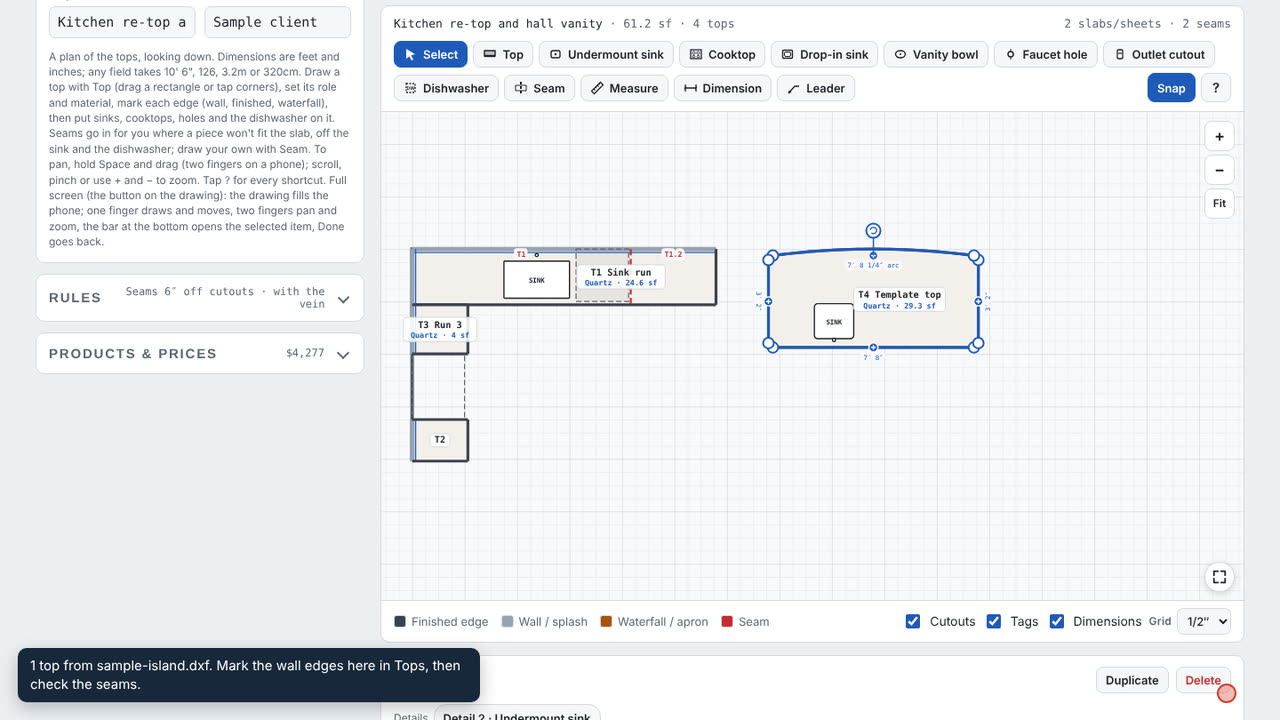
In Templates, Load a DXF file. The made-up island file reads in inches with every corner and the bowed seating side kept, and the sink inside it. Check the layer list: L7 is the faucet hole, so pick Faucet hole for it, then Add to the plan.

Field tip: Tap These layers are right once per templater brand: the next file from it reads the same way.

Step 5: A photo of a luan template: set the scale in the Countertop Designer
  1. Scale: the tape, 49″ along the back
  2. Check a length: the side, 20″

Step 5: A photo of a luan template: set the scale

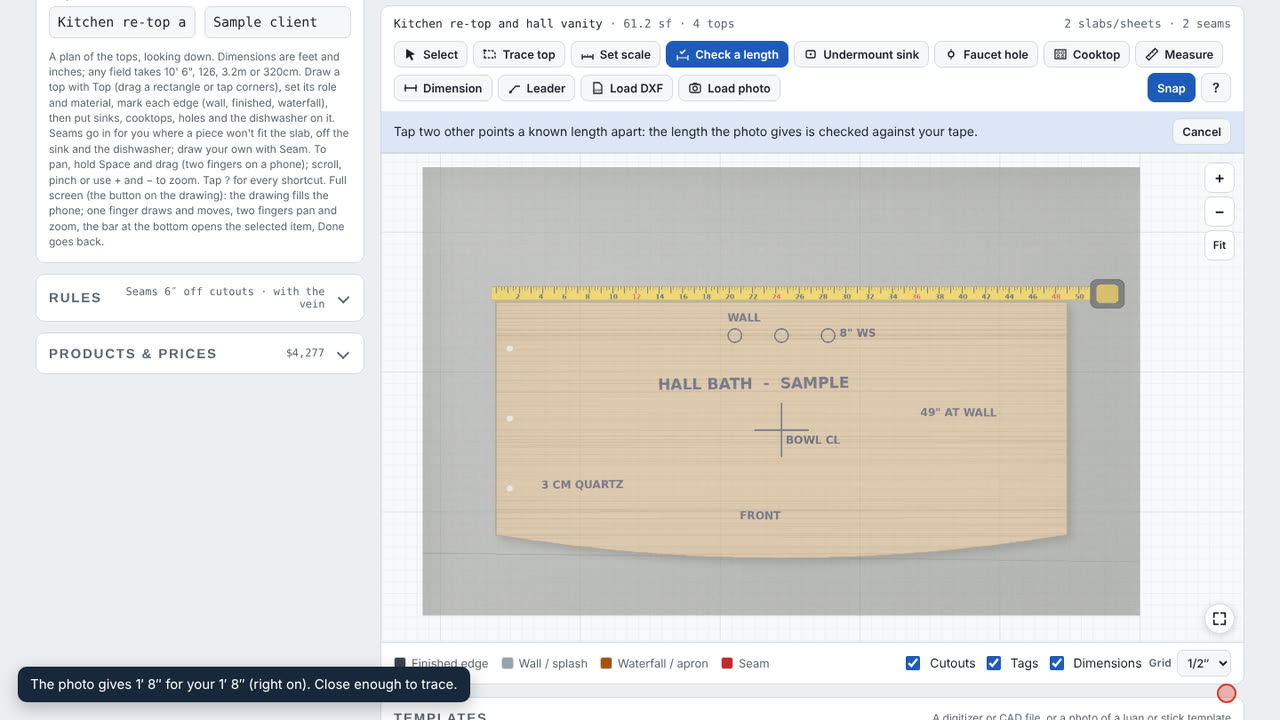
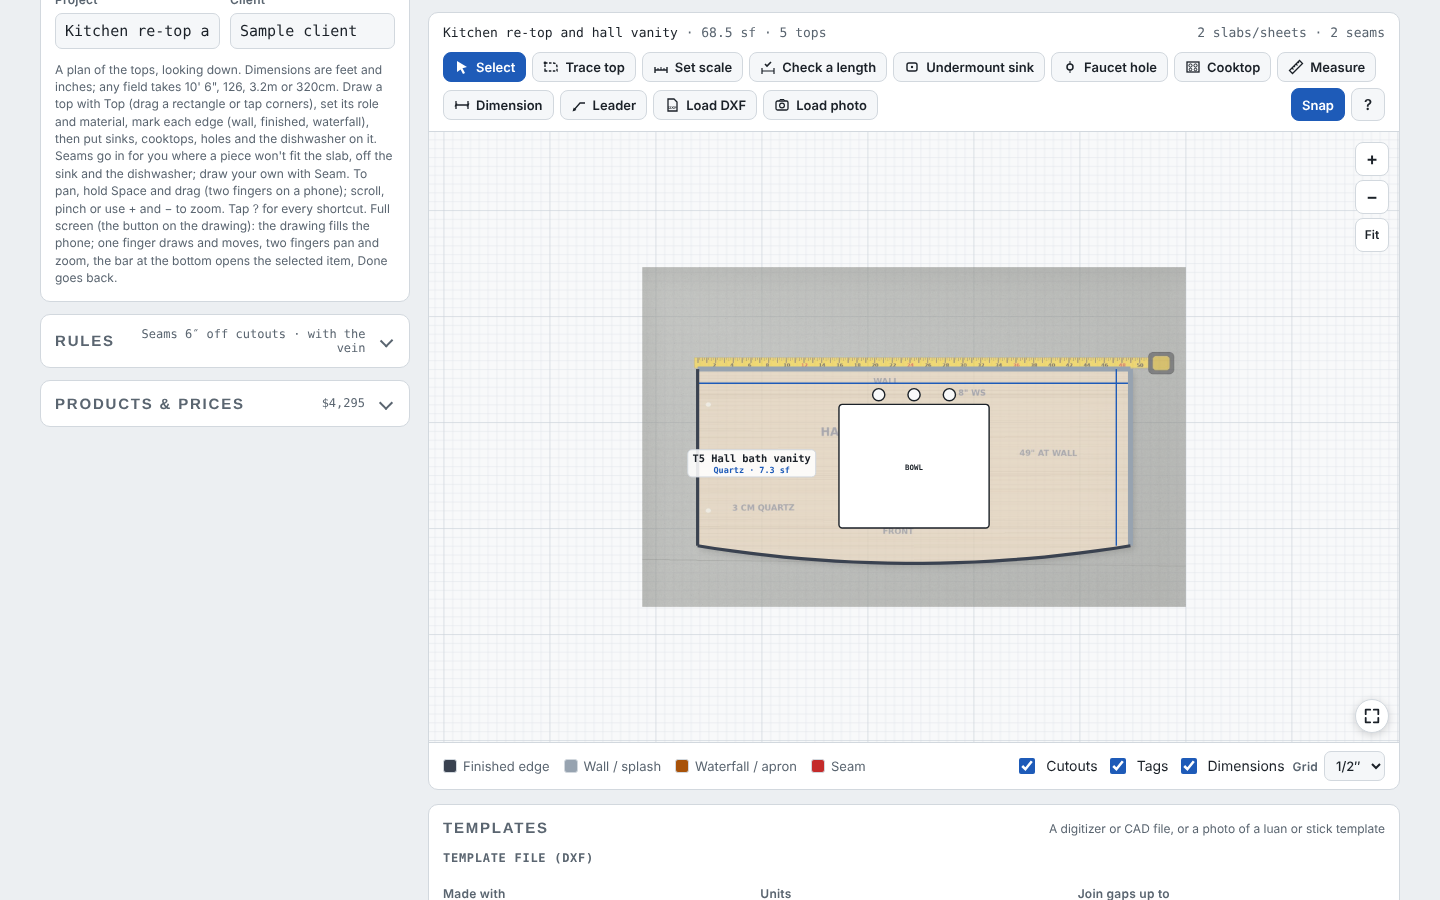
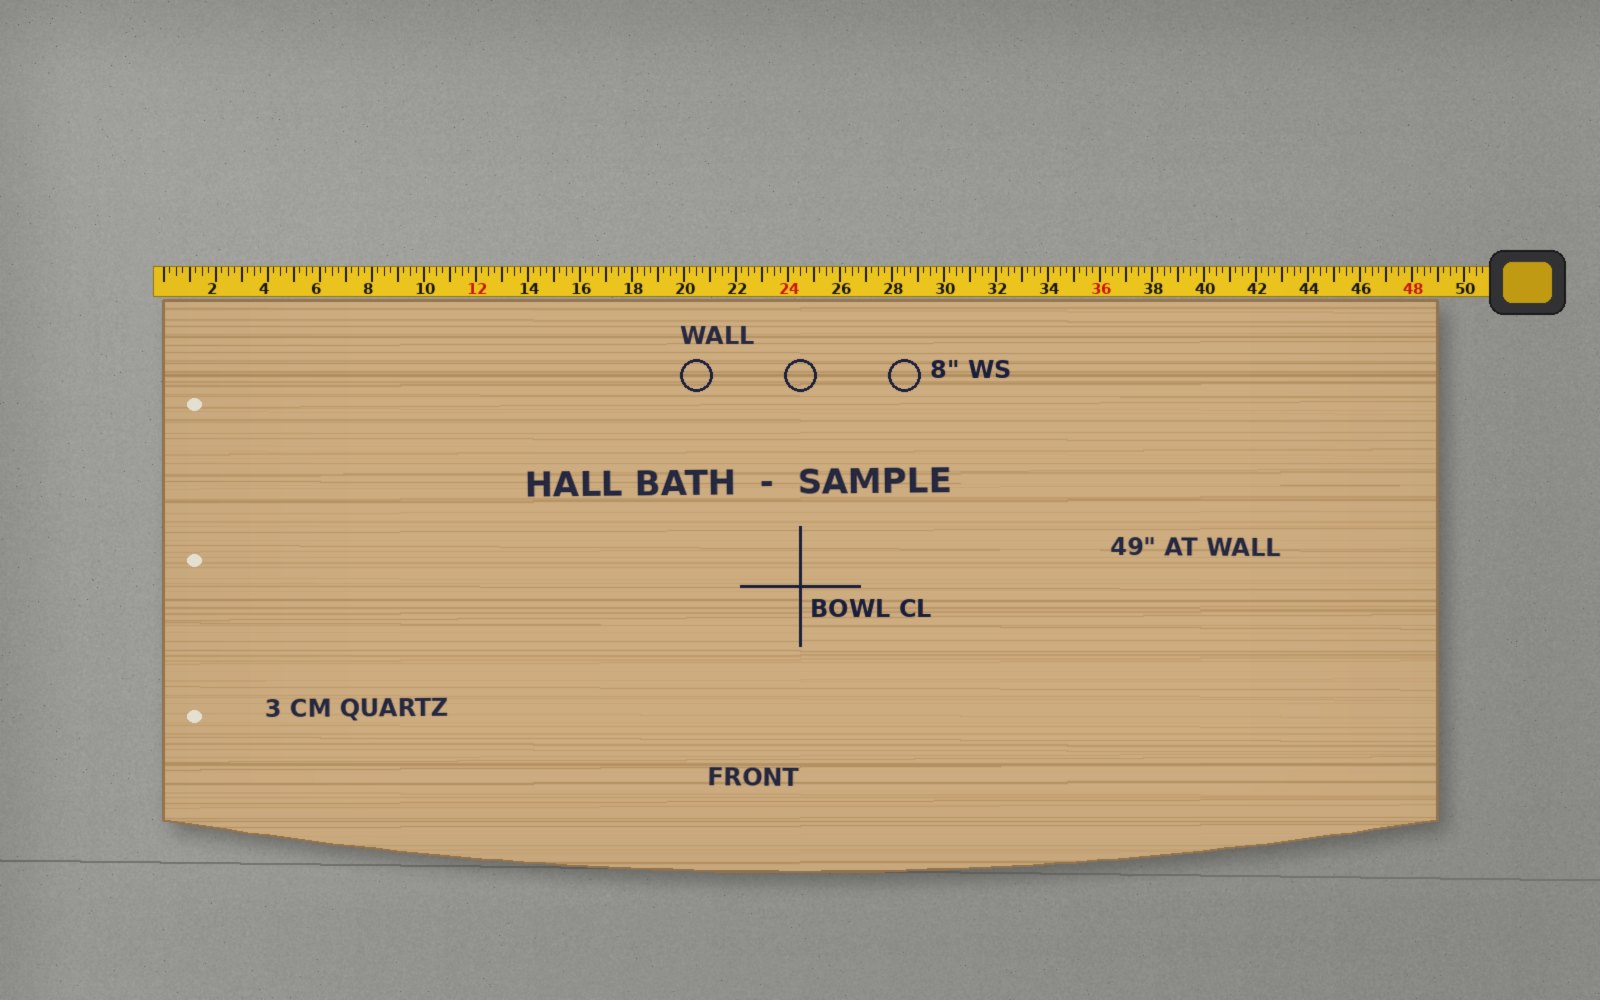
Load a photo of the template, shot straight on with a tape along its longest edge. Set scale: tap the two ends of 49″ on the tape and type 49. Then Check a length on another side: 20″ on the tape, 20″ on the photo.

Field tip: More than 1/4″ off: shoot it again from higher, square to the template.

Step 6: Trace the template in the Countertop Designer
  1. Trace top: tap the corners
  2. Curve: a point on the bowed front

Step 6: Trace the template

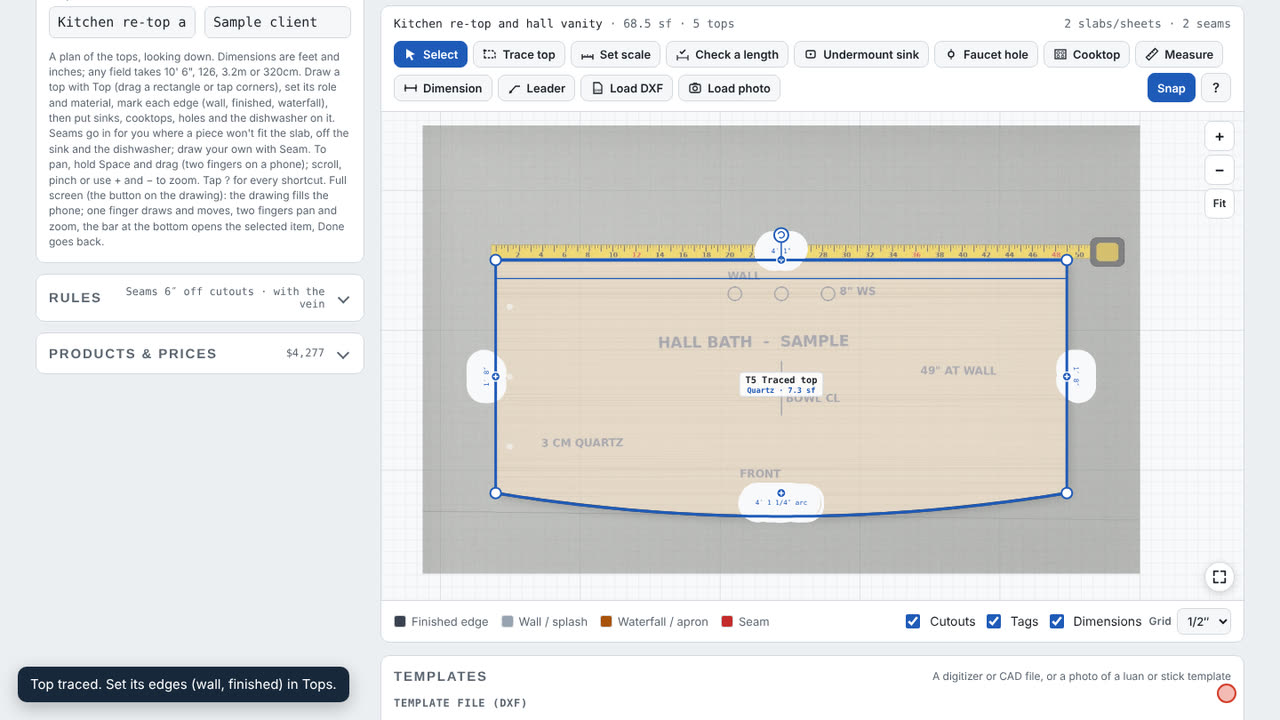
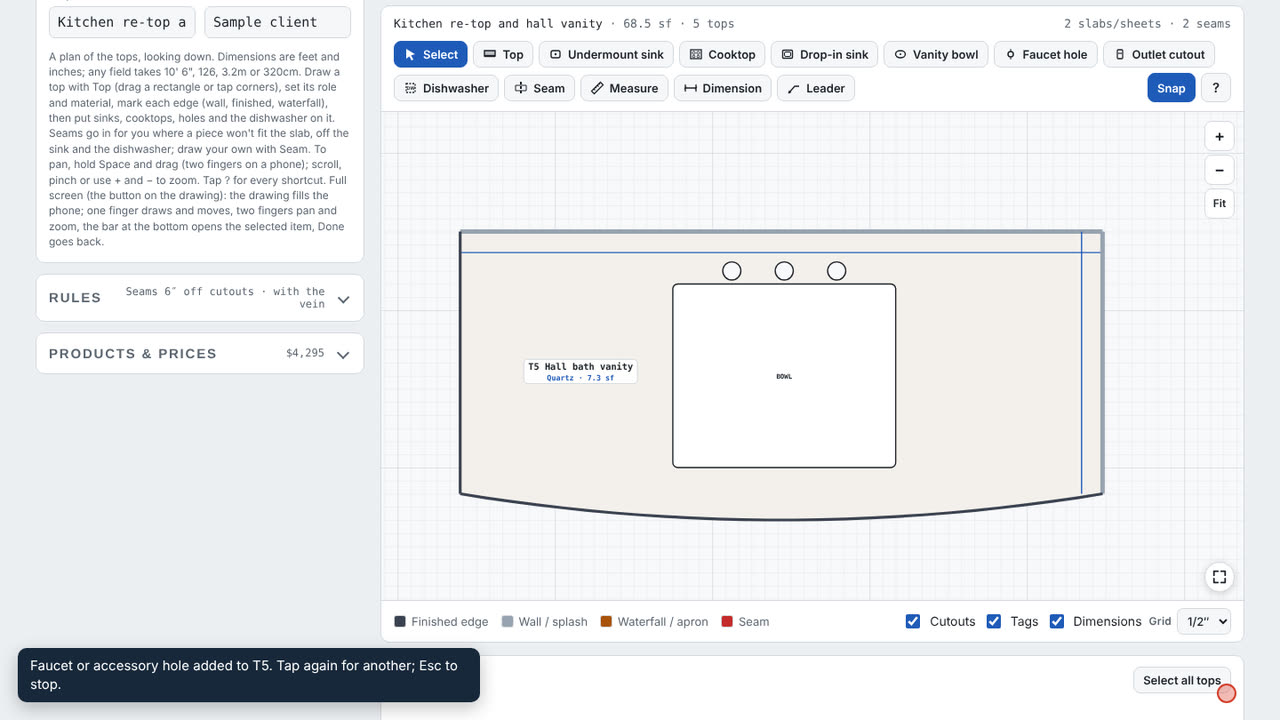
Pick Trace top and tap the corners on the photo. For the bowed front tap Curve, then a point on the curve, then the next corner. Tap the first corner to close it.

Field tip: A length typed in the bar (12′ 6 or 150) sets the next side exactly.

Step 7: Edges and cutouts like any top in the Countertop Designer
  1. Back and right end on the walls: 4″ splash
  2. Bowl and 3 holes, 8″ widespread
  3. Half bullnose on the bowed front

Step 7: Edges and cutouts like any top

The traced vanity is a top like the drawn ones. Set the back and the right end to Wall for a 4″ splash, the profile to Half bullnose, and drop in a Vanity bowl and three Faucet holes at 4″ centers.

Field tip: Check every cutout against the manufacturer's cut-out sheet.

Step 8: Seams and slabs in the Countertop Designer
  1. Slab 1
  2. Slab 2: the traced vanity nests like any top
  3. Slabs and the yield

Step 8: Seams and slabs

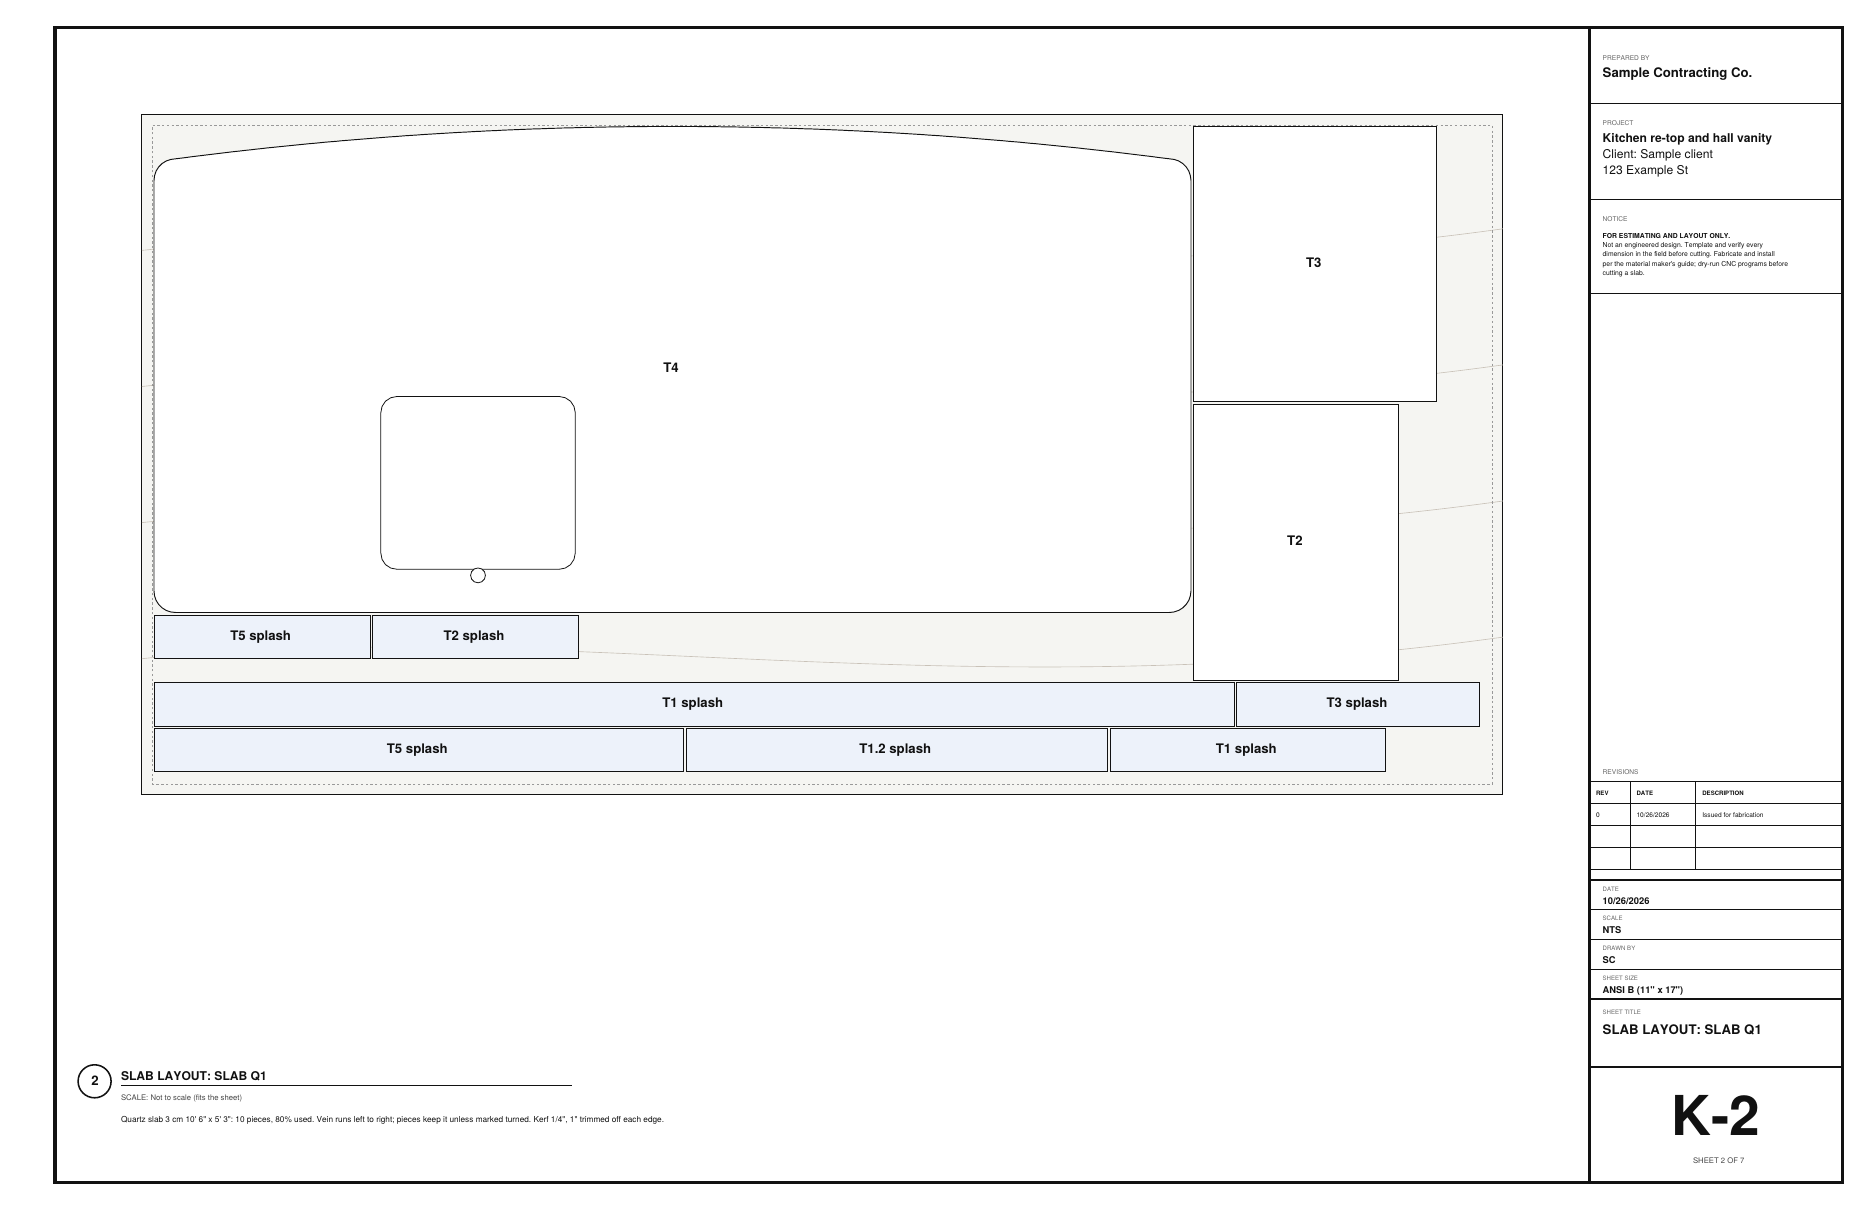
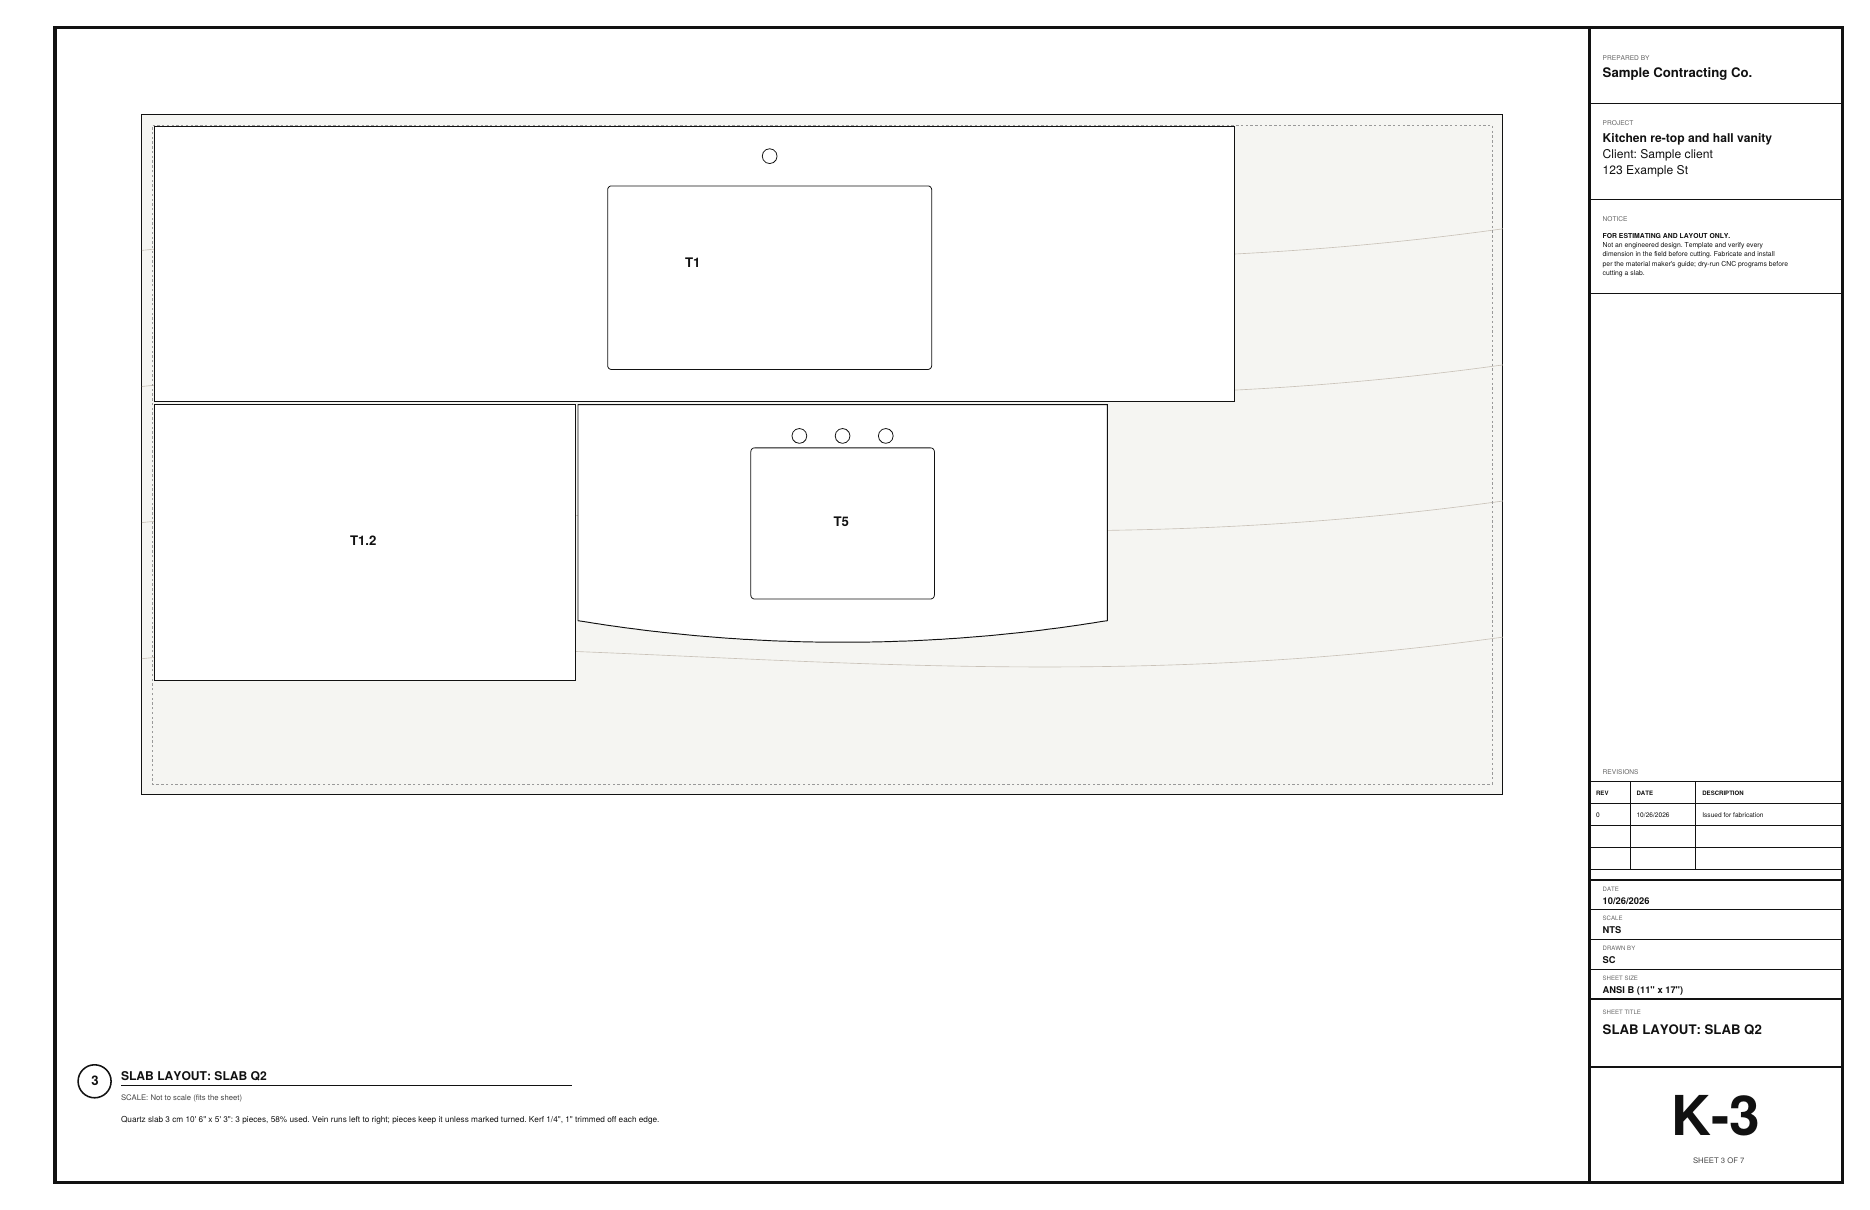
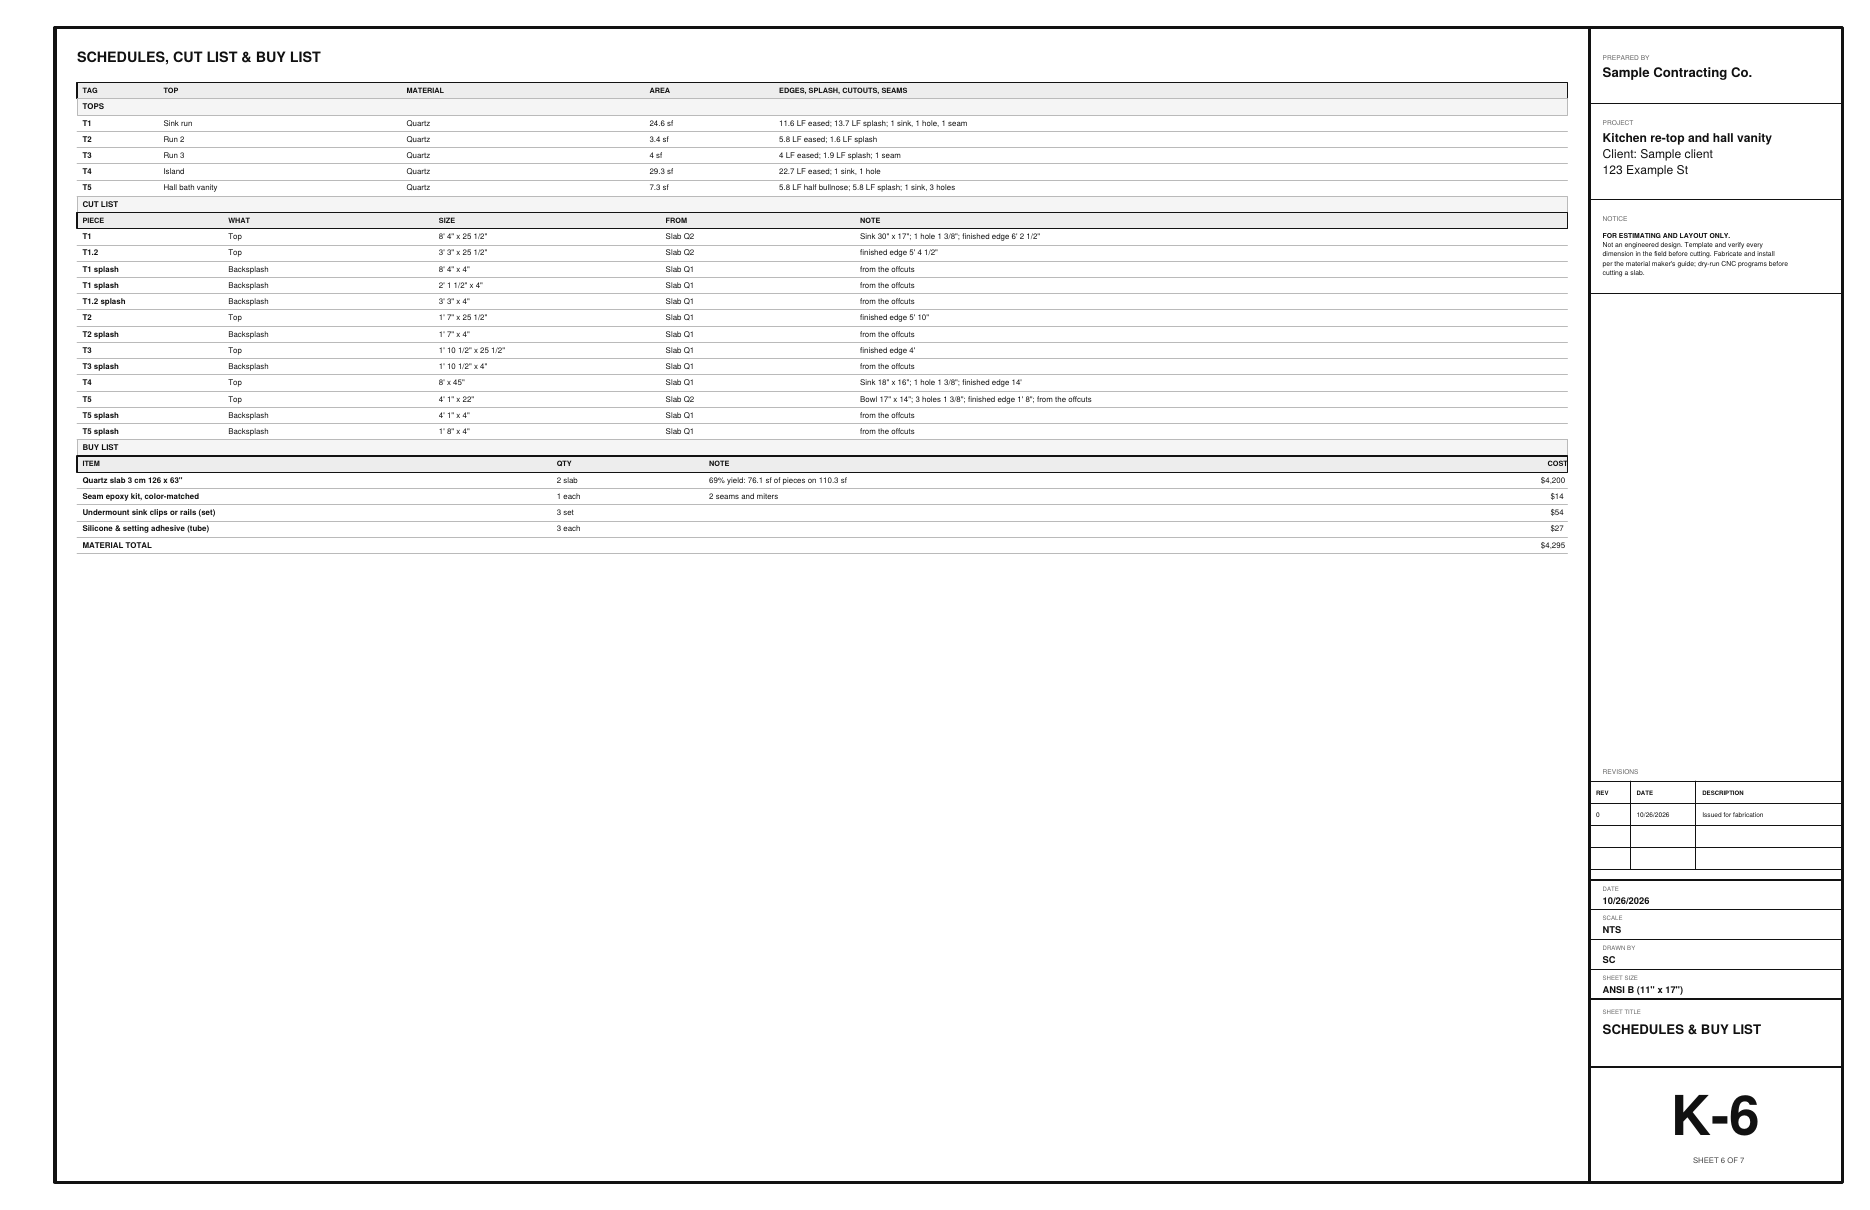
Seams go in the same way as on drawn tops: the one in the sink run stays off the sink and clear of the dishwasher. Every piece, the island and the traced vanity too, nests on 2 quartz slabs, 126″ × 63″, at 69% yield.

Field tip: Get the customer to OK the seam locations.

Step 9: CNC files and the drawing set in the Countertop Designer
  1. Sheets: plan, slabs, details, shop steps, schedules

Step 9: CNC files and the drawing set

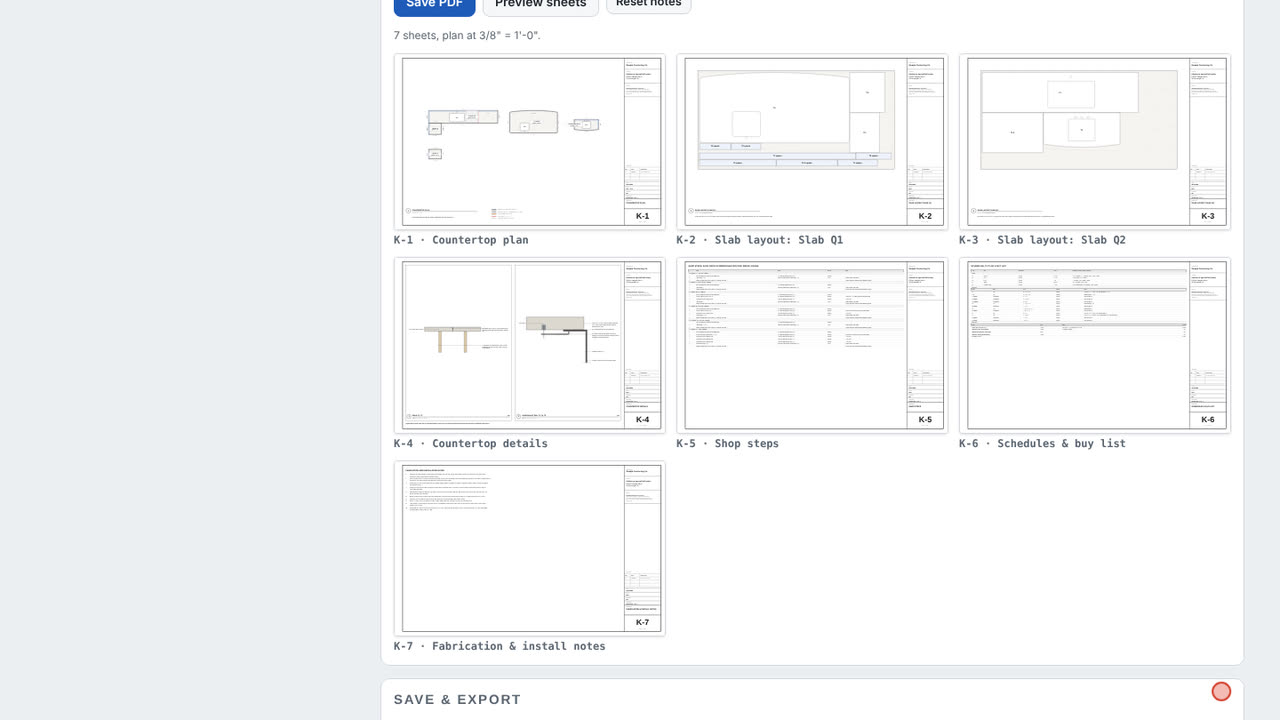
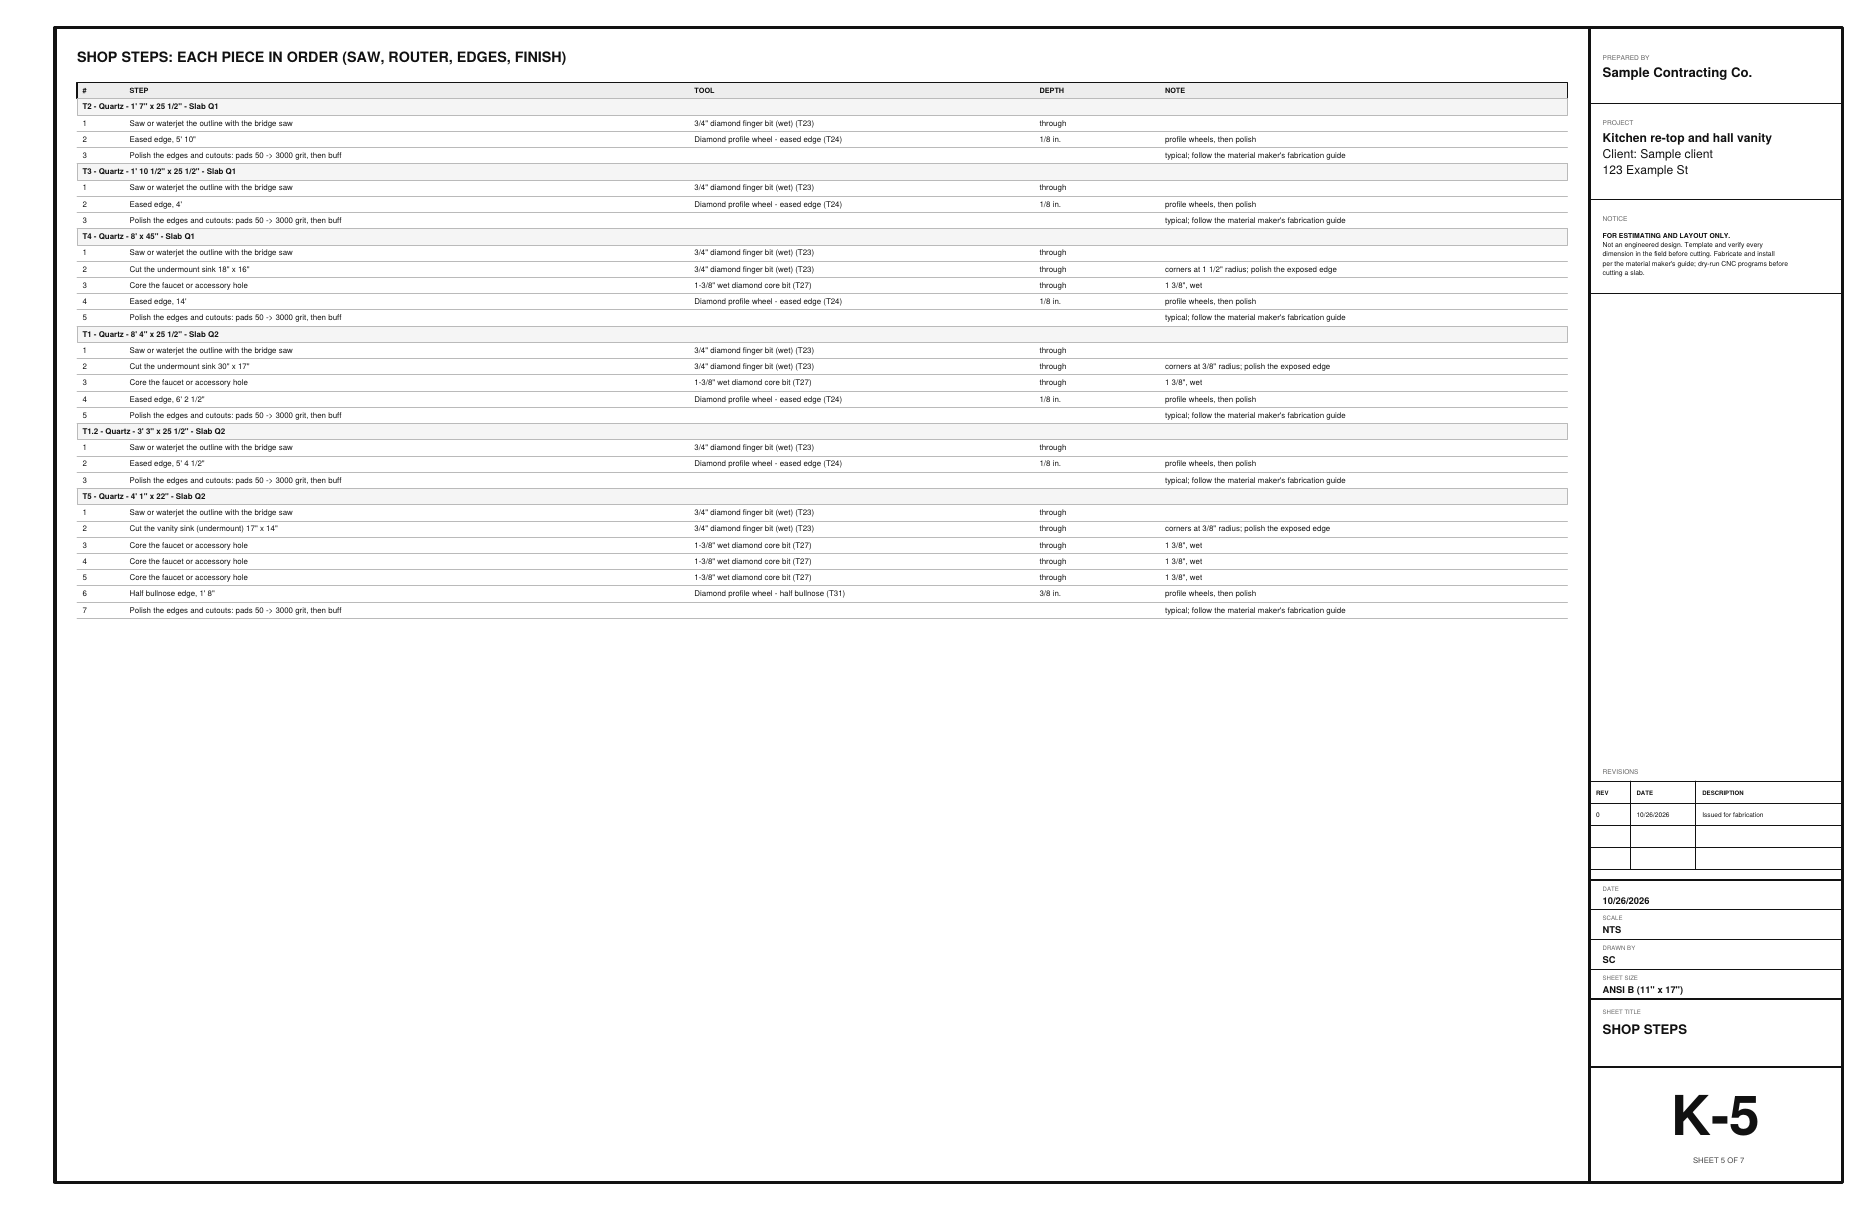
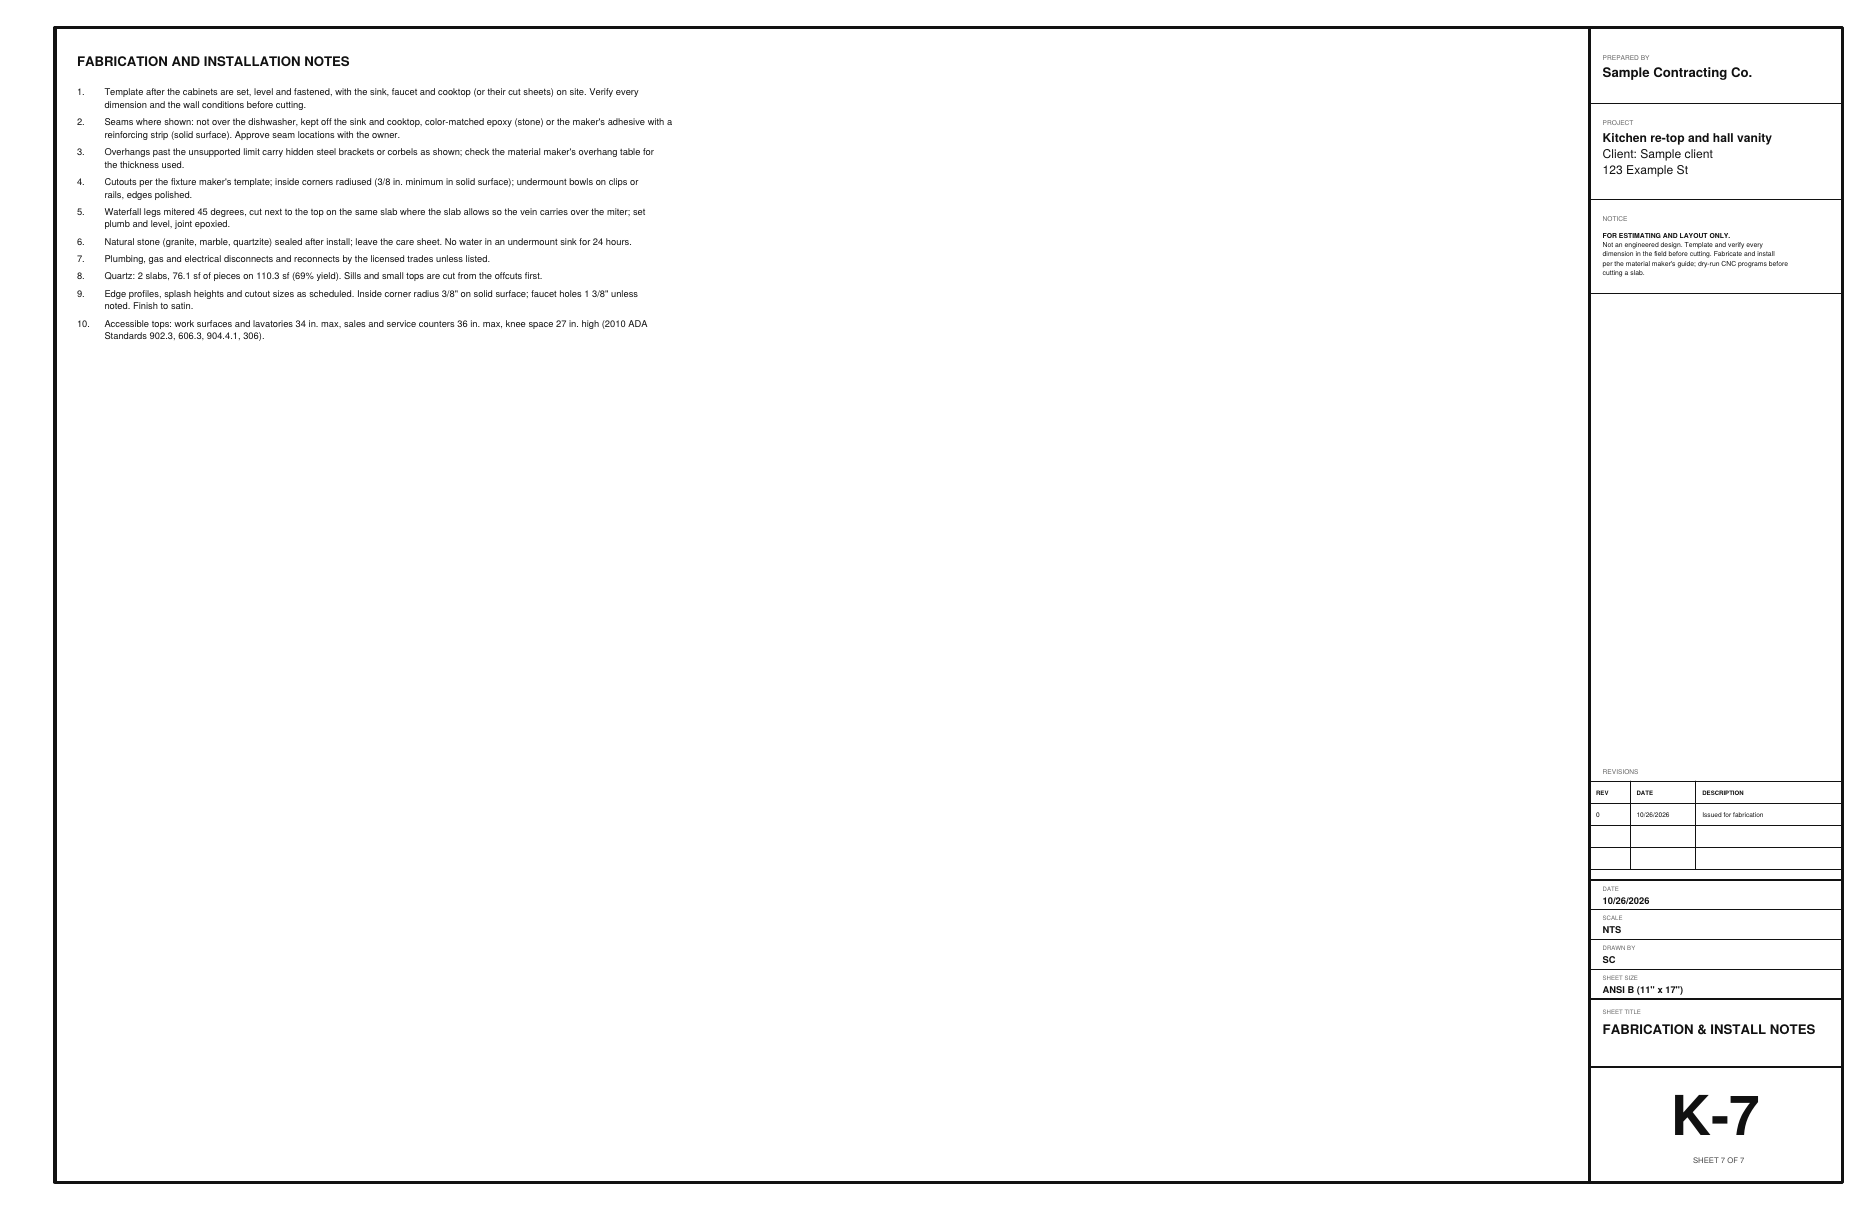
Export CNC files writes one program per slab, nested the same way. The drawing set has the plan, a layout for each slab, the countertop details, shop steps, the schedules and the notes.

Field tip: Check one dimension against the template before you cut. Dry-run every program first.

Step 10: Update the job in BidRidge in the Countertop Designer
  1. Fabricate & install at your rates
  2. Better (recommended)

Step 10: Update the job in BidRidge

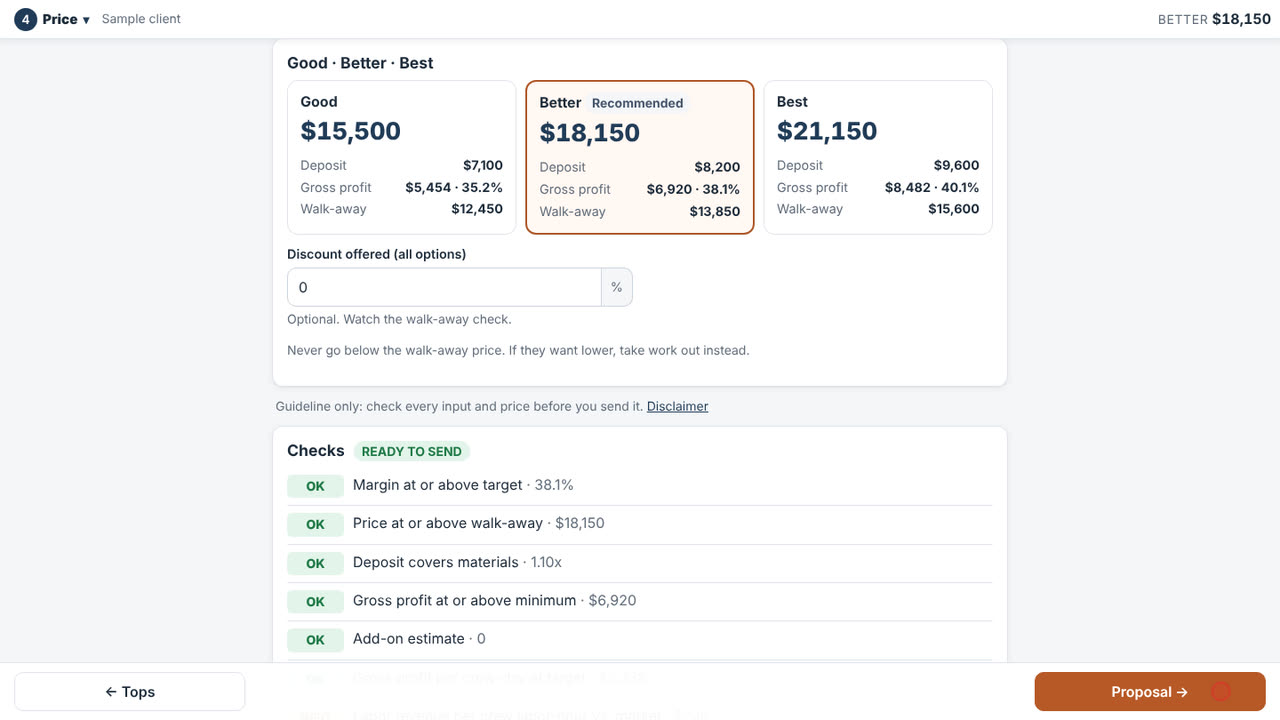
Opened from a Countertops job, Update the job in BidRidge shows what changes, then prices it fabricate-and-install at your rates. Better comes to $18,150 at the starting rates.

Field tip: Every change shows in the review before the job updates.

What you get

The drawing set, the lists and the files

Real files from this sample, made by the designer. Tap a page to see it full size. Yours carry your company, the client and the address.

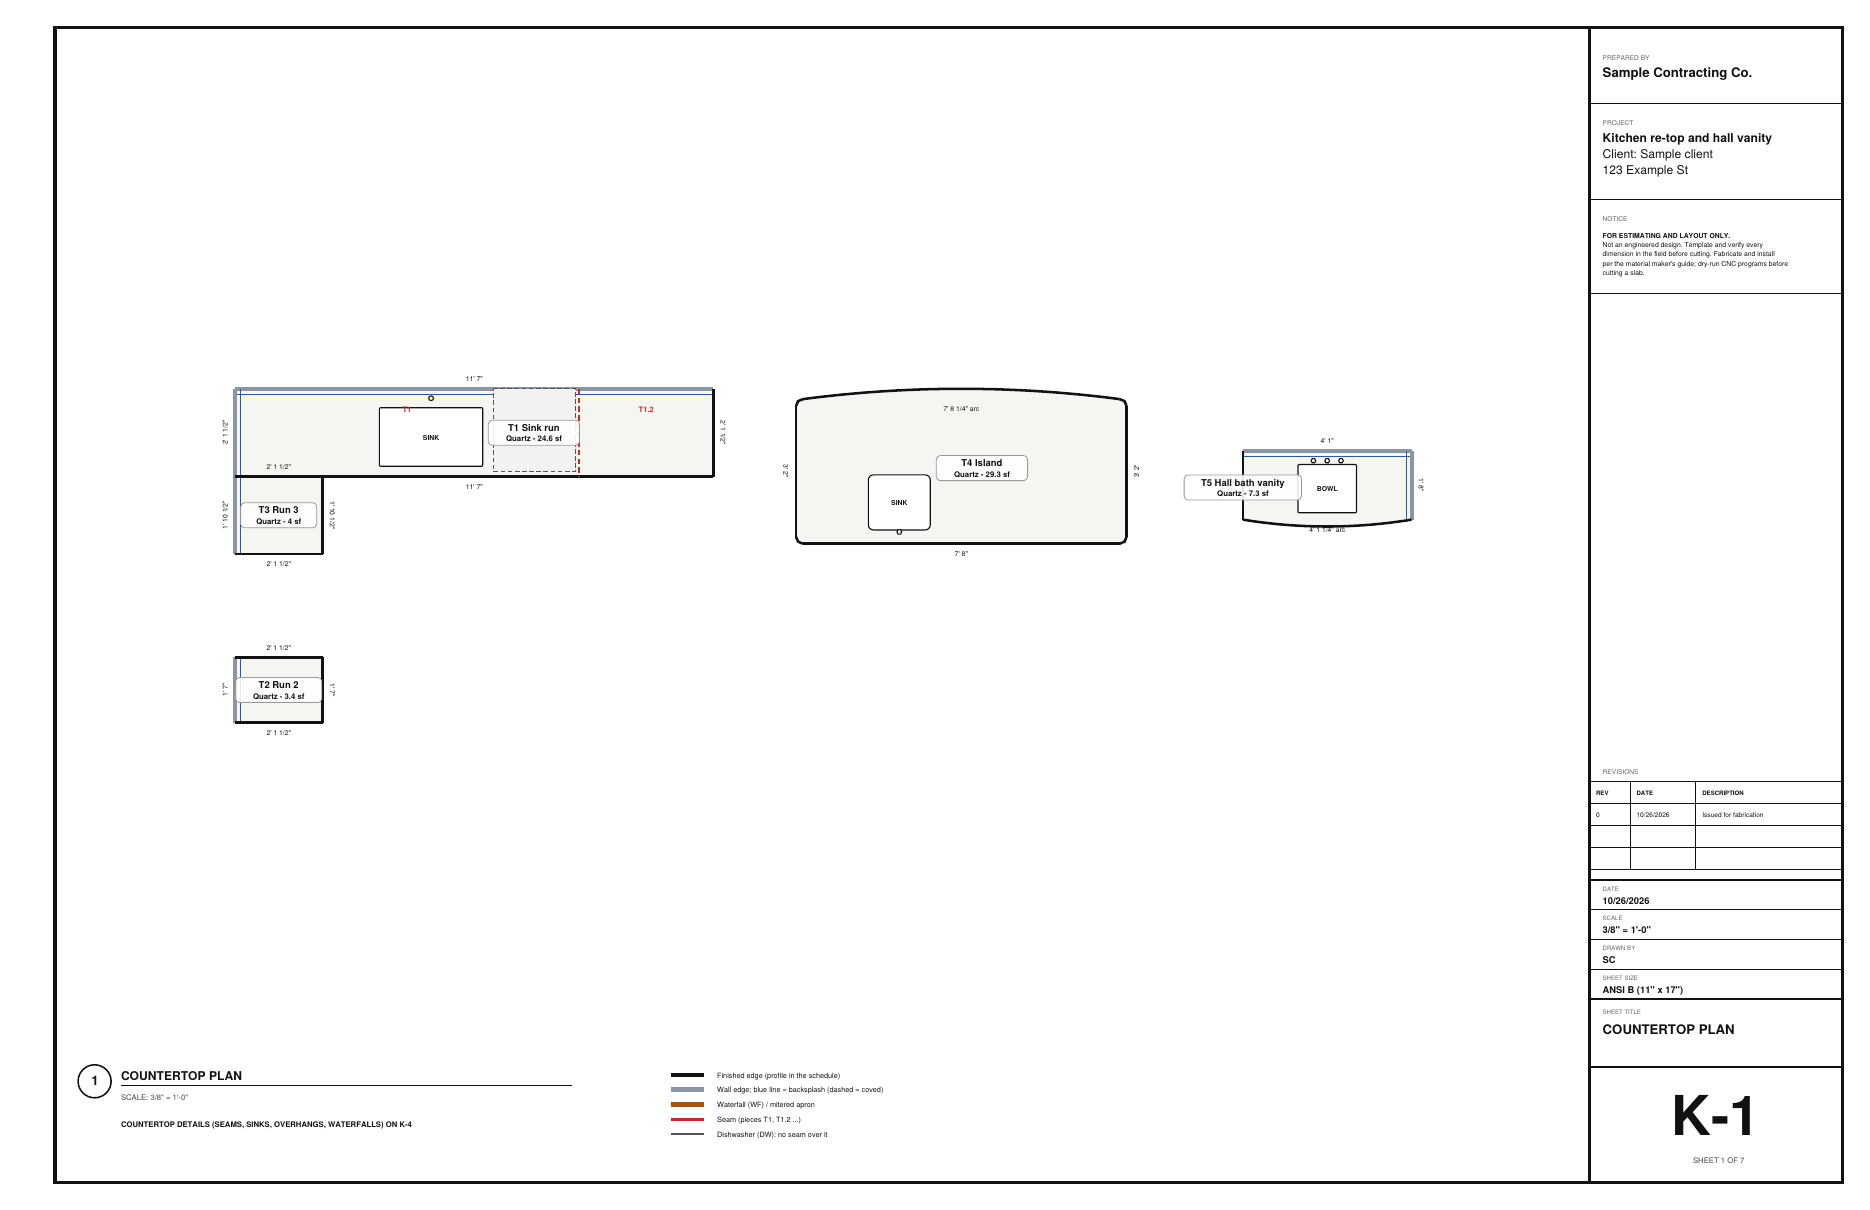
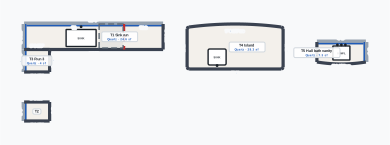
K-1 countertop plan: the tops from the cabinets, the island from the DXF and the traced vanity
K-2 slab Q1
K-2 slab Q1
K-3 slab Q2
K-3 slab Q2
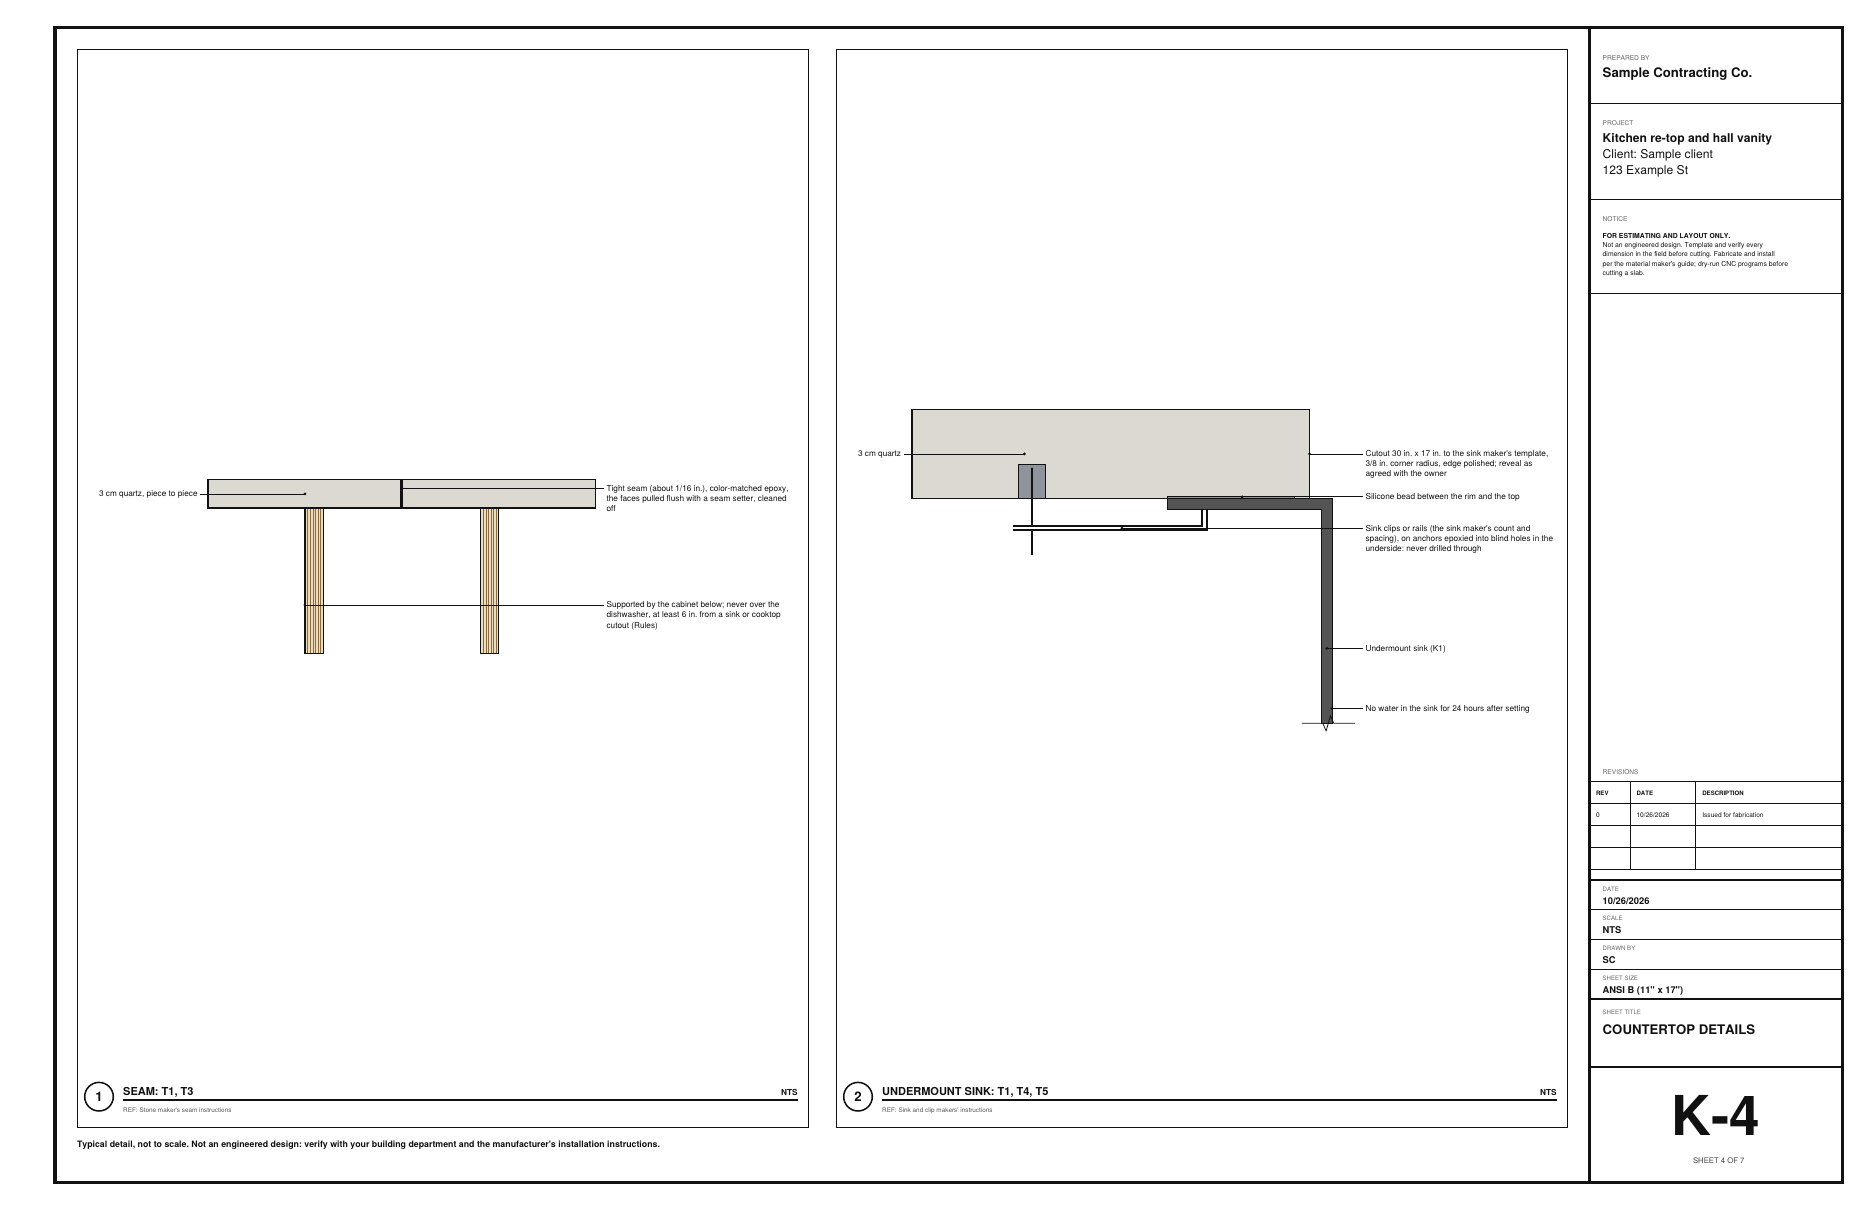
K-4 countertop details (typical, not engineered)
K-5 shop steps: each piece's cut, cutouts, edges with the bit, and the polish
K-6 schedules: the tops, the cut list and the buy list
K-7 fabrication and install notes
Existing cabinets: the runs and their diagonals, the sink wall 5/16″ out of square
Templates: the traced vanity on its photo, the island from the DXF

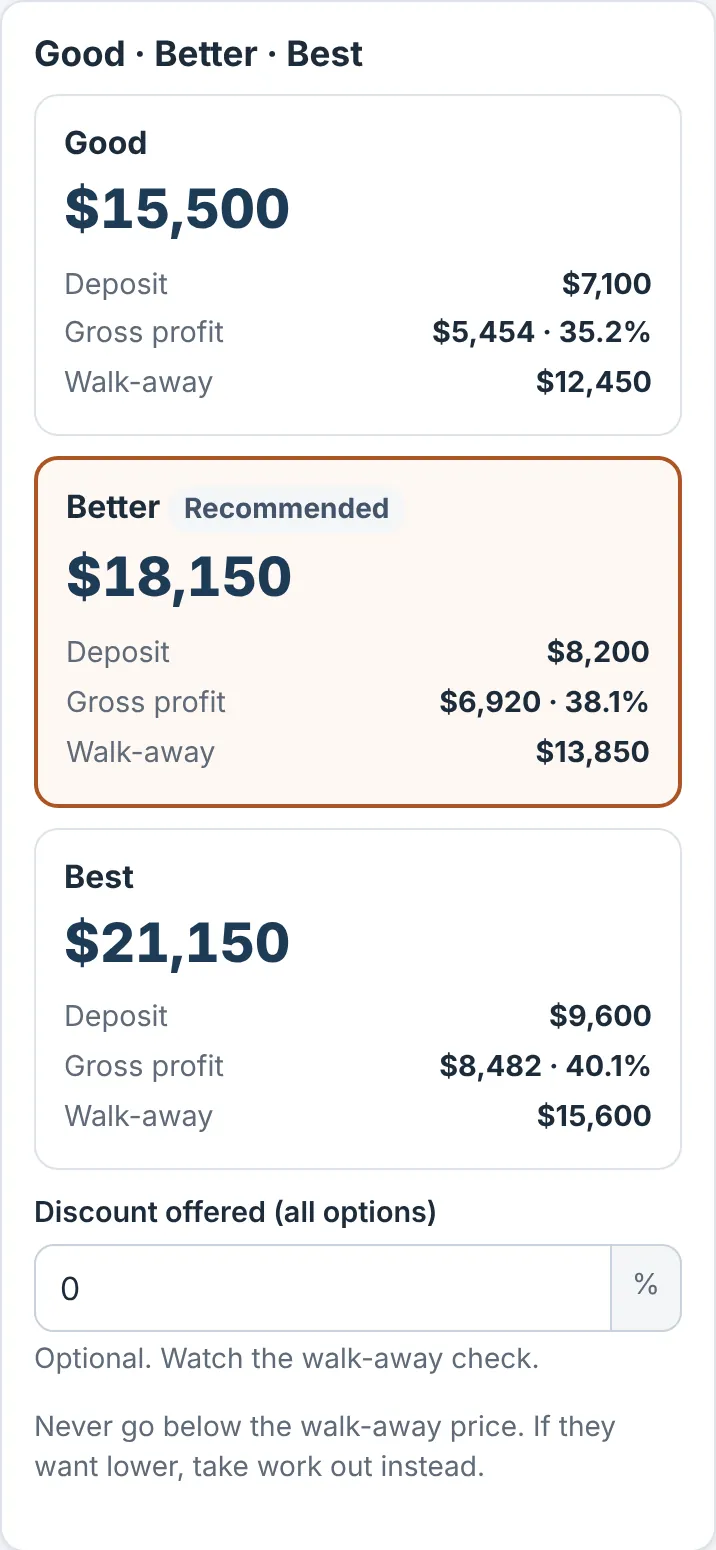
The BidRidge quote

Same numbers in the quote

The designer sends its quantities to BidRidge, and BidRidge prices the labor and materials at your rates.

  • Good
    $15,500
  • Better
    $18,150
    Recommended
  • Best
    $21,150
From the designSent to the quote
Tops68.5 sf · 5 tops · 3 from the cabinets, 1 DXF, 1 traced
Diagonals5/16″ out · the sink wall, 9/16″ between the diagonals
Slabs2 slabs · Quartz 126″ × 63″, 3 cm · 69% yield
Seams2 · 1 seam off the sink · the corner joint
Material$4,295 · slabs and supplies at the starting prices
Quote$18,150 · Better, at the starting rates

Re-top sample, sent to a Countertops job in the BidRidge app at its starting rates, fabricate-and-install. Your rates give your own numbers.

The sample opened as a quote in the BidRidge app: Good, Better and Best prices
The BidRidge app, at its starting rates.

Try it on your own job

Open the sample, change it to your measurements, and send it to a BidRidge quote. Drawing is free; the drawing set, the lists and the quote come with a BidRidge license or the 14-day trial.

In the designer, tap Open project and pick the sample file. It opens exactly as in the video.

Sample designs: names, sizes and clients are made up. Prices are BidRidge's starting rates; set your own. The designers check against common guidelines (IRC, NKBA and the makers' published numbers) to help you catch mistakes. They don't replace your building department or the manufacturer's installation instructions: verify with them.